Manage Documents with Document Manager
This article explains how to use Document Manager in Zenoti Integrated Payroll (ZIP) to upload, view, and manage business and employee documents.
Overview
Document Manager is a secure, centralized repository within Zenoti Integrated Payroll (ZIP) that enables organizations to store, organize, and control access to HR and operational documents. Instead of managing documents across email threads, shared drives, and filing cabinets, you can store everything in one place-right inside ZIP.
Document Manager organizes documents into two categories:
Business: Organization-level documents such as HR policies, employee handbooks, anti-harassment policies, and payroll schedules. These are available to all staff at your business location.
Employee Documents: Documents tied to individual employee records, such as I-9 forms, professional licenses, offer letters, performance reviews, NDAs, and background check reports.
You can upload documents from the central Document Manager or directly from an employee's profile. Each document can be configured with visibility settings, expiry dates, and categories to keep your records organized and compliant. Every upload and access action is logged with the user name and timestamp, ensuring audit-ready records.
Note
Document Manager is currently in beta and available exclusively for ZIP customers. To enroll in the beta or upgrade your payroll plan, contact payrolloperations@zenoti.com.
Prerequisites and role permissions
Before you begin, ensure the following:
You have access to Zenoti Integrated Payroll and the required role permissions (Manage Documents or View Documents) are enabled for the relevant user roles.
Document Manager access is controlled by two role permissions:
Manage Documents - Full access to upload, view, download, edit, and delete documents.
View Documents - Read-only access to view and download documents.
To enable these permissions, navigate to the role permissions settings for the desired user role, turn on the appropriate permission, and click Save.
Access Document Manager
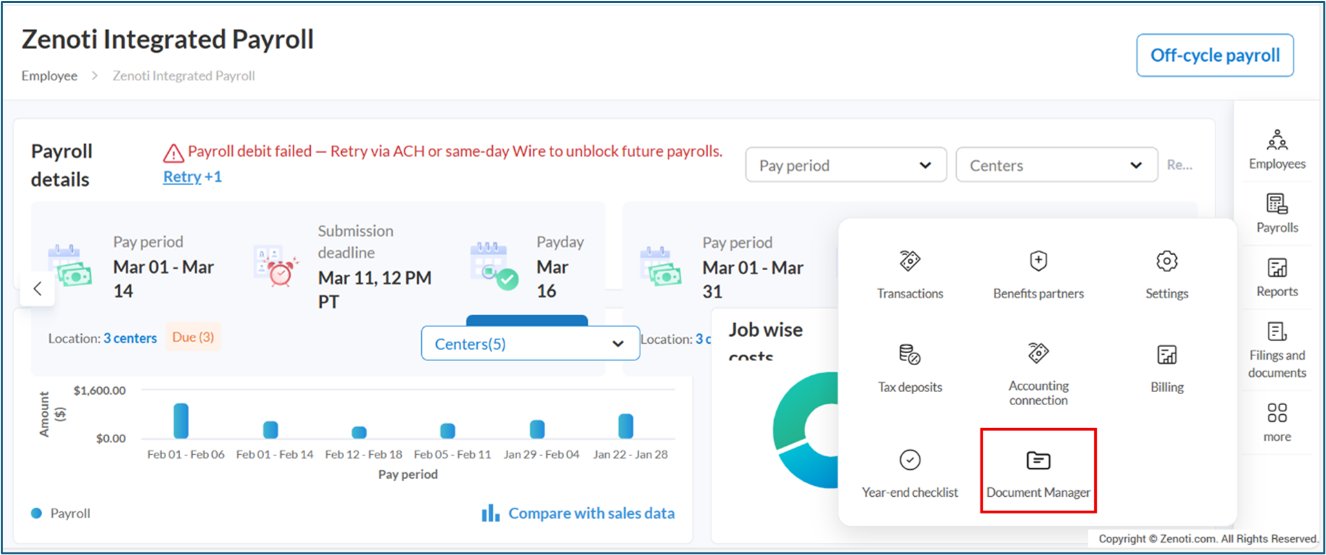
Navigate to Employee > Zenoti Integrated Payroll.
Click the Document Manager icon from the menu.
View Documents
Select the Business or Employee Documents tab in the left panel.
Use the Category or Expiration Status filters to narrow the list or use the search bar to find a specific document.
Click a document name to view it.
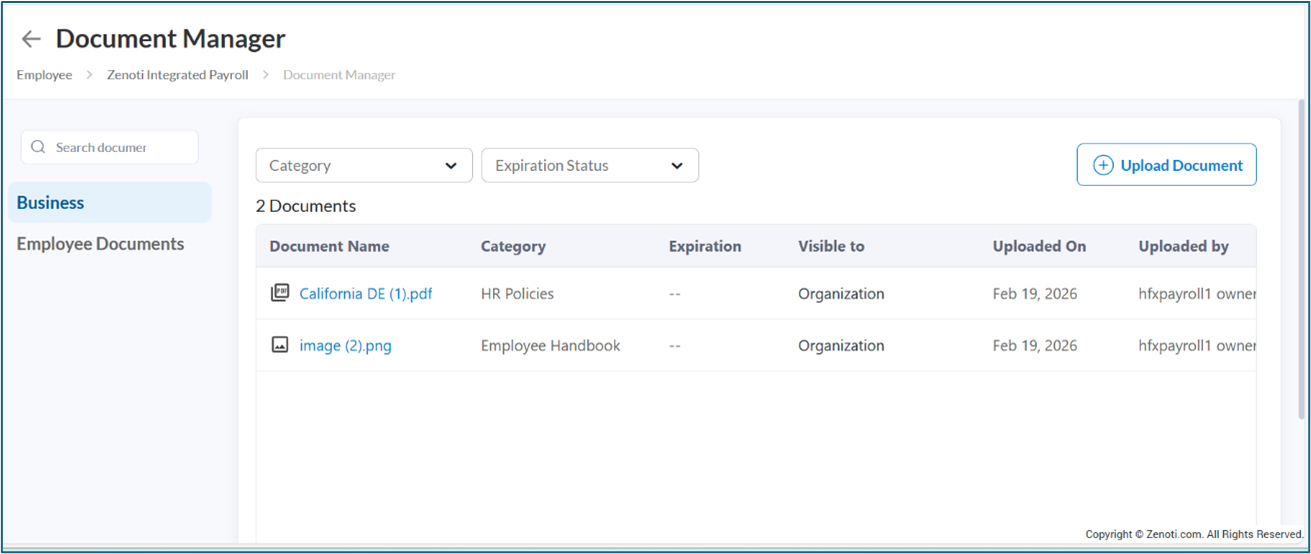
The document list displays the following details: Document Name, Category, Expiration, Visible to, Uploaded On, Uploaded by, and Actions.
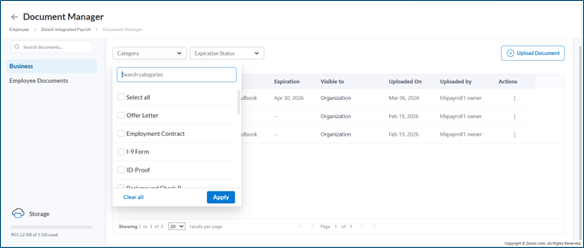
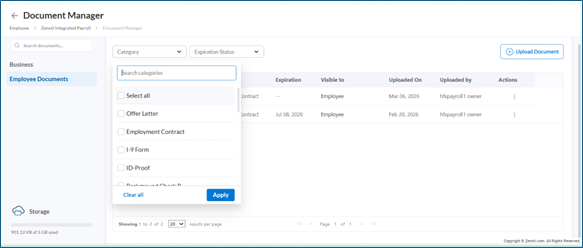
Filter Documents by category
The Category filter helps you locate documents by their type. Select one or more categories such as Offer Letter, Employment Contract, I-9 Form, ID-Proof, or Background Check Report, and click Apply.
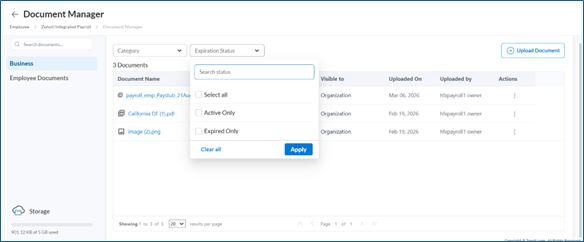
Filter Documents by expiration status
The Expiration Status filter helps you identify documents that need attention. Select Active Only to view documents that have not expired, or select Expired Only to view documents past their expiration date. Click Apply.

Upload a Document
Note
This action is available only to users with the Manage Documents permission.
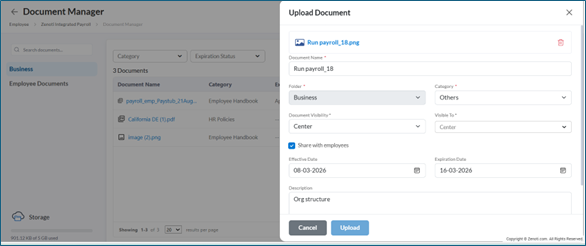
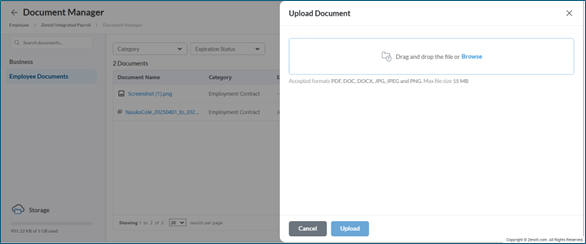
When you click Upload Document, a slide-out panel opens where you configure the document details. The panel includes the following fields:
Document Name — The name of the document. This field auto-populates with the file name and can be edited.
Folder — Select Business or Employee Documents based on where you want to store the document.
Category — Select a category that describes the document type (for example, HR Policies, Employee Handbook, Offer Letter, Employment Contract, I-9 Form, ID-Proof, or Others).
Document Visibility — Select the visibility level: Organization (visible across all centers), Center (visible only to a specific center), or Employee (visible only to the specific employee).
Visible To — This field appears after you select the Document Visibility level and reflects the scope (for example, Organization, Center, or Employee).
Share with employees — Select this checkbox to make the document accessible to employees through their self-service portal. Clear this checkbox to keep the document internal and visible only to HR and admin roles.
Effective Date — The date from which the document is applicable.
Expiration Date — The date on which the document expires. This helps track renewals for licenses and compliance records.
Description — An optional field to add context about the document.
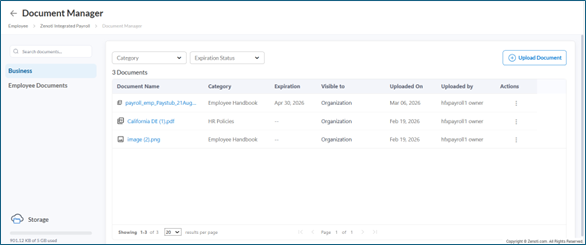
Upload a Business Document
Use this flow to upload documents that apply to your organization or specific centers, such as leave policies, employee handbooks, EIN documents, or royalty agreements.
Select the Business tab in the left panel.
Click Upload Document.
Drag and drop the file or click Browse to select a file from your device.

In the Document Name field, review or edit the document name.
From the Folder dropdown, select Business.
From the Category dropdown, select the appropriate category (for example, Employee Handbook or HR Policies). Select Others if no predefined category applies.
From the Document Visibility dropdown, select the appropriate level:
Select Organization if the document applies across all centers (for example, a company-wide leave policy or employee handbook).
Select Center if the document is specific to certain centers (for example, a center-specific operational guideline).
Select the Share with employees checkbox if you want employees to access this document through their self-service portal. For example, select this checkbox for documents like leave policies or employee handbooks that employees need to reference. Clear this checkbox for documents like EIN documents or royalty agreements that you want to store centrally but not share with employees.
Set the Effective Date and Expiration Date as applicable.
In the Description field, add any relevant context about the document.
Click Upload.

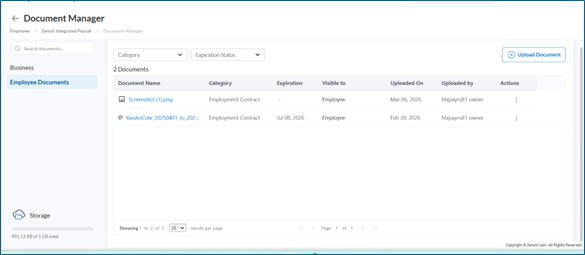
Upload an Employee Document
Use this flow to upload documents tied to a specific employee, such as certifications, licenses, offer letters, I-9 forms, or performance reviews.
Select the Employee Documents tab in the left panel.
Click Upload Document.
Drag and drop the file or click Browse to select a file from your device.
In the Document Name field, review or edit the document name.
From the Folder dropdown, select Employee Documents.
From the Category dropdown, select the appropriate category (for example, Offer Letter, Employment Contract, I-9 Form, or ID-Proof).
From the Document Visibility dropdown, select Employee.
Select the Share with employee checkbox if you want the employee to view the document in their self-service portal. For example, select this checkbox for documents like licenses, offer letters, or ID forms that the employee may need to reference. Clear this checkbox for documents like performance appraisals or internal business records that you prefer not to share with the employee.
Set the Effective Date and Expiration Date as applicable. For example, set an expiration date for a cosmetology license to track its renewal.
In the Description field, add any relevant context about the document.
Click Upload.
Upload a Document from an Employee's Profile
You can also upload documents directly from an employee's profile, which is useful for attaching records such as licenses or offer letters to a specific employee.
Note
Accepted file formats are PDF, DOC, DOCX, JPG, JPEG, and PNG. The maximum file size is 15 MB.
User Access Summary
User role | Upload | View | Download | Edit | Delete |
User with Manage Documents permission | Yes | Yes | Yes | Yes | Yes |
User with View Documents permission | No | Yes | Yes | No | No |
Employee (self-service portal) | No | Yes | Yes | No | No |
Note
Employees can view and download documents shared with them through their self-service portal. Business documents marked as employee-visible are accessible to all staff. Employee documents marked as employee-visible are accessible only to the respective employee. Documents where the Share with employees checkbox is cleared are not visible to employees.
Key terms
Term | Description |
Document Manager | A secure repository within Zenoti Integrated Payroll for uploading, viewing, and managing business and employee documents. |
Manage Documents | A role permission that grants full access to upload, edit, delete, view, and download documents. |
View Documents | A role permission that grants read-only access to view and download documents. |
Business documents | Organization-level documents available to all staff, such as HR policies, employee handbooks, and payroll schedules. |
Employee Documents | Documents tied to individual employee records, such as I-9 forms, licenses, offer letters, and performance reviews. |
Document Visibility | A setting that controls the scope of a document: Organization (all centers), Center (specific centers), or Employee (specific employee). |
Share with employees | A checkbox that determines whether employees can access the document through their self-service portal. |
Category | A classification assigned to each document (for example, HR Policies, Offer Letter, Employment Contract, I-9 Form, ID-Proof) used to organize and filter documents. |
Expiration Status | A filter that helps identify active or expired documents based on their expiration date. Filter options include Active Only and Expired Only. |
Effective Date | The date from which a document is applicable. |
Expiration Date | The date on which a document expires, used to track renewals for licenses and compliance records. |