How-tos
Device configuration guide
This guide gives you step-by-step instructions to set up and configure the above-mentioned devices. (videos and articles).
Before you Begin
To proceed with device configuration, you must ensure Zenoti Payments is configured for your business.
Device Configuration
Choose your device to view the corresponding configuration videos and articles. (Click the links below the image):
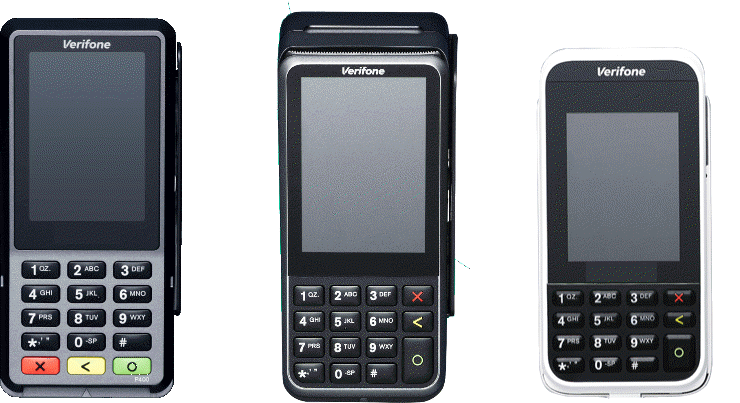
Configure Verifone P400 Plus
Videos
Unboxing
Device Overview
Before you proceed, add Verifone P400 Plus as a terminal.
Connect Verifone P400 Plus to the Internet
Board the Verifone P400 Plus Terminal
Perform a Test Transaction
Videos: Verifone V400m
Unboxing | |
Device Overview | |
Connect Verifone V400m to the Internet | |
Board the Verifone V400m Terminal | |
Configure Verifone E285
Videos
Unboxing
Device Overview
Before you proceed add Verifone e285 as a terminal.
Connect Verifone E285 to the Internet
Board the Verifone E285 Terminal
Perform a Test Transaction on the Verifone E285
Resolve the issue of wrong business name in customer bank statements with Apple Pay
Disclaimer
The steps in this article pertain to configurations on a third-party website. Zenoti is not responsible for any changes to these steps or processes. This information is provided for your convenience.
Apple Pay is one of the easiest methods to make payments on the web, in-store, and in-app. It is compatible with multiple devices and terminals and offers a safe way to make payments.
The Apple Pay ecosystem uses a host of Apple services to identify, validate, and authorize Apple Pay transactions. For example, it uses the data from Apple Maps to determine the name of the business that processes an Apple Pay transaction.
If your business name is not updated in Apple Maps, it may not appear or an incorrect business name may appear on the customer receipts and statements, which could lead to disputes.
Note
The incorrect business name appears because a nearby business has updated its name in Apple Maps, and Apple Pay picks up the nearest registered business name. To resolve such issues, Zenoti recommends you update your business name and address in Apple Maps.
This article lists the steps for the same.
Prerequisite
To perform these steps, you must have an Apple ID. If you do not have an Apple ID, click here to create one.
Open Apple Maps Connect.
The Apple Maps Connect homepage appears.
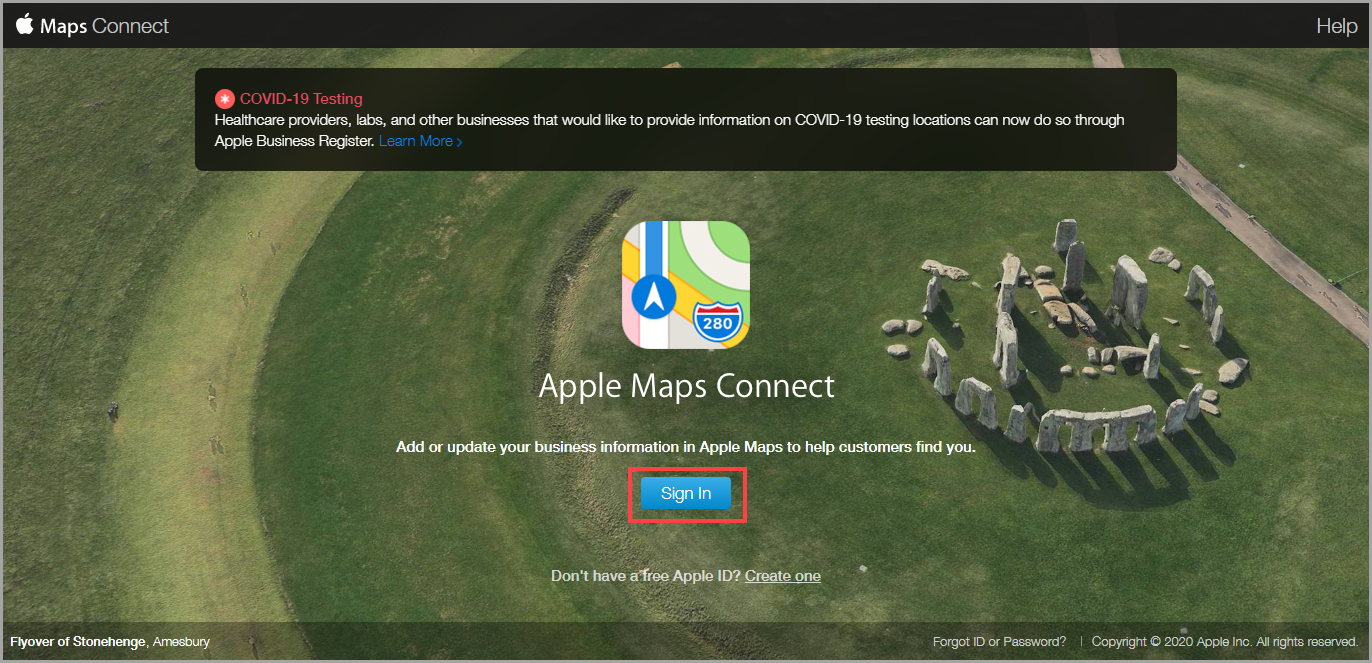
Click Sign In.
Note
You require an Apple ID to sign-in.
You will receive a verification code if you have enabled two-factor authentication.
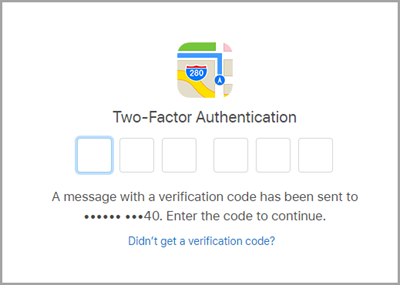
Enter the verification code.
The Terms and Conditions pop-up appears.

Select the I have read and agree to these terms of use checkbox and click Agree.
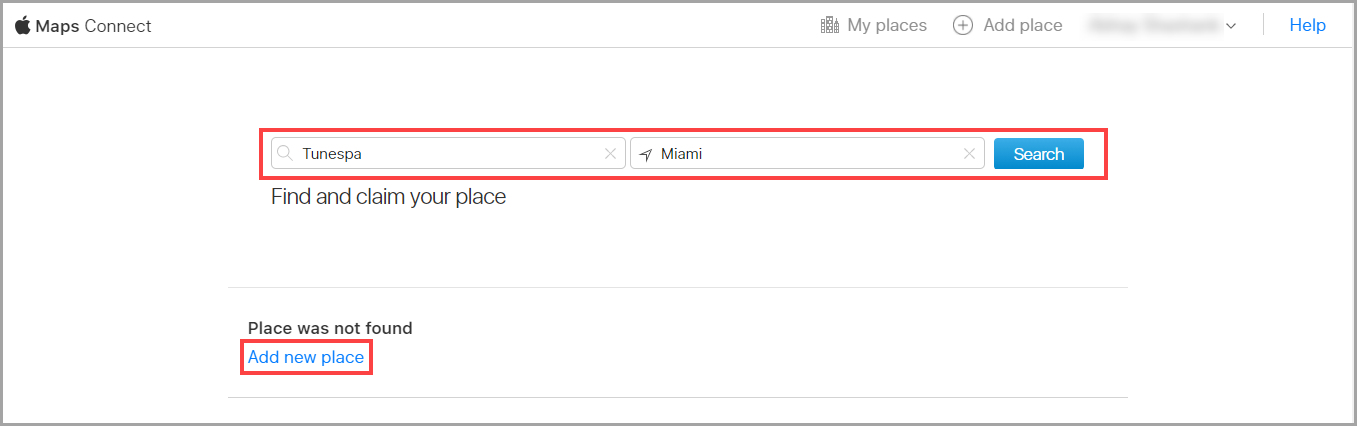
The Maps Connect page appears.
Enter your Business Name, Location and click Search.
Apple returns with the result ‘Place was not found’.
To register your business, click Add new place.
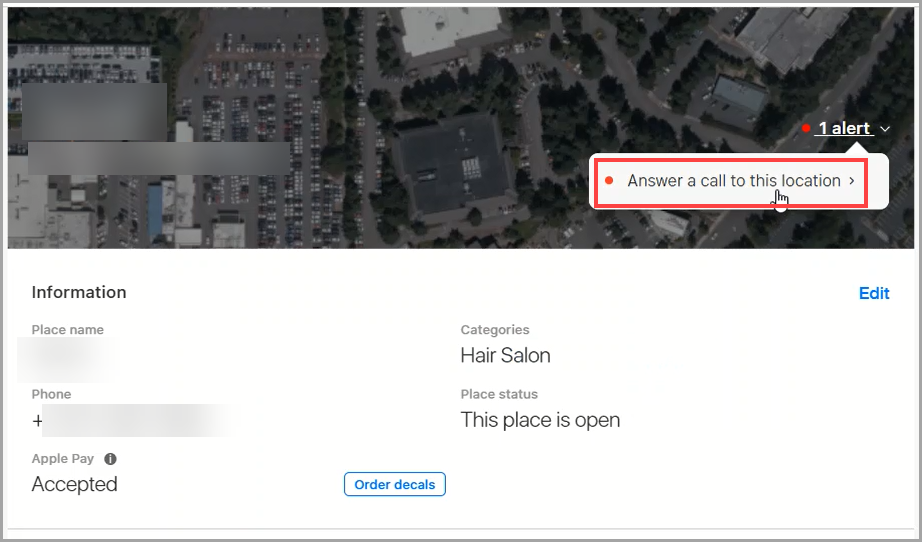
Enter the following information:
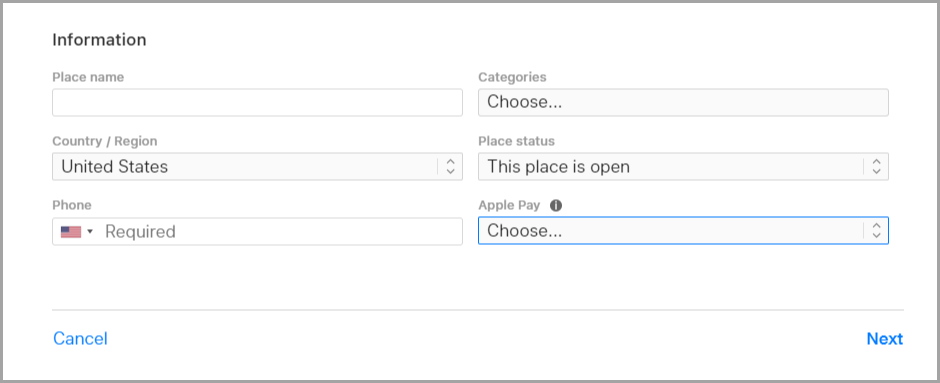
Place Name: Enter the name of your business. This is important as the customer receipts and statements will carry this name with respect to the Apple Pay transactions.
Categories: Select the primary category of your business. For example, Medi-spa, Salon, Hair Studio.
Country/Region: Select your country.
Place Status: Select any one of the following:
Phone (Mandatory): Enter the store or center phone number.
Apple Pay: Select Accepted.
Click Next.
The phone verification pop-up appears.
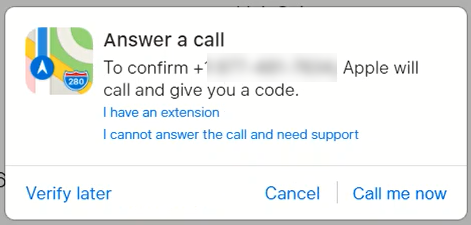
Click any one of the following:
Verify Later
Cancel
Call me now
Note
You must complete the phone number verification for the information to be
Enter the full business address.
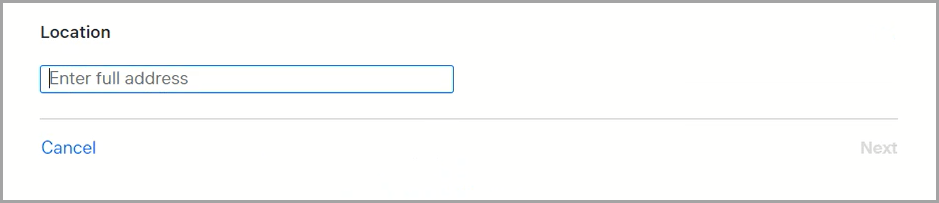
Enter the full business address.
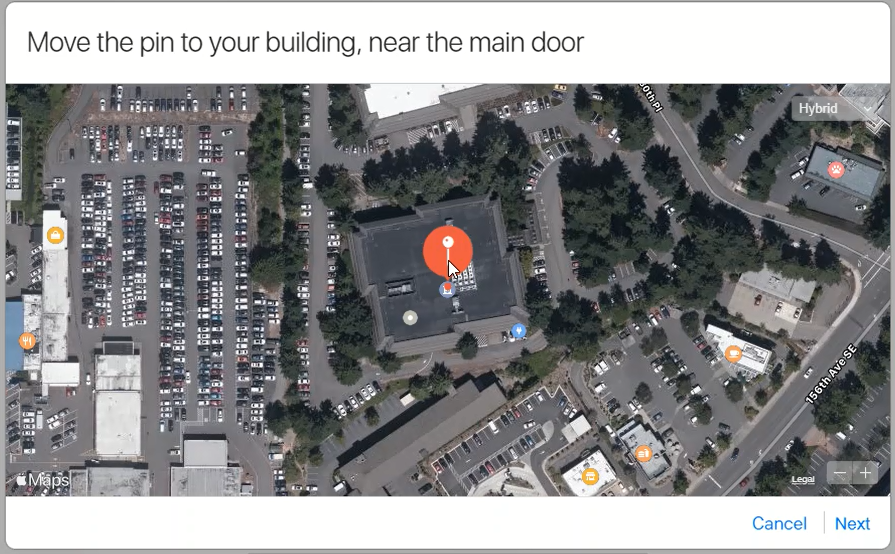
The Maps screen appears.
Move the PIN to your building on the Apple Maps and click Next.
The store timings page appears.
The store timings page appears.
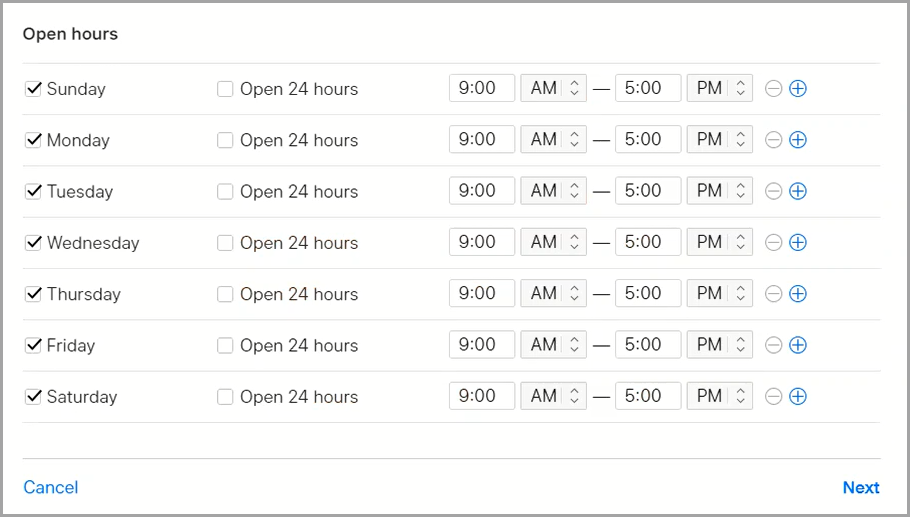
Click Next.
The store web links page appears.
Enter the URLs of your social profiles.
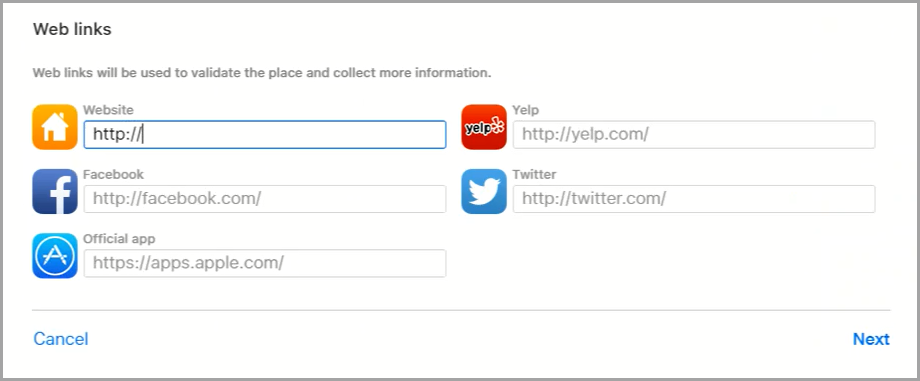
Click Next.
The summary page appears.
You have successfully updated your business information in Apple Maps. This will ensure that your business name appears in customer statements and receipts.
Note
If the shopper statement on Apple Pay still appears with the incorrect details, please contact Zenoti at payments@zenoti.com and confirm that you have completed the steps above. Submit a screenshot of the incorrect shopper statement and share the transaction details.
Accept card payments in mirror mode
Mirror mode allows your front desk staff to use their desktop computers to create an invoice for the guest, while an iPad with the mobile POS facing the guest. The guest’s experience on the iPad includes the ability to:
Review the invoice
Select a tip amount
Pay by swiping, inserting, or tapping their credit card
In mirror mode, the guests can insert, swipe, or tap their card on the card reader. You can accept all other payment types through the desktop POS.
Log in to Zenoti and click the Appointment icon.
Based on the organization settings, you may see the Queue icon instead of the Appointment icon.
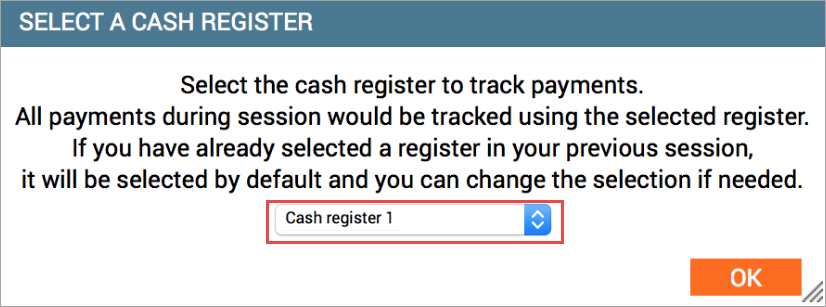
Select the cash register that you selected in the Zenoti Mobile POS.
Open the Take Payment screen of the appointment.
Click Credit/Debit and verify the amount to be collected.
Click Collect Tips.
A prompt asking you to Present Card appears on the Zenoti Mobile POS.
The guest should follow the instructions to complete the transaction.
The transaction details are updated in Zenoti and a message confirming successful payment appears with an option to email or print the receipt.
Other troubleshoot actions
If you have issues connecting to Zenoti Mobile by using the Mirror Mode function, try the following troubleshooting steps to resolve them:
Check connection
Sometimes your device may be stuck at ‘Connecting’ when you attempt to use the Mirror Mode function on Zenoti Mobile during the check out.
Ensure you have an active Wifi or internet connection.
Close and open the invoice again. After the invoice opens, verify whether the Mirror Mode function is turned ON when the connection with Zenoti Mobile is established.
Connect to correct register
Your business may have multiple registers configured on Zenoti Mobile and connecting to the correct register to access the invoice during check out is crucial. The Mirror Mode function may not work if you have not connected to the correct register.
Verify whether Enable Invoice Mirroring setting is enabled for your center. You can find this setting by clicking the Configurations icon, search for and select Cash Register.and select the register in use.
In Zenoti Mobile, verify if your center is connected to the correct cash register to collect payments.
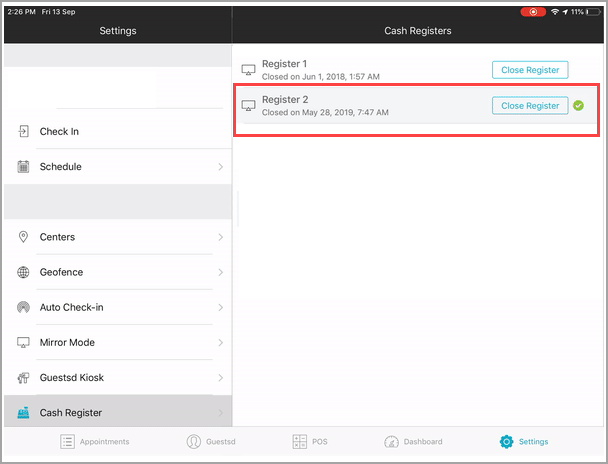
For example, assume that your business has two cash registers, ‘Register 1’ and ‘Register 2’.
If you are using ‘Register 2’ to collect payments from the guest, you must select that register before you can enable the Mirror Mode function.
Latest Zenoti Mobile version
You might face issues while connecting to the mirror mode function if you are using an older version of Zenoti Mobile.
Visit Play Store for your Android device or iStore for your iPad to make sure you have downloaded or updated it to the latest version of Zenoti Mobile.
Unknown error message
If you receive an unknown error message or if the screen freezes while accepting payments using Mirror mode, check for the following:
Solution
In the Take Payment screen of the appointment, check if the Mirror is set to ON.
Check if the iPad is paired with your card reader.
Check if the iPad is paired with your card reader.
If the Mirror is set to OFF, set the Mirror to ON and proceed with taking the payment.
To do this, on your iPad, launch Zenoti Mobile and tap the Settings icon and then tap Connected Card Readers. You should see your card reader listed here.
If your card reader is not listed, pair your iPad and your card reader and proceed with taking payments.
Guest checkout steps while using the Mirror Mode
Zenoti makes it easy for you to view and track the progress of the guest checkout when using the Mirror mode, by displaying steps of the guest checkout on your desktop POS. This way, you can actively prompt your guest about the next steps and also help the guest in case of any issues.
Note
The number of steps displayed on the desktop POS, depends on the payment processor.
Important
You must enable Mirror Mode on your desktop POS and connect it to an iPad.
Learn to set up Mirror Mode.
Click Take Payment from the context menu of the appointment block.
On POS, switch ON the mirror mode.
Note
You can find the Mirror mode button on the Collect Payment screen.
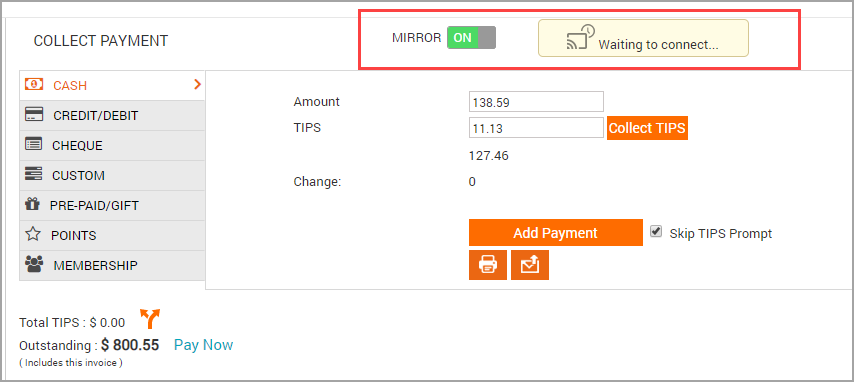
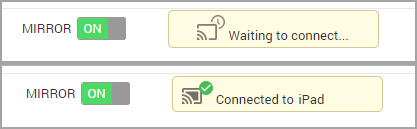
An image with text Waiting to Connect will appear. After the connection is established, the text will change to Connected.
The invoice appears on the iPad.
Click Add Payment.
The Online Payment window opens.
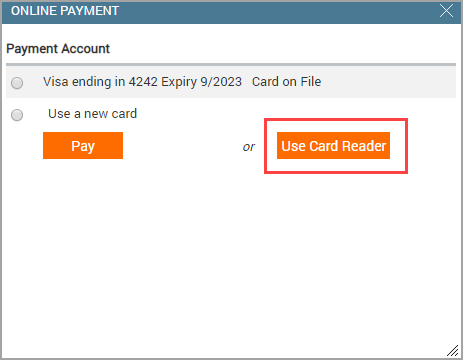
Select Use Card Reader.
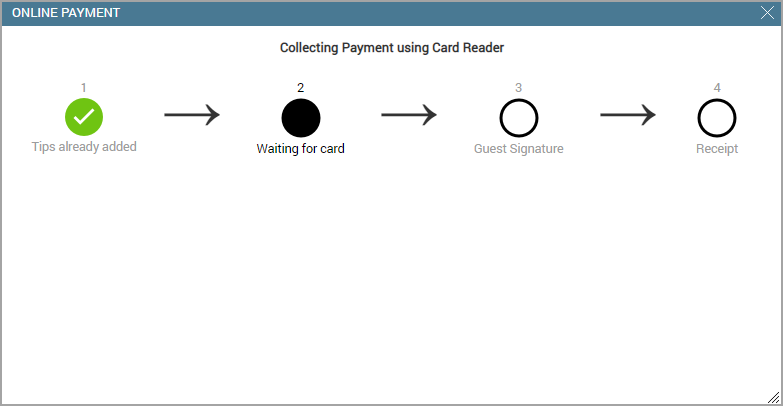
Since the Mirror mode is enabled, the guest can see the invoice amount on the Mirror screen and can add the tips. You as a front desk, can see the checkout steps on your desktop POS.
For each of the steps that are completed by your guest, you can see the progress on your screen.
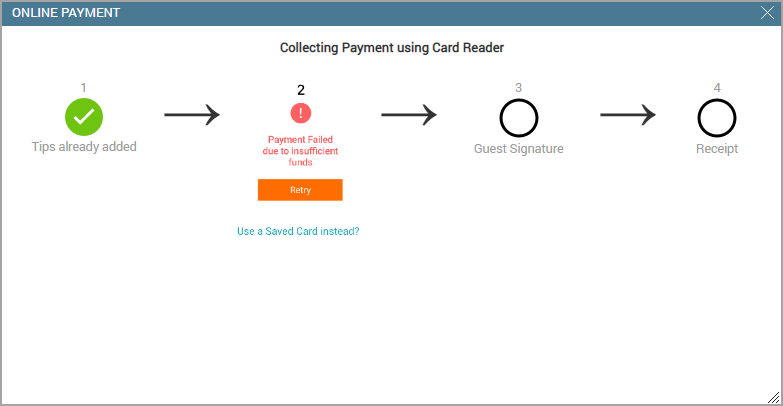
In case of a failure or an error while collecting the card payment, your screen will display an alert. This alert will also indicate the reasons for payment failure.
In such cases you can do any of the following:
Click Retry to initiate the transaction again using the same card or another card.
If the guest has a card saved, you can use one of the saved cards to process the transaction.
Note
If you choose to process the transaction using a saved card, this window closes. The Online Payment window opens again and you must select Use a Saved Card instead? option to proceed further. (Refer to the image in step 3).
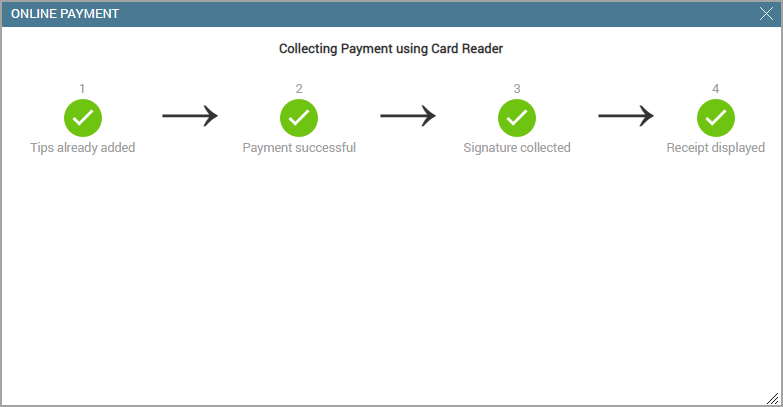
After all the steps are completed, you will see the following screen indicating that all the steps are completed and the transaction was successful:
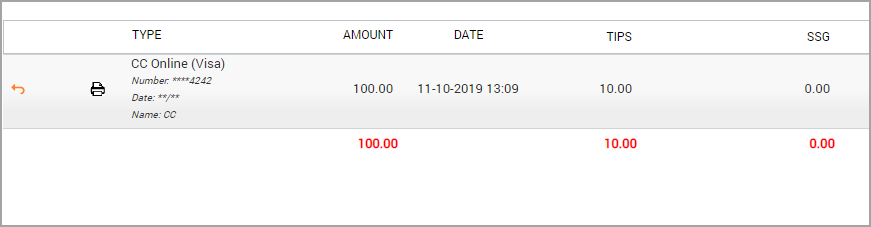
After the transaction is complete, the window closes automatically, and you can see that the payment is added in the Collect Payment screen.
Note
For cards that require a PIN input, do not need the guest's signature to be collected.
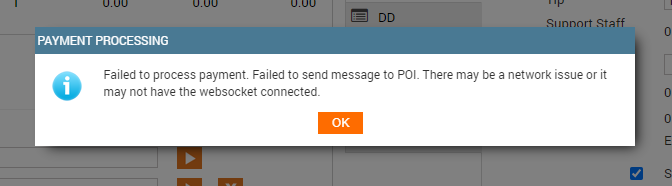
Unable to collect payments/POI error message
This article lists down troubleshooting steps if you are unable to process payments or
see an error message while collecting payments on Zenoti Payments.
You may see the following error message:
Take the following steps to troubleshoot this issue as well as other general payment
issues:
A. Device Battery: Ensure the device's battery is sufficiently charged.
B. Internet: Check your internet. If you are facing any internet connectivity issues
with your local provider, please contact your service provider.
C. Ethernet Cable: If you are using an ethernet cable for your internet, ensure the
cable is connected properly and is not a faulty one.
D. Network Icons: Check for Wi-Fi, or the Cloud icon on the top-right corner of the
screen.
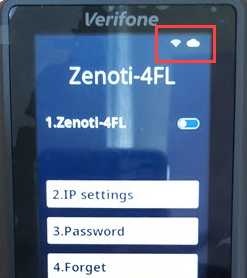
If you do not see the WiFi and the cloud icons, take the following steps;
On the keypad press number 9 and press the green enter button.
The Admin Menu appears and prompts you to enter the PIN.
On the keypad press 4060 and press the green enter button.
From the menu, select Network.
From the Network menu, select WiFi.
From the WiFi menu, select Add Network.
The device will scan for the WiFi network and will prompt you to enter the
network password.
Enter the password.
The device will connect to the internet and you should see the WiFi and the
cloud icons.
E. Device Reboot: In case you are unable to troubleshoot the network issues, you
can reboot the device. Take the following steps:
On the keypad press number 9 and press the green enter button.
The Admin Menu appears and prompts you to enter the PIN.
On the keypad press 4060 and press the green enter button.
From the admin menu, select Reboot.
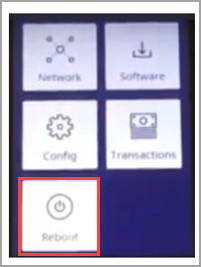
The device will reboot.
F. Device Update: You can perform a manual software update as this will not only
clear out most of the known issues, but also improve the stability and security of your
card reader.
On the keypad press number 9 and press the green enter button. The Admin
Menu appears and prompts you to enter the PIN.
On the keypad press 4060 and press the green enter button.
From the menu select Software > Update.
The update will take 30-40 mins.
Note
You cannot process transactions while updating the card reader.