Manage appointments
Edit appointments
Tap the appointment.
Modify the appointment as required.
Tap Review and Save.
Tap Change/Modify.
Action | Perform these steps |
Move the appointment time | At step 2, select the time you want to move the appointment. |
Move the appointment to another day |
|
Change the provider | At step 2, select the provider to whom you want to move the appointment. |
Change the duration of the appointment | At step 2, in the Duration column, select the duration. |
Change the guest details |
|
Add a service to an appointment | At step 2, in the Service column, select the service. |
Remove a service from an appointment | Tap the Delete appointment icon next to the service. |
Modify appointments
Change appointment statuses
Access Appointments from the menu.
On the Appointments tab, tap the appointment for which you want to change the status.
Select the applicable status:
Status
Description
Confirm
When your guest confirms an appointment
Check in
When your guest arrives to take the service
Cancel
When your guest cancels an appointment.
Note
You must select a reason and add a comment
When you cancel an appointment, the appointment is removed from the appointment book.
If your organization enforces a cancellation fee, you must inform the guest that cancellation charges may apply.
No Show
When your guest does not show up for a booked appointment
Note
You must select a reason and add a comment
When you select No Show for an appointment, the appointment is removed from the appointment book.
If your organization enforces a no-show fee, you must inform the guest that no-show charges may apply.
Depending on your selection, the color for the appointment changes accordingly.
Appointment status
Screenshot
Appointment Booked (New, Tentative):
Orange
Appointment Confirmed:
Light green
Appointment Time Elapsed:
Purple
Guest Checked in:
Yellow
Appointment Started:
Soft yellow
Appointment Completed:
Green
Appointment Closed:
Light blue
Pending actions on the appointment (such as feedback pending):
Red
Add service add-ons
Tap the appointment.
Below the service with an add-on, tap +Add-ons.
Tap Add.
Tap Done.
Upsell retail items during an appointment
Open the Appointment Details section.
In the Upsell other items box, tap Add items.
Adjust service duration
Tap the appointment.
Next to the service, tap the Modify icon.
Change the duration.
Tap Save.
Fill intake form
Tap the appointment, and then tap the form that needs to be filled.
To turn on the guest mode, tap the ‘Lock’ icon on the top right corner of the screen.
Note
Enable this lock before handing over the device to the guest so that they can fill the form. This lock ensures that guests cannot access anything apart from the intake form in the app.
Ensure the guest fills in the details in the form as per requirement.
Tap Submit.
Note
If you minimize or toggle the screen, an alert message appears, prompting you to submit or save the changes to avoid loss of data.
To see the list of guest intake and service intake forms for a guest, on the Guest Details screen, tap the Forms Unified View tab.
Explore the new Appointment Book on Zenoti Mobile
The new Appointment Book on Zenoti Mobile comes with a sleek and modern interface, refined fonts, and a palette of cool-toned colors.
The interface has clean layouts, workflows, and navigation options, making it easier to complete common tasks and reduce the need for assistance.
Note: Coming Soon!
The Point of Sale on Zenoti Mobile will be updated on similar lines with the new Appointment Book design.
You will have the choice to switch to the new Appointment Book interface at the centre level and Zenoti Mobile settings or continue to work with the default Appointment Book.
What's changed
Tap an appointment to see a list of related actions, such as, modify or rebook an appointment, take payment, add invoice to a group bill, fill forms, etc.
An improved group booking interface to make the process smoother and faster!
An improved interface to book parallel services with a notification header specifying which services have been booked in an appointment.
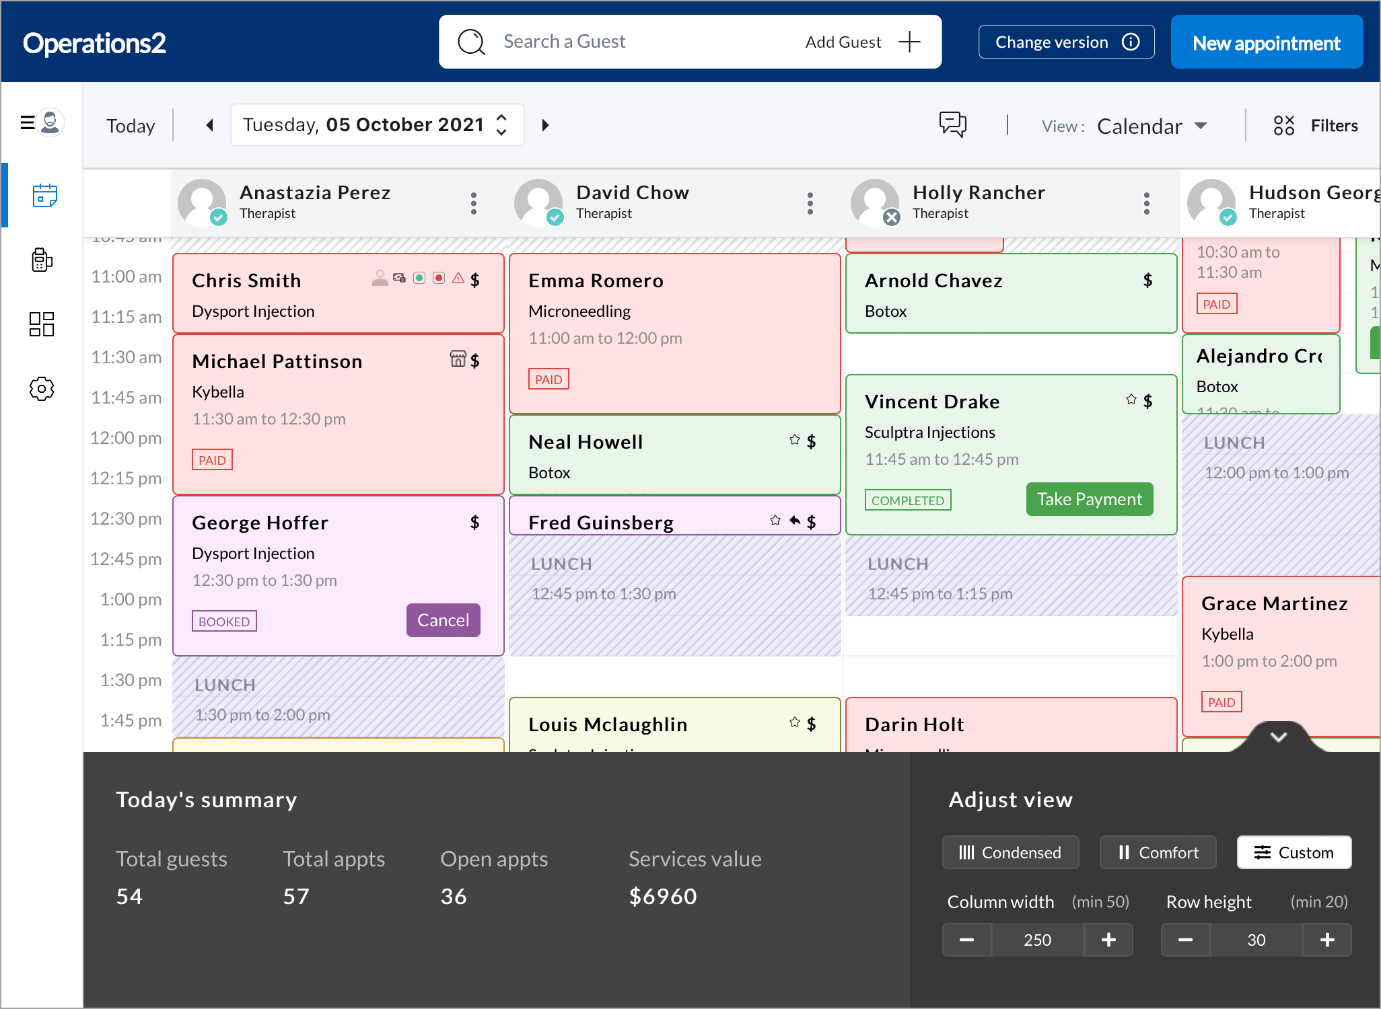
View Today’s Summary; daily stats for the number of guests, appointments, open appointments and the total value of services in the calendar view.
Let’s explore the improvements in detail:
Improvement | Before | After | |||||||
|---|---|---|---|---|---|---|---|---|---|
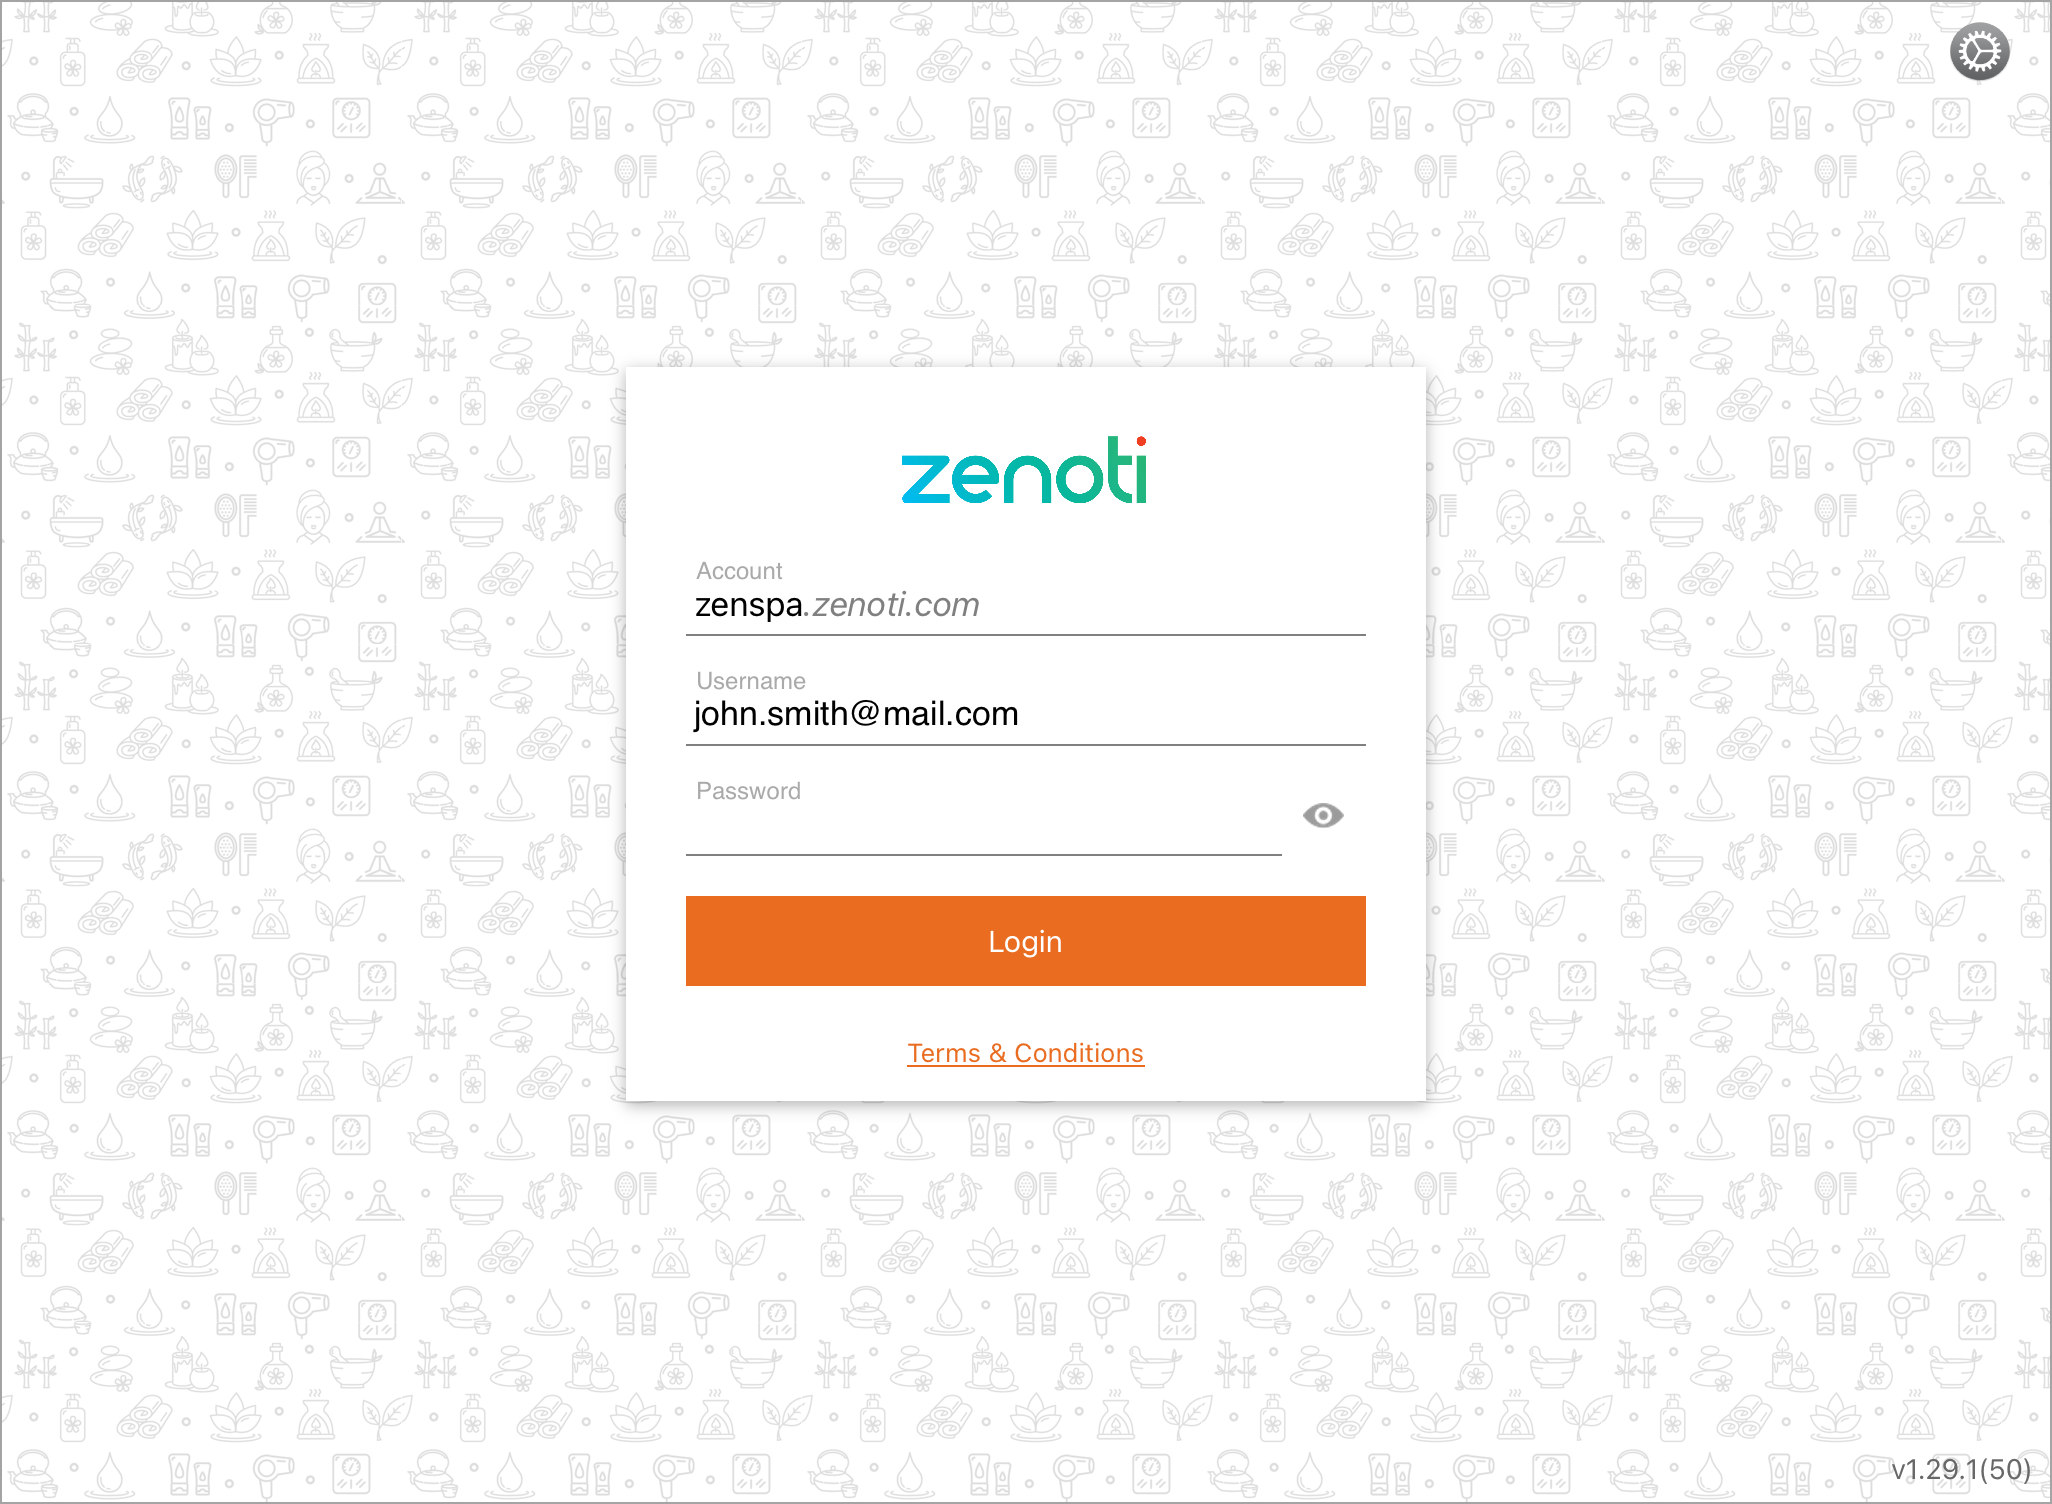
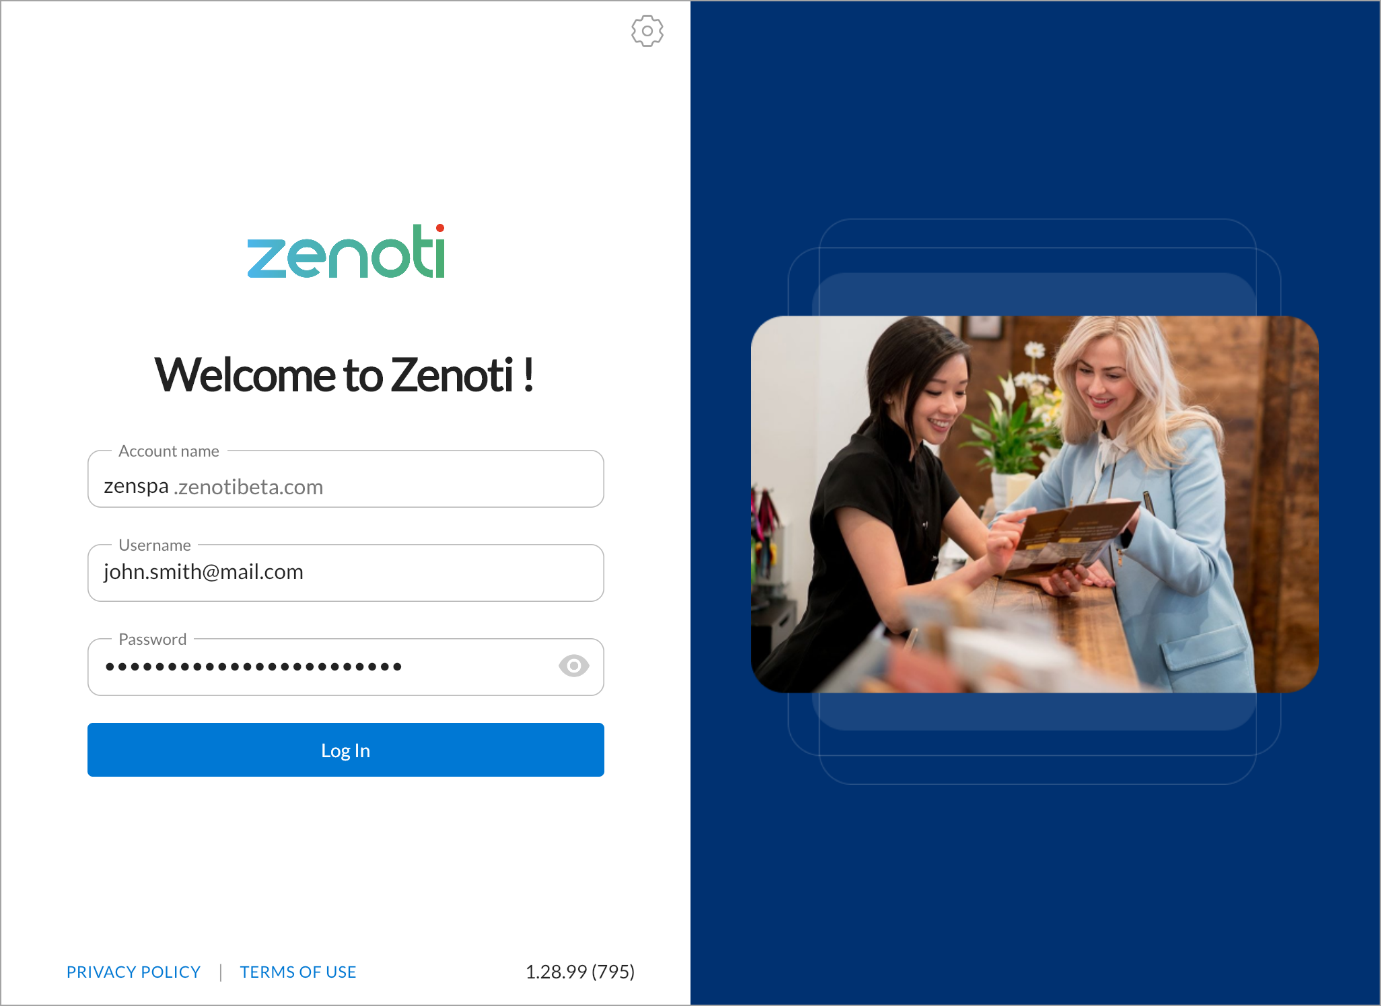
Login Screen |
|
The new login page looks sleek and compact, enhanced to create an easy and no fuss log-in experience for the users. | |||||||
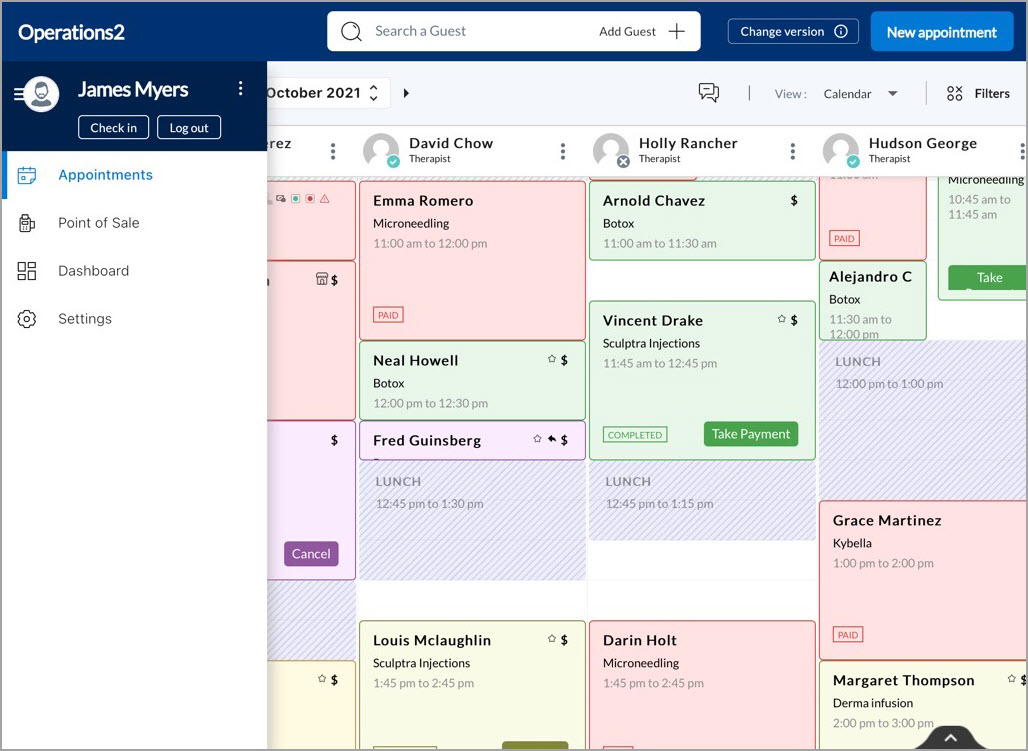
Navigation Panel |
|
The navigation panel on the left will allow you to navigate to different sections on Zenoti Mobile, check in for the day and log out from the application.
| |||||||
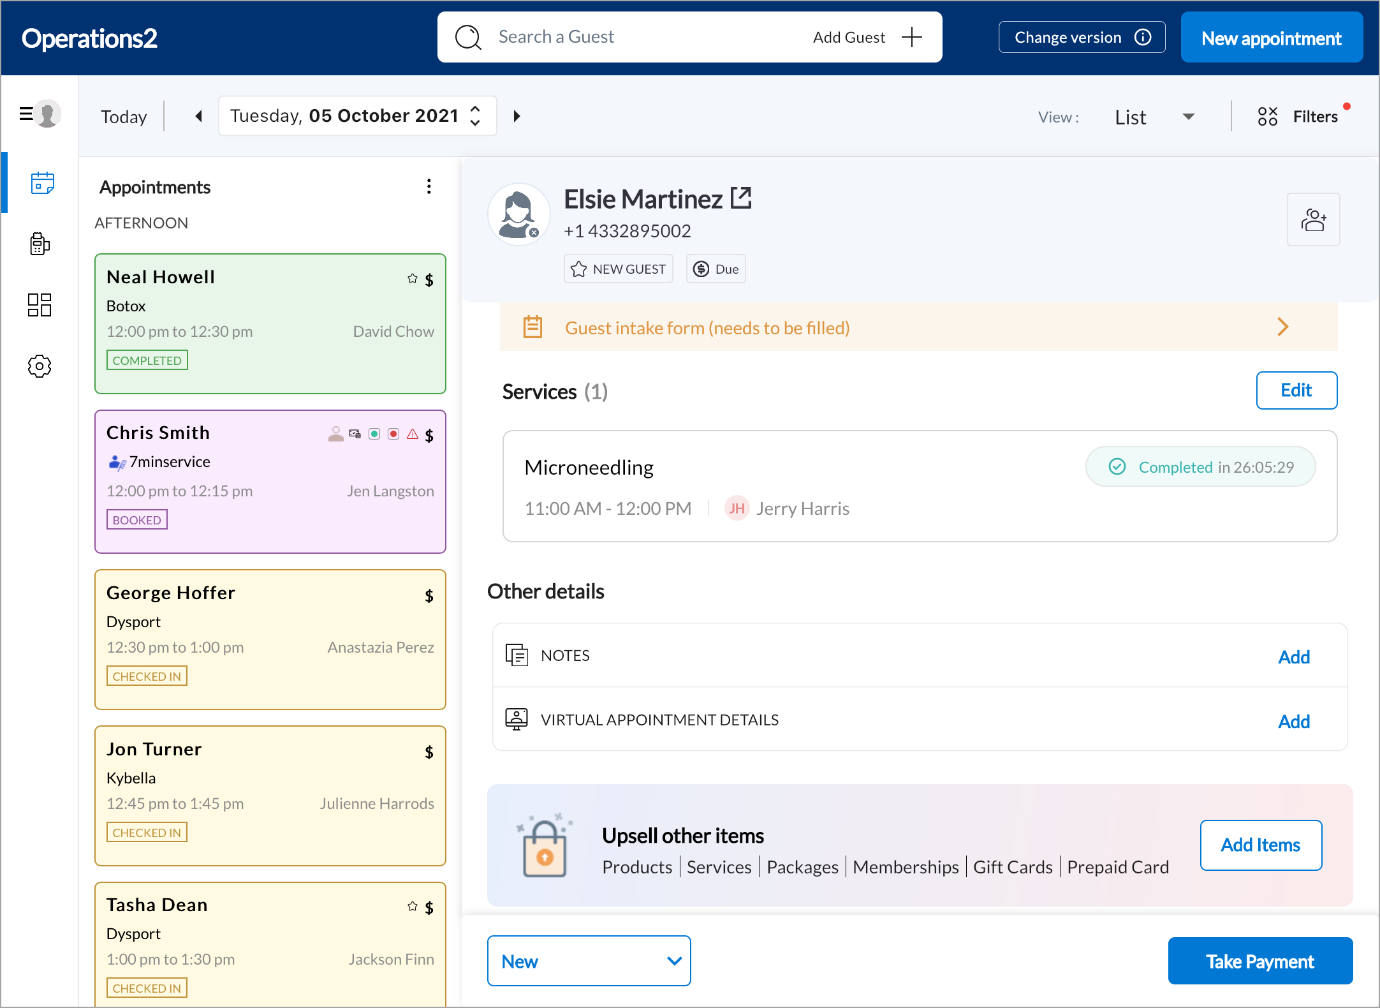
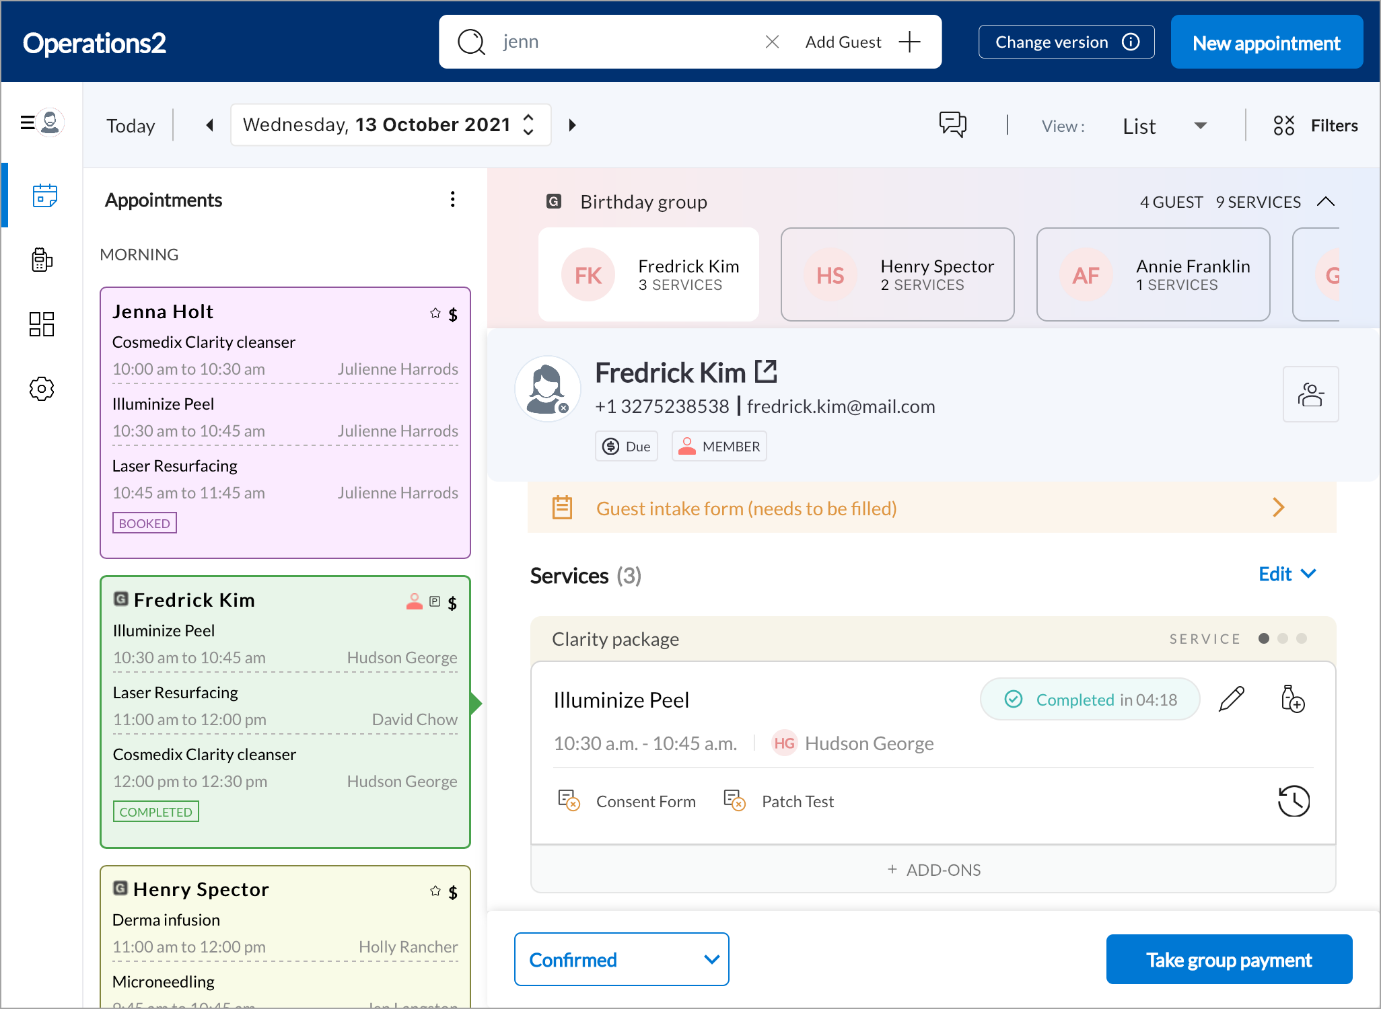
List View |
|
We designed the list view to let you see all the important information about the guest in one place. You can see the icons upfront, without going into the appointment details. Other information such as guest contact information, booking details, service status, appointment colors, guest notes, sort/filter, and the option to switch between list view and calendar view, are visible and clearly placed within a compact design. | |||||||
Calendar View |
|
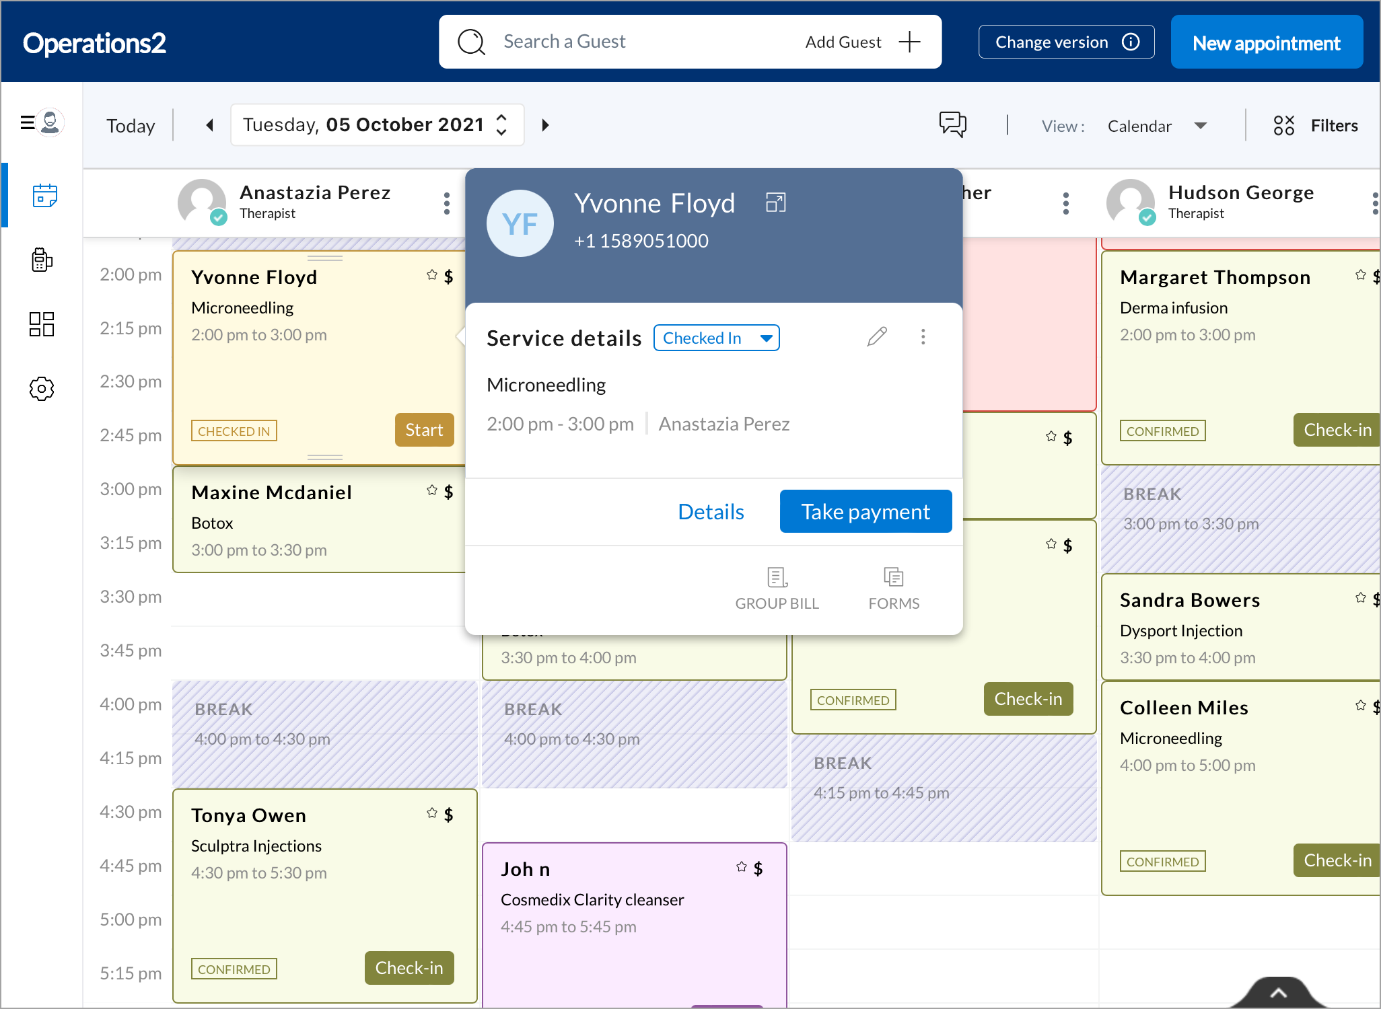
The calendar view has some changes. Here you can book and move appointments around with a few simple steps. The front-desk staff can use the calendar view to quickly change the status of appointments, see which therapists are available, collect payments, print receipts and get a gist of how the workday looks. | |||||||
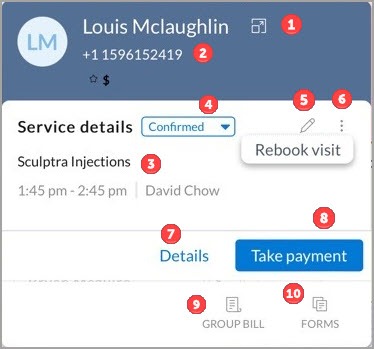
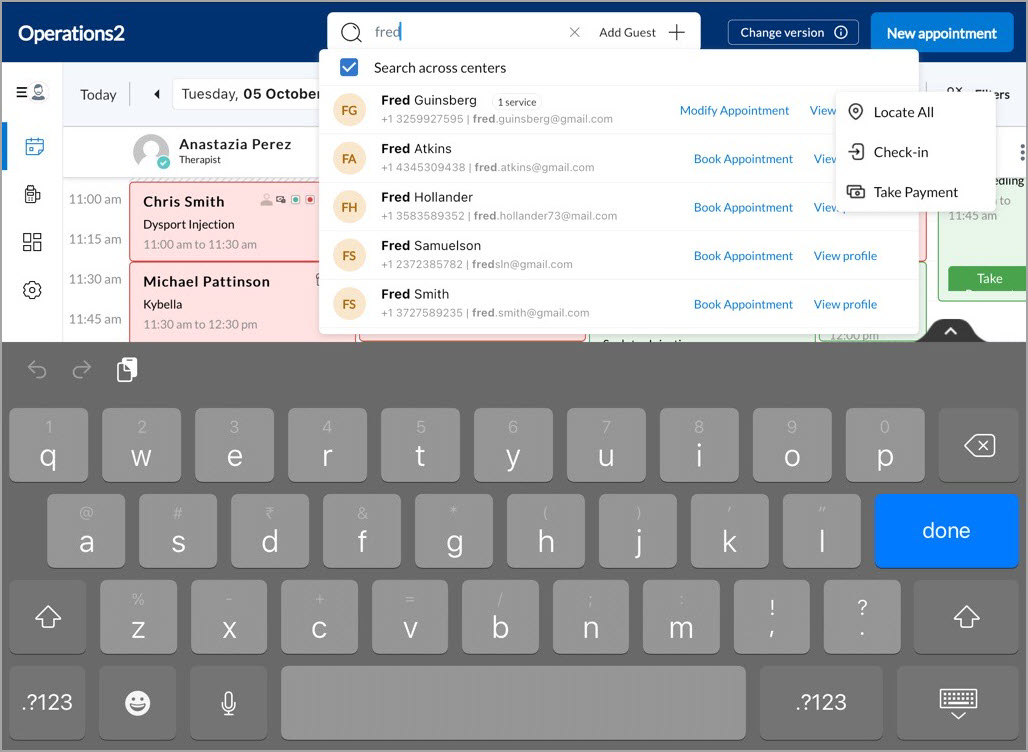
Context Menu |
The context menu has an in-built intelligence and makes navigation easy for the front-desk staff. Tap an appointment in the calendar view to open the context menu to take actions related to the appointment. The options you see on the menu for a new appointment and or a completed appointment vary and are indicative of the next steps.
You can take the following actions via the context menu:
| ||||||||
Filters |
|
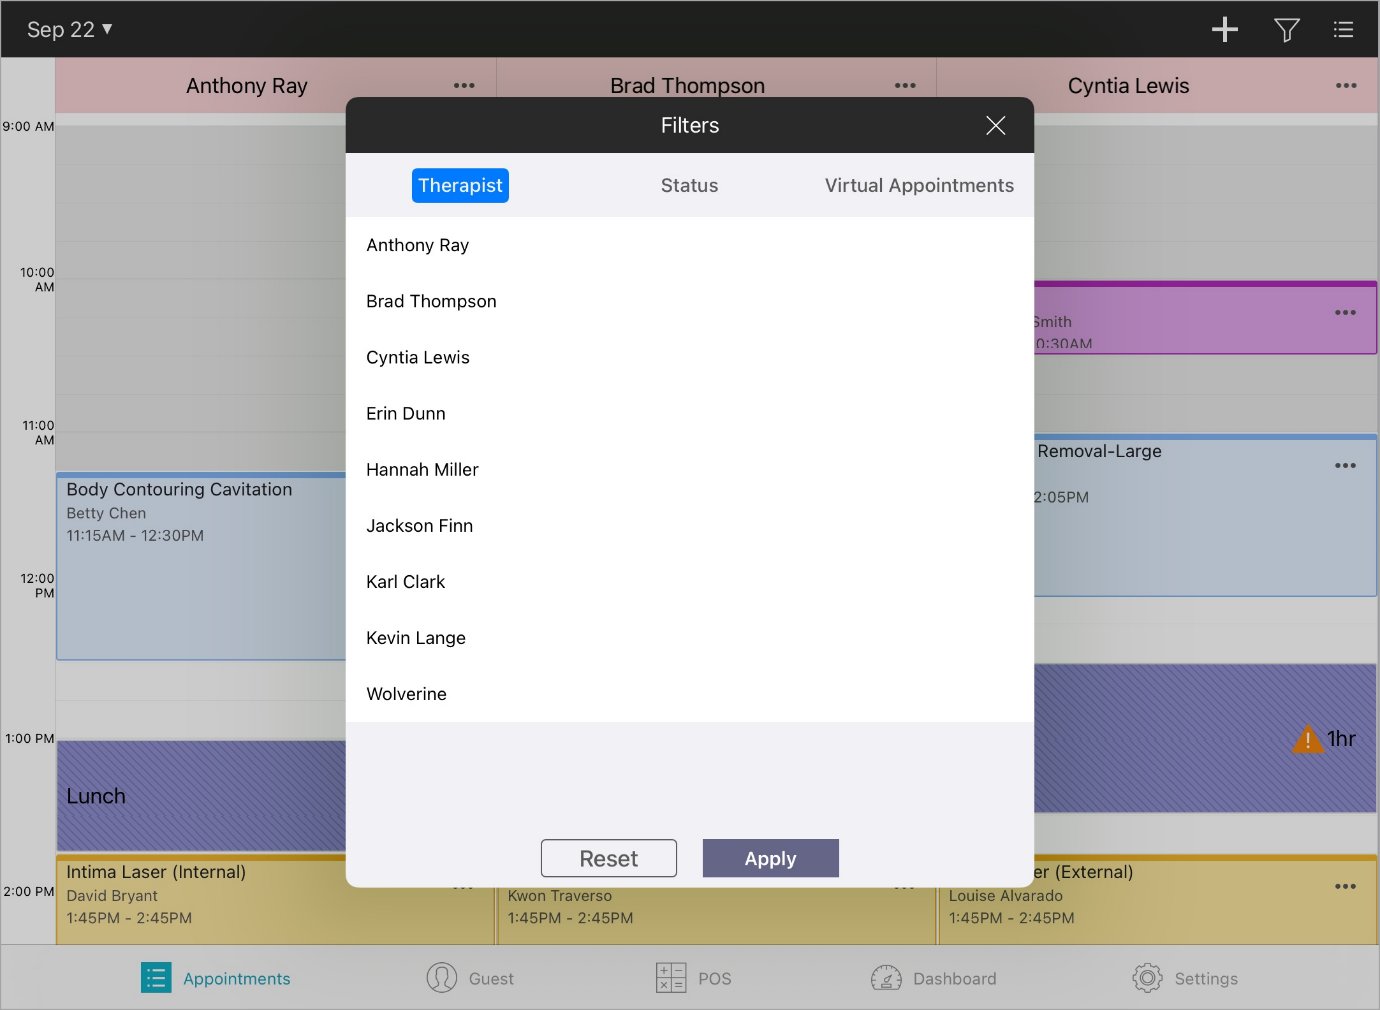
The filters option allows you to filter appointments by status, therapist, virtual appointment details and view block out time for therapists.
| |||||||
Today's Summary |
Tap the arrow at the bottom of the calendar view to expand Today’s summary. The summary shows you the number of total guests, total appointments, open appointments, the total value of services sold in the day. | ||||||||
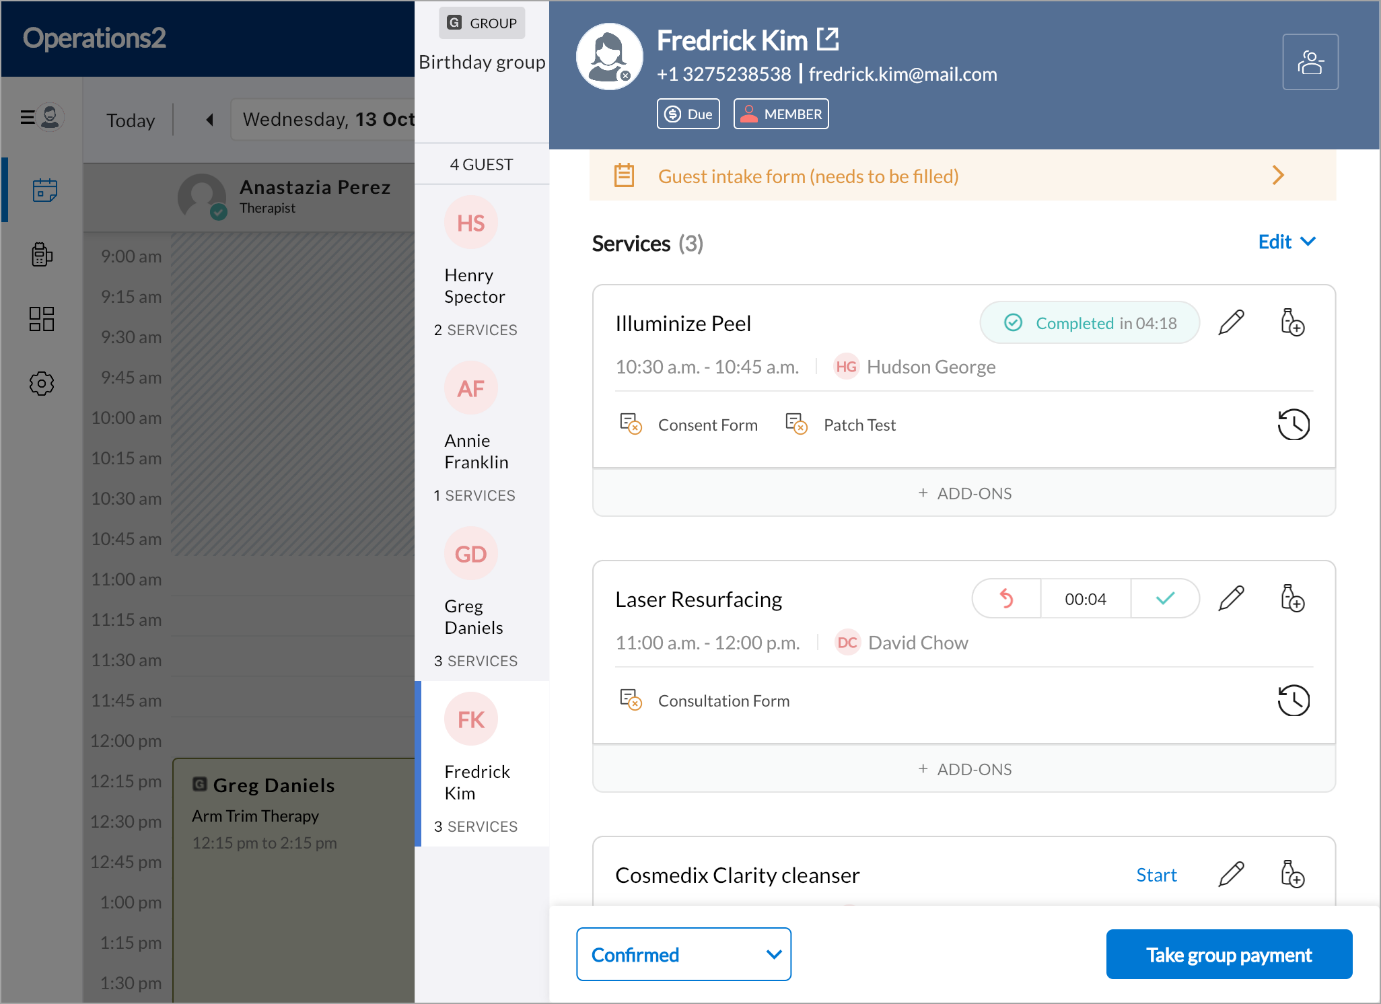
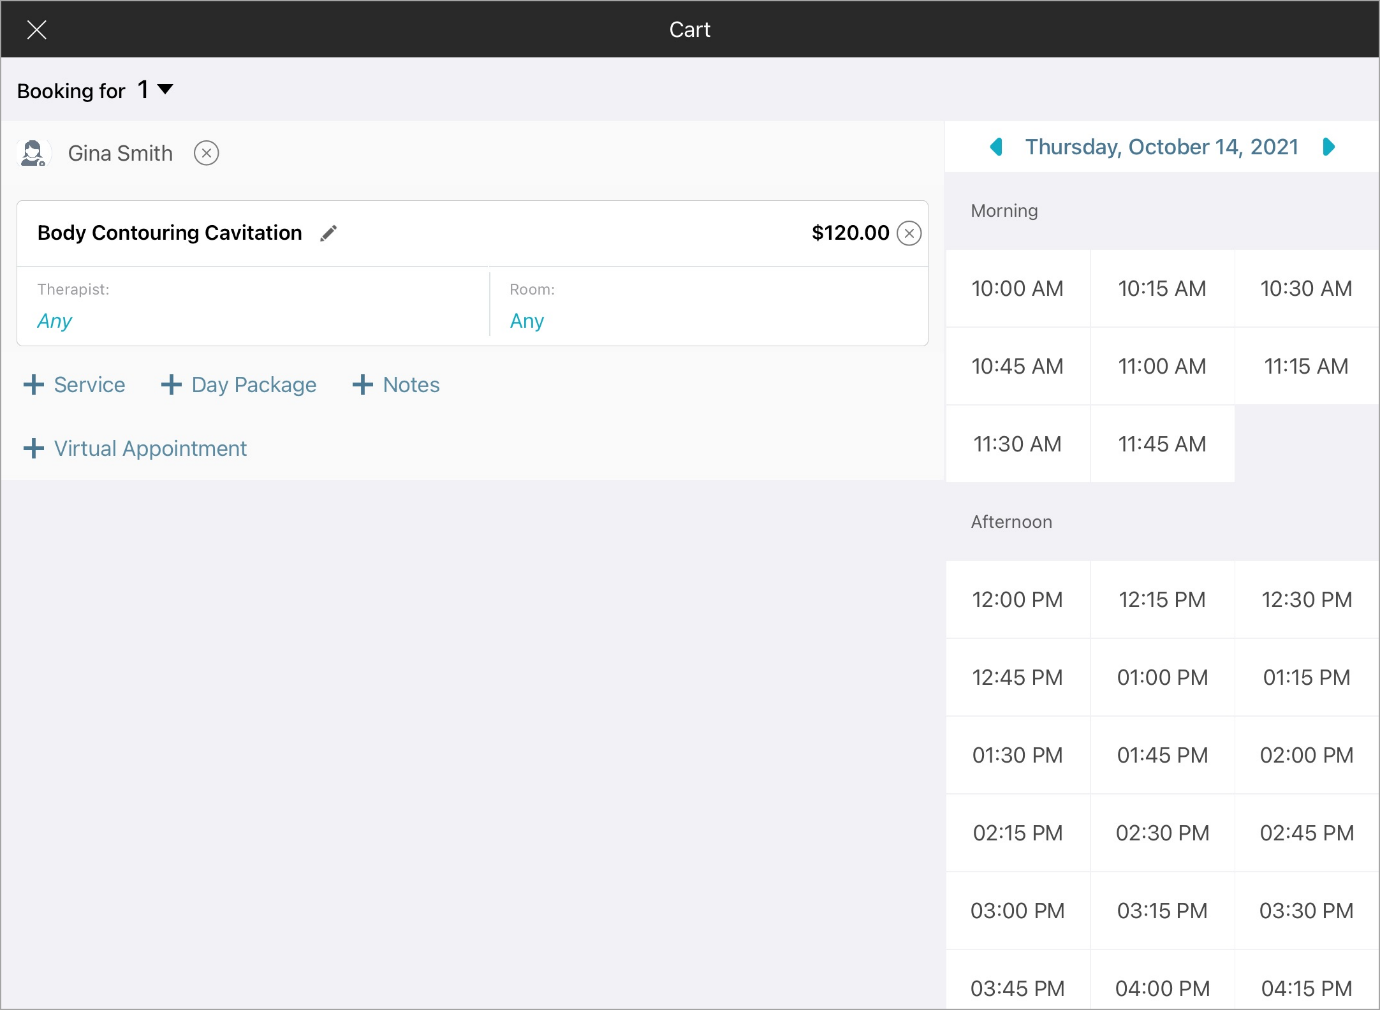
Group Booking |
|
We have simplified the Group Booking process to give the user and the guests an optimum booking experience and reduced wait time. The front-desk staff can navigate swiftly between the group members with a simple tap to see all their visible tags, history, notes, and profile. They can also customize add-ons as per each guest’s requests, enter notes, add virtual appointments, change the status of services, and collect payments.
| |||||||
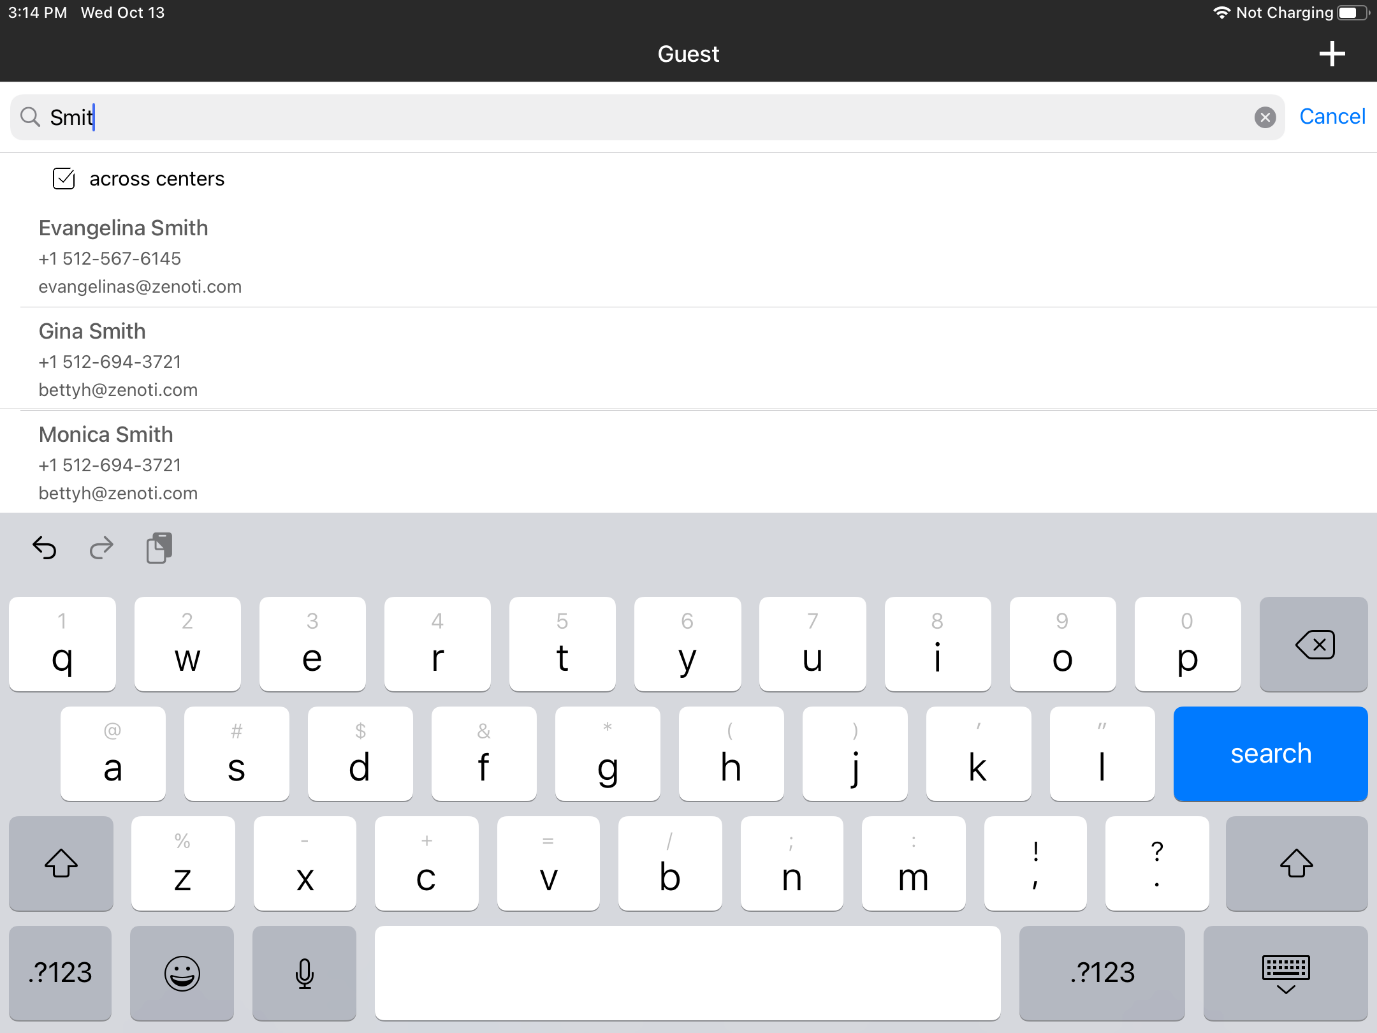
Guest Search |
|
The new guest search is clean, intuitive, and easy to use with the most frequent actions available upfront based on the status of the guest’s appointment. | |||||||
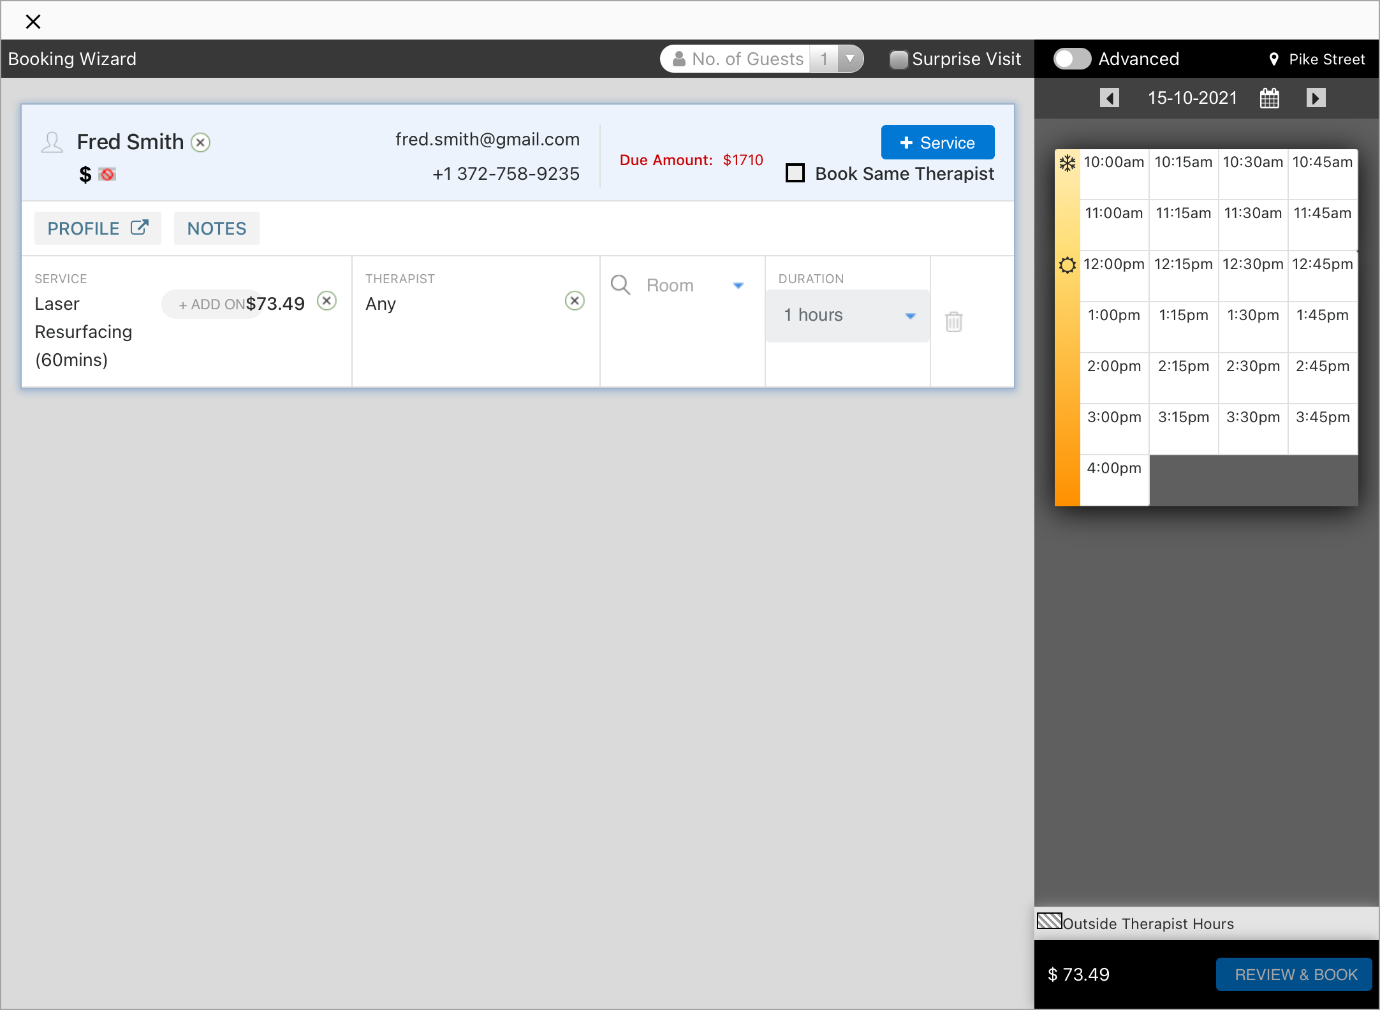
Booking Wizard |
|
The desktop version of the booking wizard will replace the default booking page on Zenoti Mobile. You can use the Booking Wizard to:
|


FAQ
1. How can I switch to the new Appointment Book on Zenoti Mobile?
You can switch to the new Appointment Book by changing the center-level setting and Zenoti Mobile settings. You have the option to opt-in for both the new Appointment Book and Point of Sale V2 separately.
Open Zenoti Mobile app on your tablet.
Go to Settings.
Tap Zenoti Mobile V2.
Select Appointment.
Note: If you enable the new Appointment Book, the Point of Sale will be automatically enabled for your center and it cannot be unselected.
2. Can businesses using Zenoti Mobile V1 choose to switch to the new Appointment Book? No, a center will have to switch to Zenoti Mobile V2 to opt-in for both the new Appointment Book and Point of Sale V2.
3. Will users have to update to a new version of Zenoti Mobile application to get the changes? Yes, an update to the latest Zenoti Mobile app version is required to see the changes.
4. Can a center use redesigned Point of Sale without the new Appointment Book interface as they currently do today? Yes, existing users of Zenoti Mobile V2 can continue to use only the redesigned Point of Sale. It is not mandatory for them to use the new appointment book.