Enable Permissions for HyperConnect
This article provides a step-by-step guide on how to enable permissions for the Zenoti HyperConnect feature, ensuring team members have the necessary access to use its capabilities effectively.
Overview
Enabling permissions for HyperConnect ensures that your team members have the required access to leverage its communication and automation capabilities. Proper configuration of security roles allows your staff to interact with guests, manage conversations, and use SmartBot features without limitations.
Key terms
Security Roles: User profiles that determine access to various features and actions within Zenoti.
Steps to Enable HyperConnect Permissions
To enable permissions for HyperConnect, perform the following steps:
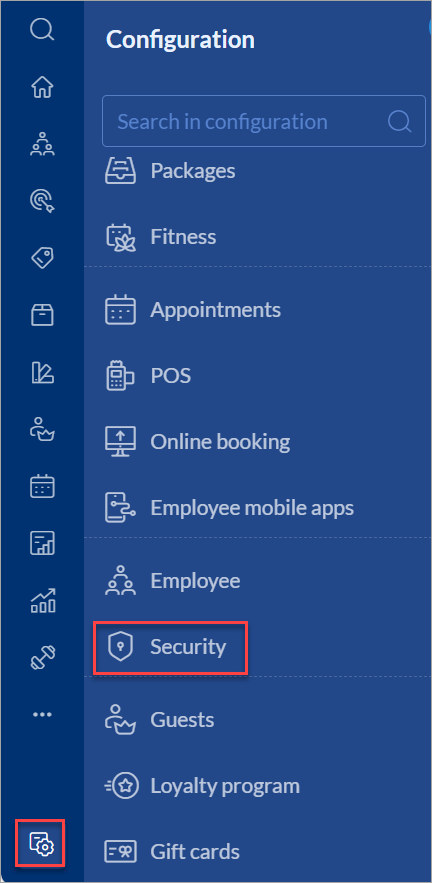
At the organization level, click Configuration.
In the Configuration menu, locate the Security section.
You can do this by scrolling down or by using the search bar to type in Security Roles.
Once you are in the Security Roles settings, find the role that you want to grant HyperConnect permissions to.
After selecting the role, scroll down or search for Zenoti HyperConnect within the role’s permissions tab.
Check the boxes next to the required permissions to enable them for this role.
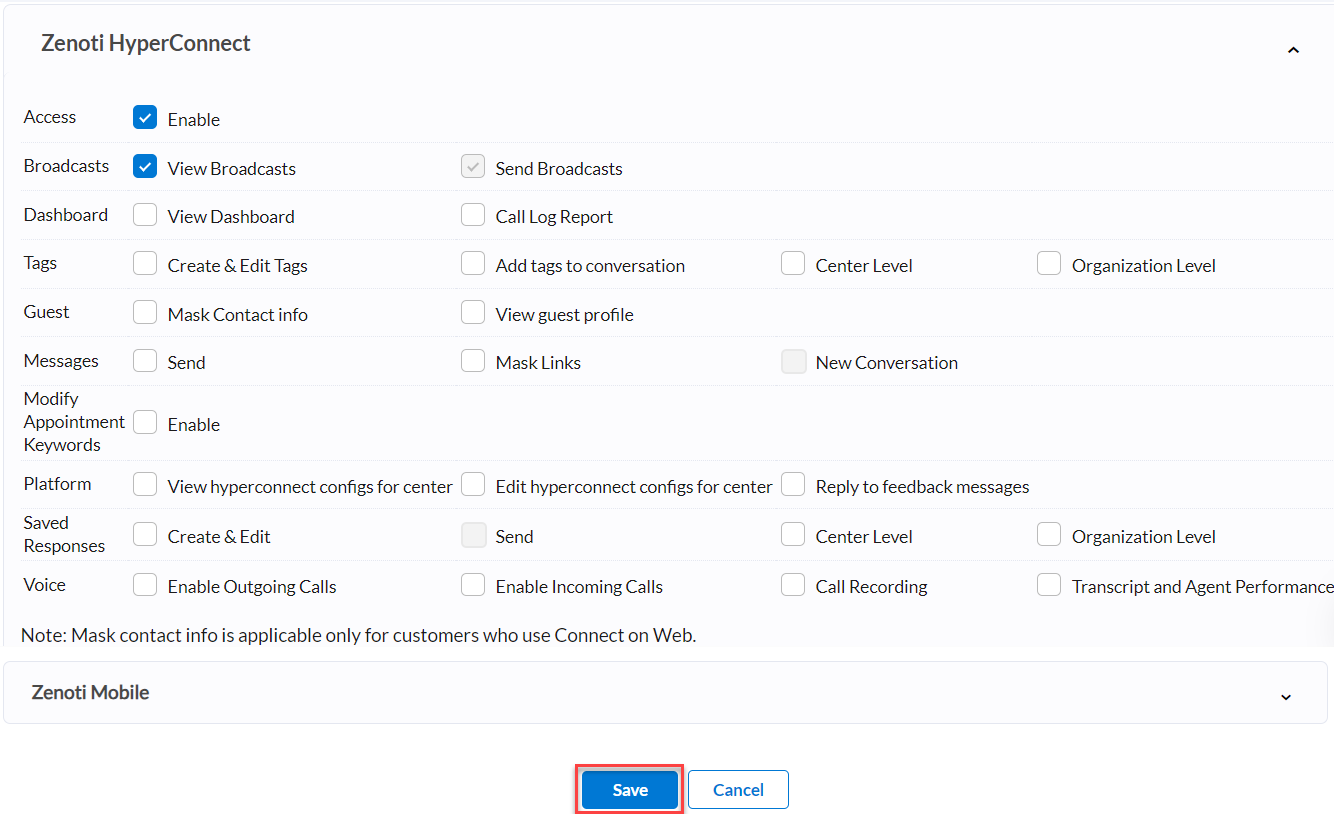
Once you have enabled the permission for the role, click Save to apply the changes.