Feedback
Overview of guest feedback
Business owners gather feedback both, positive and negative, to try and gain insights into aspects of their business that work well and areas that need improvement. In a sense, gathering and analyzing feedback influences business decisions and can go a long way in growing a business as a whole.
Important
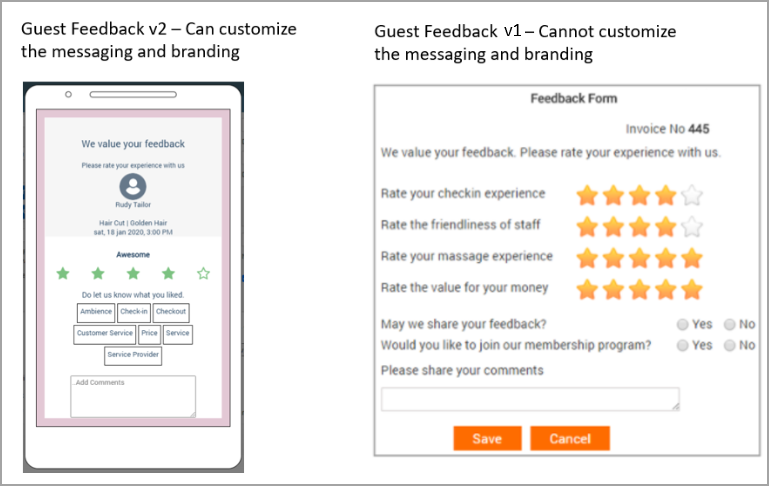
Zenoti offers two different versions of setting up the guest review experience.
Overall Rating using Guest Feedback v2 (Recommended by Zenoti): Guests rate overall experience and then indicate aspects of the business they liked or did not like.
Advantages: Giving feedback is faster and easier; more number of guests tend to give feedback. As a result, businesses get better insights into areas of improvement.
Rating Individual Questions using Guest Feedback v1 (the existing experience): Guests read questions on different aspects of business and rate each question separately. This could be time-consuming and fewer guests may actually leave feedback. As a result, businesses may find it challenging to aggregate their findings and identify areas of improvement. Note that guests cannot rate their overall experience using this method.
Set up the guest feedback experience based on v2
In Zenoti, setting up and using the feedback experience, using Guest Feedback v2 is a three-step process.
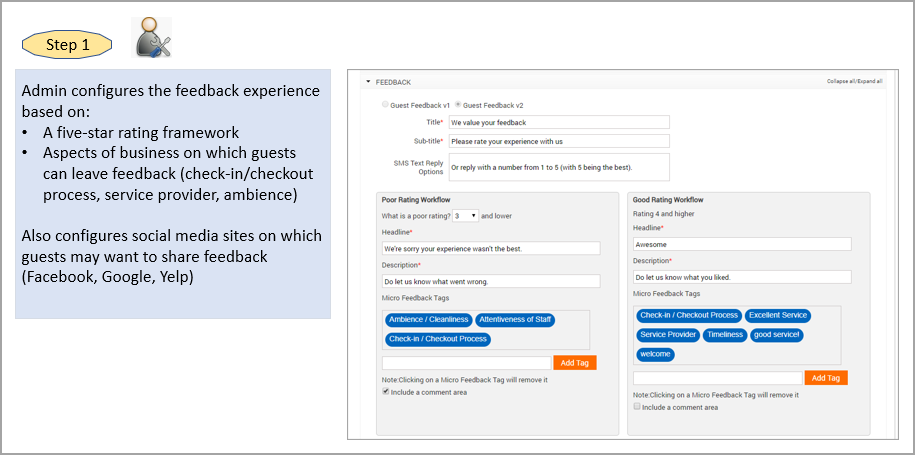
Step 1: An administrator configures the feedback experience based on a framework of a five-star rating. Administrators can also customize the branding look and feel of the feedback screen.
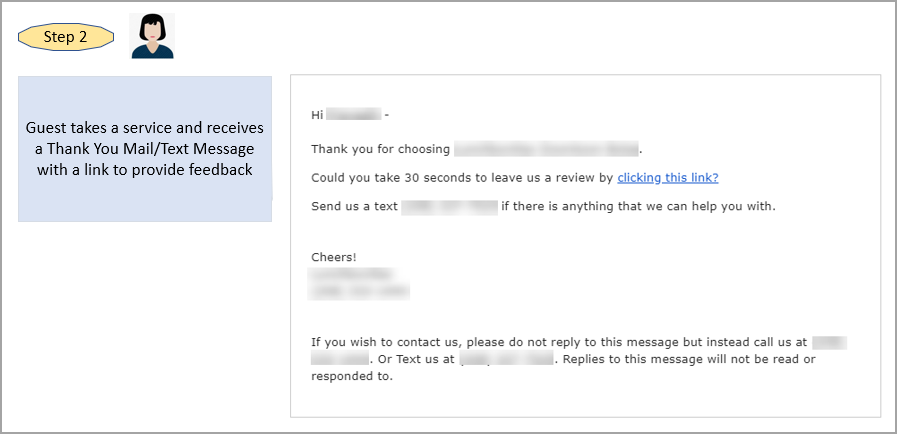
Step 2: Guests who have completed a service, get a mail/text message with a link that prompts them to provide feedback.
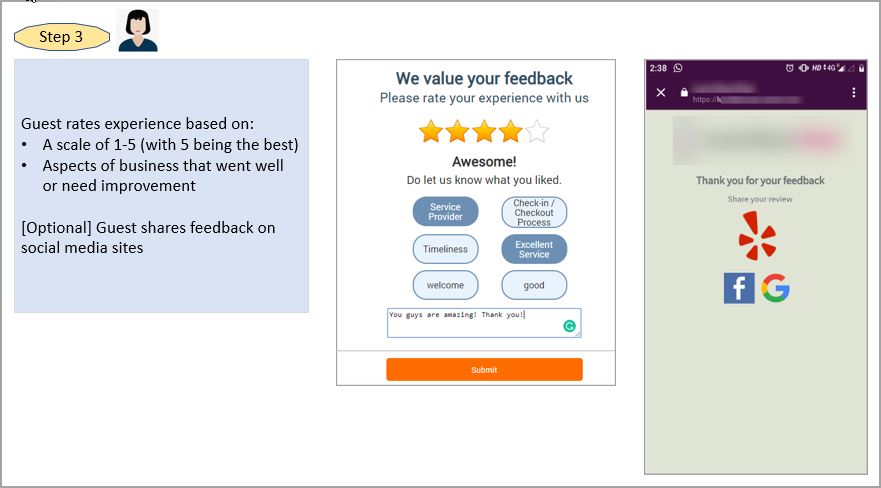
Step 3: Guests rate their overall experience and leave feedback around aspects they liked or didn’t like; they can also enter comments and share their feedback on social media sites.
Important
You must enable the option Guest Feedback v2 from the organization level to set up this feedback experience. Once you switch to Guest Feedback v2, you cannot switch back to Guest Feedback v1.
Set up the guest feedback experience based on v1
If you prefer, you can continue using the current feedback process that is based on Guest Feedback v1. This option is selected by default. Learn how the administrator sets up the feedback form in this case
The big picture of guest feedback v2
See the following infographics to understand how administrators configure Guest Feedback v2 and how guests can provide ratings and feedback using this method.
Enter guest feedback v2
Before you begin
An administrator should have set up the feedback experience for your organization.
An administrator should have set up links to social media sites where guests may want to share their feedback (from the center level).
Guests should have completed a service.
Feedback Channels
Guests can leave feedback using any one of the following channels:
Appointment Book: The front desk can capture guest feedback directly from the Appointment Book from the context menu of the appointment block. See the steps in the next section.
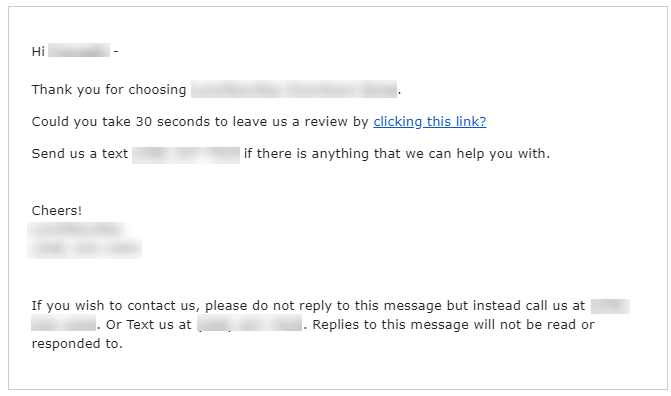
Web link via Email/Text Message: Guests receive a Thank You mail/text message after they complete their service. This mail/text message has a web link to enter feedback.
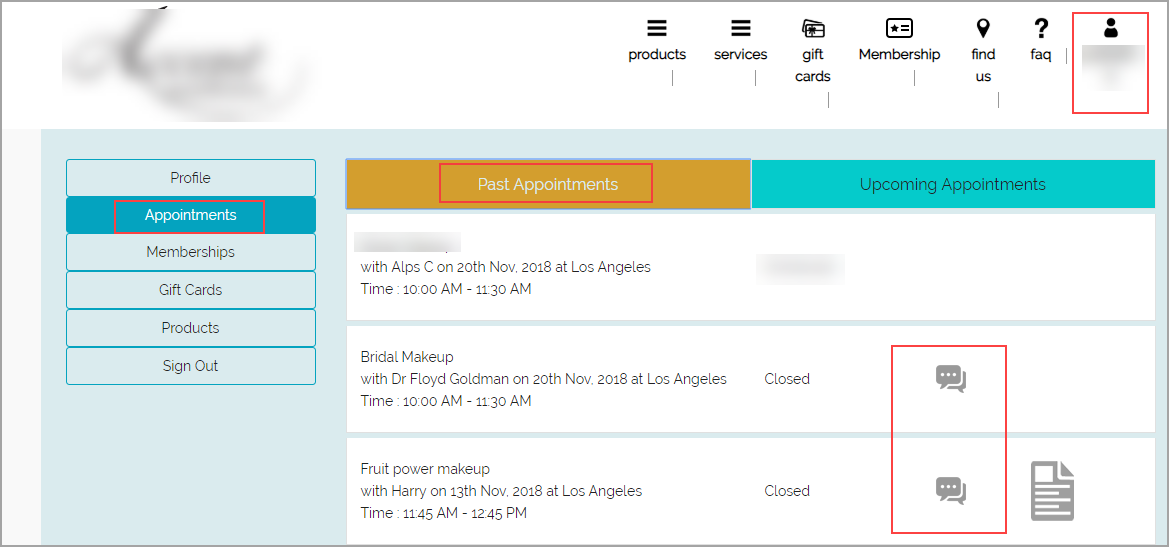
Webstore: To leave feedback via the Webstore, guests must log in to the Webstore and click the feedback icon for an appointment (from Profile > Appointments > Past Appointments).
Note
Guests can click the same icon to view feedback that they may have left earlier for a past appointment.
Zenoti Mobile: After a guest completes a service, providers can either hand over their device to the guest to enter their feedback or the provider can enter feedback on behalf of the guest.
To enter feedback from the Appointment Book
Locate the appointment for which you want to enter the guest’s feedback.
Click the appointment block and select Enter Guest Feedback from the context menu.
Rate the guest’s experience on a scale of 1 to 5 (with 5 being the best).
Click the aspects the guest liked or didn’t like.
Enter the guest’s comments, if any.
Click Submit.
To enter feedback using web link via email/text message
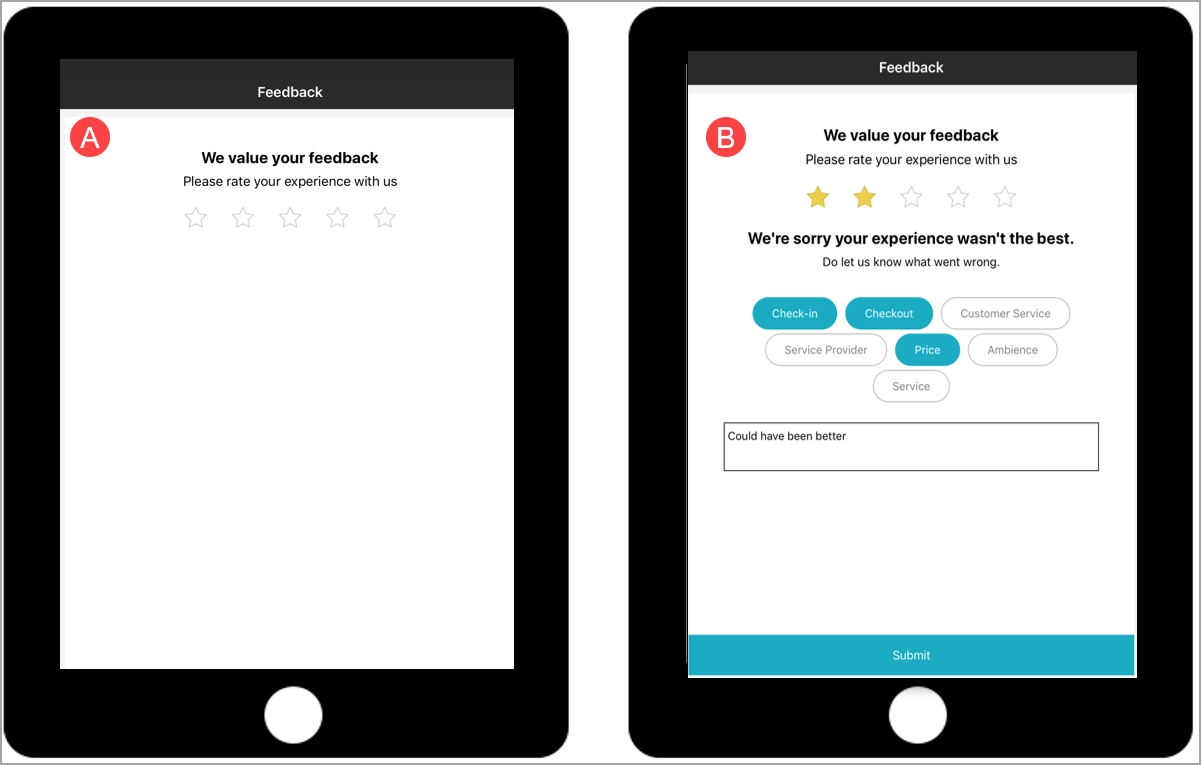
As a guest, after you complete your appointment, you will get a Thank You mail/ text message inviting you to click a link to share feedback.
You can click the link to view the feedback page where you can review your experience, mark out aspects you liked (or did not like), and enter comments if any.
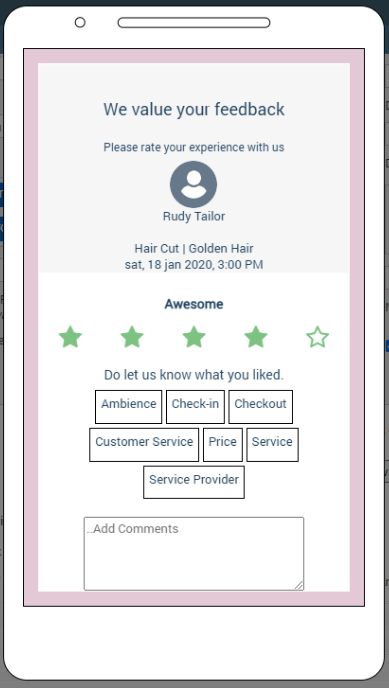
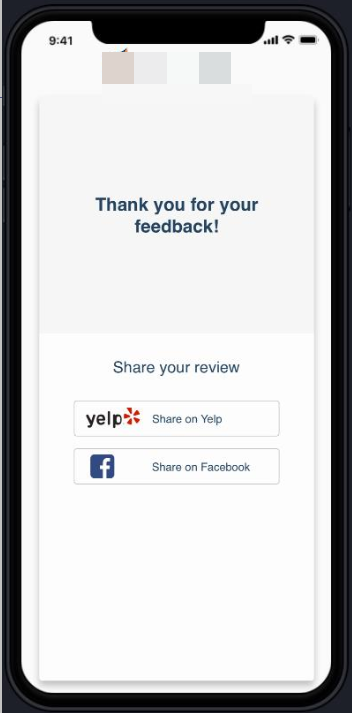
You may also share your feedback on social media sites by clicking any one of the icons.
Set up the feedback experience for guest feedback v2
Configure guest feedback settings
At the organization level, click the Configuration icon.
Search for and select the Feedback settings from the Guests section.
Switch the Enable Guest Feedback toggle.
Switch Enable across all centers toggle.
Set the expiration dates for feedback links or notifications sent on Webstore and CMA and enter a message for guests on expiry link.
Select brand colors for a consistent look.
Enter the title and subtitle.
Set up the headline and description for good and bad ratings.
To define feedback tags, click Add after entering the tags.
To include a comment box, select the Include a comment area checkbox.
Select the Allow user to share feedback on Social Media checkbox if required.
To preview the configured feedback panel, click Preview.
Click Save.
Impacts and considerations
This setting only works if Enable Guest Feedback is enabled at the center level as well.
Enable email and text notifications
Required role: Owner or Administrator
Required permissions: Notifications (from Org settings > Configuration > Security > Security roles > Administrator role > Permissions tab > Administrator > View Admin Reports)
At the organization level, click the Configurations icon.
Search for and select the Email/Text setting from the Notifications section.
Turn on Activate email.
Turn on Activate SMS.
Turn on Do not send Thank You message for non-service purchases.
Click Save.
Configure email and text templates
Required role: Owner or Administrator
Required permissions: Notifications (from Org settings > Configuration > Security > Security roles > Administrator role > Permissions tab > Administrator > View Admin Reports)
At the organization level, click the Configurations icon.
Search for and select the Templates for email and text setting from the Notifications section.
Find the template you wish to configure and click Edit.
Turn on Email, Text, or WhatsApp as required. You can turn on all three options as well.
Select the language in which to send out the communication. The default language is English.
To add recipients, click Add and provide the necessary details.
To personalize your communications, use macros. Each notification has an Available macros section; drag the relevant macros in the email or text as required.
Click Sent Test Mail and/or Send Test Message as required.
Click Save.
Notification templates in Zenoti
Appointment
Configuration
Customer opt-in templates
Employee
Guests
Integrations
Inventory
Kiosk
Memberships and packages
Mobile/Webstore
Queue
Zenoti Go
Center-level managers can only view the email and text templates configured at the organization level.
Set up social media sites for centers where guests can share reviews
At the center level, click on the Configurations icon.
Search and select the Feedback settings from the Guest > Feedback section.
To view the configuration options for feedback at the center level, enable the Enable Guest Feedback for this center option.
To set up social media reviews, turn on the Enable posting feedback to social media/review websites option.
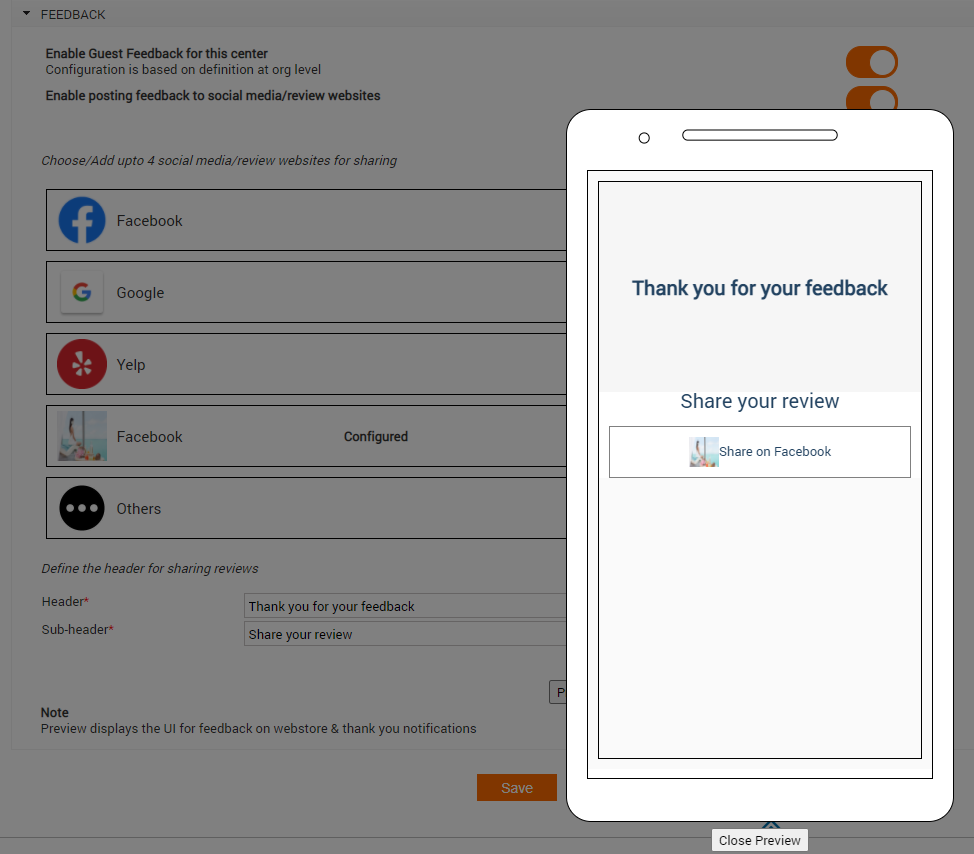
Configure up to four social media channels where guests can post their feedback such as Facebook, Google, and Yelp. We have predefined these to enable quick and easy configuration.
To add other social media channels that are not mentioned in the list, click Add in the Others section.
Enter the Link and the Display Order as appropriate.
Click Add.
Configure similar details for other social media sites as required.
Enter the text you want guests to see in the Header and Sub-header.
Example:
Header: Thank you for your feedback
Sub-header: Share your review
Click Preview.
Click Save.
Create a feedback form for guest feedback v1
Important
This article describes how an administrator can create a feedback form based on Guest Feedback v1.
Zenoti allows you to create a feedback form with a set of customized questions that you can use to gather opinions of guests visiting your business establishment.
After the feedback form is created, it is made available in the Appointment Book, Webstore, Customer Mobile App, Employee Mobile App, and Manager Mobile App for guests to give their feedback (rate their experience). You can also choose to print the feedback form on every receipt, invoice, or both and request guests for their feedback.
At the organization level, click the Configurations icon.
Click the Settings tab and expandFeedback.
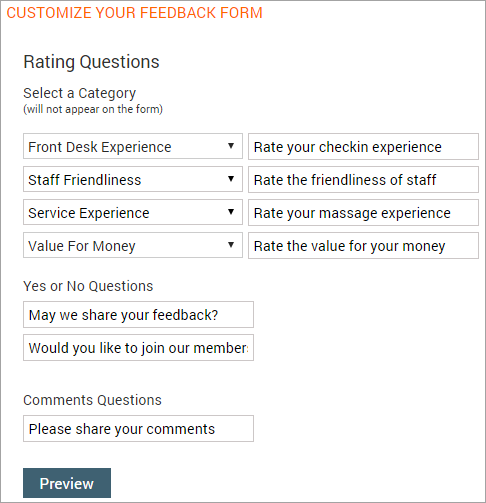
The feedback form consists of the following sections:
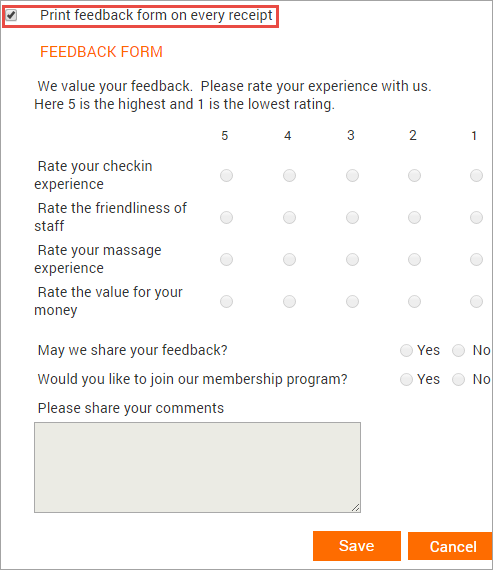
Rating Questions: Allows you to select a category (for example, ambience, cleanliness, service experience, overall experience) and ask customized questions that the guest can rate between 1 and 5 stars.
For example, you can select the category as Service Experience and enter the question as "Rate your massage experience?"
Note
The category does not appear on the feedback form. Only the question is displayed.
Yes or No Questions: Ask questions that the guests answer in yes or no. For example, "May we share your feedback?" or "Would you like to join our membership program?".
Comments: A text box where you can ask guests to enter additional comments or feedback.
Note
If you wish to include only a few options from the above section, contact
Zenoti Support to help you hide the other options.
Based on your requirements, complete the feedback form.
Click Preview to see how the feedback form appears to the guest or front desk staff when printed.
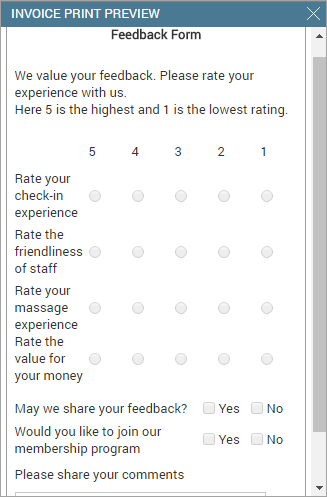
Click Save.
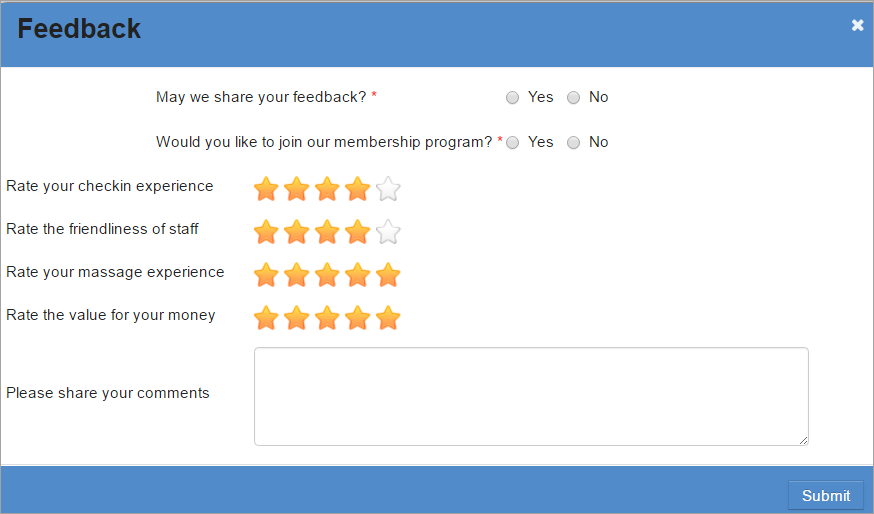
The feedback form appears in the Appointment Book, Webstore, Customer Mobile App, and Employee Mobile App.
This is how the feedback form appears in the Appointment Book and in the Webstore after a guest provides feedback:
Appointment Book

Webstore
Capture guest feedback v1
Zenoti allows you to create a feedback form with a set of customized questions that guests can use to rate their experience and provide their feedback.
After creating the feedback form, you can gather feedback from the guests in the following ways:
Appointment Book: Front desk staff request guests for their feedback verbally and enter the feedback directly in the appointment book. Learn how.
Receipt or invoice: If you auto-print the feedback form (on every receipt, invoice, or both), front desk staff can request guests to enter their feedback in the printed feedback form and then enter the feedback manually in the appointment book.
Employee Mobile App: Front desk staff or therapist may request guests to enter their feedback in the Employee Mobile App on a device.
Manager Mobile App: Front desk staff or Managers may request guests to enter their feedback in the Manager Mobile App on a device.
Webstore: Guests receive a thank you text message or email after their invoice is closed with a link to provide their feedback. When guests click the link, the feedback form opens on the Webstore.
Customer Mobile App: Guests can provide their feedback for any of their appointments from the Past Appointments page in the Customer Mobile Application (CMA).
Note
To view feedback that is already recorded for an appointment, click the appointment block and click Show Guest Feedback.
For Zenoti and Zenoti Mobile, by default your organization allows you to collect feedback from your guest. Additionally, you can either continue to use the organization level setting or override it at your center by selecting the Enable Feedback For This Center Appointments setting.
Enter guest feedback (v1) from Appointment Book
Important
This article applies if you are using Guest Feedback v1.
Zenoti allows you to create a feedback form with a set of customized questions that guests can use to rate their experience and provide their feedback.
After creating the feedback form, you can enter the feedback that a guest provides verbally or in the printed feedback form from the appointment book.
Open appointment book, click the appointment block of the guest for which payment is received, and click Enter Guest Feedback.
The guest feedback form opens.

Enter the guest feedback in the form and click Save.
Feedback saved successfully pop-up appears indicating that the feedback is recorded.
Click OK to dismiss the pop-up.
The color of the appointment block for which you have entered feedback changes to light blue (assuming that no custom colors have been applied to the appointment) indicating that feedback has been recorded for the appointment.
Enter or view guest feedback from the guest profile
Zenoti allows you to create a feedback form with a set of customized questions that guests can use to rate their experience and provide their feedback.
After creating the feedback form, you can enter the feedback that a guest provides verbally or in the printed feedback form from the appointment book or from the guest profile.
Open Guest Profile and click the Appointments tab.
A list of guest appointments appears.
For the appointment that you wish to record or view feedback, click the following icon against that appointment:

The guest Feedback Form opens.
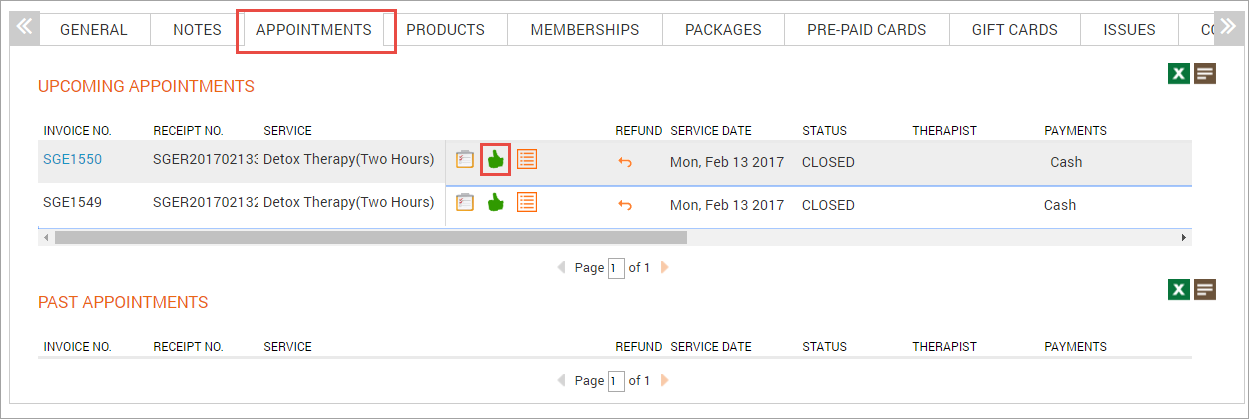
If feedback is already recorded for the appointment, it displays the recorded feedback, else it allows you to enter and save the feedback.
Enable printing of feedback form at the organization level
After you configure the feedback experience, you can choose to print the form on every invoice, receipt, or both. Your front desk staff then can collect the feedback (printed on a invoice or receipt) from the guest and enter the ratings and comments in Zenoti.
Before you can print a feedback form on every invoice, receipt, or both, you must ensure that you have enabled printing of the feedback form at the organization level.
At the organization level, click the Configurations icon.
Click the Settings tab and expand Invoice & Receipt.
Based on your requirement of printing the feedback on an invoice, receipt, or both, perform any one or all of the following:
To enable printing on the invoice: In the Print Before Payment section, select the Feedback Form checkbox.
To enable printing on the receipt: In the Print After Payment section, select the Feedback Form checkbox.
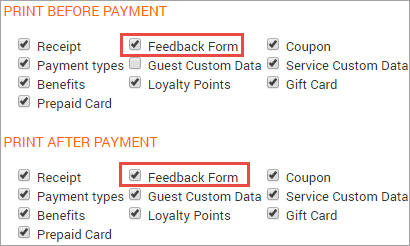
Click Save.
You have successfully enabled printing of the feedback form on an invoice, receipt, or both.
You can now proceed to enable printing of feedback form on every receipt at the center level.
Print a feedback form on receipt
Important
This article applies only if you have Guest Feedback v1 enabled.
After you create a feedback form, you can choose to print the form on every invoice, receipt, or both. Your front desk staff then can collect the feedback form (printed on an invoice or receipt) from the guest and enter the ratings and comments in Zenoti.
Important
To print a feedback form, ensure that you have enabled printing of the feedback form on an invoice, receipt, or both at the organization level.
At the center level, click Configurations > Guests.
Search for and select Feedback Form from the Feedback section.
Select the Print feedback from on every receipt checkbox.
Click Save.
You have successfully enabled printing of the feedback form on an invoice, receipt,or both (based on your organization level print settings).
Can I capture Net Promoter Score (NPS) using Zenoti?
No. You cannot capture NPS using Zenoti.
That said, Zenoti currently does have a feedback mechanism that allows you to identify detractors (unhappy customers) and promoters (happy customers), which is the very essence of NPS, and additionally allows you to follow up with the detractors to take appropriate action easily!
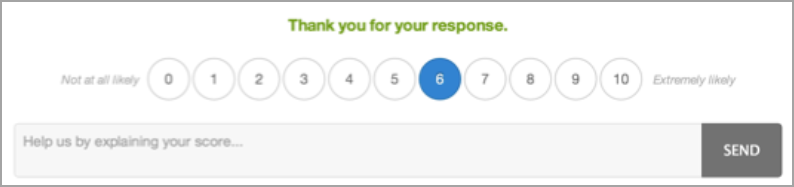
NPS survey is sent to customers with one key question: On a scale of 0-10,
How likely are you to recommend us to a friend or colleague?

If the customer gives a rating, a follow-up question requesting an explanation as to why the customer chose a particular score.
You must analyze the survey results and follow up with the detractors to try to convert them into promoters.You must analyze the survey results and follow up with the detractors to try to convert them into promoters.
While Zenoti does not allow you to ask the "how likely are you to recommend us" question or compute the NPS score (% of Promoters - % of Detractors), you can use Zenoti Feedback V2 mechanism to identify promoters and detractors and take appropriate action.
Use Zenoti to do the following:
a. Create a feedback form that a guest can rate on a scale of 1 to 5.
b. Add aspects that the guest liked or did not like.
Learn how to create a feedback form based on a five-star rating framework.
Guests who have completed a service, get a mail/text message with a link that prompts them to provide feedback.
Guests rate their overall experience and leave feedback around aspects they liked or didn’t like.
If a guest leaves negative feedback or was not happy with a service, then you can launch Connect from the guest's feedback page and easily collect more details about the feedback, and take appropriate action.
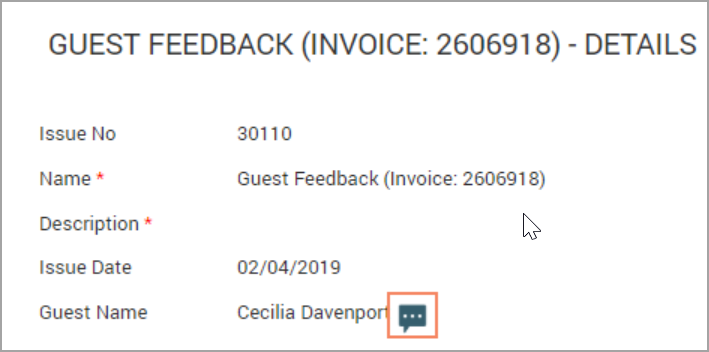
Note
Connect is currently supported only in the USA and Australia.
Guest feedback
The guest feedback screen presents insights such as average ratings, rating distribution, and the total number of received feedback. You can filter data based on ratings, specific centers, and responses to feedback. You can respond to guests either through email or SMS and address user feedback effectively.
To view the Manage feedback screen you need to have Guest Feedback v2 enabled. More information.
Required security role permissions: Any role with the Respond to guest feedback permission enabled from Configuration > Security > Security roles > Role > Guest Manager.
Note
This permission is enabled by default for Owner and Manager roles.
To access the dashboard, navigate to Guests > Guest feedback.
Field | Description |
|---|---|
Tags | Tags are short labels that organize customer feedback making it easier to analyze and understand specific aspects. More information. |
Highspender | Guests who consistently spends more than the specified spending limit per visit. More information. |
Filter data
Click the filter icon.
Select the center whose feedback you want to view.
Select the tags, feedback response status, and rating.
Click Apply.
To refine your data, specify a date range.
Respond to your guests
Click the feedback to which you want to respond.
Click Respond.
To select your mode of response, click SMS or Email next to the Respond via toggle. Enter the subject and response.
Click Send & close.
The messages sent through email or SMS, can be viewed from the Transactional Messages tab of the guest profile. All messages are sent through the center email or phone number. Feedback responded through SMS appears in ezConnect enabling a two-way conversation with guests.
Note
From Notifications > Templates for email and text, use the Guest feedback response template to send the responses and configure the following macros within them:
[FeedbackResponseSubject]: Expands to include the subject entered when responding to guest feedback from the Respond to user feedback pop-up.
[FeedbackResponseBody]: Expands to include the message entered while responding to guest feedback through the Respond to user feedback pop-up.
Feedback responses are considered transactional messages, and credits will be consumed accordingly.
Troubleshooting guest feedback errors
You must troubleshoot these errors before providing a response to feedback:
Email or SMS messages are not enabled for the organization
At the organization level, click the Configuration icon.
Click Notifications > Email/Text.
Switch on the Activate email or Activate SMS toggle based on what you want to enable.
Click Save.
Guest did not opt in to receive transactional email messages
Navigate to Guests > Manage Guests.
Select the guest that does not have transactional email messages enabled.
Click General.
From Transactional Messages section, select the Email checkbox.
Guest did not opt in to receive transactional SMS messages
Navigate to Guests > Manage Guests.
Select the guest that does not have transactional SMS messages enabled.
Click General.
From Transactional Messages section, select the SMS checkbox.
Email or SMS feedback template is disabled
At the organization level, click the Configuration icon.
Click Notifications > Templates for email and text.
Search for Guest feedback response.
Click the Edit hyperlink.
Switch on the Email or SMS toggle.
Click Save.
Email or SMS feedback template is empty
At the organization level, click the Configuration icon.
Click Notifications > Templates for email and text.
Search for Guest feedback response.
Click the Edit hyperlink.
Edit the template as required.
Click Save.