Loyalty points notifications
Zenoti provides a number of templates that you can customize and send automated messages via email or text messages (SMS) to guests when points are added, redeemed, about to expire etc.
The following are the notification templates that are available for loyalty points:
Loyalty points accrued: Notify guests when loyalty points are accrued through either a regular or tiered loyalty program.
Loyalty points redeemed: Notify guests when loyalty points are redeemed either a regular or tiered loyalty program.
Loyalty points expiry reminder: Notify guests when loyalty points are near the expiry date in a tiered loyalty program
Loyalty points tier enrollment: Notify guests when they are enrolled into a tier.
Loyalty points tier upgrade: Notify guests when they are upgraded to a higher tier.
Loyalty points balance statement: Send periodic loyalty points balance statements to guests.
Accessing the loyalty points notification templates
Zenoti provides a number of templates that you can customize and send automated messages via email or text messages (SMS) to guests when points are added, redeemed, about to expire, etc.
Notification type for all loyalty points notifications: Transactional
Click here to see the list of notifications available for loyalty points.
Note
You can access loyalty points notification templates only from the organization level.
At the organization level, click the Configuration icon.
Search for and select the Email/Text from the Notifications section.
Scroll to the Guests category. You will find the notifications related to loyalty points.
Configuring loyalty points notifications
You can use this article to configure the following loyalty points notifications:
Loyalty points accrued
Loyalty points redeemed
Loyalty points expiry reminder
Loyalty points tier enrollment
Loyalty points tier upgrade
Loyalty points balance statement
Notification type for all loyalty points notifications: Transactional
To configure loyalty points notifications:
Click Edit against the notification you wish to configure.
The template opens and allows you to make your edits.
Example: If you wish to configure the Loyalty points redeemed notification, click
Edit against the notification as follows:

The template consists of the following two sections:
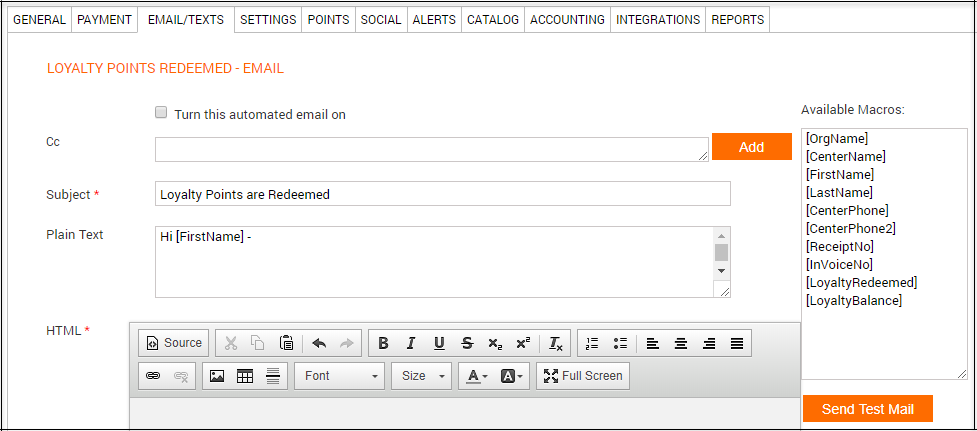
Email
Text Messages (SMS)
Configure each of the sections as follows:
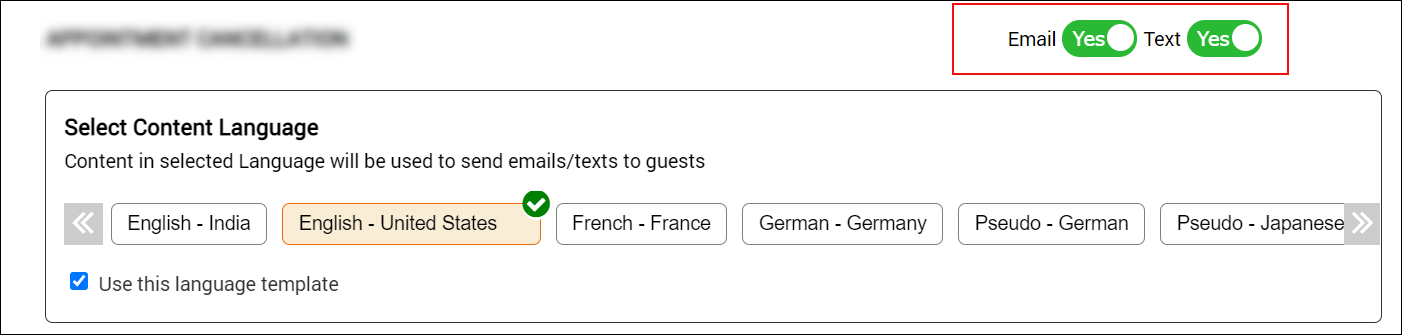
Switch on the Email toggle to activate the email template.
To send an email copy (Cc), click Add to include recipients by Username, employee Role or Email.
Note
For recipients added by Role, all employees mapped to the role selected at the guest's base center, will receive the email notification.
Make edits to the Subject field as desired.
Use the Macros available for loyalty points to customize the content for Plain Text and HTML emails.
Depending on the recipient's browser, the email will be delivered as plain text (no formatting and images) or HTML text (includes images, links and formatting).
Note
You can click the Full Screen icon in the editor to edit the text in full screen mode.
Click Send Test Email to send a test notification and to see how the test
email appears to your guest.
Note
In the test email, macros will appear as is and will not be expanded. For example, if you have used [FirstName] macro in the email text such as 'Hi [FirstName]' then, test mail continues to show Hi [FirstName] and does not show actual first name.
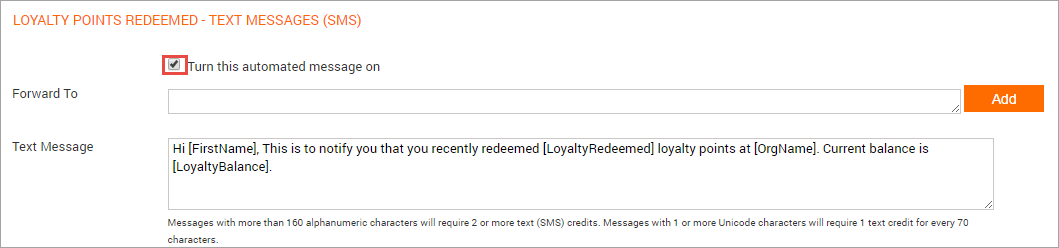
Text messages (SMS)
Switch on the Text toggle to activate the text template.
To forward a message automatically, click Add to include recipients by Username, employee Role or PhoneNo.
Note
For recipients added by Role, all employees mapped to the role selected at the guest's base center, will receive the message.
Use the Macros available for loyalty points to customize the text message.
Note
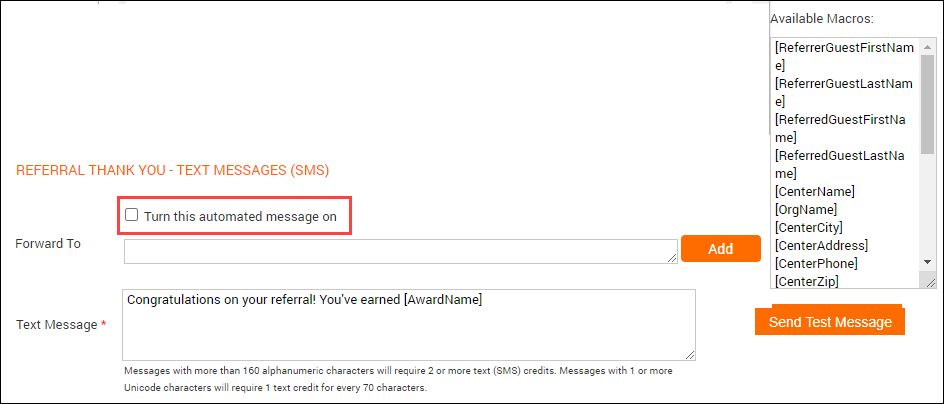
Messages with more than 160 alphanumeric characters will require two or more text (SMS) credits. Messages with one or more Unicode characters (international/multilingual text characters) will require one text credit for every 70 characters.
Click Send Test Message to send a test notification and see how the test SMS appears to your guest.
Note
In the test message, macros will appear as is and will not be expanded. For example, if you have used [FirstName] macro in the SMS text such as 'Hi [FirstName]' then, test mail continues to show Hi [FirstName] and does not show actual first name.
Click Save.
Your configuration is saved.
Set up automated referral Thank You notifications
After you’ve set up the referral reward program to award both guests (referrer and referred), you can set up automated emails or texts to thank referrers for referring new guests. The notification is sent to the referrer as soon as the invoice is closed.
Important
These notifications are sent only for appointments that are booked from Webstore.
Zenoti offers templates and macros that you can use to send automated emails or texts to the referrers on each closed invoice with a referral code.
At the organization level, click the Configuration icon.
Search for and select Email/Texts from the Notifications sections.
Under the Appointment section, locate the Referral Thank You template.
Click Edit.
The template opens for editing.
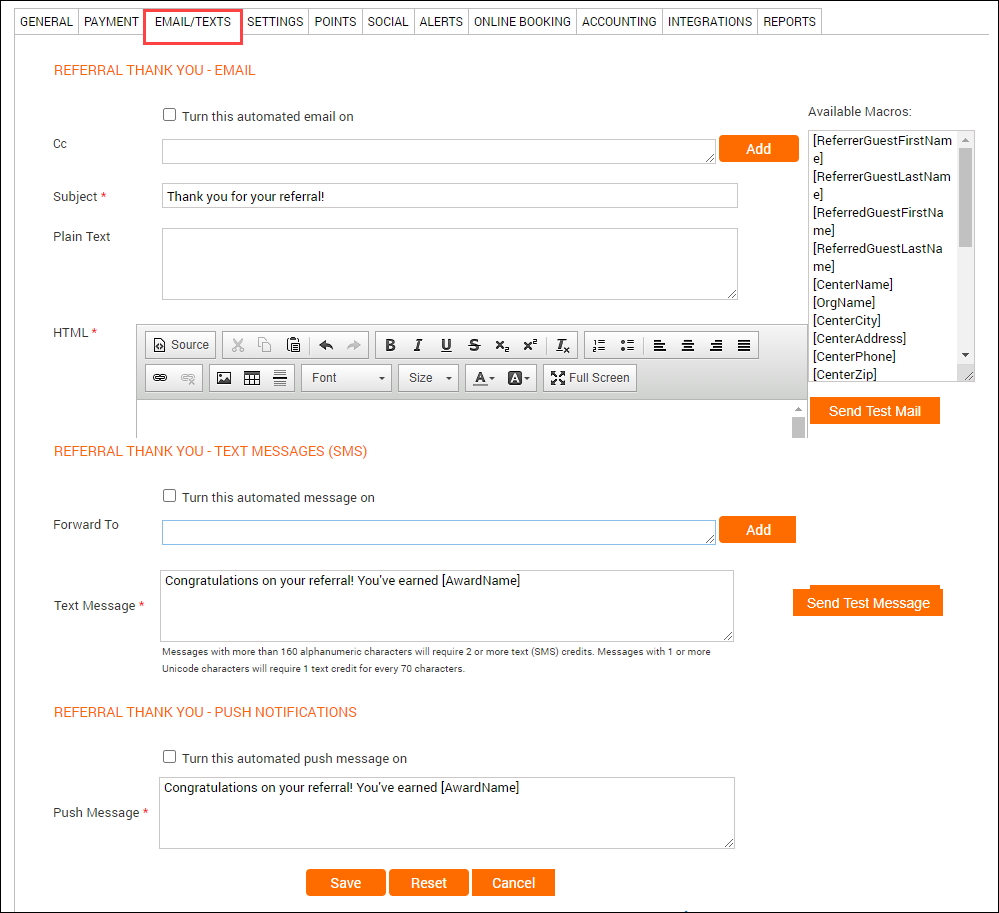
Depending on your requirement, set up an automated email, SMS message, or a push message
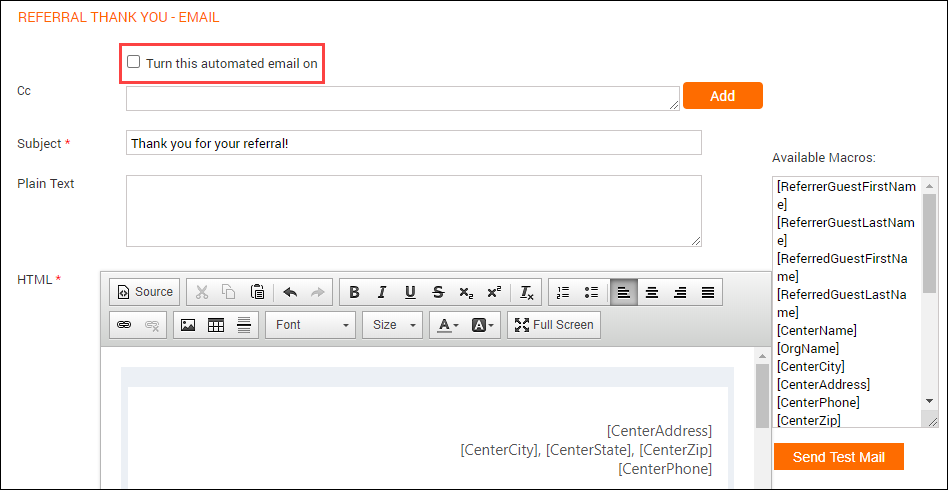
For emails, use the Referral Thank You - Email section.
For SMS, use the Referral Thank You - Text Messages (SMS) section.
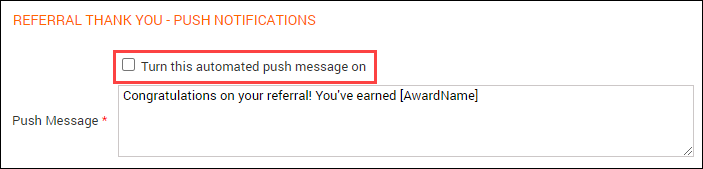
For push notifications, use the Referral Thank You - Push Notifications section.
While setting up the automated email or text, you can use the following referral reward-related macros:
Macro | Description |
[ReferrerGuestFirstName] | First name of the existing guest. |
[ReferrerGuestLastName] | Last name of the existing guest. |
[ReferredGuestFirstName] | First name of the new guest. |
[ReferredGuestLastName] | Last name of the new guest. |
[CenterName] | Name of the center where the invoice was generated. |
[OrgName] | Name of the organization. |
[CenterCity] | City where the center is located. |
[CenterAddress] | Complete address of the center (corresponds to the Address 1 and Address 2 field in the center settings). |
[CenterPhone] | Primary phone number of the center where the invoice was closed (corresponds to the Phone 1 field in the center’s settings). |
[CenterZip] | ZIP code or postal code of the center’s location |
[GuestReferralCode] | First name of the existing guest and the first four characters of the user id. |
[AwardName] | Name of the discount or gift card that is assigned to the referral program. |
[BookingURL] | Link to Webstore to book a service. |
[MailUnsubscribeLink] | Link to unsubscribe and stop receiving marketing and campaign emails. |
[CustomMacro1], [CustomMacro2], [CustomMacro3], [CustomMacro4] | Use these macros to insert any optional fields (Optional Field1, Optional Field2, Optional Field3, and Optional Field4 respectively) that are defined at the organization level. |