Set up your Stripe account
This article explains how to set up and connect your Stripe account to Zenoti Payments. You’ll learn how to create a new Stripe or Stripe Express account.
Overview
Zenoti Payments (powered by Stripe) enables fast, secure, and compliant payment processing for your business. Each center requires its own Stripe or Stripe Express account to receive payouts and view real-time transactions.
Stripe Express offers simplified onboarding and unified management across centers, ensuring seamless setup and transparent tracking of collections and payouts.
Create a Stripe account
When you sign up for Zenoti Payments (powered by Stripe), you must first create a Stripe account for each center, and then connect it to Zenoti Payments.
At the organization or the center level, click the Configuration icon.
Search for and select the Payment processor onboarding.
To configure Stripe for your organization or center, for Zenoti payments (Stripe) click Setup.
Click Create a new stripe account.
Provide the information required to create the new Stripe account.
After you complete the Stripe sign-up steps, click Finish setup.
If you already have a Stripe account, click Connect My Stripe Account to Zenoti.
Create a Stripe Express account
Stripe Express allows you to sign up for Zenoti Payments quickly and easily by collecting only the required information. After the setup, you can access your Stripe Express dashboard from within Zenoti, which updates in real-time to show important payment information.
Note
Stripe Express is currently available in the USA, Canada, Australia, New Zealand, Spain, Netherlands, Denmark, UAE, and the UK.
At the organization or center level, click the Configuration icon.
Search for and select Payment processor onboarding.
For Zenoti Payments (Stripe), click Setup.
Read the agreement, select the I accept the Zenoti payment rates and agree to terms and conditions checkbox, and click Accept and proceed.
To start the stripe express onboarding process, click Start submission and complete the onboarding process.
Connect to a Stripe Express account
If your business is on Stripe Express and if you have multiple centers, you can associate all of your centers to a single Stripe Express account to manage the payments of those centers. You can also monitor the collections and payouts of the centers through a single Stripe Express dashboard.
In this article, you will learn how you can connect to an existing Stripe Express account.
Note
Stripe Express is currently available in the USA, Canada, Australia, New Zealand, Spain, Netherlands, UAE, and the UK.
To connect to an existing Stripe Express account, you must have the following information:
Mobile number: You must have the phone number that was used to create the existing Stripe Express account.
Email ID: You must have the email ID that was used to create the existing Stripe Express account.
Note
In case you do not have the phone number or email ID, please get in touch with your administrator or center manager to retrieve the existing Stripe Express account details.
The E-mail address you provide to create a Stripe Express account is tied to a single bank account. If you want to use another bank account, you must provide a new email address and subsequently create a new Stripe Express account.
At the center level, click the Configuration icon.
Search for and select Payment processor onboarding.
Expand the Integrated payment processor tab.
Note
This navigation requires the Configure payments settings role permission to be enabled.
For Zenoti payments, click Configure.
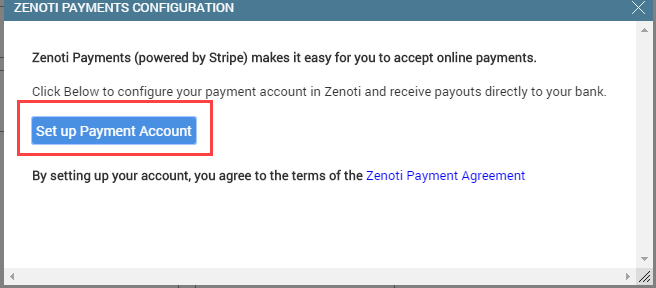
Click Set up payment account.
Enter the following information and click Next.
Country: From the list, select your country.
Mobile number: Enter the phone number to which the existing Stripe Express account is mapped.
Email: Enter the email ID to which the existing Stripe Express account is mapped.
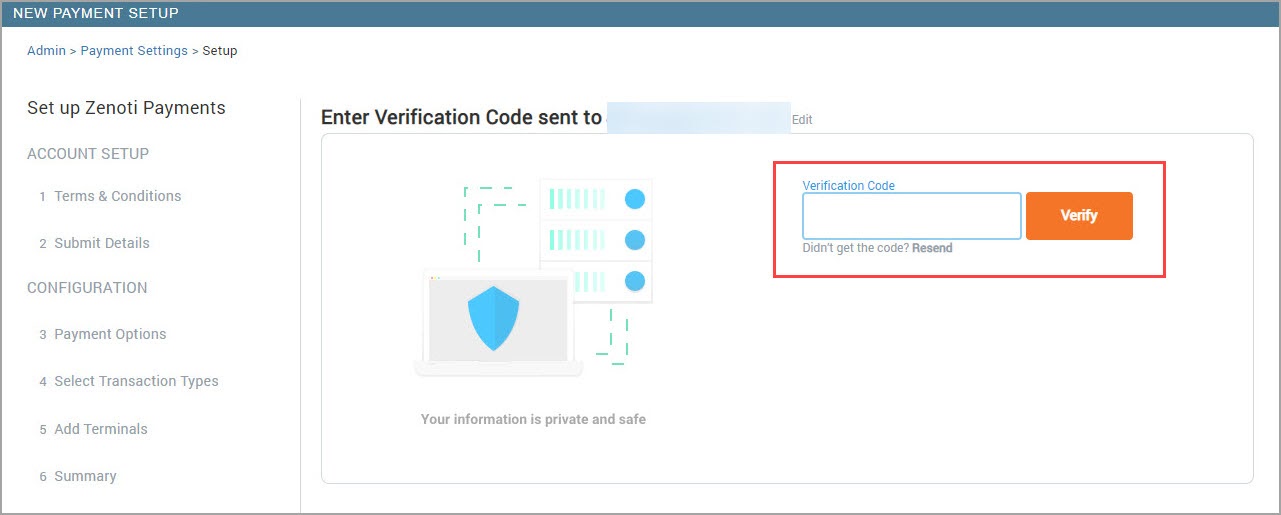
Enter the six-digit mobile verification code that you receive.
Select Transactions Types tab.
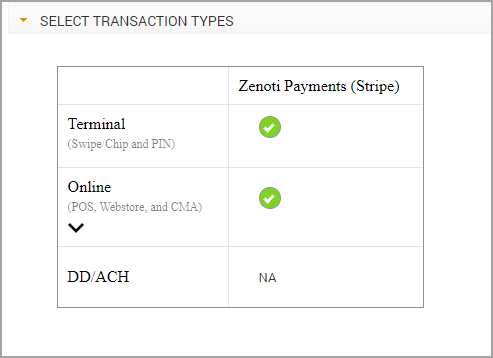
Configure the desired transaction types.
Click Save and Finish.
Associate multiple centers to your existing Stripe account
Stripe allows you to manage the payments of all your centers using a single login. This requires you to add new accounts or accounts of the centers to your existing Stripe profile.
You must create a new account for each of your centers. For example, if your organization has five centers, then you must create five new accounts of Stripe and associate them with your existing Stripe profile.
Navigate to the Stripe home page.
Click Sign in.
Enter your email ID and password.
Select the drop-down arrow beside the account name.
Click New account.
Enter the name of the account. The name of the new account can be the name of your center
Click Create account.
Click Activate your account.

Enter your banking information, and click Activate your account.
At the center level, click the Configuration icon.
Search for and select Payment processor onboarding.
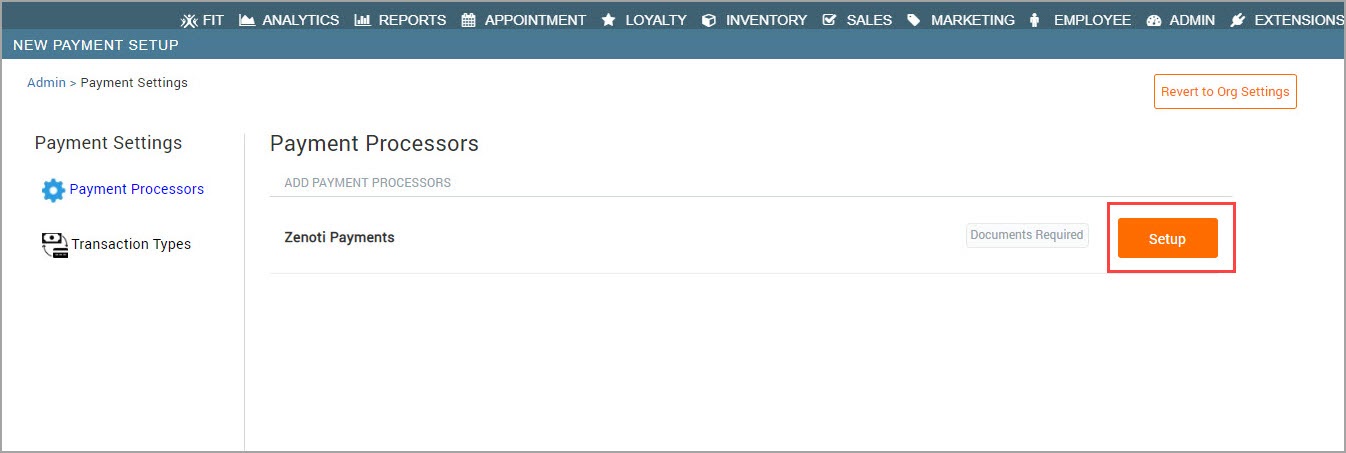
Under Payment settings > Payment processors > Zenoti payments (Stripe), click Setup.
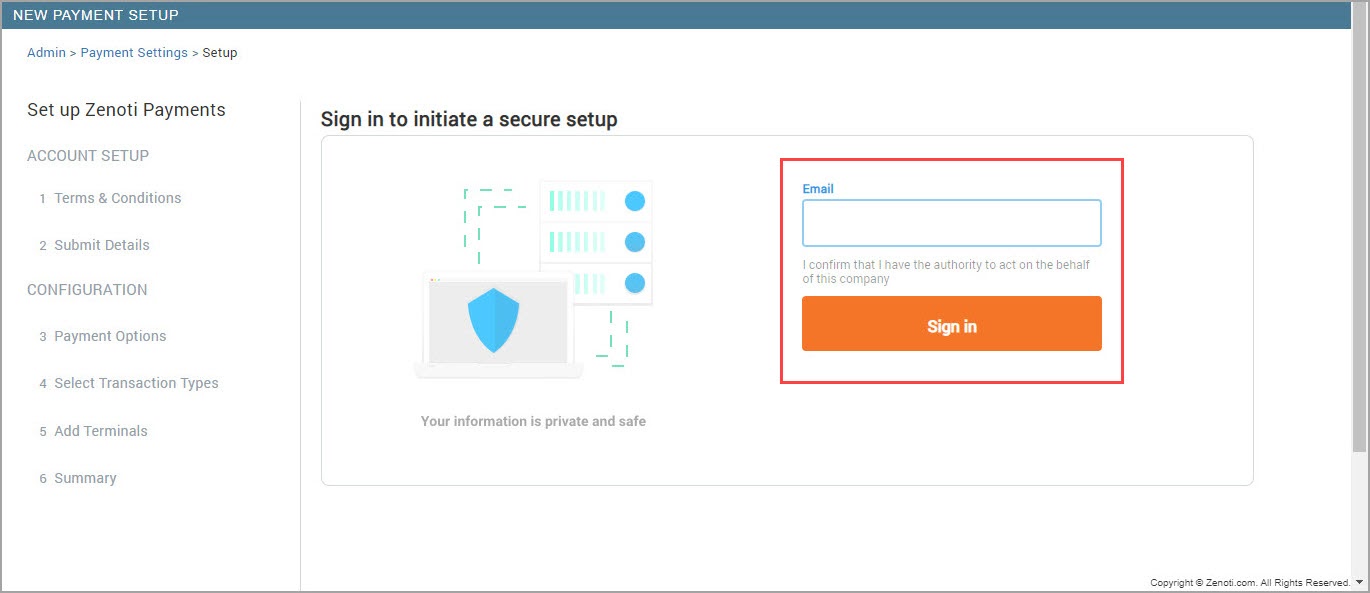
Enter your existing Zenoti Payments (Stripe) email address, and click Sign in.
Enter the verification code sent to your email and click Verify.
Select Connect my stripe account to zenoti.
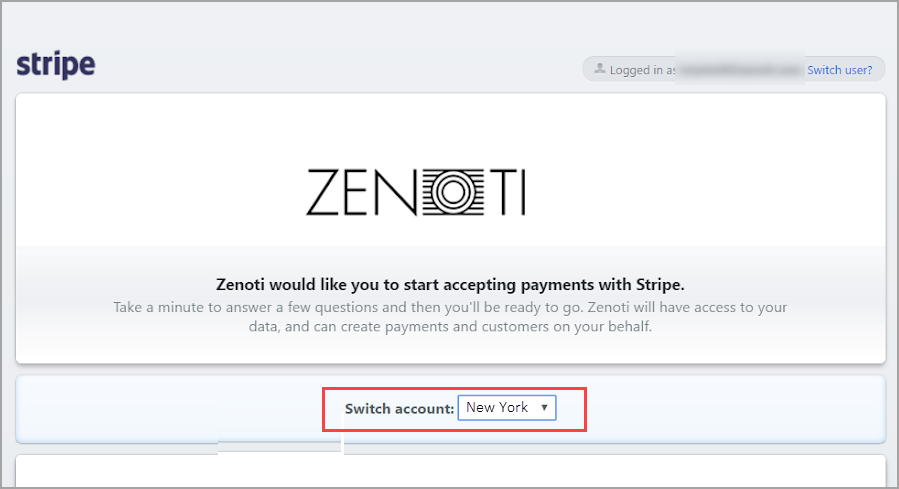
Click Connect.
Stripe Express: FAQs
Does the ID Verification happen in real time?
No, the ID verification does not happen in real time. The information provided and the IDs uploaded are matched individually. However, the account approval is nearly instantaneous and users will be able to accept the payments right away. The account's status can be one of the following:
Complete: Complete means the account holder provided all the required information and the account is in good standing.
Enabled: Enabled means the account is in good standing, though additional information might be required if the payment volume threshold is reached.
Pending: Pending means Stripe is reviewing the account. This occurs when Stripe is verifying the information that was provided, such as an ID document upload, Stripe is performing a watchlist check against a list of prohibited individuals and businesses, or Stripe is reviewing the account for suspected fraudulent activity.
What if payments are being accepted but deposits are not taking place?
In case you want to check your account’s pending payouts, you can view your Stripe Express dashboard to view recent and upcoming payouts. If you are awaiting your first payout, please note that the first payout for every new Stripe account is made 7-10 days after the first successful payment is received. This requirement allows Stripe to mitigate some of the risks inherent in providing credit services and cannot be waived. The subsequent payouts will then process according to Stripe’s payout schedule.
How can I consolidate multiple accounts under one Stripe login id?
Stripe Express account can be configured in multiple centers using the same email id. Select Setup your Payment Account for the new center and enter your existing account email id and phone number. Enter the OTP sent by Stripe to the phone number and continue using the same account for a different center.
Can I switch from Stripe Standard to Stripe Express?
If you have an existing Stripe Standard account and wish to switch to Stripe Express, contact Zenoti.
Key words
Term | Description |
|---|---|
Stripe account | A payment processing account that connects your business with Zenoti Payments to manage collections and payouts. |
Stripe Express | A simplified version of Stripe that enables faster onboarding and real-time dashboard access from within Zenoti. |
Payment processor onboarding | The Zenoti configuration area used to set up or connect your Stripe account. |
Zenoti Payments (Stripe) | The integration between Zenoti and Stripe that supports secure transactions and payout management. |