Run Payroll Using Zenoti Integrated Payroll
This article explains how to run payroll using Zenoti Integrated Payroll (ZIP), from preparing earnings and handling multi-center setups to confirming pay dates and submitting payroll. It also provides answers to common scenarios and troubleshooting tips for accurate, compliant payroll processing.
Overview
Zenoti Integrated Payroll simplifies payroll management for both single-center and multiple-center operations. It allows businesses to consolidate wages, commissions, reimbursements, taxes, and deductions into a single, streamlined payroll cycle.
ZIP ensures payroll is compliant and complete—whether you're processing regular employee pay, managing contractors, or addressing cross-center payments.
You will learn how to:
Prepare and calculate earnings for each pay period
Initiate payroll and manage input data
Review earnings across locations and employment types
Adjust pay days and preview final calculations
Submit payroll for processing and track outcomes
Role permission prerequisite
To run payroll in ZIP, the user must be assigned the Process Payroll Payouts role permission. Ensure this role is enabled before accessing payroll features.
Calculate earnings
Before you initiate a payroll run, make sure all employee earnings are updated for the selected pay period.
For single-center payroll, navigate to Reports > Payroll Summary Report.
For multi-center payroll, use the Zone-level or Org-level Payroll Summary Report for a consolidated view.
Click Calculate Commissions/Earnings to refresh the data.
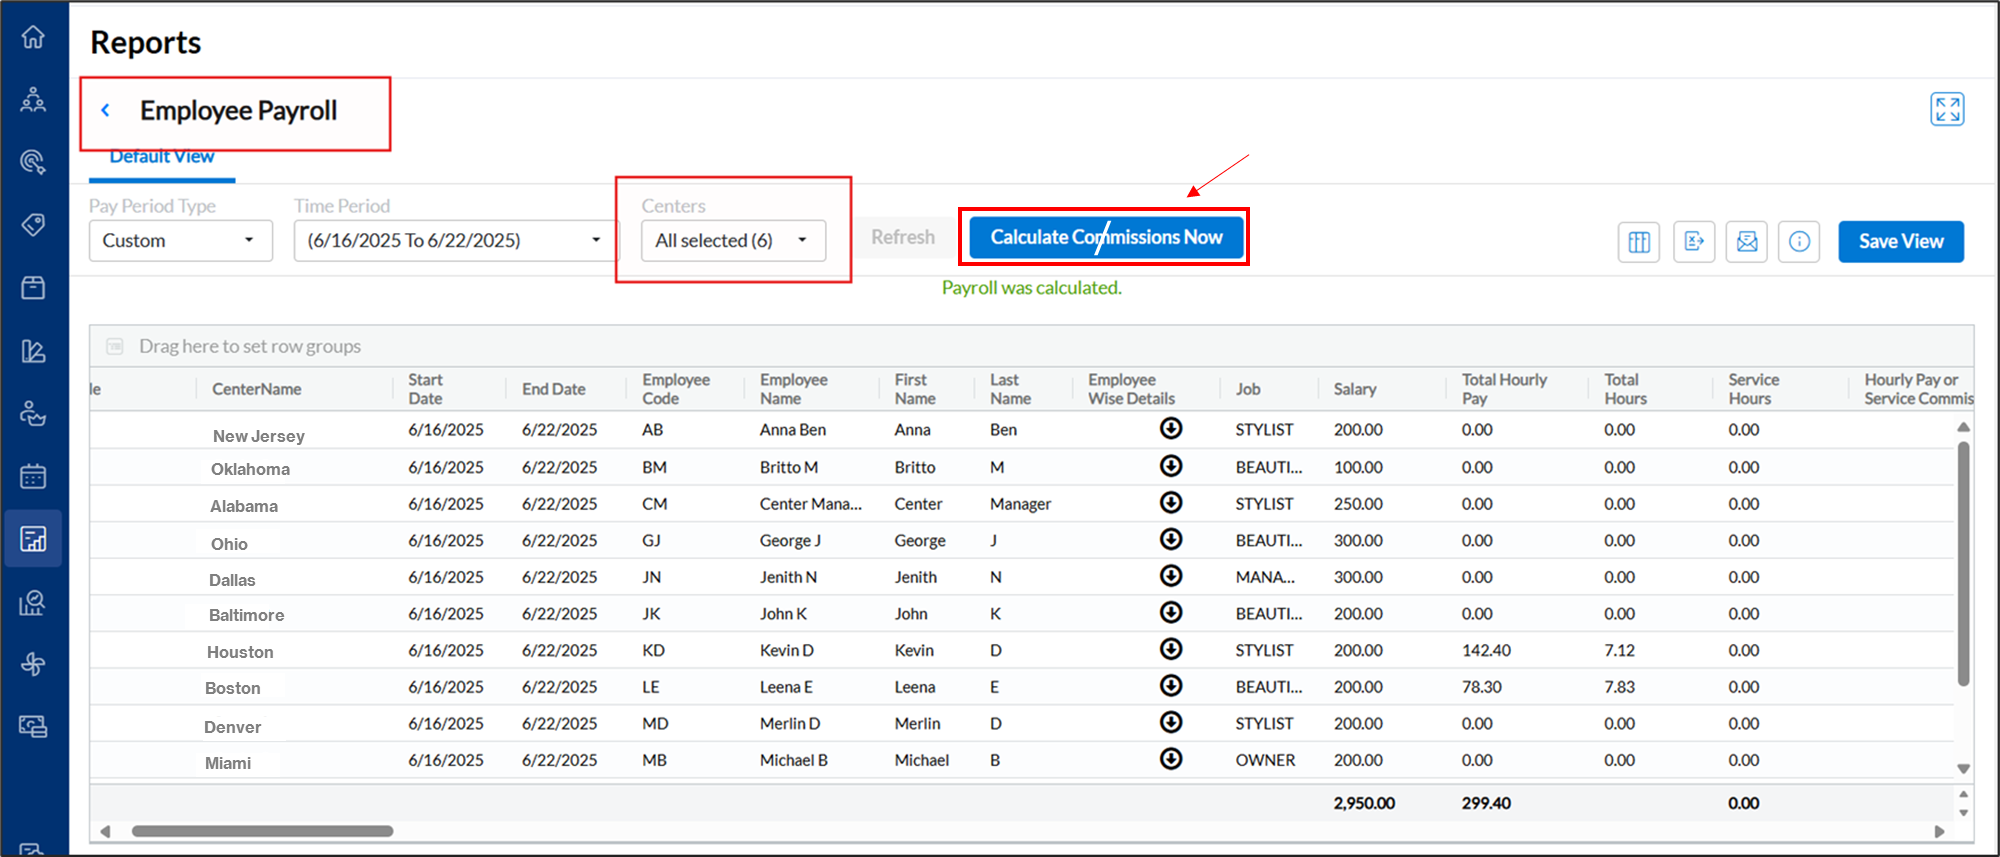
From this screen, click Run Payroll (or Resume Payroll, if already initiated) to proceed to the ZIP dashboard.
Note
If any changes were made to invoices or attendance data, recalculate earnings before initiating payroll to ensure accuracy.
The Run Payroll option becomes available only after commissions and earnings are calculated. If commissions have not been calculated, the Run Payroll option does not appear. Navigate to the Payroll Summary Report and click Calculate Commissions/Earnings before you proceed.
Once payroll is initiated, you cannot recalculate earnings for that pay period.
Initiate payroll for a pay period
To begin processing payroll for a specific pay period:
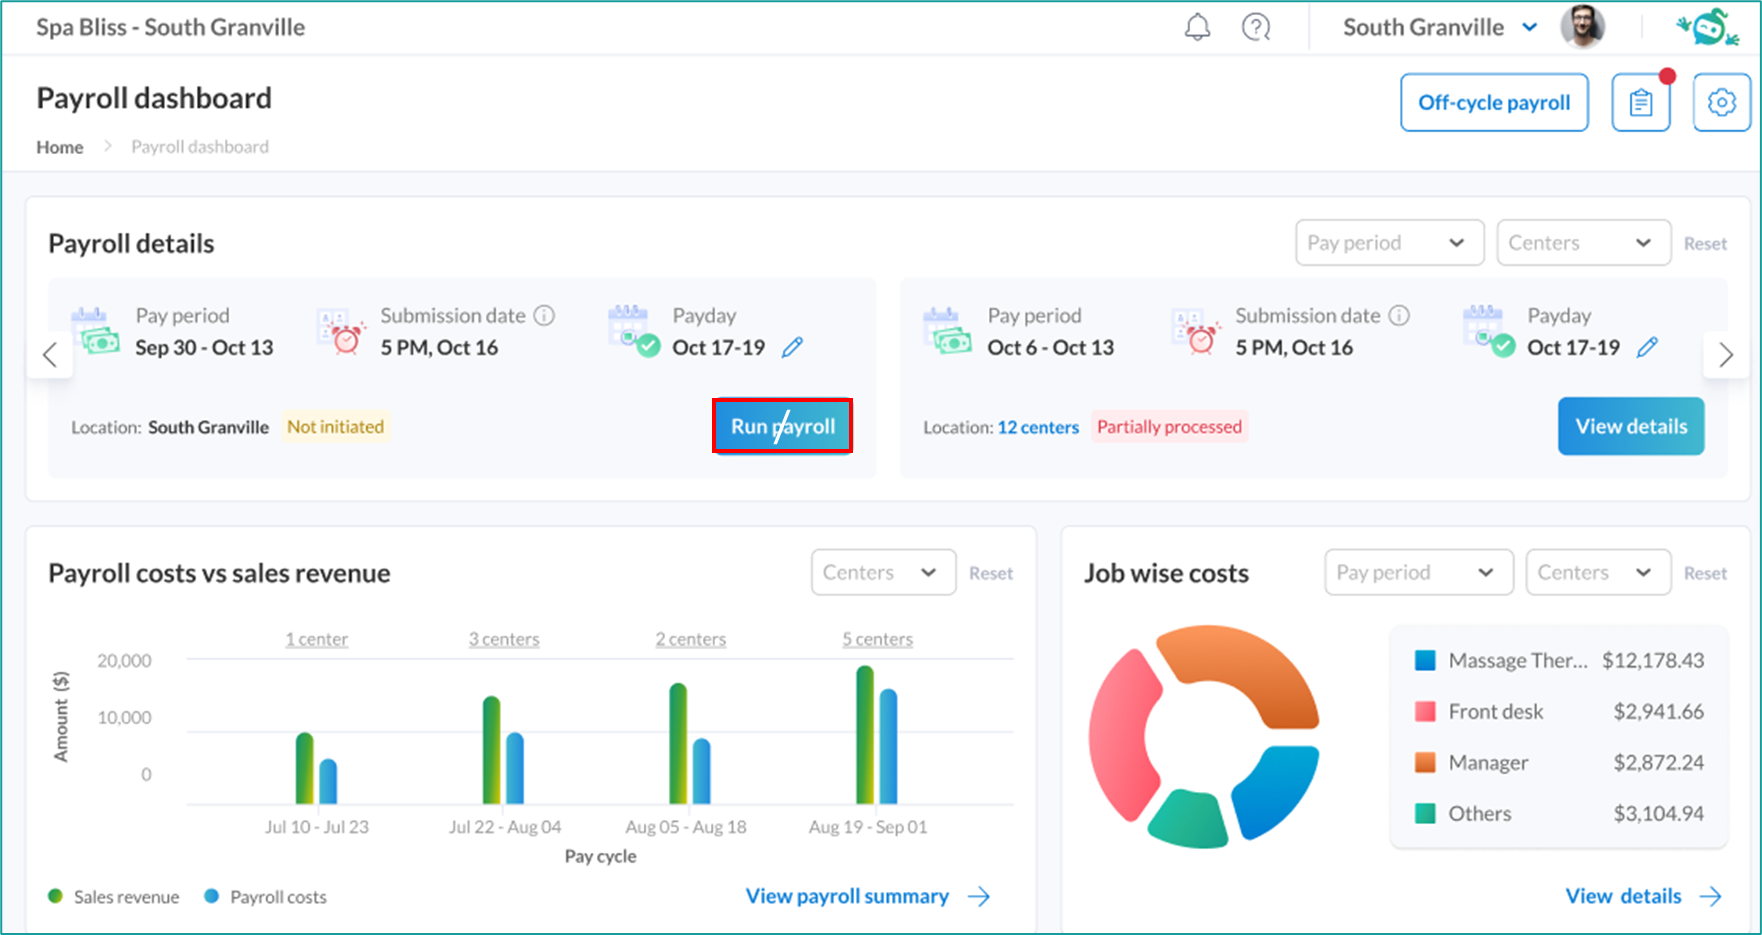
Navigate to Employees > Zenoti Integrated Payroll.
On the dashboard, locate the relevant pay period you want to process.
Click Run Payroll to check the timestamp of the most recent earnings calculation.
Click Proceed to load calculated earnings into the Payroll Input screen.
You can also access this flow by clicking Run Payroll (or Resume Payroll) from the Payroll Summary Report, which opens the ZIP dashboard with the selected pay period automatically applied.
If payroll is already initiated, the button displays as Resume Payroll.
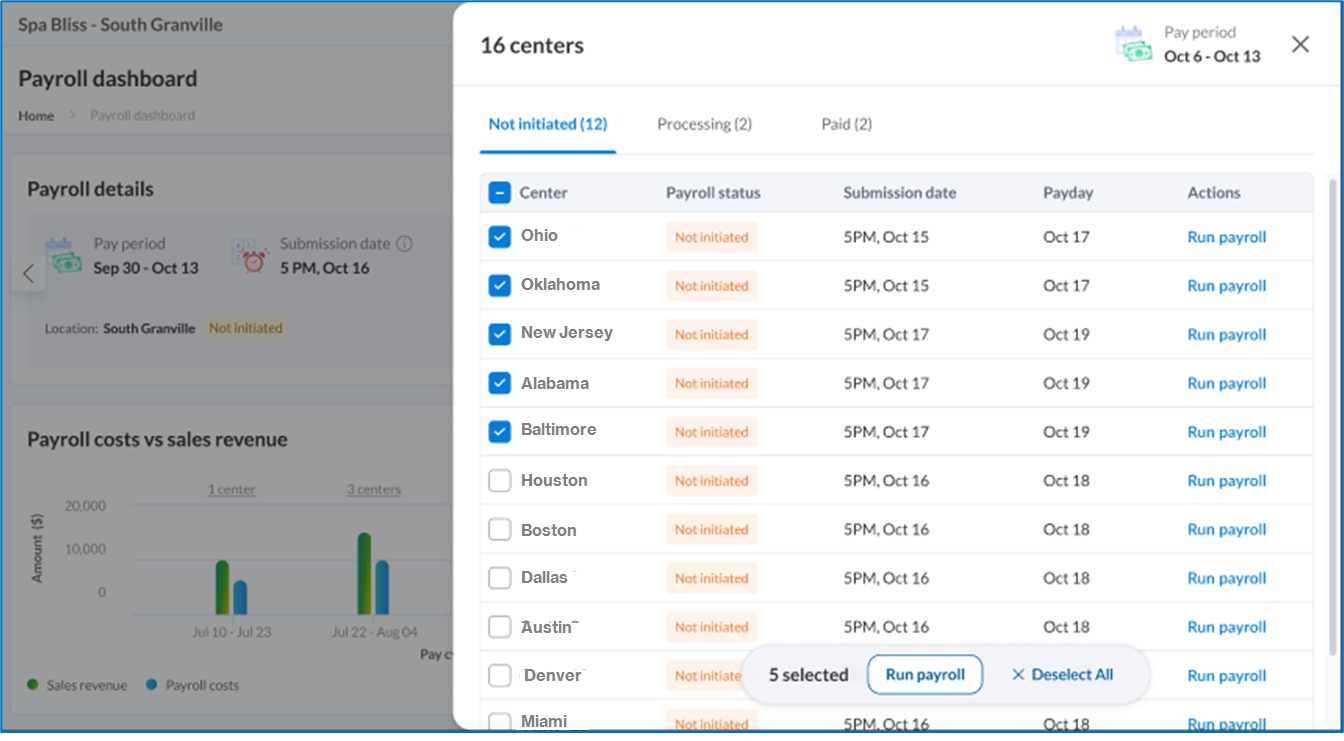
ZIP allows you to run payroll across multiple centers and business entities in a single batch.
Important
Once payroll is initiated - even in draft - you can no longer modify invoices, attendance, or commission data for that pay period.
If changes are needed after initiation:
Discard the draft payroll run.
Update the relevant records
Recalculate earnings using the Payroll Summary Report.
Re-initiate payroll.
Note
Payroll can be initiated any time after the pay period ends, starting from the next calendar day.
Review and manage payroll in the Payroll Input Screen
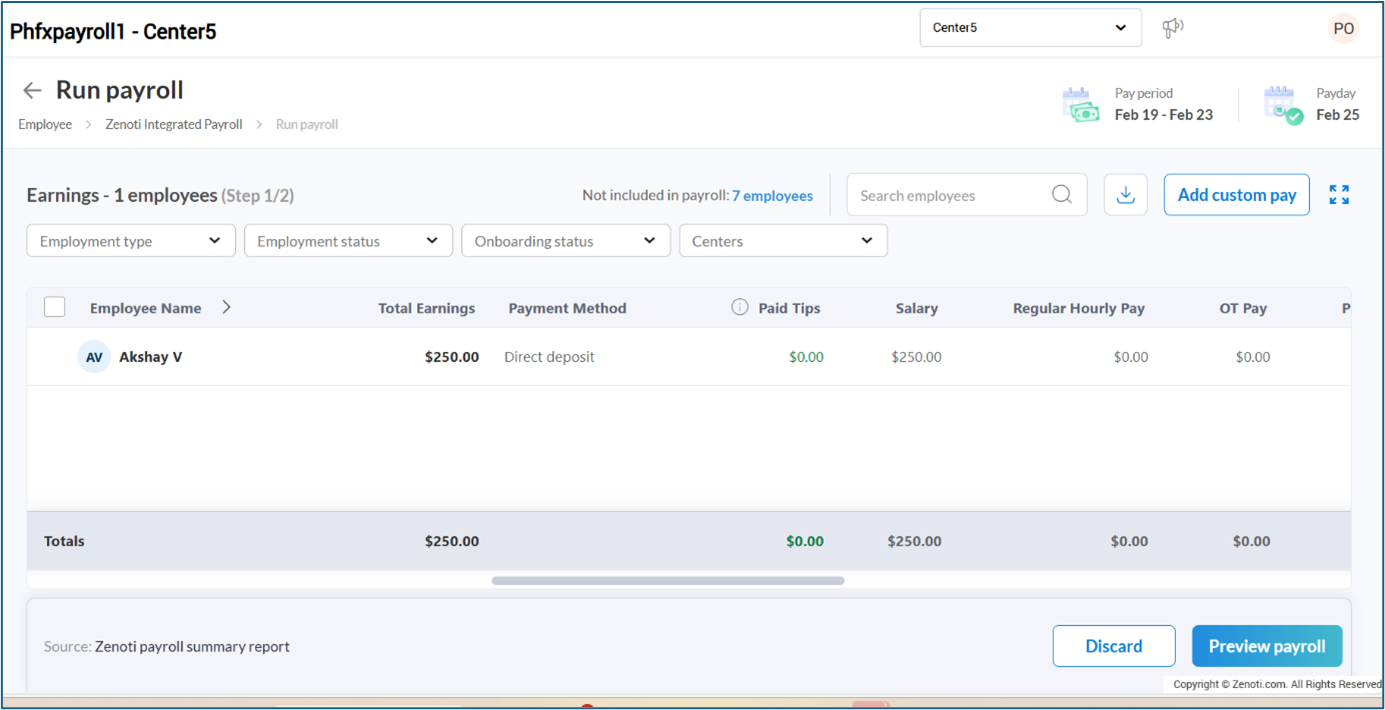
Once payroll is initiated, the Payroll Input screen displays all employee records for the selected pay period. This screen allows you to:
Review default earnings
Add custom earnings and deductions
Record reimbursements
Filter employee records
Finalize payroll before submission
Default and custom earnings
ZIP automatically populates earnings based on earning types configured in Payroll Settings > Earnings Configuration.
The earning columns displayed on the Payroll Input screen correspond to the earning types enabled in your configuration. If an expected column does not appear, navigate to Payroll Settings > Earning Types and select the required hourly or non-hourly earning type. This ensures the earning type is included as a default column in the Payroll Input screen.
Note
If a leave policy is enabled for your organization, the respective Paid Time Off (PTO) earnings are automatically selected and populated for the relevant pay period.
Gross earnings cannot be negative for payroll processing. If there is a deduction that’s higher than their earnings, the recommendation is split the deduction and adjust across multiple payrolls.
The net pay after all tax withholdings, benefits or post-tax deductions cannot be negative. If this error occurs, verify their tax withholding parameters or benefits or garnishment deductions or reach out to payrolloperations@zenoti.com for other recommended options.
Add custom earnings
You can also include additional earnings as needed:
Recurring custom earnings (example, monthly performance bonuses): Configure in Payroll Settings so they are applied automatically in every cycle.
One-time custom payments (example, spot bonus or incentive): Add directly using the Custom Pay option within the Payroll Input screen. Select the appropriate earning type and enter the amount.
Add custom deductions
Custom deductions are amounts withheld from an employee's pay for specific reasons, such as equipment purchases or uniform costs. In ZIP, custom deductions are created as custom earning types with the earning mode set to Debit.
To add a custom deduction:
Navigate to Payroll Settings > Earnings Configuration.
As shown in the following image, the Earnings Configuration screen displays all earning types included in the payroll, categorized as Hourly earnings, PTO earnings, and Non-hourly earnings.
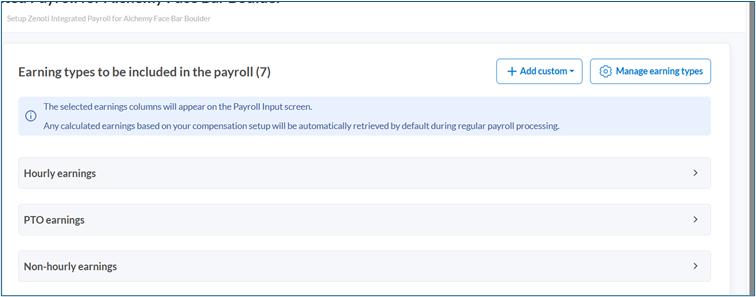
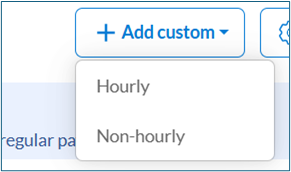
Click + Add custom.
Select Hourly or Non-hourly based on the deduction type.
In the Add custom earning type slide-out panel, enter a name for the deduction in the Custom earning name field.
Select the Debit option for Earning mode.
Select the appropriate payroll code from the Payroll code dropdown.

Click Save.
Record reimbursements (non-taxable)
To account for non-taxable payouts such as travel or supply reimbursements, use the Reimbursement section under Custom Pay. These entries are processed separately from taxable income and do not affect net taxable wages.
Understanding paid tips
If your business uses same-day tips, the Paid Tips column reflects tips that have already been paid to employees (for example, tips paid through Zenoti Wallet or declared cash tips). These amounts are included for tax calculation purposes but are not paid out again through direct deposit or paycheck. As a result, Paid Tips do not affect Net Pay.
Filter and manage employee records
ZIP offers flexible filters to help you manage which employees appear in a payroll run. You can filter by:
Center
Employment Type (Regular/W2 or Contractor)
Employee Status (Active, Terminated)
Onboarding Status (Active, Pending)
Use Cases
Exclude contractors when running payroll for regular employees.
Run payroll for contractors only.
Exclude terminated employees who were already paid via an off-cycle payrol
Change an employee's payment method
The Payment Method column shows the payment method from each employee's payroll profile. You can change it for this payroll run without updating their profile.
Click the Payment Method field for an employee to edit it. What you can change depends on their bank account status:
If the current method is Direct deposit — you can switch it to Manual.
If the current method is Manual and the employee has a bank account in Active or Pending Validation status — you can switch it to Direct deposit.
If the current method is Manual and the employee has no bank account or their bank account validation has failed — the field is not editable. Hover over the info icon next to Manual to see: No direct deposit account available.
Note
This change applies to the current payroll run only. It does not update the employee's default payment method in their profile.
If an employee’s payroll setup is incomplete, they appear at the top of the screen. You can either complete their setup or remove them by clicking the delete icon next to their name.
Review terminated employees
Click View data next to terminated employees in the Payroll Input screen to check if a final payment has already been issued. This helps you avoid duplicate payments.
Handle earnings for employees working across multiple centers
If an employee work across multiple centers:
If the Do not consider other center invoices for payroll setting is enabled, ZIP lists separate line items for each center.
If the setting is disabled, ZIP consolidates all earnings into a single entry under the employee’s base center.
In cases where an employee has only a fixed salary and no additional data (example, commissions or attendance), they may appear only under the base center. If an expected record is missing, use the Not Included in Payroll link to view and restore it.
Preview Payroll
Before final submission, click Preview to review all payroll details.
Note
The Preview step only calculates taxes and other deductions. It does not submit payroll. You can still edit earnings data or the pay day as required before final submission.
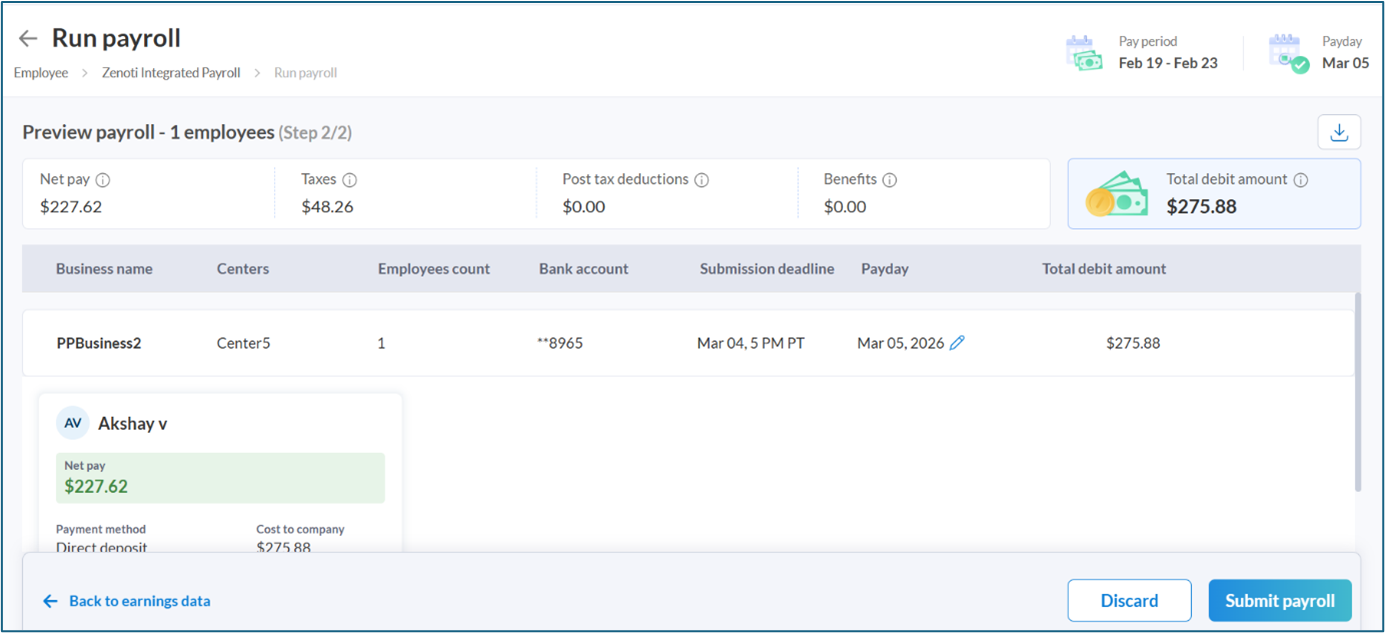
The Preview screen displays:
Net pay per employee
Payroll grouped by business entity
Expandable employee records with detailed breakdowns
ZIP manages:
Federal and state tax calculations
Benefits deductions (for example, 401k, health insurance)
Post-tax deductions (for example, garnishments)
Change the payroll funding account
The Preview screen shows the business bank account that will be debited to fund this payroll run.
You can change this before submitting.
Click the edit icon next to the bank account in the funding account column.
A panel opens listing all bank accounts added to your business setup.
Select the account you want to use for this payroll run.
Click Save.
To change the funding account:
Note
To add a new bank account, go to ZIP dashboard > Settings (right-side menu) > Bank account.
Edit the pay day
You can edit the scheduled Pay Day if it falls on a public holiday or needs to be adjusted for other reasons.
To edit the pay day:
On the Preview screen, click the edit icon next to the Pay Day field.
Select the updated date.
Confirm the change.
For example, if the regular pay day is Friday, July 4 (a holiday), update it to Thursday, July 3.
Submission Deadline: Payroll must be submitted one business day before the selected pay day by 5 PM (center time).
For a July 3 pay day, submit payroll by July 2, 5 PM (center time).
For a July 7 pay day, submit payroll by July 3, 5 PM (center time).
Note
For first-time payroll, review the benefit and tax setup for all employees to avoid incorrect deductions. You can view associated tax transactions under the Tax Deposits screen.
Submit Payroll
After you review and verify all details:
Click Submit Payroll.
On Pay Day, ZIP will:
Debit amounts from the relevant business bank accounts
Initiate direct deposits for all eligible employees
Frequently asked questions
Q1: Can I make changes after payroll is initiated?
A. No. Once payroll is initiated—even in draft mode—you cannot modify attendance records, invoices, or commission data for that pay period. To make changes:
Discard the draft payroll
Update the required records
Recalculate earnings
Re-initiate payroll
Q2: How do I add a custom earning or custom deduction?
A. To add a custom earning, use the Custom Pay option on the Payroll Input screen and select the appropriate earning type. To add a custom deduction, open Custom Pay, navigate to the Deductions section, select the deduction type, and assign the correct classification for tax treatment. For more information, refer to the Add Custom Earnings and Add Custom Deductions sections in this article.
Q3: Why is there an amount in the Paid Tips column that doesn't affect Net Pay?
A. ZIP includes Paid Tips - such as tips paid through Zenoti Wallet or declared cash tips, as taxable earnings. If your business uses same-day tips, these tips have already been paid out and are included only for tax calculation purposes. They are not paid out again through direct deposit or paycheck.
Q4: When can I initiate payroll?
A. Payroll can be initiated any time after the pay period ends, startingfrom the next calendar day.
Q5: How do filters help during payroll?
A. Filters allow you to control which employees are included in a payroll run. You can:
Exclude contractors from regular payroll
Run payroll only for contractors
Remove terminated employees already paid via off-cycle payroll
Q6: What should I verify in my first payroll run?
A. Before submitting your first payroll, make sure:
All employee tax information is correct.
Benefit deductions (example, 401k, health insurance) are correctly configured.
Payment methods are validated for direct deposit.
Q. Why can’t I run payroll before the pay period is completed?
A: You can run payroll only after the pay period is completed. If your payroll provider’s submission deadline falls on or before the pay-period end date, update the Payday to the next feasible submission date.
For example, if the pay period is Nov 1–Nov 15 and the default Payday is Nov 17, the default submission date may show as Nov 14. You can process payroll only starting Nov 16. In this case, update the Payday to Nov 18 so that the submission deadline moves to Nov 17, allowing you to submit payroll on time.