Dynamically add forms during Consultations
Medical professionals can dynamically add or remove forms during consultations, offering greater flexibility in capturing essential patient information. This ensures they collect all necessary consents and medical data in real-time using required forms without being restricted by forms previously associated with the service.
Set up dynamic forms
You can configure forms to be available for dynamic addition across the organization or for specific centers. You can also select specific forms to be available for dynamic addition at either level.
To make forms dynamically available during consultations, at the organization level, follow these steps:
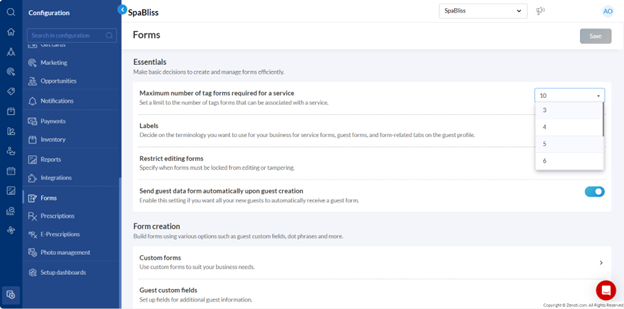
At the organization level, navigate to Configuration > Forms.
In the Form settings section, enable Allow adding forms to appointments dynamically.
Click Dynamic form setup.
Under Configuration Mode, select Organization Level and click Save.
In the Organization-Level Configuration section:
Select All Tag Forms to make all forms across your organization available for dynamic addition.
Select Specific Tag Forms, click Configure, then select specific forms to make them available across your organization for dynamic addition.
Click Save.
To make forms dynamically available during Consultations, at the center level, follow these steps:
At the organization level, navigate to Configuration > Forms.
In the Form settings section, enable Allow adding forms to appointments dynamically.
Click Dynamic form setup.
Under Configuration Mode, select Center Level.
Click Save.
When you configure dynamic forms at the center level for the first time, you will be prompted to choose how to initialize the availability of forms for each center.
In the Center Forms Setup dialog box, select one of the following options:
Start from Scratch: Begin with an empty list for each center and manually select which forms should be available.
Pre-load Existing Forms: Use forms already mapped to each center (via tag mappings), then customize as needed.
Click Confirm to apply your selection.
In the Center-Level Configuration section, click Configure next to the relevant center.
Use the Dynamic forms are enabled/disabled for this center toggle to enable or disable dynamic forms for the center.
Select the forms that should be available for dynamic addition in that center.
Click Save.
Note
Changes to service-level form mappings do not update center-level configurations automatically. To apply such changes, you must manually update the dynamic form list for each center.
Add forms dynamically during an appointment
Option 1: Add a form from the guest profile >> Forms tab
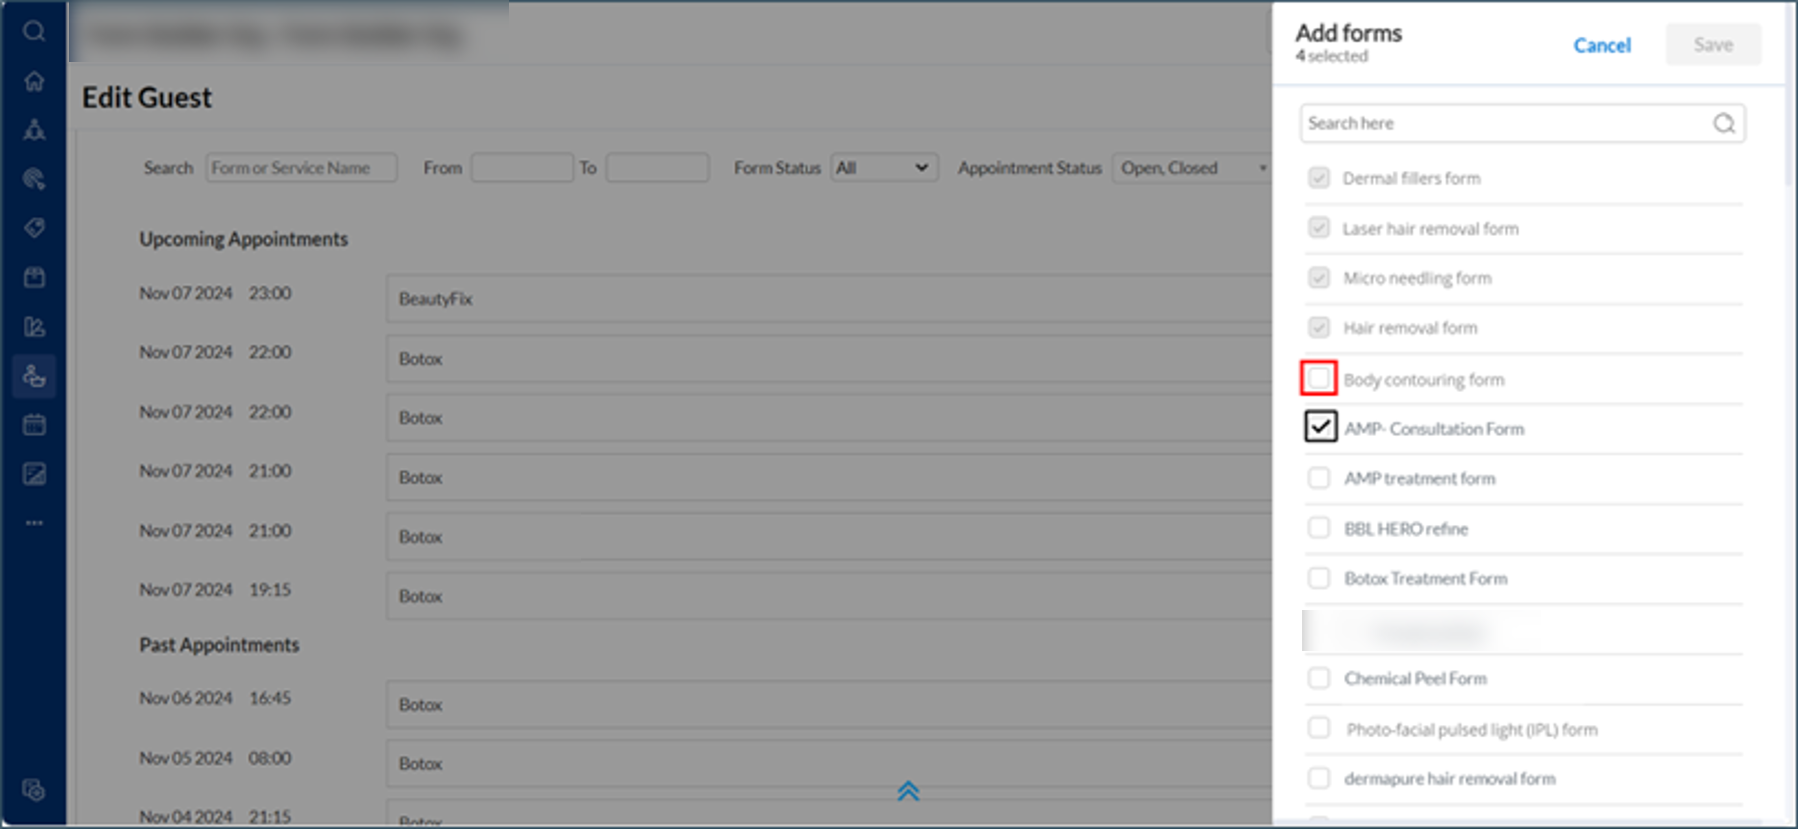
From the guest profile, click the Forms tab.
Next to the list of forms associated with the service, click the plus (+) icon.
A list of Tag forms associated with the Service Tags will be displayed on the right.
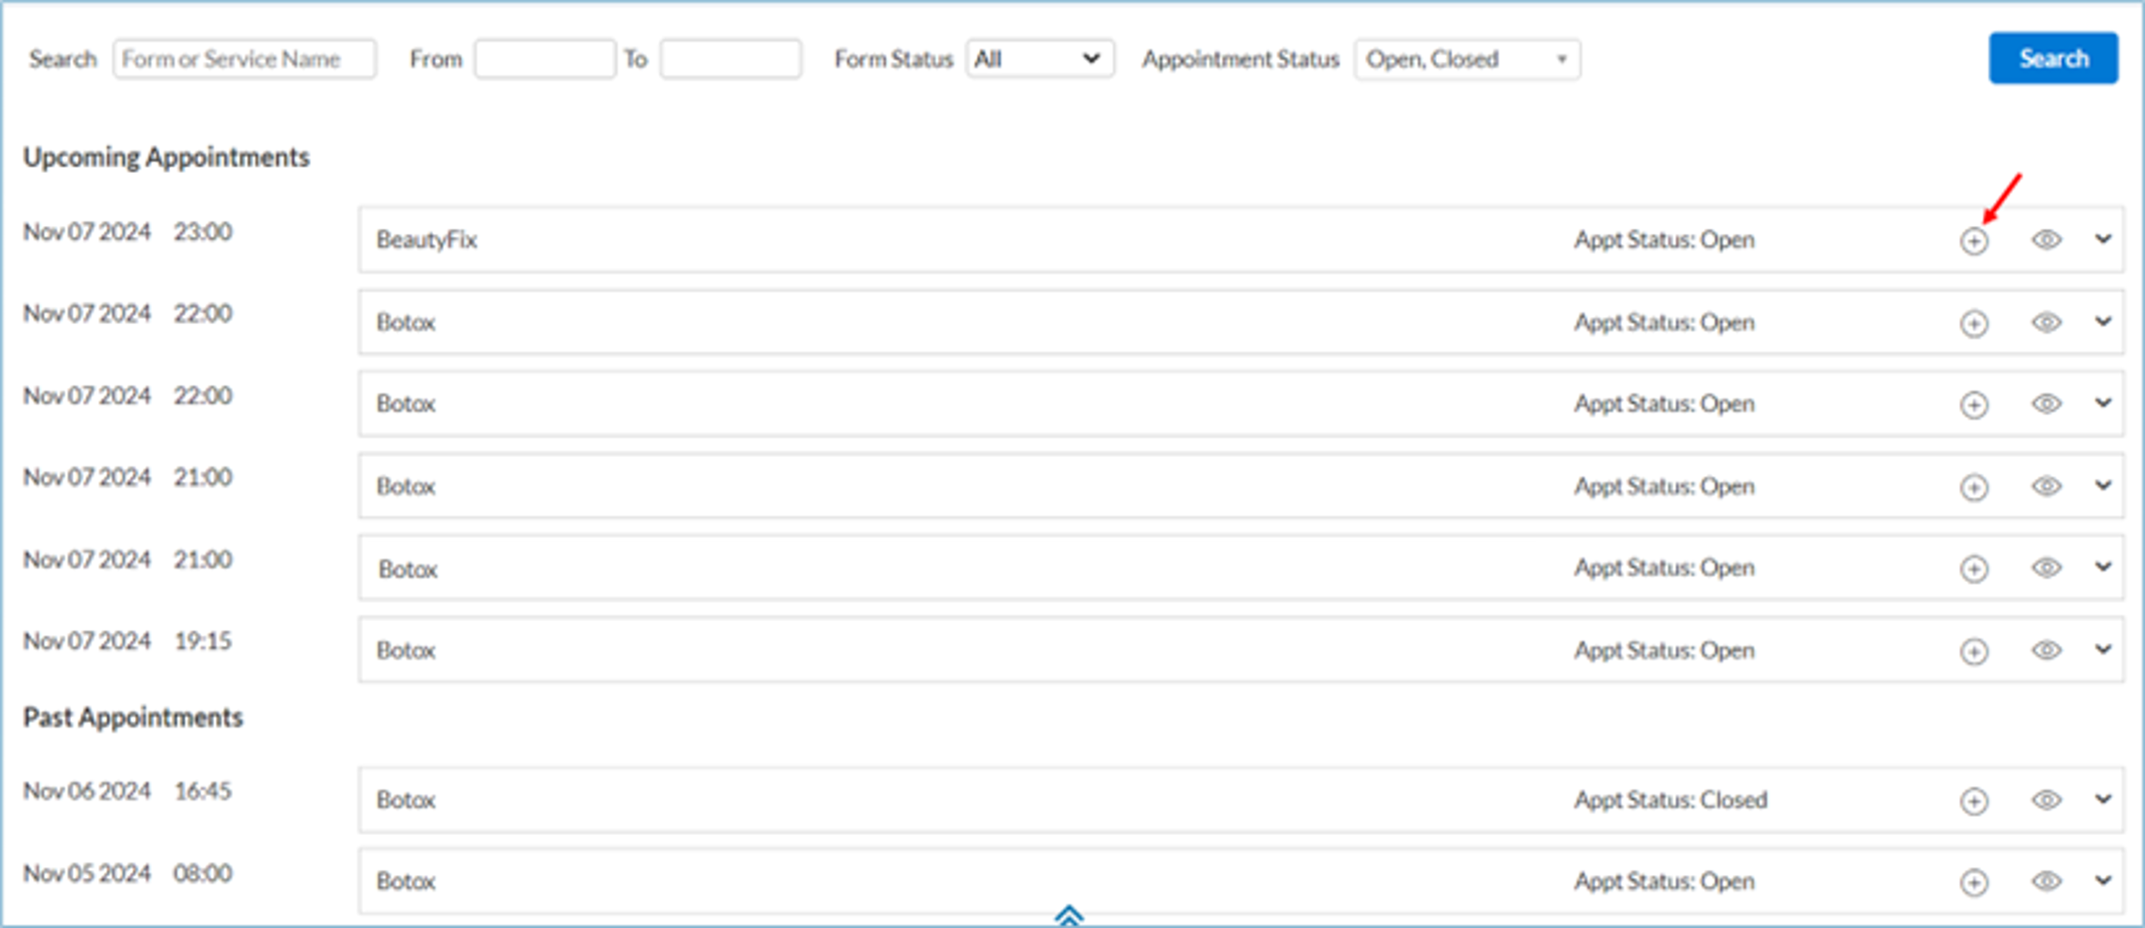
Select the forms you wish to add. Forms already associated with the service will be greyed out, indicating they cannot be modified.
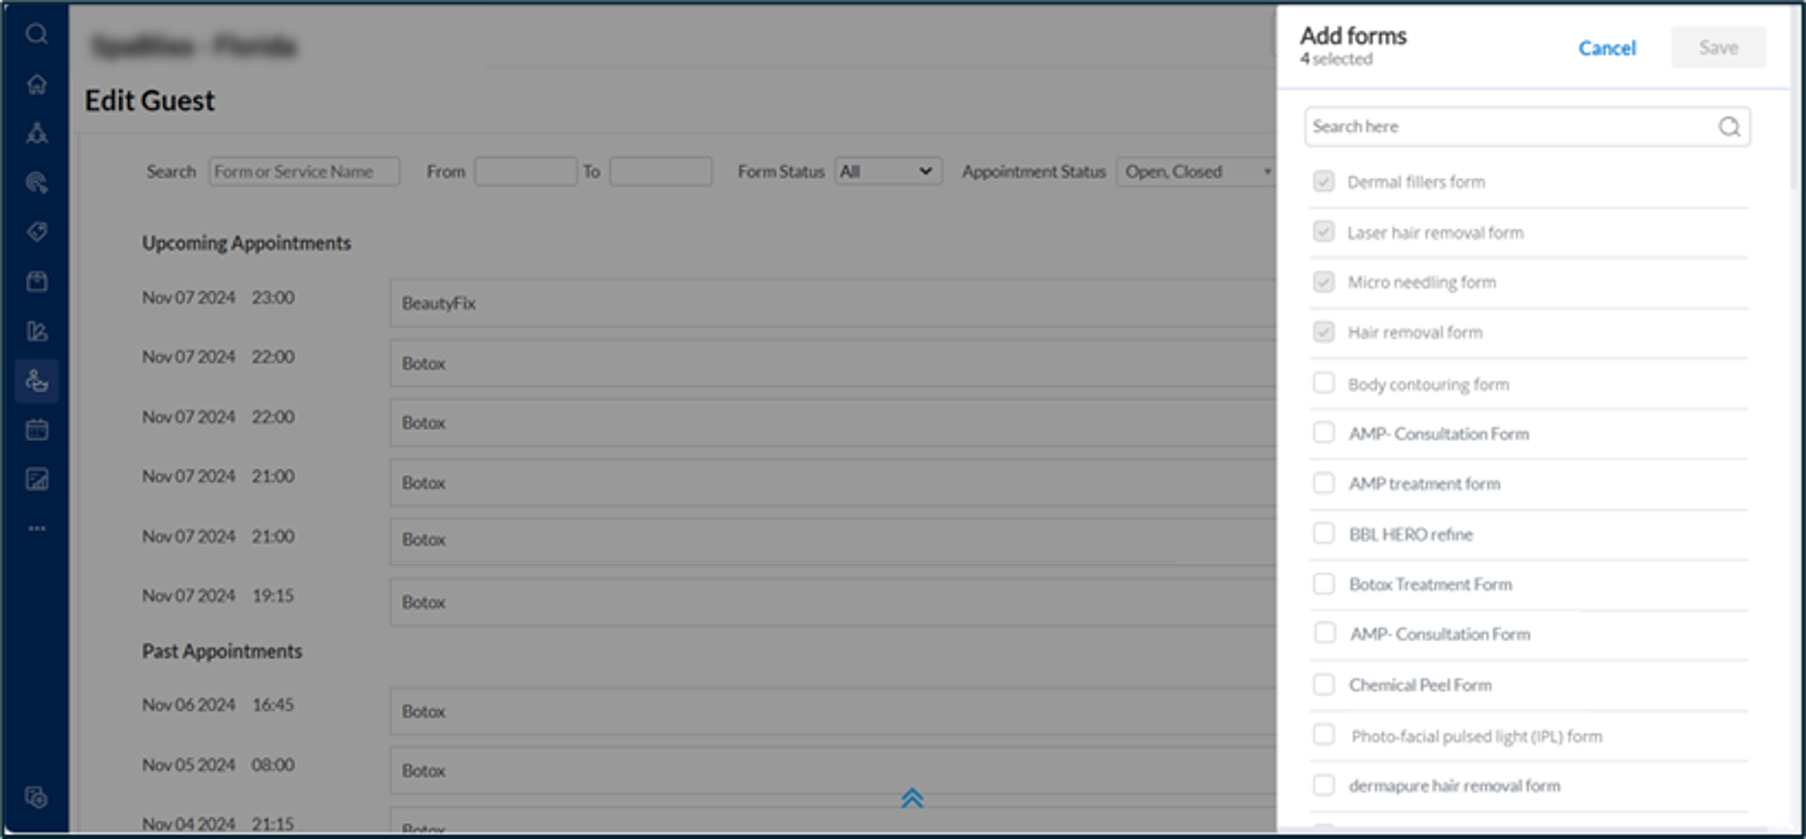
Click Add to add the forms to the open appointment.
Option 2: Add a form from the guest profile >> Unified Forms View page
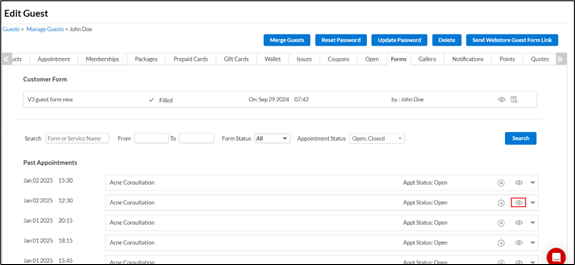
From the guest profile, navigate to the Forms tab and click the View Form icon next to the open appointment.
Click +Add New Form.
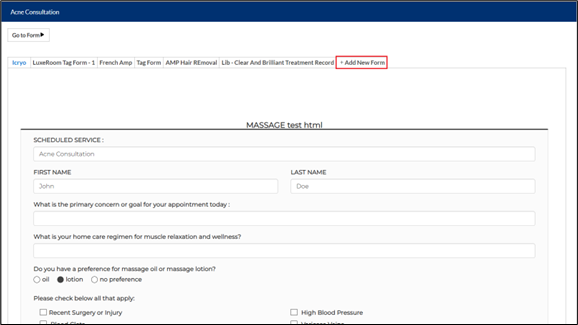
Use the search bar to locate the form you need from the available tag forms list and select the desired forms.
Click Save.
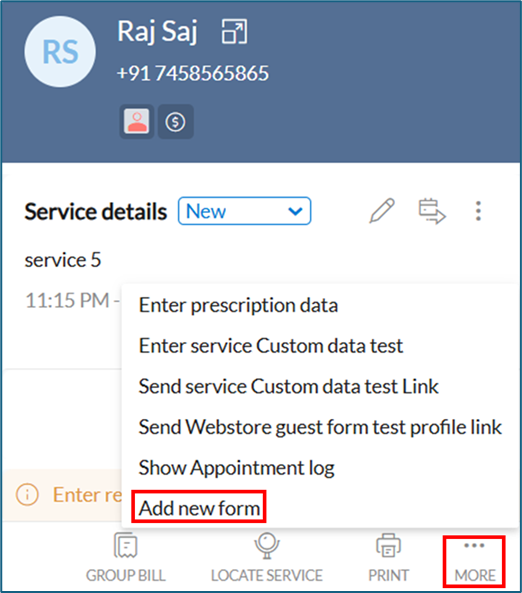
Option 3: Add a form from the appointment book
From the Appointment Book, click an existing appointment and click MORE.
Click Add new form.
Use the search bar to locate the form you need from the available tag forms list and select the desired forms.
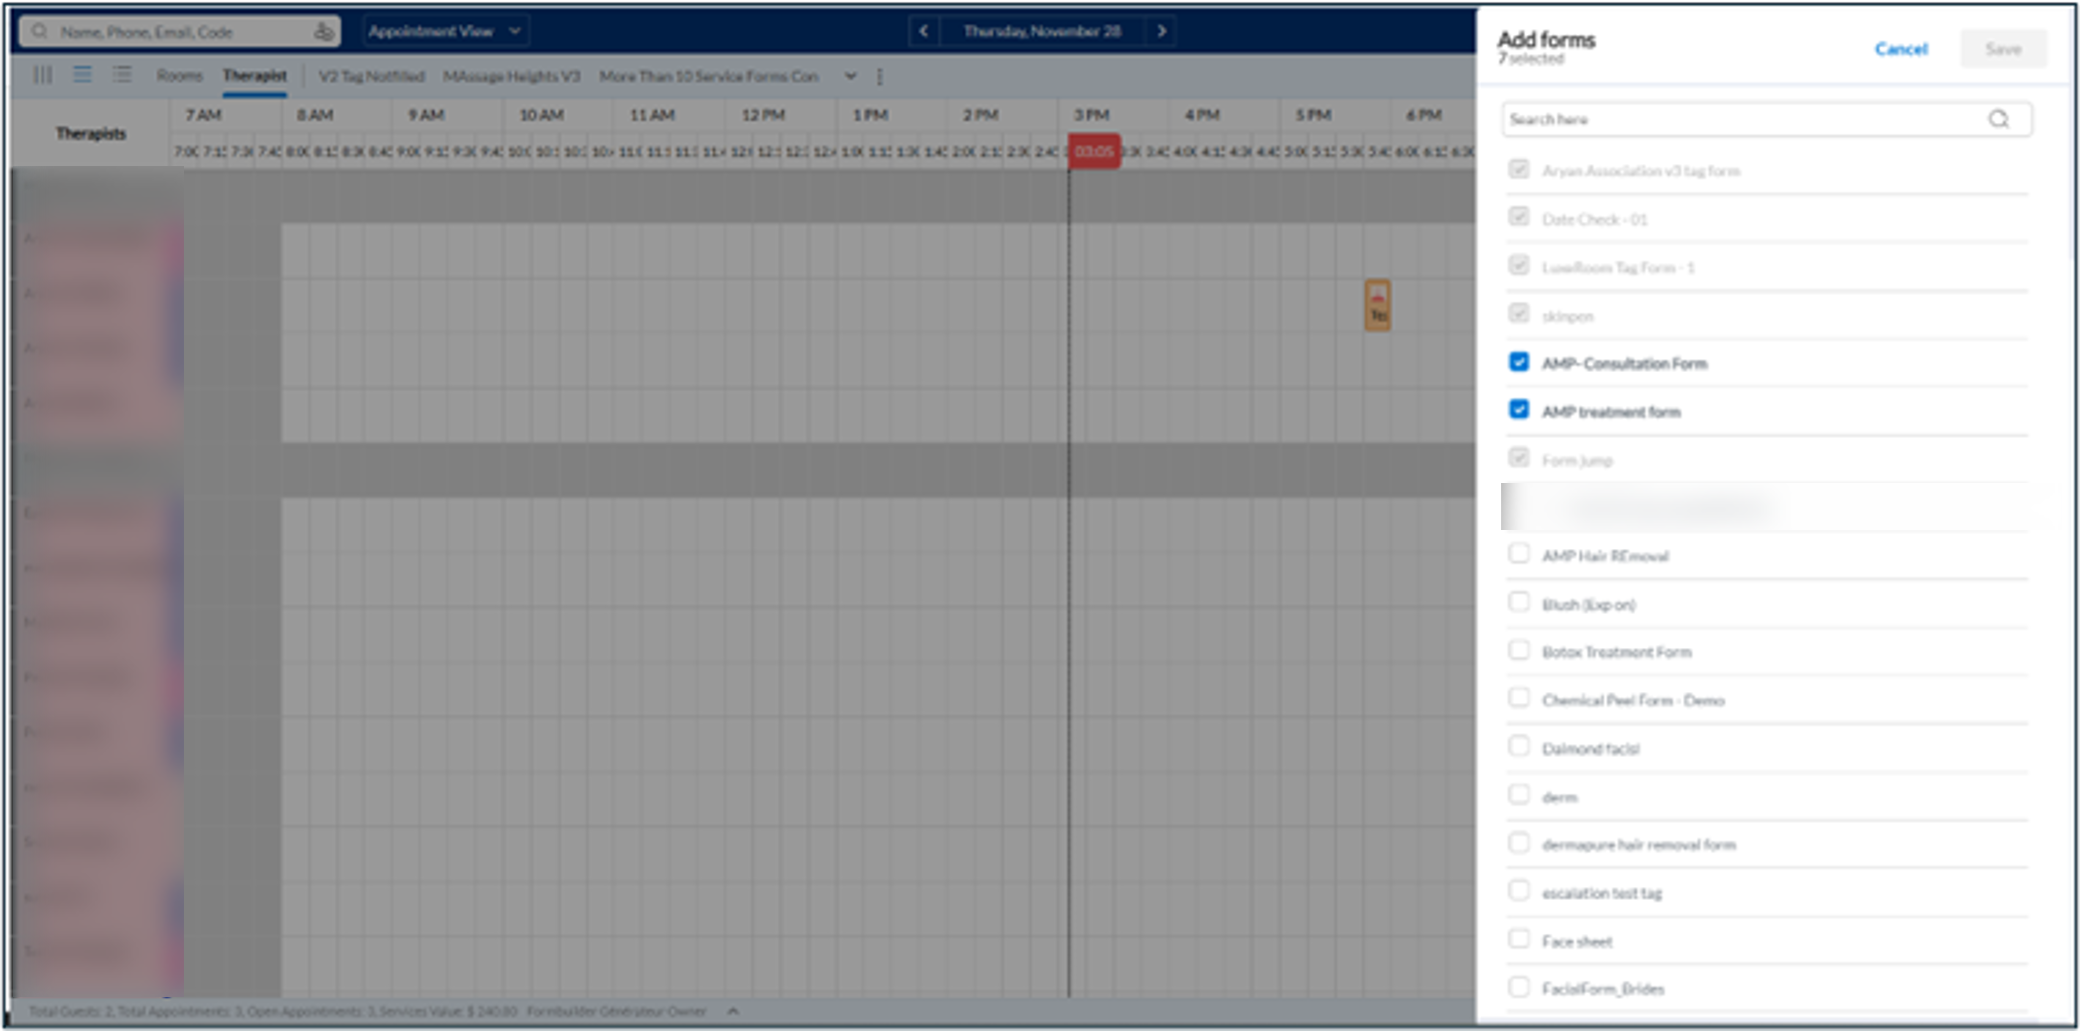
Click Save.
Add forms dynamically on ZMA
Option 1: Add a form from the Forms tab
From the guest profile, click the Forms tab.
Under Upcoming Appointment, click + Add new form.
A list of tag forms associated with the service tags will be displayed on the right.
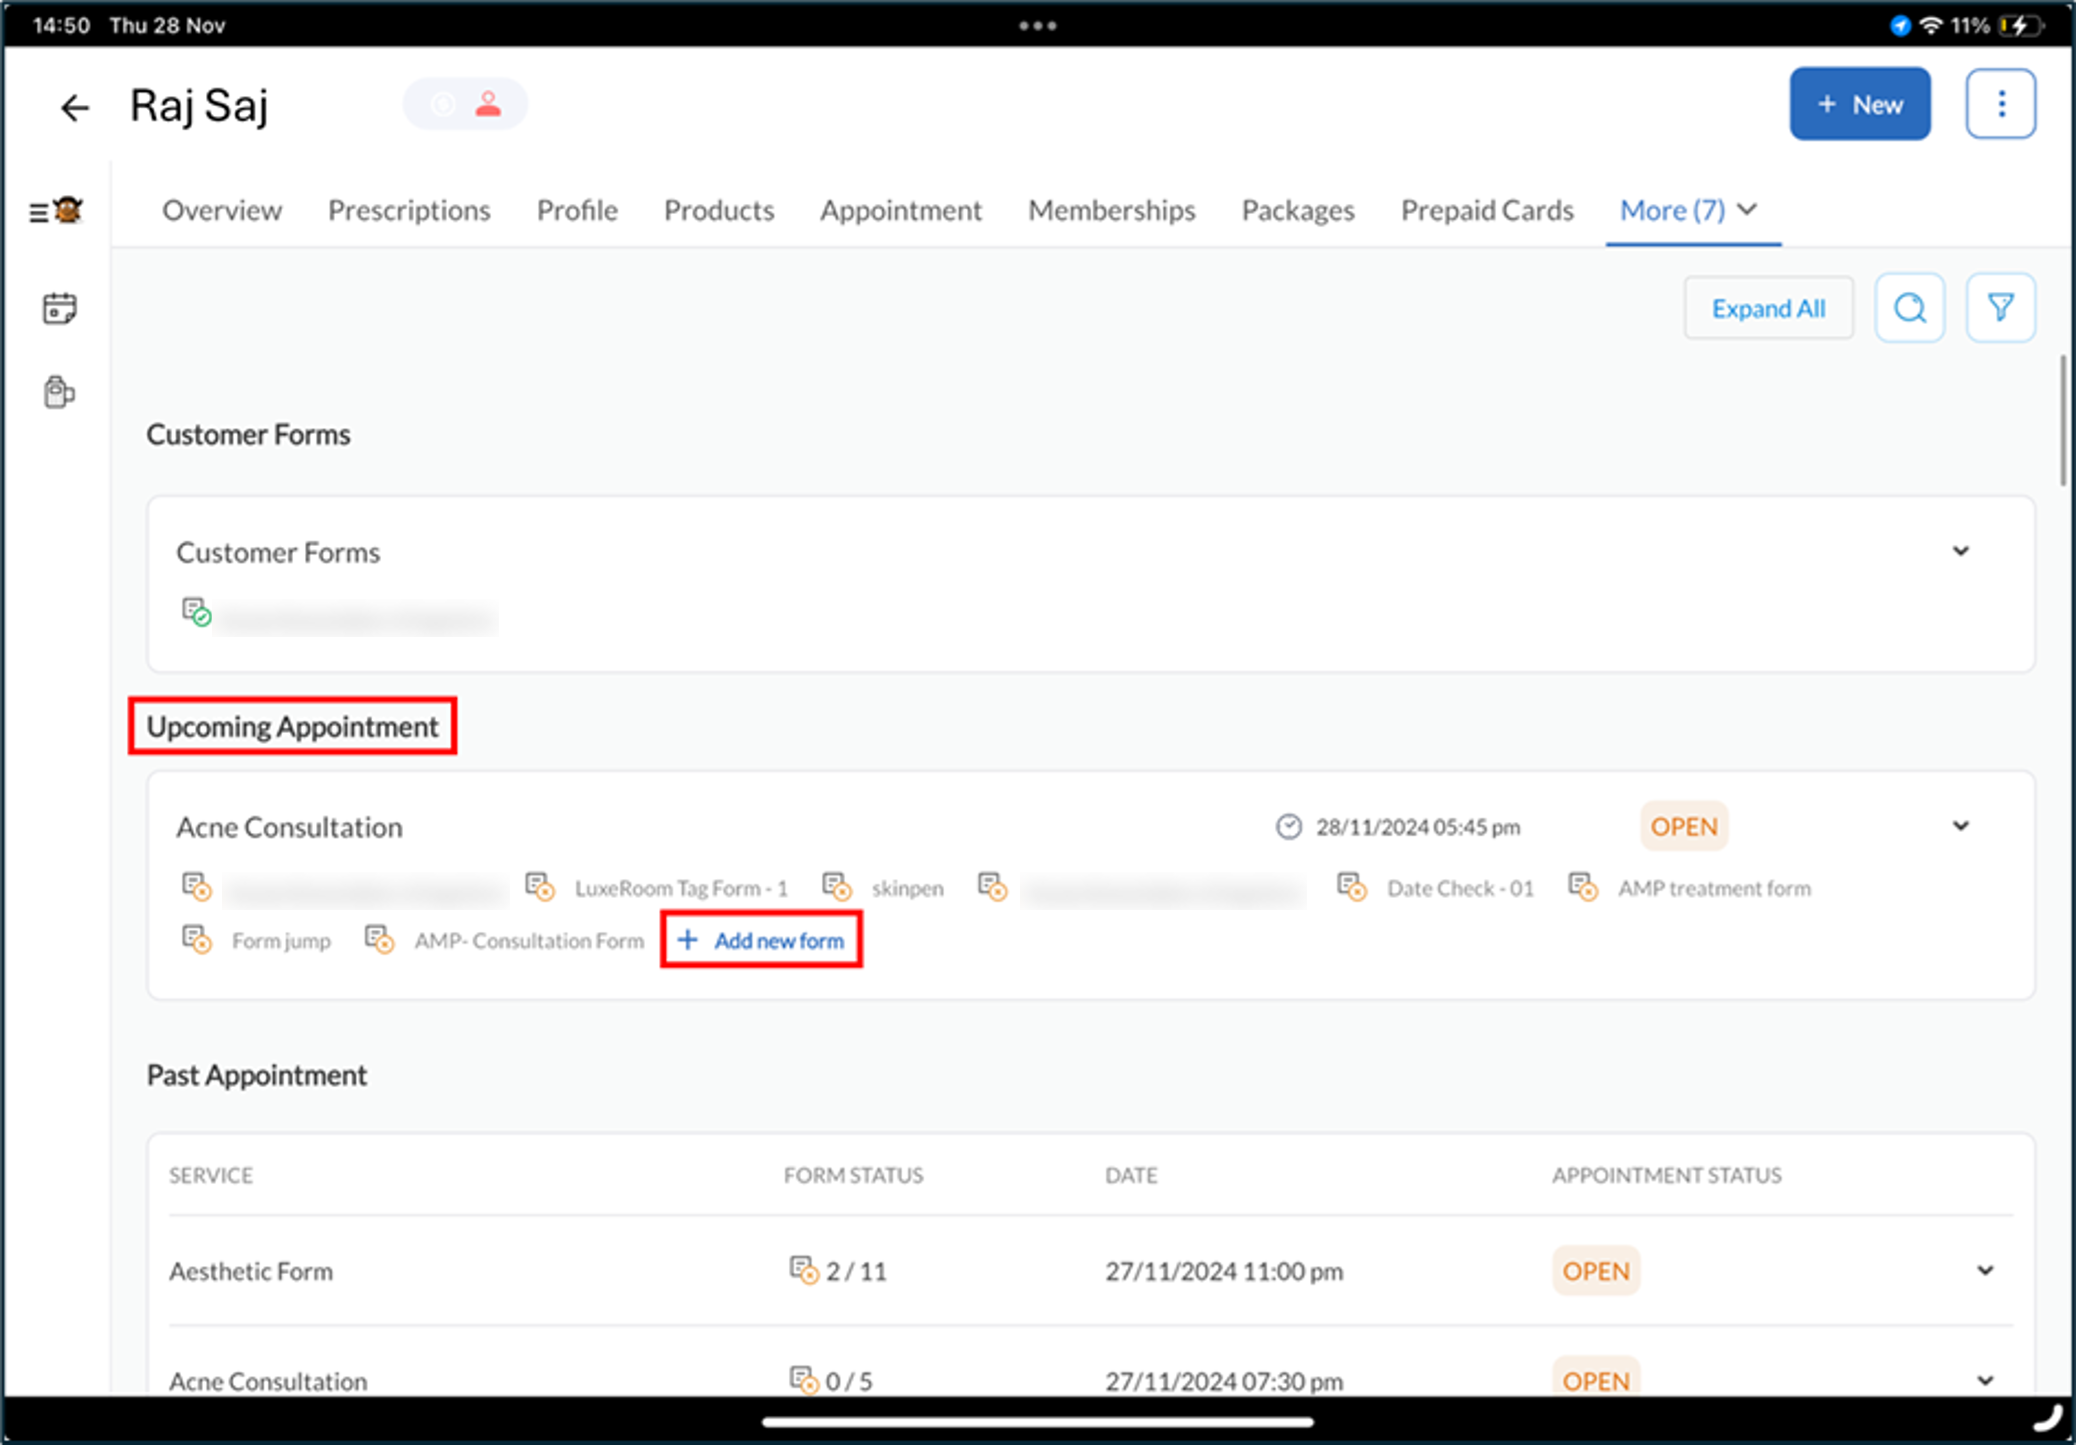
Select the forms you wish to add. Forms already associated with the service will be greyed out, indicating they cannot be modified.
Click Add to add the forms to the open appointment.
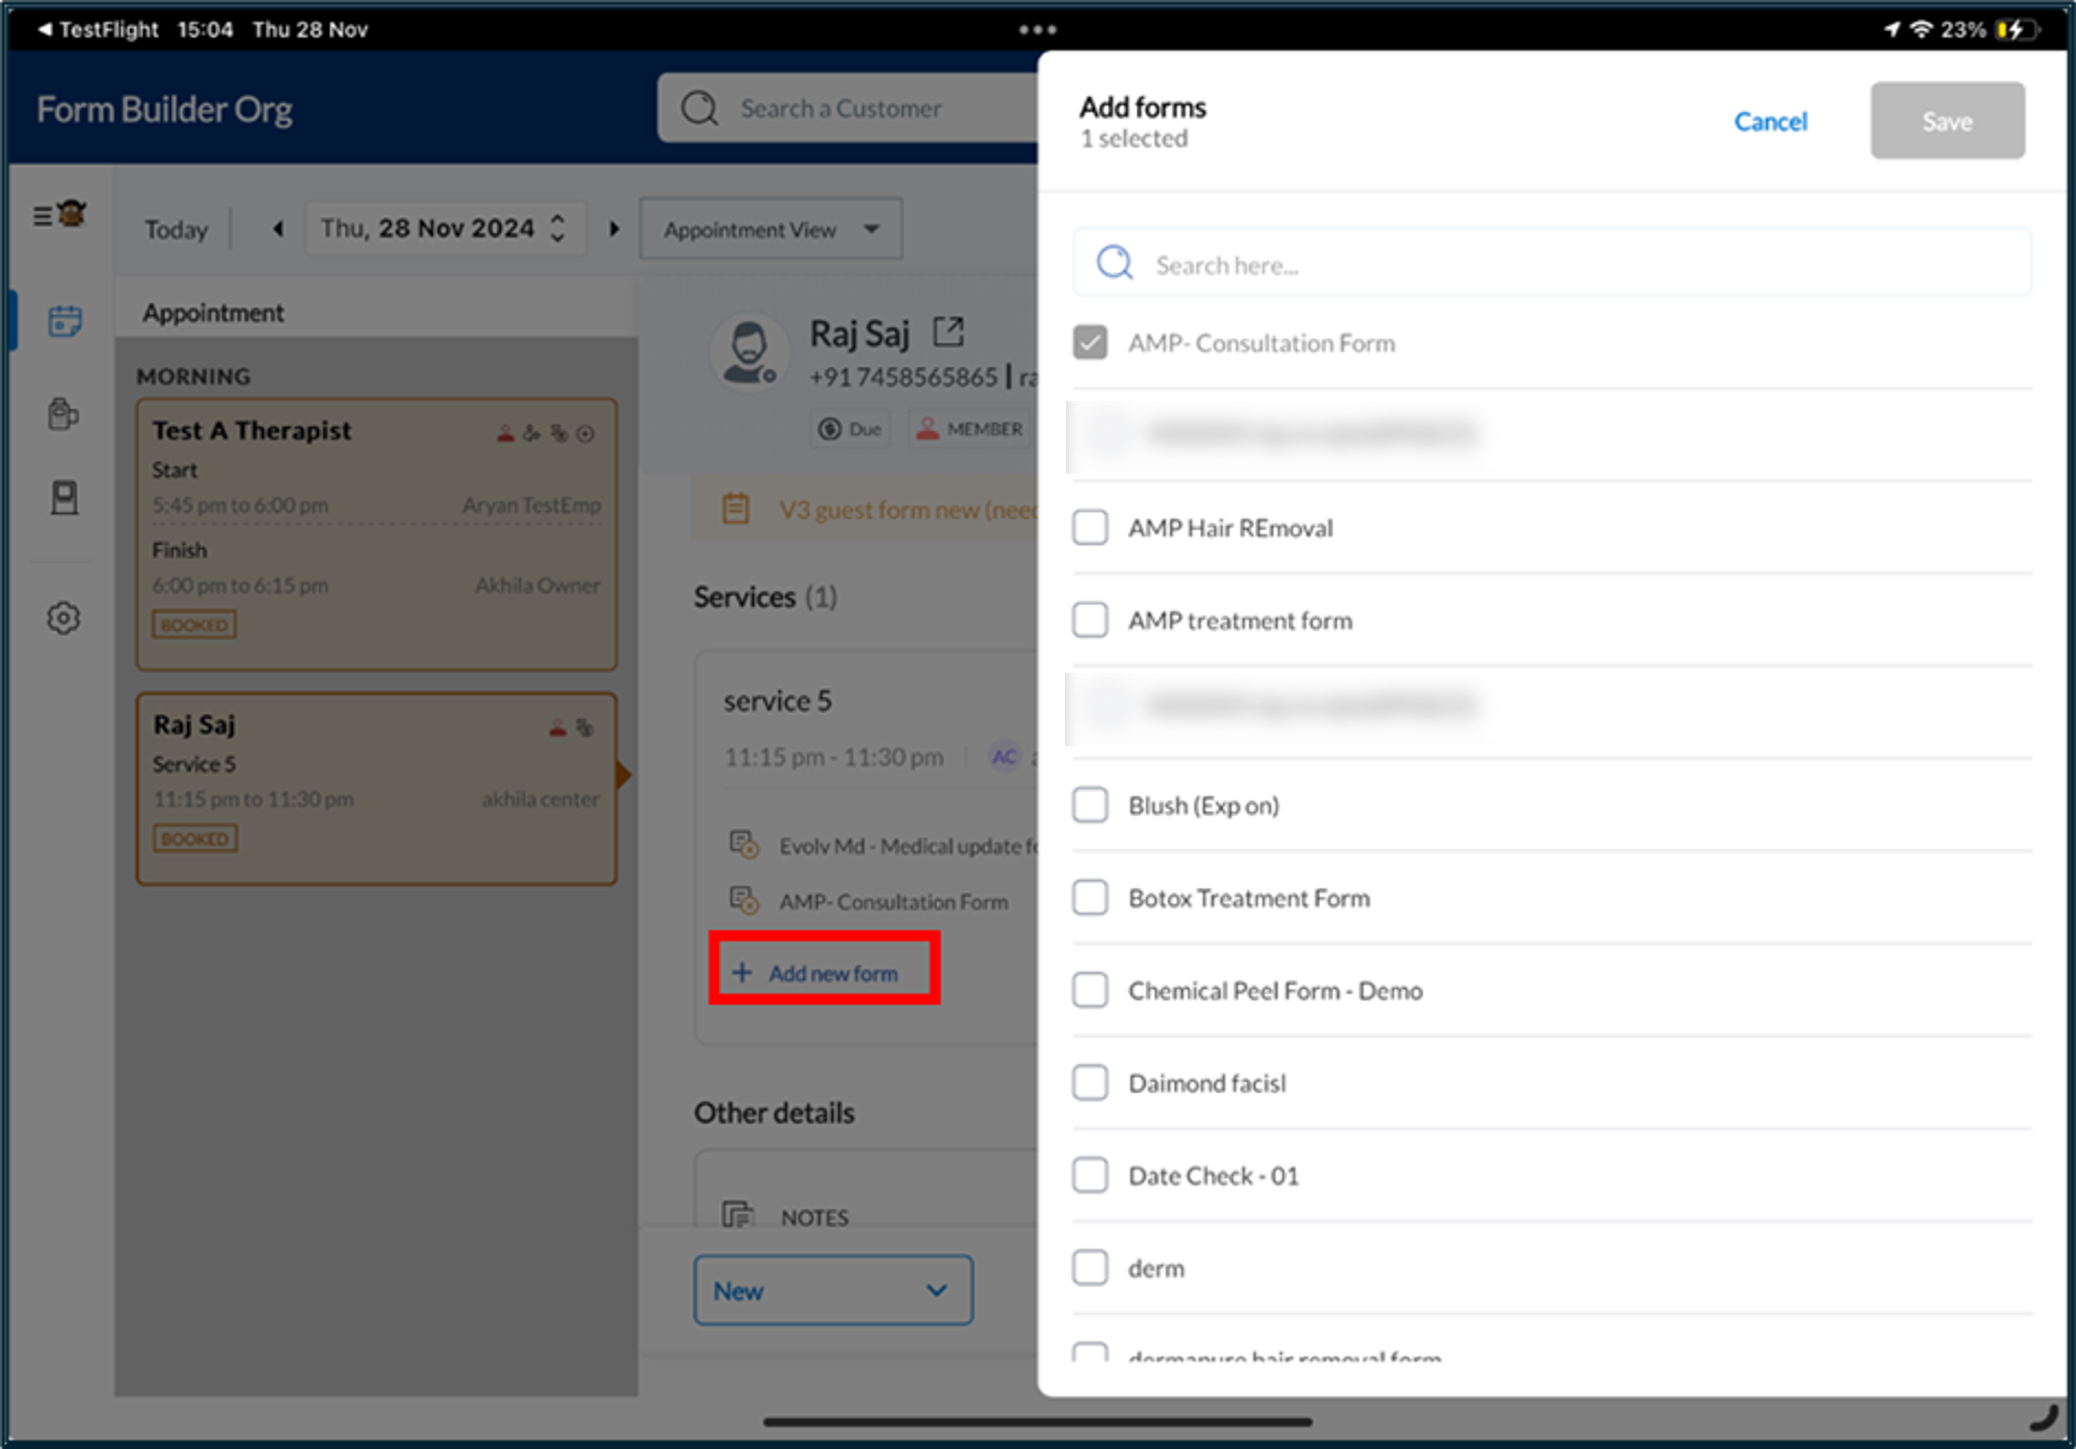
Option 2: Add a form from the appointment book
From the Appointment Book, click on an existing appointment and click MORE.
Click Add new form.
Use the search bar to locate the form you need from the available tag forms list and select the desired forms.
Click Save to add the forms to the open appointment.
Remove dynamically added forms
From the guest profile, open the list of available tag forms.
Clear the checkbox next to the form you wish to remove.
Note
You can only remove unfilled forms.
Click Confirm to remove the form from the open appointment.
Impacts and considerations
Form tag restrictions
Only tag forms associated with the Service Tags will appear as options for dynamic addition.
Form association
Forms added dynamically and filled during an appointment cannot be dissociated from that appointment.
Form limits
You can add up to 10 tag forms per session to maintain system performance and efficiency.
The limitation on form additions will be based on the tag limit configuration (minimum 3, maximum 10) set in the Forms configuration menu (under Organization level, Configuration Settings > Forms).
Expiry settings
Expiry rules for forms will still apply to dynamically added forms.
Pre-fill settings
Data from previous appointments will not be pre-filled into dynamically added forms.
Unified Forms View
Dynamically added forms will be visible in the Unified Forms View tab, along with pre-associated service forms.
Note
It is best practice to create a new tag and associate forms with it, rather than replacing the forms associated with an existing tag, especially if the forms are intended to be added dynamically (or on the fly) and are not specifically linked to a single service.
Benefits of dynamic form management
Flexibility to handle specific use cases
Certain forms, like Photo and Video Consent or Good Faith Estimate (GFE), do not need to be assigned to every service. With dynamic form management, these forms can be added directly to an appointment as needed, avoiding unnecessary associations with all services.
Efficient process to fill forms during up-selling
During an appointment, if the business successfully upsells another service, staff no longer need to wait for the front desk to add the new service to the appointment before accessing related forms. Forms can be added dynamically and completed on the spot, streamlining operations.
Simplified setup for new or small businesses
For new or small businesses, dynamic form management minimizes the effort required during the initial setup. Instead of spending time associating numerous forms with services, businesses can add forms dynamically as needed during appointments. However, Zenoti recommends assigning mandatory forms upfront to ensure they can be emailed to clients automatically when an appointment is booked.
If you have any questions or require additional help, contact your Zenoti representative.