CMA admin tasks
Collect service deposits on CMA and Webstore
Why collect deposits on services?
Deposit collection:
Safeguards you from cancellations or no-shows, and any expenses the cancellation might impose.
Increases instances of guests turning up for their appointments since partial payment for the services is already made.
How to configure deposits for online bookings?
Scenario | Functionality |
|---|---|
A deposit is defined as a flat amount and a discount is applied to the invoice, the deposit collected will be of the lower value of the two; configured deposit, or service value. | After the discount is applied, the system compares both the service value amount and the deposit amount. The lesser of the two values will be charged as a deposit. For example, if a service value is $100, and the configured deposit for the service is $50.
|
If you use Zenoti GO on CMA | Front-desk staff must apply the PPC before the guest triggers autopay or self-pay to ensure that the guest is only charged the balance amount. Also, the PPC must be applied to the invoice before the appointment starts to avoid charging a deposit twice for the same service. |
It is a group booking | The deposit amount for all services will be collected with a single PPC; the host will get the PPC. |
The appointment is canceled | Automatic refunds cannot be issued. You can only issue manual refunds. |
The appointment is a no-show (the guest doesn't show up in time for service) | PPC expires to ensure that the guest doesn't use the amount for any other service. |
The appointment is rescheduled to a day when price scaling is applicable | No additional deposit is charged. |
Enable mandatory selection of finishing services
Services such as hair color, require a compulsory blow dry and styling service. These services are chargeable and require a specific provider.
Guests who usually book a hair coloring service on the Webstore, do not know that they also need to select a finishing service. The front-desk staff adds these services and informs the guest later that these services are mandatory.
In lieu of this, you can enforce your guests to mandatorily select the finishing services when they book an appointment for a service that requires one.
Before you begin
Ensure you add Finishing Services at the service-level, before you enable this feature for the CMA.
At the organization level, click the Configuration icon.
Search for and select the Online booking setting from the Online booking settings section.
Navigate to General > Service Selection.
Turn on the Enable Finishing Services setting.
Note
You can also change the text label for the finishing services on the CMA. At the organization level, click the Configuration icon. Search for and select the Online booking setting from the Online booking settings section. Navigate to Labels > Finishing Services Label.
Click Save.
When your guests book a service for which a finishing service is added, the CMA prompts them to also book the finishing services. Until a finishing service is booked, the main booking is not complete.

Collect feedback on services
Consumer Mobile App allows your guests to rate the services that you provide to them and share the feedback on social media. The guests can rate you for your services, and also leave a comment about what they felt was good or bad about the service. This allows you to collect valuable feedback from your guests and also focus on the improvement areas.
Before You begin
You must configure Feedback for your organization.
You must configure the Request Feedback push notification to send feedback notifications.
There are three ways for you to prompt your guests to give feedback.
Push notifications
Example: Sandra, after finishing her Pedicure at your center, receives a notification asking her to rate the services. She takes the following steps:
Sandra taps on the notification.
The feedback screen appears, which consists of the appointment details and the name and photograph of the stylist (if uploaded).
Sandra rates the service 5 stars as she really liked your service.

Additional options appear asking Sandra what she liked the most.
Alternatively, if Sandra does not like the service and gives only a single star, she can specify the reason why she did not like the service and also leave a comment on how to improve the services.
Note
After submitting the feedback, Sandra cannot change the feedback.

After Sandra gives her feedback, the feedback sharing screen appears where she can share the feedback on social media.

Note
If Sandra taps on any one of the social media icons, she is redirected to the respective app.
Manual
Log in to CMA.
Tap the hamburger icon on the top left to open the menu.
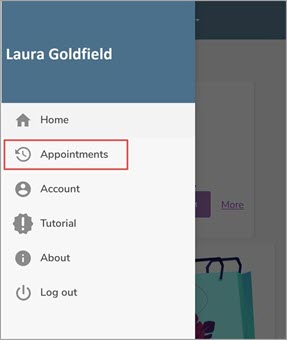
Tap Appointments.
The Upcoming and Past appointment tabs appear.
Tap Past Appointments.

Tap Feedback.
The feedback screen opens and the guest can give her feedback accordingly.
In-app prompt
If Sandra takes the service and does not provide feedback, and if she opens the CMA later, she will see the following screen prompting to provide feedback for the services:
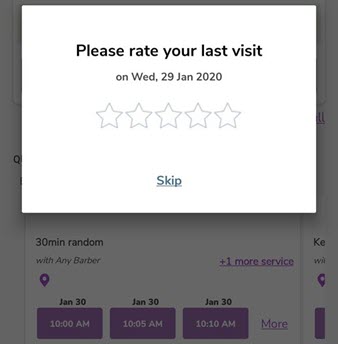
After giving the rating, she is redirected to the main feedback screen. Here she can complete the feedback.
Configure service prerequisites
Medical Spas or Med-Spas are a hybrid between the traditional day spa and a medical clinic. Most of the services in med-spas require medical procedures to be carried out which are usually performed by professional doctors.
These services also require guests to take mandatory consultation services that determine if the guests are allergic to certain procedures or whether the guests have any pre-existing conditions. Such consultations are termed as prerequisite services.
For example, a service such as “Facial Fillers and Botox Injections” will require a basic consultation (prerequisite) to determine the skin type, composition of facial muscles, and existing facial irregularities. This will give clarity to the service providers as to how many botox injections are needed and which parts of the face require such injections.
Zenoti allows you to create such prerequisite services and attach them to the main services. This will ensure prerequisites are met before the main service.
Before you begin
You must have an existing prerequisite service to add it to the main service. Creating a prerequisite service is the same as creating a service in Zenoti.
At the organization level, click Master Data. Navigate to Services > <Service Name (This is the main service for which you want to add a prerequisite service) > Prerequisites.

Configure the following fields:
Service: Enter the name of the prerequisite service to find and add to the main service.
Order: Enter the order of the prerequisite. This is helpful if there are multiple prerequisite services that have to be taken in a sequence. Enter the number 1 for the first prerequisite and so on.
Validity Days: Enter the number of days for which the prerequisite service is valid.
To attach the prerequisite service to the main service, click Add.
Click the General tab.
Locate the Service Prerequisites section.

Configure the following:
Enforce Prerequisites for this Service: Select this checkbox to enforce a prerequisite service while booking the main service. This means that the guests cannot book a main service without booking the prerequisite.
Allow Prerequisites to be Booked with the Service: Select this checkbox to allow the guests to book the prerequisite and the main service together. If you do not select this checkbox, your guests should first book a prerequisite service and then book the main service separately.
Enable Service Validity: Select this checkbox to set an expiry date for the main service. After this date, the guests have to book the prerequisite service and main service again. For example, Judy (guest) is booking a Botox procedure. The Botox procedure can remove wrinkles on her forehead. But this is a temporary solution that will last for just six to seven months. After this, Judy should book another consultation, and based on the results of the consultation, she can book the Botox procedure again.
Click Save.
Turn on the Enable Pre-Requisites setting.
Things to remember
If you assign more than one prerequisite service to a single main service, the guest must book all the prerequisites. The order of the prerequisite booking is based on the order you add the prerequisites in the Prerequisite tab.

If the guest history indicates that she has not taken any prerequisites earlier, the CMA prompts the guest to book the prerequisites. If the guest history indicates that she has taken the prerequisites earlier, the CMA will not prompt the guest to book the prerequisites again.
Note
Enforce Prerequisites for this Service and Allow Prerequisites to be booked with the service should be enabled.
Booking a prerequisite service will require the guests to log in. This allows the CMA to check the guest history of the logged in user and suggest accordingly.
Content to display
At the center level, click the Configuration icon.
Go to the Online Booking > Online booking settings.
Expand the Content to display section, and make the required changes.
If you want to make changes under other sections, go to Settings, Online booking setup, and Integrations.
Click Save.
Configure the following:
Action | Perform these steps |
|---|---|
Apply the online booking settings defined at the organization level to your center | Select the Apply same settings as defined under the organization catalog settings check box. |
Display menu items on webstore | Next to the Menu bar and screens section, select all the menu items that should appear on the Webstore. For example: If an organization with multiple centers wants the option of memberships to be available at some centers only, then the center can opt out of the memberships page by not selecting the Memberships check box in this section. NoteThe menu bar items and the screens depend upon your organization. You can have multiple pages and screens based on your requirement. |
Online booking setup
At the center level, click the Configuration icon
Go to the Online booking > Online booking settings and select Online booking setup.
Make the changes described below.
If you want to make changes under other sections, go to Settings, Content to display, and Integrations.
Click Save.
Online booking setup
Configure the following:
Apply same settings as defined under organization catalog - V2 settings: Select this check box if you want the organization level Webstore v2 settings to be applied on your webstore.
Apply same settings as defined under organization catalog - V3 settings: Select this check box if you want organization level CX v3 settings to be applied on your webstore.
Enable Deals Select this check box to display deals at the center level.
To ensure that the sidebars for deals, series packages, and memberships are visible in the Webstore
At the organization level, click the Configuration icon.
Search and select Online booking and click Webstore v2.
Expand Display settings, enable the relevant menu items, and integrate a payment processor.
Action | Perform these steps |
|---|---|
Enable Queue mode on Webstore for your center | Select the Enable queue checkbox. |
Display a custom header for Webstore | In the Custom header (HTML) field, enter the HTML code for your custom header. |
Display terms and conditions on the guest's end NoteThe terms and conditions appear on the Confirm Booking page of your Webstore. The guest must accept the terms to book a service. | In the Booking page T&Cs field, enter your terms and conditions. |
Display an announcement banner on the top of every page The Announcement banner setting is available only when you enable it at the organization level.
| Select the Enable Announcement Banner check box. |
Display a title for the announcement banner | In the Title box, enter the title. |
Display text on the announcement banner | In the Body field, enter the message or the text of the banner. You can format the text as per your needs. |
Display a label for the membership sidebar | In the Membership side bar label box, enter a label. The sidebar is the plain area on the screen next to the booking and purchase panel that can be used to display text and images to convey information. There are sidebars on services, memberships, packages, and deals screens to convey relevant information. |
Display information on the membership sidebar | In the Membership side bar field, enter a text or an HTML code for the information you want to display. You can also use this field to display promotions and offers. |
Display a label for the series package sidebar | In the Series package side bar label box, enter a label. |
Display information on the series package sidebar | Series package side bar |
Display a label for the services sidebar | In the Side bar label box, enter a label. |
Display information on the services sidebar | In the Side bar field, enter a text or an HTML code for the information you want to display. |
Display a label for the deals sidebar | In the Deals side bar label box, enter a label. |
Display information on the deals sidebar | In the Deals side bar label field, enter a text or an HTML code for the information you want to display. |
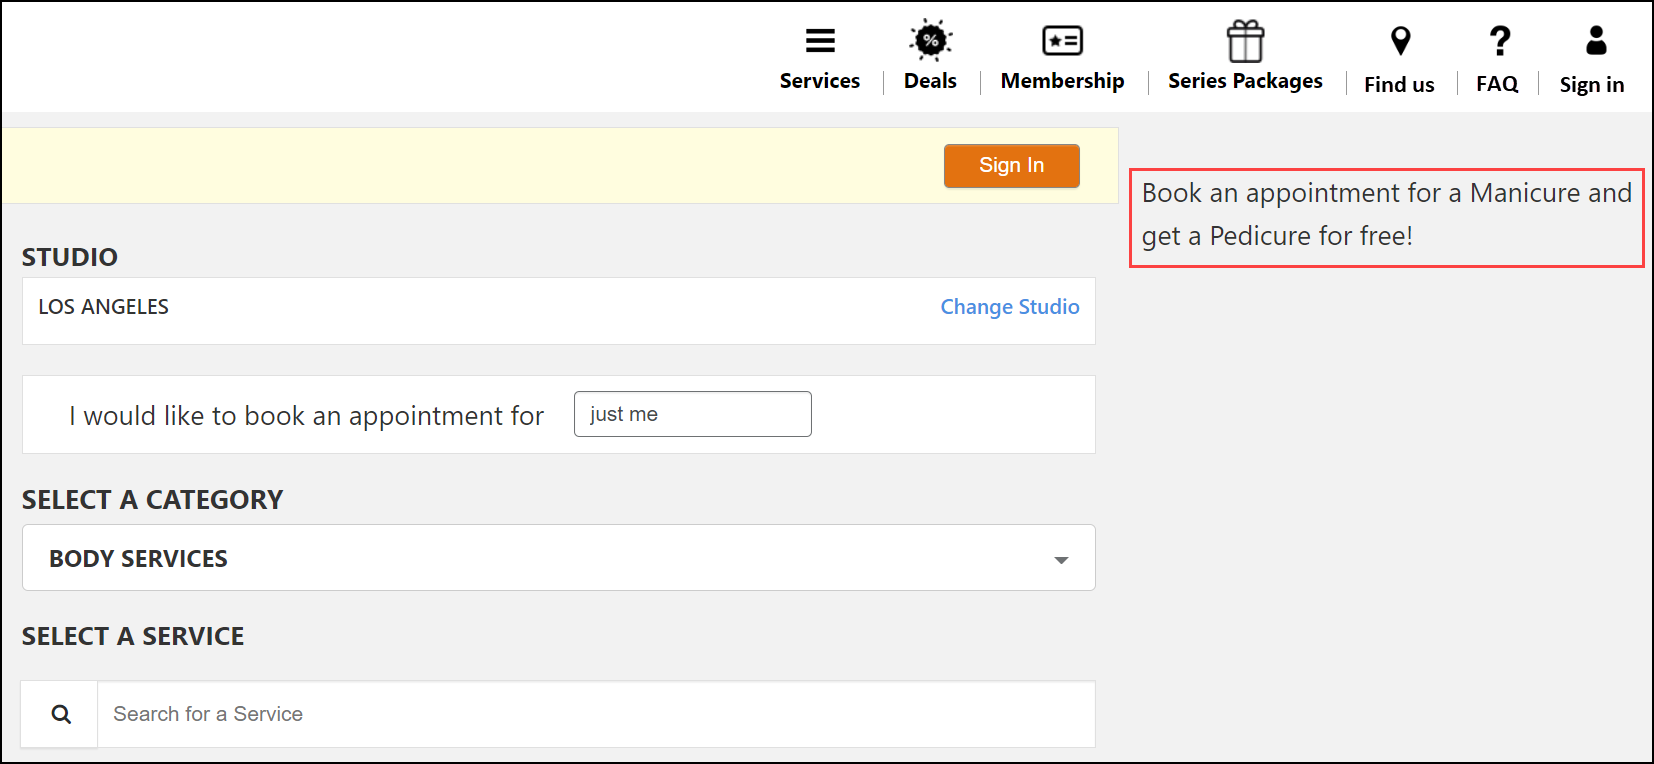 Sidebar - Desktop view. | 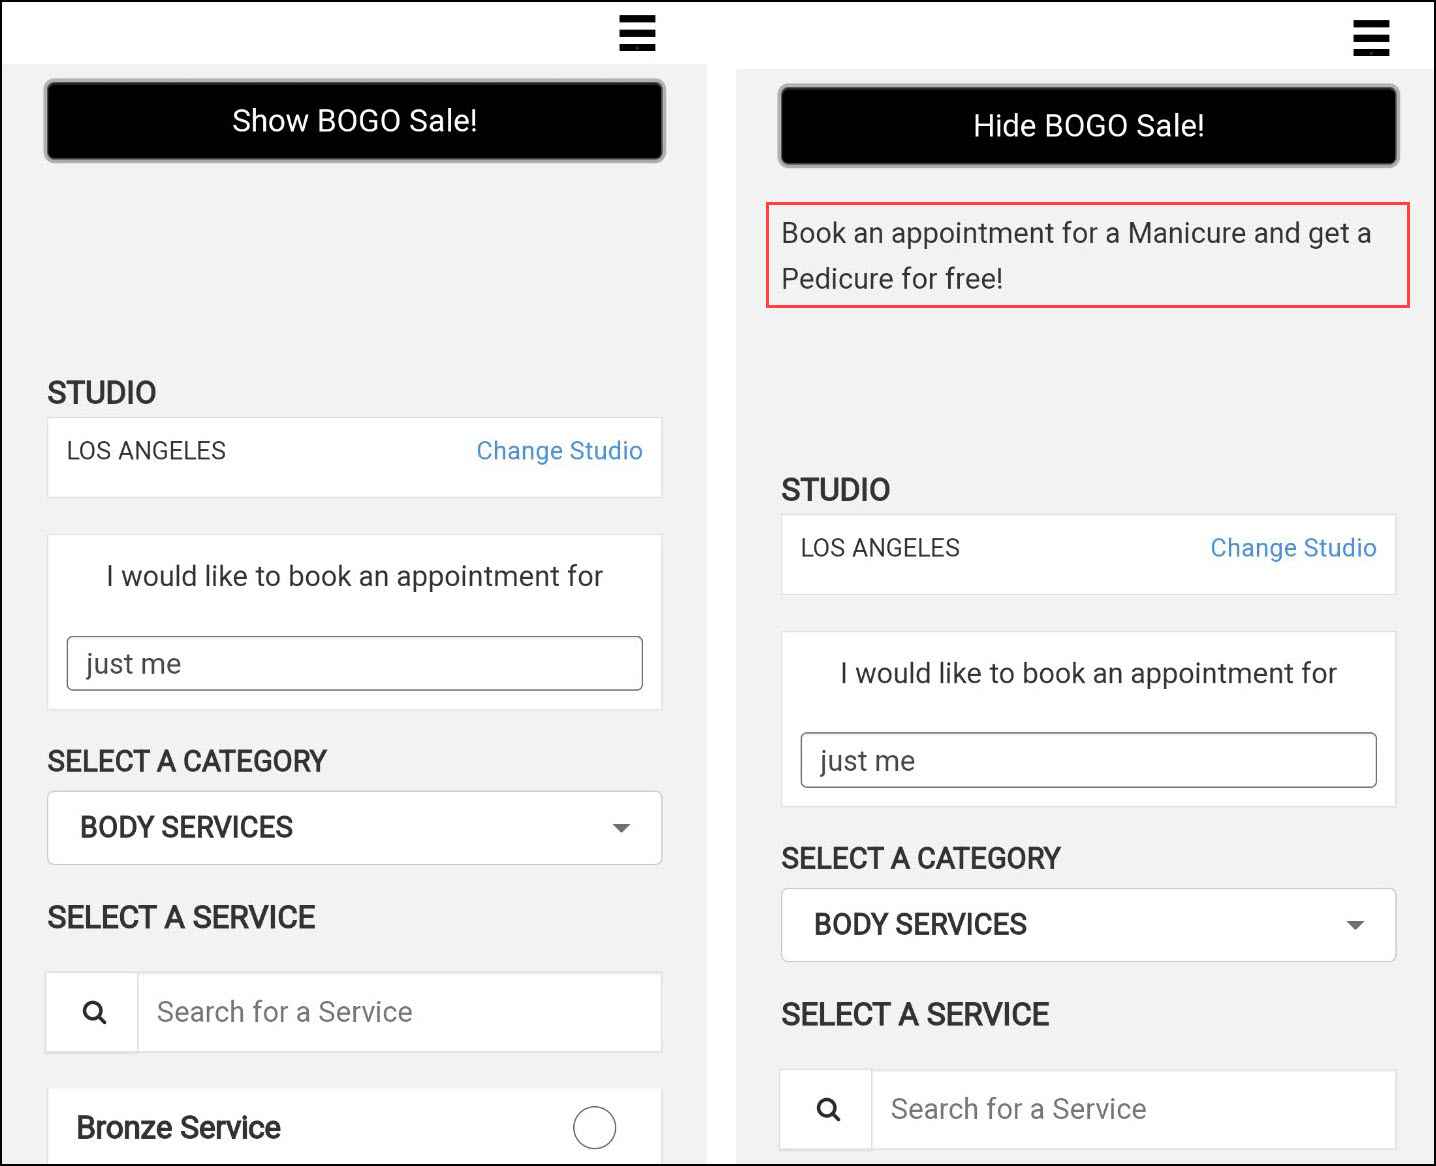 Sidebar - Mobile view. |
Impacts and considerations
Enable Deals setting is available for your center when you enable deals at the organization level.
You can also use the sidebar fields to display promotions and offers. To display or hide offers for the selected sidebar, enter text in the show/hide fields.
The show/hide feature appears only while browsing a website from a mobile device. It appears when the side banner contains information while setting up your webstore.
To check how your sidebar promotion appears online, click the magnifying glass icon on the right of the sidebar text field. This displays the preview of your sidebar on your online store.
Action | Perform these steps |
|---|---|
Capture the guest's consent each time their card on file is used | Select the Enable user consent for card on file check box. |
Display terms for taking the user consent for saving the card on file | Enable the User consent for card on file check box. Example: I understand that my card details will be saved and used in accordance with the cancellation and no-show policy. |
Display a disclaimer on the screen when a service with a Deposit fee is selected | Select the Enable deposits disclaimer check box and in the Deposits disclaimer field, enter the text that displays when a service with a Deposit fee is selected. |
Display cancellation policy on webstore | In the Cancellation policy field, enter the text for cancellation policy. If your business allows the cancellation of appointments on the Webstore, you can display a disclaimer text to your guests stating the terms and conditions for the appointment cancellation. |
Collect deposits from guests at center level | NoticeThese settings are available only if deposits are enabled at the organization level. In large organizations, when different centers have different target guests and payment rules, collection of deposits must also cater to the center's requirements. You can choose if you want to follow the organization settings to collect deposits by selecting the Apply organization settings or configure center-specific settings by clearing the Apply organization settings checkbox and selecting the Enable deposits.
|
Setting name | Description |
|---|---|
Online booking | |
Display an announcement banner on top of every page | Select the Enable announcement banner check box. NoteThe Announcement banner setting is available only when you enable it at the organization level.
|
Display a title for the announcement banner | In the Title box, enter the title. |
Set a background color to your announcement banner | In the Background color field, select a color or enter the color code in available formats (RGB, HSL, and Hex) For example, you can set the color by selecting the color from the panel or set the code in color codes, like entering RGB(128,128,128), HSL(0°, 0%, 50.2%), or #808080 for gray. |
Set a text color to your announcement banner | In the Foreground color field, select a color or enter the color code in available formats (RGB, HSL, and Hex) For example, you can set the color by selecting the color from the panel or set the code in color codes, like entering RGB(0,0,0), HSL(0°, 0%, 0%), or #000000 for black. |
Display text on the announcement banner | In the Body field, enter the message or the text of the banner. You can format the text as per your needs. |
Branding | |
Set different colors for light and dark mode 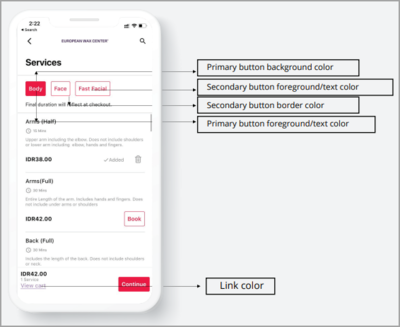 | Under the Colors section, select appropriate colors for light and dark modes. |
| Under the Brand logos/ Symbols/ Typefaces section:
|
Homescreen | |
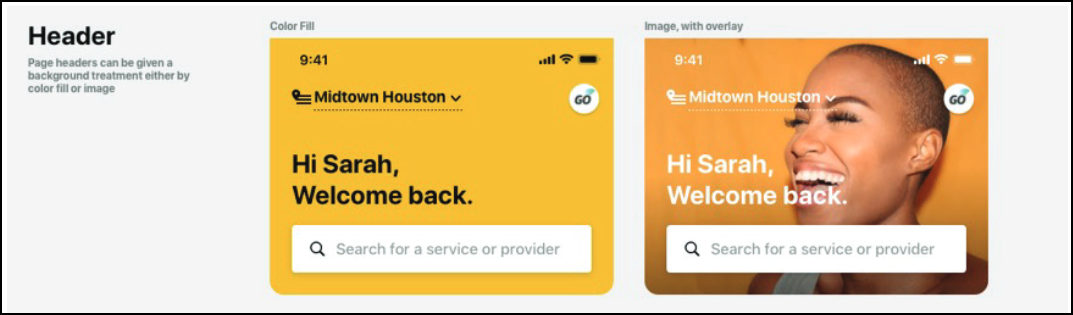 | Under the Header Section
|
Display announcements on the app | To feature your important announcements, use the Spotlight section.
|
Add your shops to the app | Under the Shop section, perform the following steps
|
General | |
| Under the Appointments section:
|
User profile | |
Allow users to use the app in dark mode | Switch on the Enable dark mode setting. |
Labels | |
Display the basic details of your business on the app | In the About us field, enter a description of the values, culture, and vision of your business. |
