eGHL integration
Note
Zenoti supports eGHL integration in Southeast Asia - Thailand, Malaysia, Indonesia, and the Philippines.
To complete eGHL integration with Zenoti, you will need an eGHL account. If you do not have one, contact eGHL.
You can choose to configure eGHL for your entire organization or for specific centers.
Note that if you configure eGHL at the center level, the center settings override the organization settings.
If you are configuring eGHL at the organization level, from the organization level, click the Configuration > Payments > Settings.
If you are configuring eGHL at the center level, from the center level, click the Configuration icon and navigate to Payments > Settings.
The New Payment Setup screen opens. Recommended processors for your location appear.
Locate eGHL payment processor and click Setup.
The eGHL configuration screen opens.
Enter your Merchant ID, Password, and Provider URL.
Click Save.
The account information is saved.
Configure transaction types
Configure the following settings:
Online: Select this checkbox to allow online transactions for Webstore and CMA
on eGHL.
You can now collect card payments from the Webstore.
Process card payments on Webstore after configuring eGHL
After you configure eGHL, guests can make card payments on Webstore as follows:
Guests log in to the Webstore, make a purchase, and come to the Payments Screen.
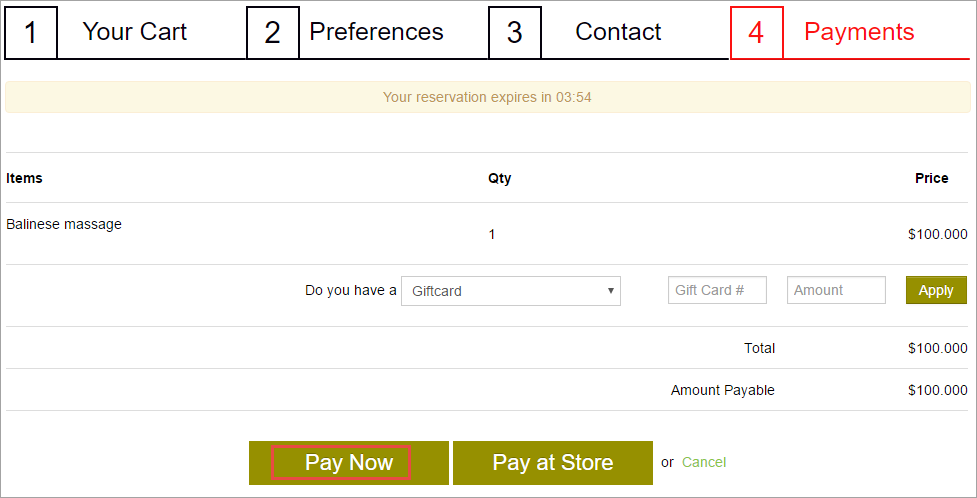
Guests click Pay Now

A window to enter the card details appears.
Guests enter their card details and click Submit Payment.
The transaction details are updated in Zenoti.