Airpay (India)
Overview
Airpay specializes in providing multi-channel payment support (both Online and POS). With Airpay integration, you can allow your guests to make quick in-store and online payments
Note
Airpay is supported only in India.
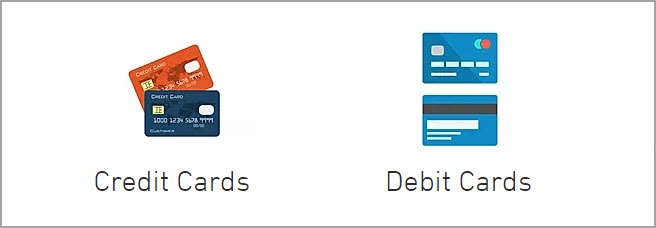
Airpay supports the following in-store payment methods:
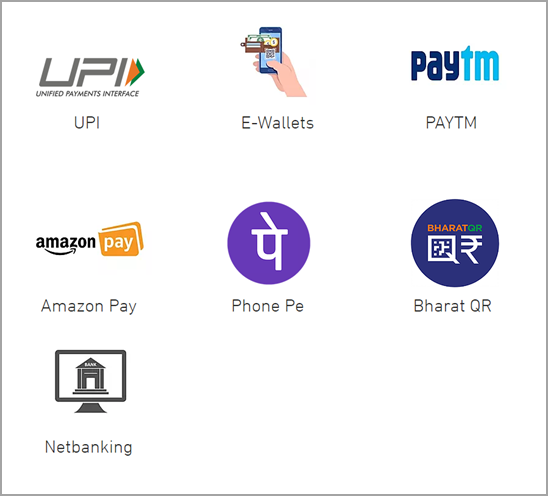
Airpay supports the following online payment methods:
Configure Airpay in Zenoti
Airpay is an integrated payment processor that specializes in providing multi-channel payment support.
This article lists the steps for configuring Airpay in Zenoti.
Note
Airpay is supported only in India.
Before you proceed to configure Airpay for your organization or center in Zenoti, you must create an account with Airpay and have the following details ready:
Airpay Merchant Id
Airpay Secret Key
Airpay Username
Airpay Password
At the organization or the center level, click the Configuration icon.
Search for and select Payment processor onboarding.
Locate Airpay and click Setup.

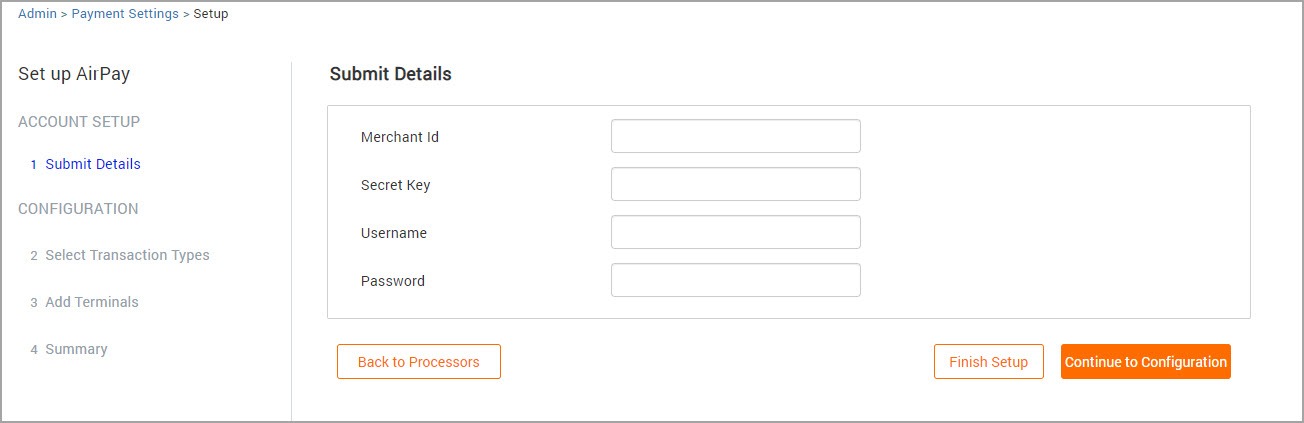
Enter the following information:
Note
Airpay will provide the below information.
Merchant Id: Enter your Airpay merchant id. This is generated by Airpay when you create your Airpay account.
Secret Key: Enter your Airpay secret key.
Username: Enter your Airpay username.
Password: Enter your Airpay password.
Click Continue to Configuration to proceed with setting up payment options, transaction types, and terminals. If you wish to configure these settings later, click Finish Setup.
Configure transaction types in Zenoti
After you configure Airpay in Zenoti, you must configure the transaction types. These transaction types allow you to collect payments through various modes such as Online and Terminal transactions.
In this article, you will learn how you can configure the transaction types for Airpay in Zenoti.
At the organization or the center level, click the Configuration icon.
Search for and select Payment processor onboarding
Select Transaction Types.
In the Airpay column, select the types of transactions you want to enable.
The available transaction types are:
Terminal: To enable terminal transactions for Airpay.
Note
You must also set up the terminal PAX D200 for collecting payments.
Online: To enable online transactions on Webstore.
Note
Airpay currently does not support CMA.
Click Save and Finish.
You have successfully configured the transaction types for Airpay in Zenoti.
Configure WiFi on PAX D200 terminal
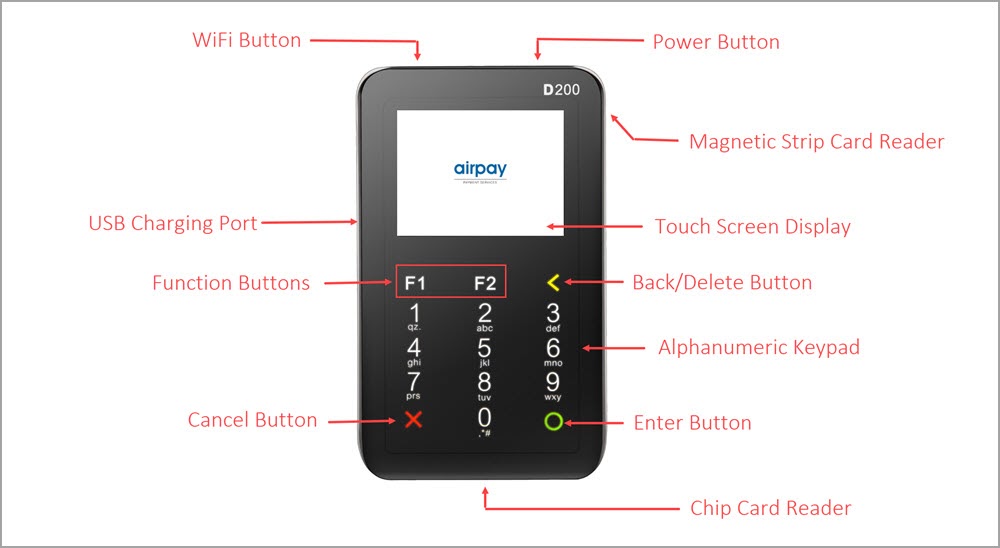
When you receive the terminal PAX D200, you must connect the terminal to your WiFi network to collect payments and to process transactions. This article lists the steps for configuring WiFi on the device.
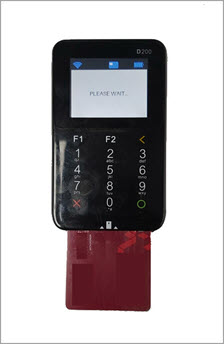
Refer to the following image for a quick reference of the device:
Turn on the device.The device boots up and after the boot up will display the following message on the screen:
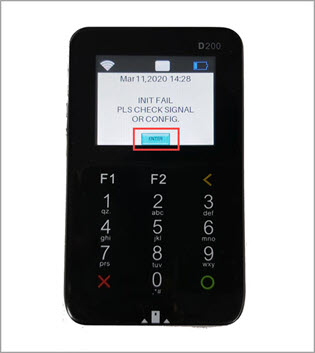
Note
This message appears because the device is not connected to a WiFi network.
Tap ENTER on the touchscreen.
The device will now display the home screen.
Tap Func.
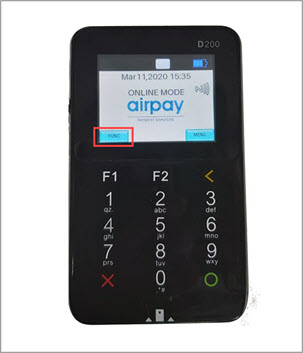
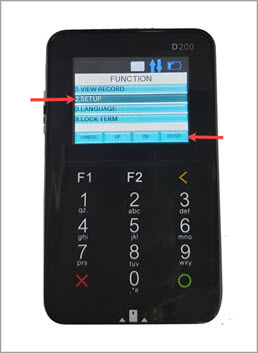
The Function screen appears
Tap Setup and then tap Enter.
The device will prompt you to enter the Bank Password.
Note
The Bank Password will be provided by Airpay.

The Term Setup screen appears.
Tap Comm Para in the Term Setup screen and tap Enter.

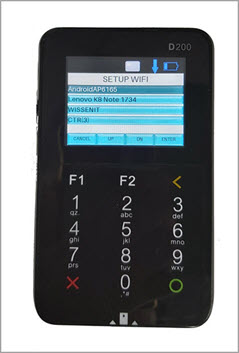
Tap WiFi and press Enter.
The device will scan for available WiFi networks and display the same.
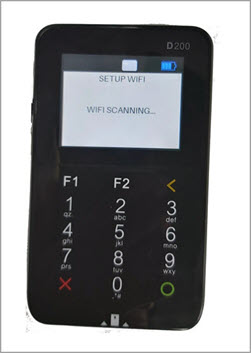
Select your WiFi network and press Enter.
The device will prompt you to enter the WiFi password.
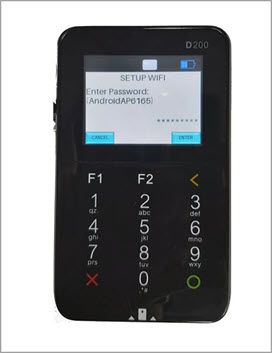
Enter the password of the WiFi network and press Enter.
The device will connect to the selected WiFi network and display the same.
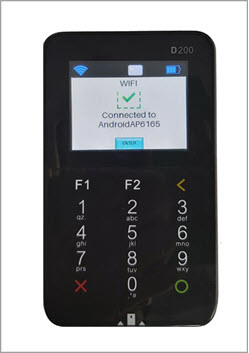
Tap Enter to return to the home screen.
You have successfully configured WiFi on PAX D200.
Add PAX D200 as a terminal in Zenoti
After you configure Airpay for your organization or center, you must add the card reader PAX D200 as a terminal in Zenoti. This allows you to use the card reader for collecting in-store payments.
At the organization or the center level, click the Configuration icon.
Search for and select Payment processor onboarding
Expand Airpay
The Airpay Configuration page appears.
In the Terminal Settings section enter the following details:

Terminal Name: Enter the name of your choice for the terminal. This name will reflect on the POS screen in Zenoti.
Serial Number: Enter the serial number of the terminal. You can find the serial number of the terminal on the back of the device. It will be denoted by S/N.
Unique Identifier: Enter a unique id for the device.
Click Save.
You have successfully added the device PAX D200 as a terminal in Zenoti.
Understand the payment methods
Airpay gives you the flexibility to accept payments from multiple channels. These options make it easier for your guests to pay for the services.
In this article, you will learn about the payment methods supported in Airpay.
In addition to credit cards, debit cards, and internet banking, Airpay supports the following:
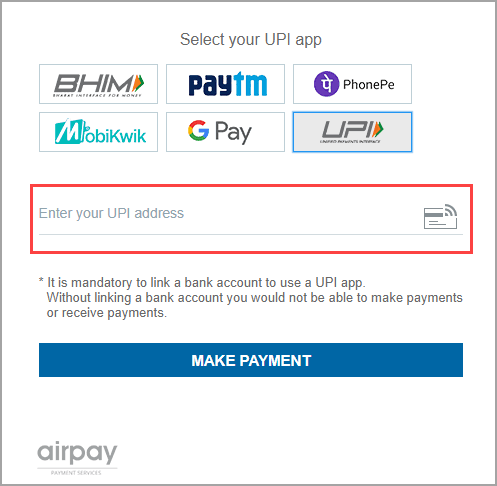
UPI: Unified Payments Interface or UPI allows your guests to link multiple bank accounts to a single UPI account for managing payments. Guests must enter the UPI address or the UPI ID which is typically <username>@.<bankname> :
Note
Your guests can also use other UPI based apps such as PhonePe, Google Pay, MobiKwik, Jio Money, and OlaMoney to make payments.
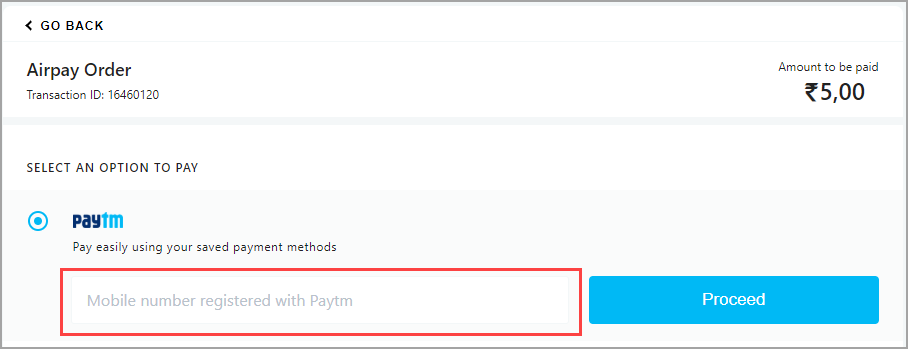
PAYTM: PAYTM is a private payments bank, that allows your guests to link their bank accounts for making payments. PAYTM also offers UPI and wallet services. : Guests must enter their PAYTM registered mobile number to initiate the payment.
Note
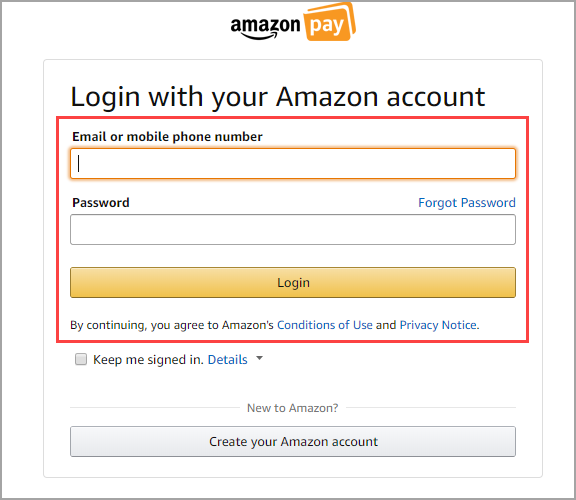
Amazon Pay requires your guests to have an active Amazon account with sufficient pay balance.
Amazon Pay: Amazon Pay is an online payment service from Amazon.
Note
Amazon Pay requires your guests to have an active Amazon account with sufficient pay balance.
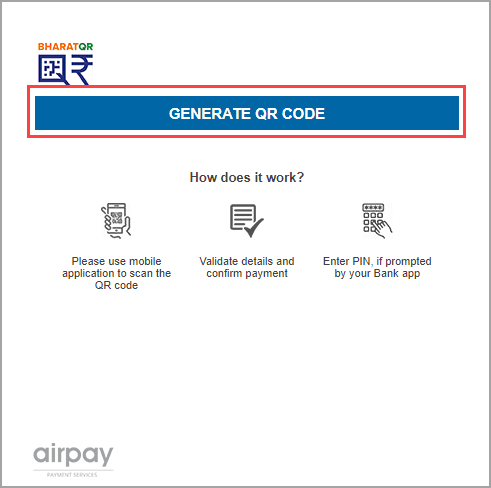
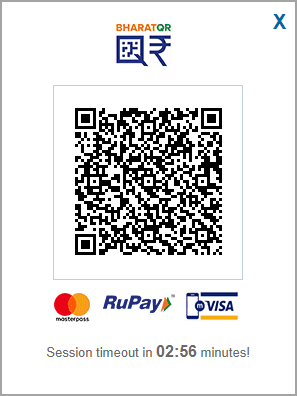
BharatQR: BharatQR is a P2M (Person to Merchant) mobile payment system that is based on the QR codes. When initiating the payment via BharatQR, your guests will see an option to generate a QR code. This code includes details of your bank account. Your guests will scan the QR code by using their bank app or any UPI app, validate the details, and make the payment.
A sample image of the QR Code:
Perform a transaction on the PAX D200 card reader
This article lists the steps you must take to collect payments from your guests by using the PAX D200 card reader.
Ensure that you have added the PAX D200 card reader as a terminal in Zenoti.
Ensure that you have configured the WiFI on the PAX D200 card reader.
Open Appointment Book.
Open the context menu for a finished appointment and click Take Payment.
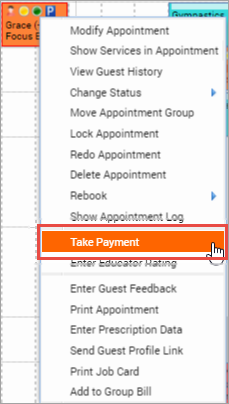
The POS screen opens. The guest and the service details are auto-populated.
On the Collect Payment screen, click Credit/Debit.
Ensure that you are selecting the appropriate terminal. Click Change to view all the listed terminals and select the appropriate terminal.
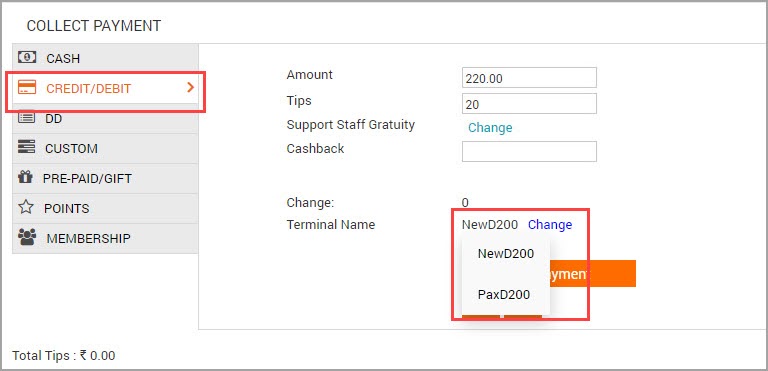
Click Add Payment.
The Online Payment screen appears and prompts you to insert/swipe the card on the PAX D200 terminal.
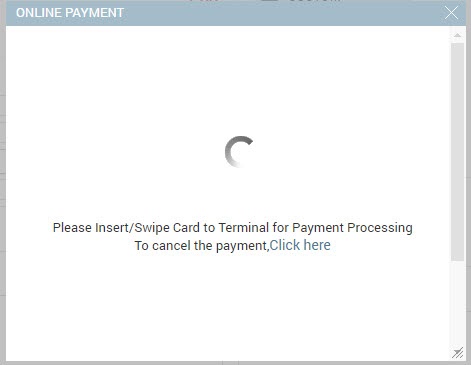
Insert or Swipe the card.
The terminal will read the card reader and receive the payment information. The terminal then prompts you to enter the PIN for the card.
Note
If you press the Cancel button during this process, the sale information is cleared and the card reader displays the home screen. You must click Add Payment in Zenoti again to initiate the sale.
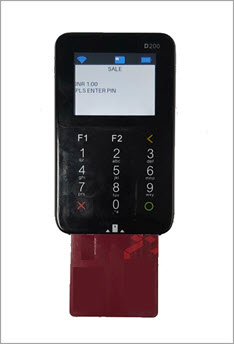
Use the keypad to enter the PIN.
Press the Enter button (with green circle on the keypad), to submit the PIN.
The sale is done and the device will prompt you to send the invoice to the guest.

Tap Enter on the touchscreen.
The invoice appears on the POS screen in Zenoti.
To close the invoice, click the desired Close button (Print or Email).
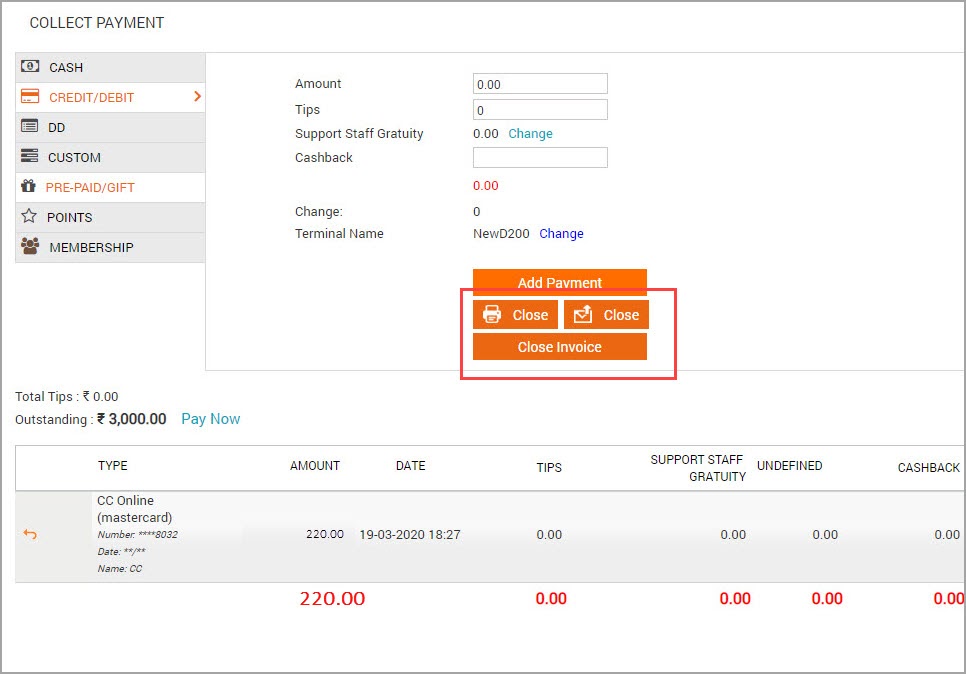
You have successfully collected the payment using the card reader PAX D200 card reader and the Collect Payment screen will reflect the received amount.
Collect payment from the guests on Webstore
After you configure Airpay for your center in Zenoti, you are ready to accept payments from your guests.
In this article, you will learn the steps taken by your guests for making payments on the Webstore.
Consider the following example:
Teresa is an existing guest and wants to purchase a gift card on your Webstore. She is purchasing the gift card from the New Delhi center and this center has Airpay configured.
She will take the following steps:
Navigates to the Webstore and logs in to her profile.
On the home screen, she clicks the Gift Card option.
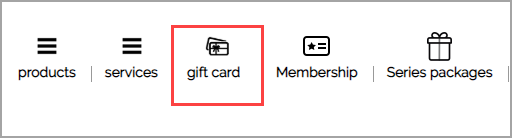
The Gift Card page of the Webstore opens.
She selects the Amount gift card and selects the Custom Amount option.
In the Amount field, she enters 100.00.
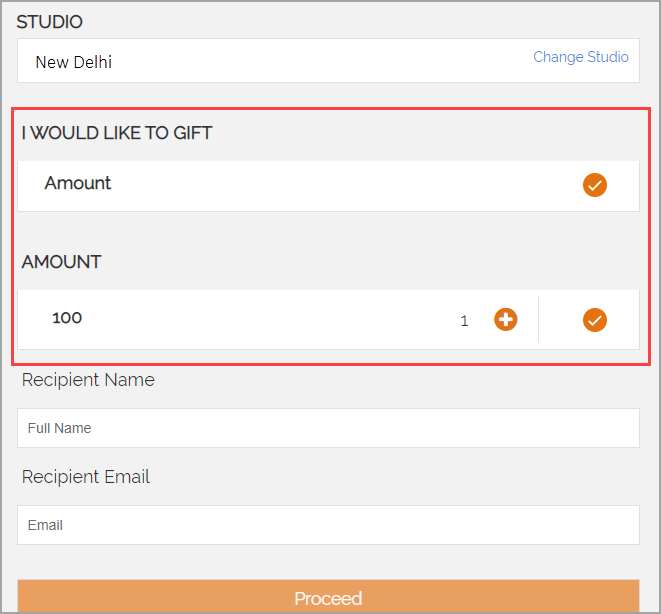
She enters the following details:
Recipient Name
Recipient Email
She clicks Proceed.
The Webstore prompts her to select an occasion.
She selects Anniversary.
She enters a personal message that will appear on the gift card.
From the Deliver Date options, she selects Send Now.
The gift card Summary appears.
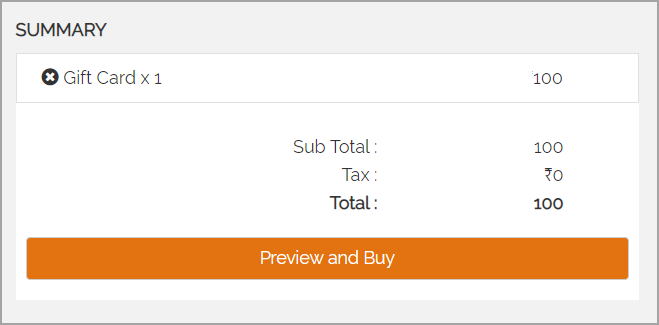
She clicks Preview and Buy.
The Airpay email/phone authentication prompt appears.
Teresa will be required to enter her email/phone number for authentication purposes.
The Airpay payment options appear.
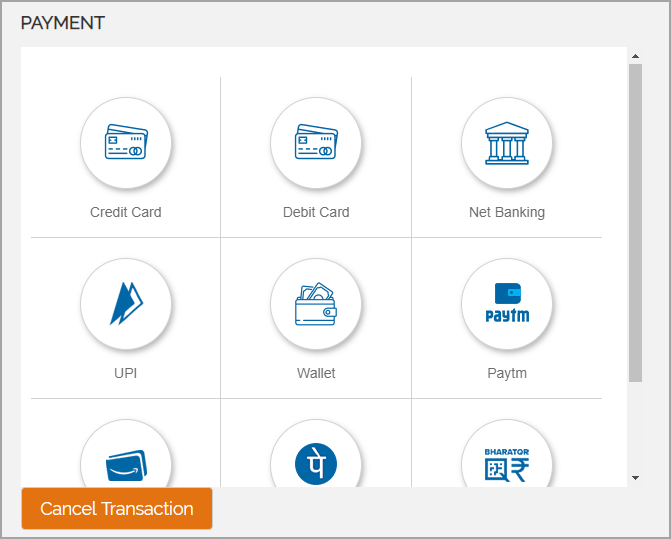
She uses any one of the following payment methods to make the payment:
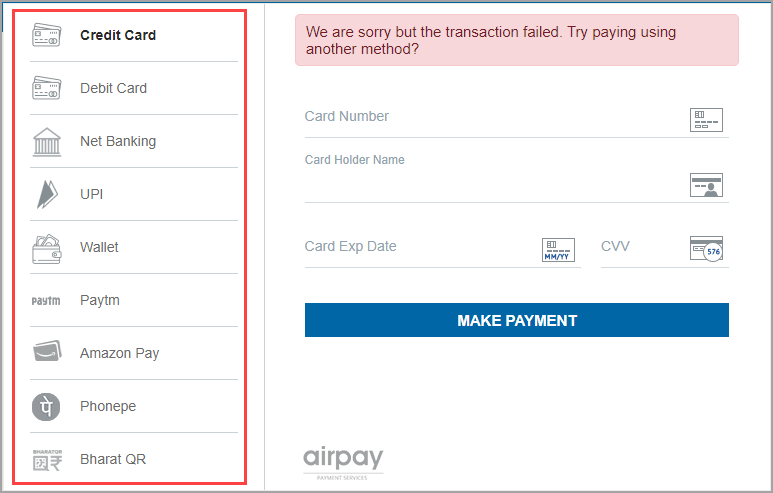
Credit Card: Enter the card details such as Card Number, Expiry Date, and CVV/CVC to continue with the transaction.
Debit Card: Enter the card details such as Card Number, Expiry Date, and CVV/CVC to continue with the transaction.
Net Banking: Select a bank from the list and enter the net banking username and password to continue.
UPI: Enter the UPI Id or select from a list of UPI enabled apps such as Google Pay, and MobiKwik.
Wallet: Select any of the popular wallets such as Jio Money and OlaMoney. Enter the phone number associated with the wallet to continue with the transaction.
PAYTM: Enter the PAYTM registered phone number to log in and continue with the payment.
Amazon Pay: Enter the Amazon credentials to log in to Amazon Pay and continue with the transaction.
PhonePe: Enter the registered phone number to log in and continue with the payment.
BharatQR: Click Generate QR Code and scan the code using the mobile phone. Validate the details and proceed with the payment.
Note
If the payment fails for any of the above methods, a prompt appears asking Teresa to either retry or select an alternative payment method.
The payment is successful and she receives an invoice stating she has purchased a gift card for $100.00.
Note
All of the payment methods require Teresa to authorize the payment either via a One Time Password (OTP) or through an online secure code.
Process a refund
There may be cases when after a successful transaction, the guests may request a refund, due to reasons aplenty.
Airpay allows you to refund any successful transaction. Such a refund may take three to five days for the amount to be deposited into the bank account of the guest.
There may be two scenarios when a refund is requested:
Refund after the day of purchase
Refund on the day of purchase
You must initiate the refund process in Zenoti if you are refunding after the day of purchase. It may take around 3 - 5 days for the amount to be credited to the guest’s account.
Airpay voids a transaction that is refunded on the same day.
Scroll down to the end of the article to know the differences between refund and void.
Note
If you are processing the refund on a closed invoice, first open the invoice and then proceed to refund. If the invoice is open, continue with the following steps:
On the POS screen, click the refund icon.

The Transaction Details screen opens.
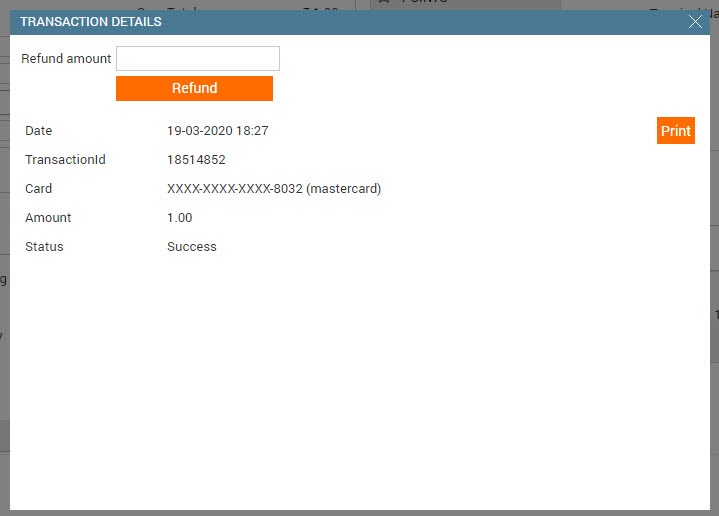
In the Refund Amount field, enter the amount you want to refund.
Click Refund.
You will see the following message on the Transaction Details screen. "Please press number 1 key on the Airpay terminal and follow the instructions to void the transaction. To cancel the void press here."
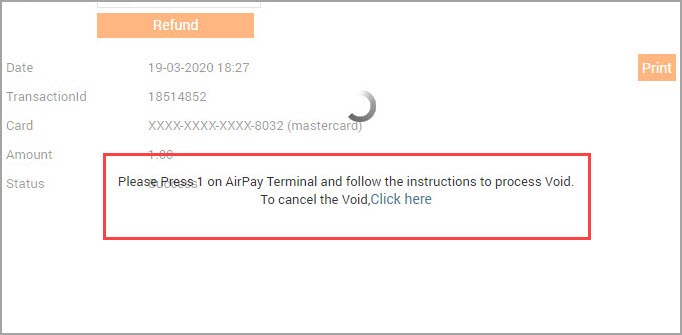
On the PAX D200 terminal, press the number 1 key.
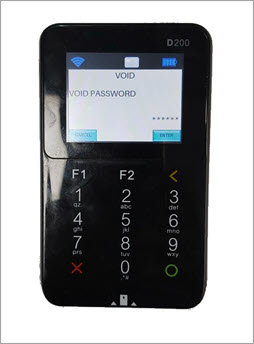
The device prompts you to enter the Void password.
Note
The void password will be provided by Airpay.
Enter the void password.
The device displays the trace number of the transaction.
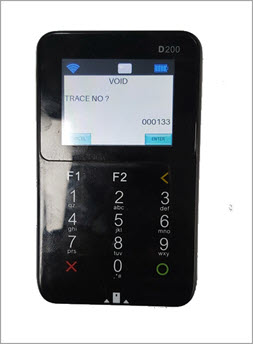
To confirm tap Enter on the device.
The device displays the transaction amount.
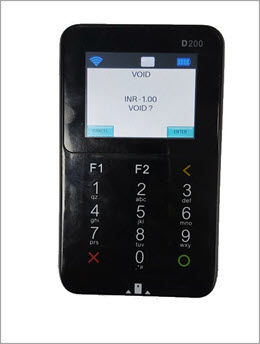
To confirm the amount, tap Enter on the device.
The device processes the transaction and displays the message "VOID TXN ACCEPTED".
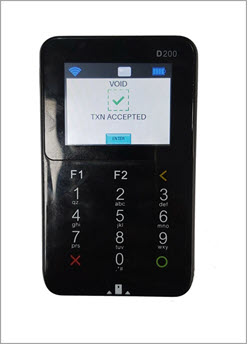
To return to the home screen, tap Enter.
The transaction is voided and the amount will be refunded within 3 to 5 days.
Refund vs Void
The difference between refund and void boils down to whether the transaction is settled or not. Let us look at the definitions of Refund and Void.
Refund: A transaction that is canceled after the settlement is called a Refunded transaction.
Void: A transaction that is canceled before the settlement is called a Voided transaction. In other words, only unsettled transactions can be voided.
For a better perspective, check the definition of a settled transaction below:
Settled: After payment is initiated, the bank authorizes the transaction and verifies that the account holder has sufficient balance. If there is sufficient balance, the amount is deducted from the account but is not transferred to the merchant. The transfer is done at the end of the day during the bulk processing.
Note
Once a transaction is settled, it can be refunded or partially refunded.
View the Settlement report on AirPay
The Settlement Report of Airpay displays a list of your daily transactions (Online and POS) along with important details such as deposit amount, deposit date, and transaction fees.
This will allow you to reconcile your collections with the bank deposits.
For effective reconciliation of collections and payouts, Zenoti recommends you to compare the Zenoti Collections - Online Transactions report with the Airpay Settlement Report for each of your centers. This gives you a complete picture of your total collections versus total deposits in the bank account.
As a secondary validation, you can also compare your bank statement with the Airpay Settlement Report and check if the correct amounts are deposited.
Note
Transactions processed in Airpay are not immediately deposited to your bank account. Airpay usually takes two working days for depositing the collected amount to your bank account. For example, if you process a transaction for ₹200/- on March 10, the amount will be deposited on March 12th.
Navigate to the URL https://ma.airpay.co.in/
The Airpay MA Panel login screen appears.
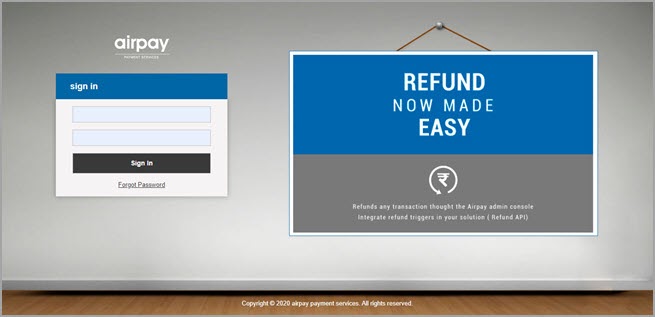
Enter your username and password.
The MA Panel home screen appears.
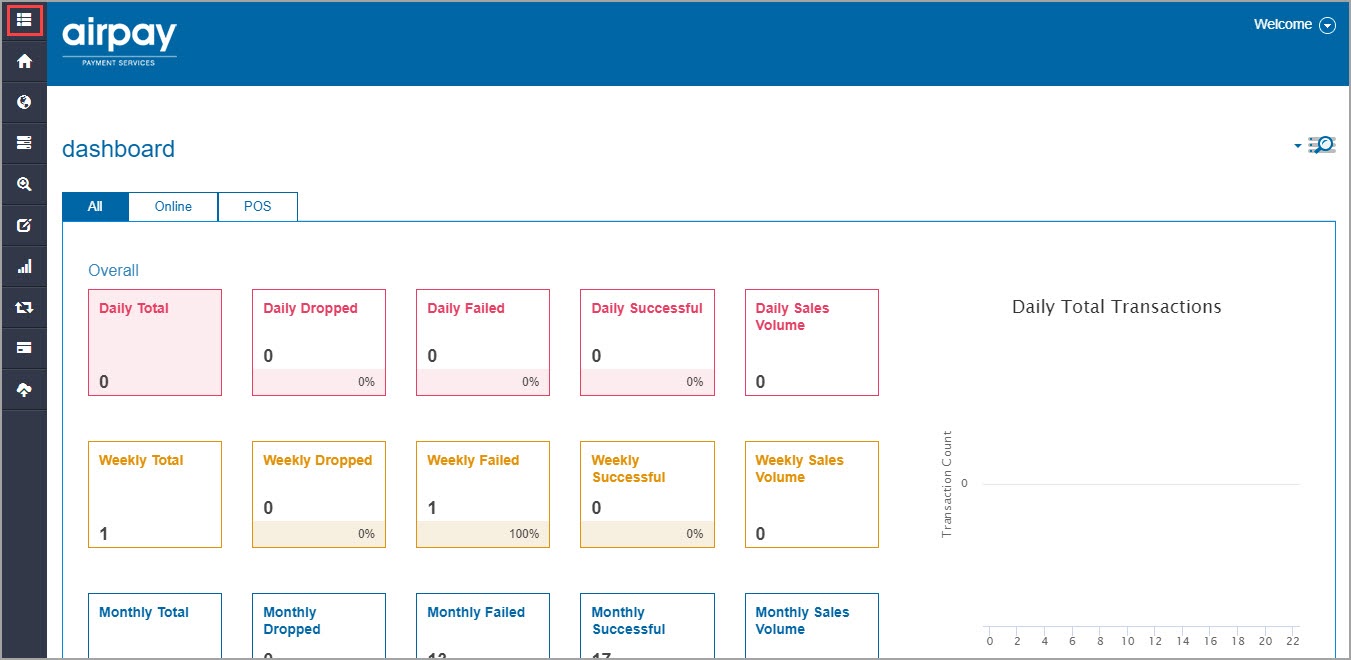
On the left panel, click the Menu icon.
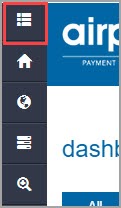
The menu opens.
For the Report menu item, click the arrow icon.
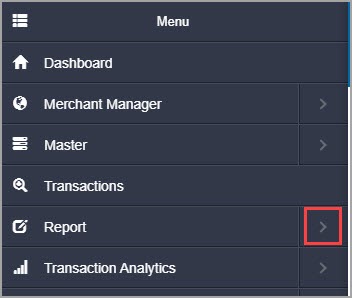
The MA Panel will display the following options:
Merchant Report
Top Banks
Top Cards
Top Channels
Transaction Settlement
Click Transaction Settlement.
The Transaction Settlement report opens.
Specify the From Date and the To Date.
Note
The date range should not be more than 62 days.
Click Submit to view the report.
The Settlement Report appears.
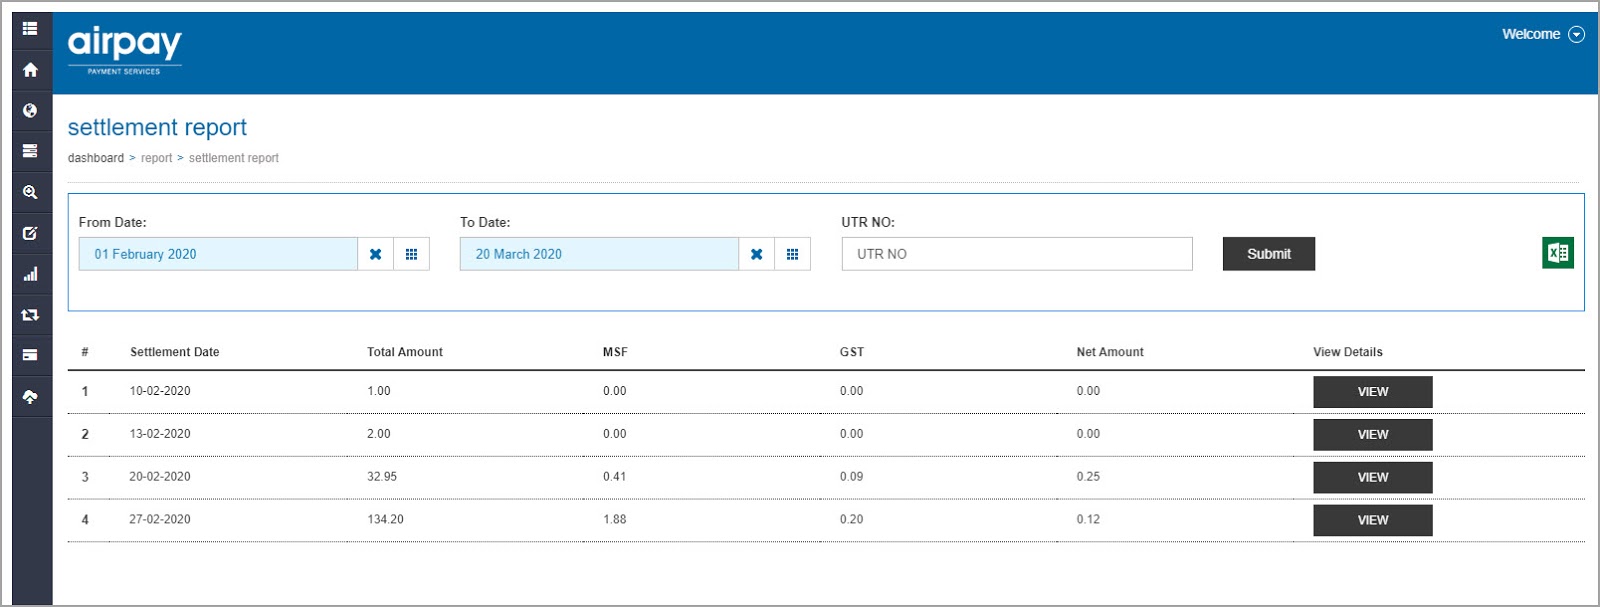
To view more details , click View. The Transaction Wise Merchant Settlement Report appears and displays a day-wise summary of the transactions along with the following information:
Transaction Date/Time: The transaction date and time.
Airpay ID: The Airpay id of the merchant.
Merchant Name: The name of the merchant.
Customer Name: The name of the guest.
Customer Email: The email address of the guest.
Customer Contact Number: The phone number of the guest.
Bank: The name of the bank.
Card Number: The card number of the guest. The card number will be crossed out.
Payment Type: The type of payment done by the guest. Whether on POS or Online.
Transaction Amount: The amount of the transaction.
Transaction Currency: The currency of the transaction.
Net Payable: The net amount payable to the merchant after the deduction of fees.
Payout Currency: The currency in which the payout is made.
Conversion Rate: The conversion rate if the collection currency and the payout currency are different.
Payout Date: The date when the payout was deposited to the merchant’s bank account.