Manage work tasks
This article explains how to create and assign specific work tasks to employees so they can track training, guest follow-ups, or other non-service responsibilities.
Overview
Work tasks help employees stay accountable for activities outside of services, like following up with no-show guests or training new hires. Once enabled, managers can assign work task types by center and role. Providers can then check in to these tasks and track completion.
Key terms
Work Task: A non-service responsibility such as calling guests or conducting a training.
Work Task Type: A category that defines the kind of task assigned.
Prerequisites
Work tasks must be enabled at the organization level before assigning them to employees.
You must have the Add and Edit permissions for Work Task enabled for the Administrator role.
At the organization level, click the Configurations icon.
Search for and select the Work Task Types setting from the Employee section.
Note
Ensure the administrator has the Add and Edit permissions for Work Task enabled.
Ensure that the organization-level setting, Enable Work Tasks is enabled.
Click Add.
In the General tab, enter a Name, Code, and Description for the work task type.
Name: Trainer - New Hires
Code: TR100
Description: Employee takes training sessions for new hires.
In the Centers tab, select the names of the centers where these work task types should be available.
Click Finish.
Points to note after creating a work task
In the General tab, you will find that by default, the work task type is active (the Active check box is selected).
Tip
Clear this checkbox if you don’t want a particular work task type to appear in the selected Center/Employee profile.
In the Centers tab, you can see the names of centers you selected earlier where this Work Task Type is active.
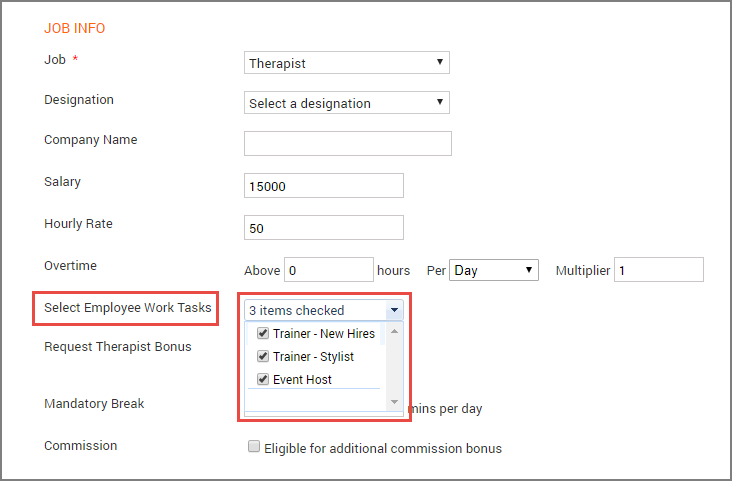
In the Employees tab, you will see that no employees are listed. This is because administrators need to update each employee’s profile with the work tasks that they can perform from individual employee profiles (Center level: Employee > Employees > Name of the employee > General tab > Job Info section > Select Employee Work Tasks).
Important
Users with appropriate permissions can check-in and checkout employees for these work tasks only while editing a check-in and not during actual check-in (from Employee Check-In).
Considerations
Work tasks can only be checked in through the Edit Check-In screen, not during real-time check-in.
You must assign task types manually in each employee’s profile for them to appear in check-in options.
Only 1 task type can be active per employee check-in.
Enable commission comparison for selected work tasks
Some businesses pay commission on certain tasks — typically service-provider work — while keeping other tasks, such as reception or inventory, strictly hourly. When you enable commission comparison at the work task level, Zenoti compares commission against straight-time hourly earnings only for the tasks you choose. All other tasks are always paid hourly.
This is useful, for example, at a salon where stylists earn commission on services but also spend part of their week at the front desk. The stylist's commission is compared against their hourly earnings for service tasks only. Their front-desk hours are always paid at the front-desk hourly rate.
The setting is available only when:
Work tasks are enabled at the organization level.
The setting Manager and employees can select work tasks at check-in, and manager can assign pay rate by work task is turned on.
Required roles: Any role with access to the Administrator mode
Required permissions: None To enable the organization-level setting:
At the organization level, navigate to Settings.
Search for and switch on Allow commission comparison based on selected work tasks.
Click Save.
After you enable the setting, a new column called Commission comparison eligibility appears on the Centers tab of each work task. Use this column to mark which centers should treat the task as commission-eligible.
At the organization level, click the Master data icon.
Navigate to Employee > Work tasks.
Click the name of the work task you want to edit to open Work Task Setup.
Go to the Centers tab.
In the Commission comparison eligibility column, select the checkbox for each center where the task should be eligible. Use the header checkbox to select or deselect all centers at once.
Click Save.
Note
When the organization level setting is on, at least one work task must be marked commission-eligible at each center. Zenoti shows a validation warning if no work tasks are selected.