Manage SMS Broadcasts in HyperConnect
This article explains how to send, track, and manage SMS broadcasts using HyperConnect. You will learn about broadcast types, how to initiate messages, monitor delivery statuses, and ensure guests receive timely notifications for key updates.
Overview
HyperConnect's SMS Broadcasts feature allows businesses to send targeted messages to groups of guests regarding appointment confirmations, changes in operating hours, or provider availability. The tool helps reduce cancellations, improve guest communication, and streamline last-minute updates.
Key Terms
Broadcast Type: The reason for the message (Example: Provider Unavailability).
Eligible Guests: Guests who meet the criteria and have opted in to receive SMS.
Delivery Status: Real-time status of SMS delivery (Queued, Submitted, Delivered, Failed).
Types of SMS Broadcasts
Unconfirmed Appointments: Ensure guests confirm their appointments to reduce last-minute cancellations and empty slots.
Change in Center Hours: Quickly notify all users when your center needs to close for any reason or if there’s a change in operating hours.
Provider Unavailability: Inform guests when a service provider is unavailable so they can reschedule accordingly.
View SMS Broadcasts
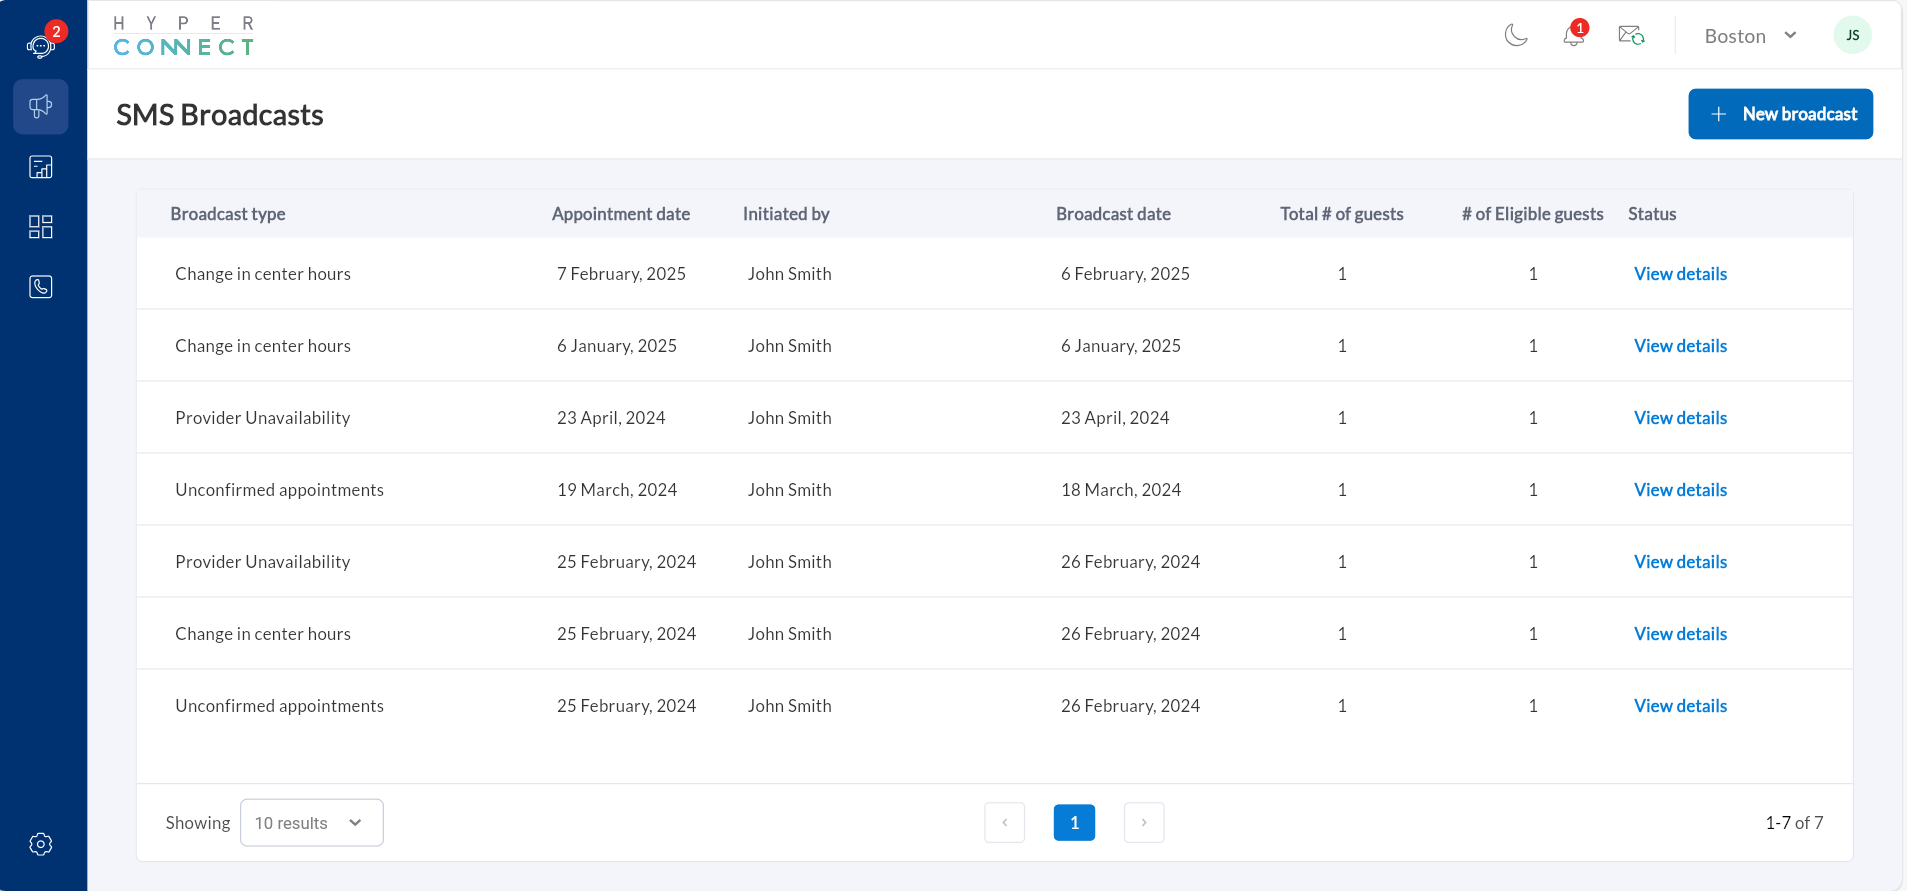
This screen provides an overview of all SMS broadcasts, displaying key details such as:
Broadcast Type: The reason for the message, such as "Provider Unavailability" or "Change in Center Hours."
Appointment Date: The date of the affected appointment.
Initiated By: The front-desk staff who sent the broadcast.
Broadcast Date: When the message was sent.
Total Number of Guests: The number of recipients included in the broadcast.
Number of Eligible Guests: Guests who met the criteria to receive the message.
Status: Click View Details to see more information about a specific broadcast.
The View Details screen shows the message sent, delivery status (Queued, Submitted, Delivered, Failed), and a guest list with their phone numbers and individual statuses.
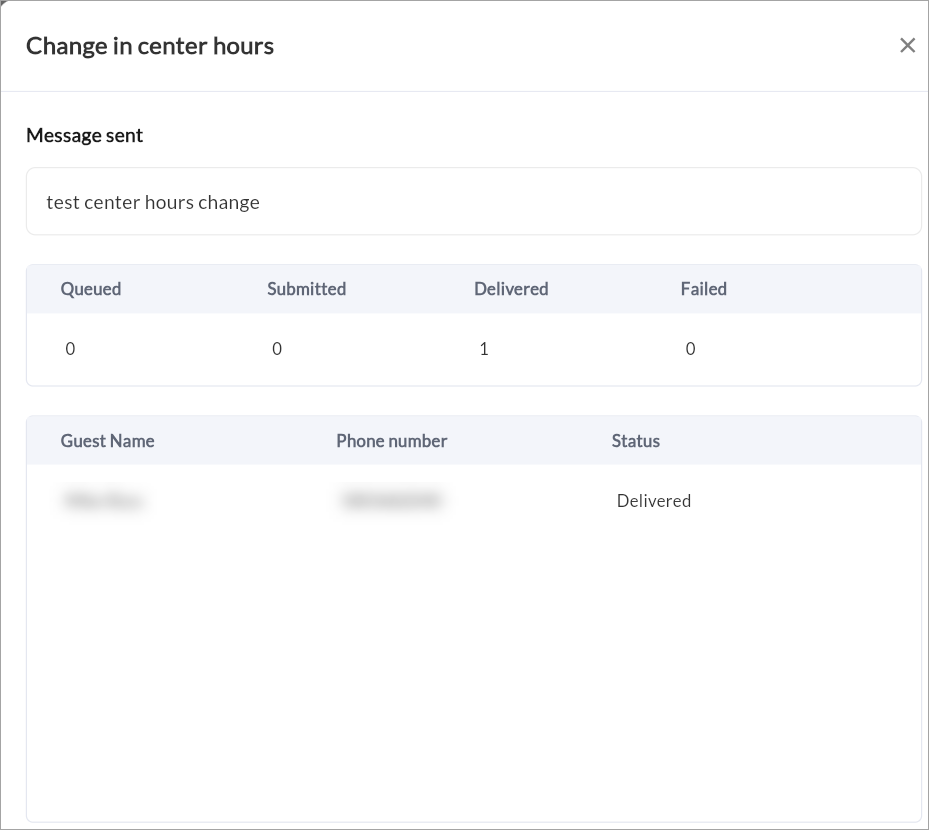
It helps track and troubleshoot SMS notifications.
Note
If the status is 'Failed', the broadcast message has not reached its intended recipient, and you will need to manually contact the guest to inform them.
If Mask contact info is enabled under role permissions guest phone numbers will appear masked in the dashboard.
Send a Broadcast
Prerequisites
Ensure View Broadcasts and Send Broadcasts permissions are enabled under security role permissions.
Guests must have opted in to receive SMS notifications.
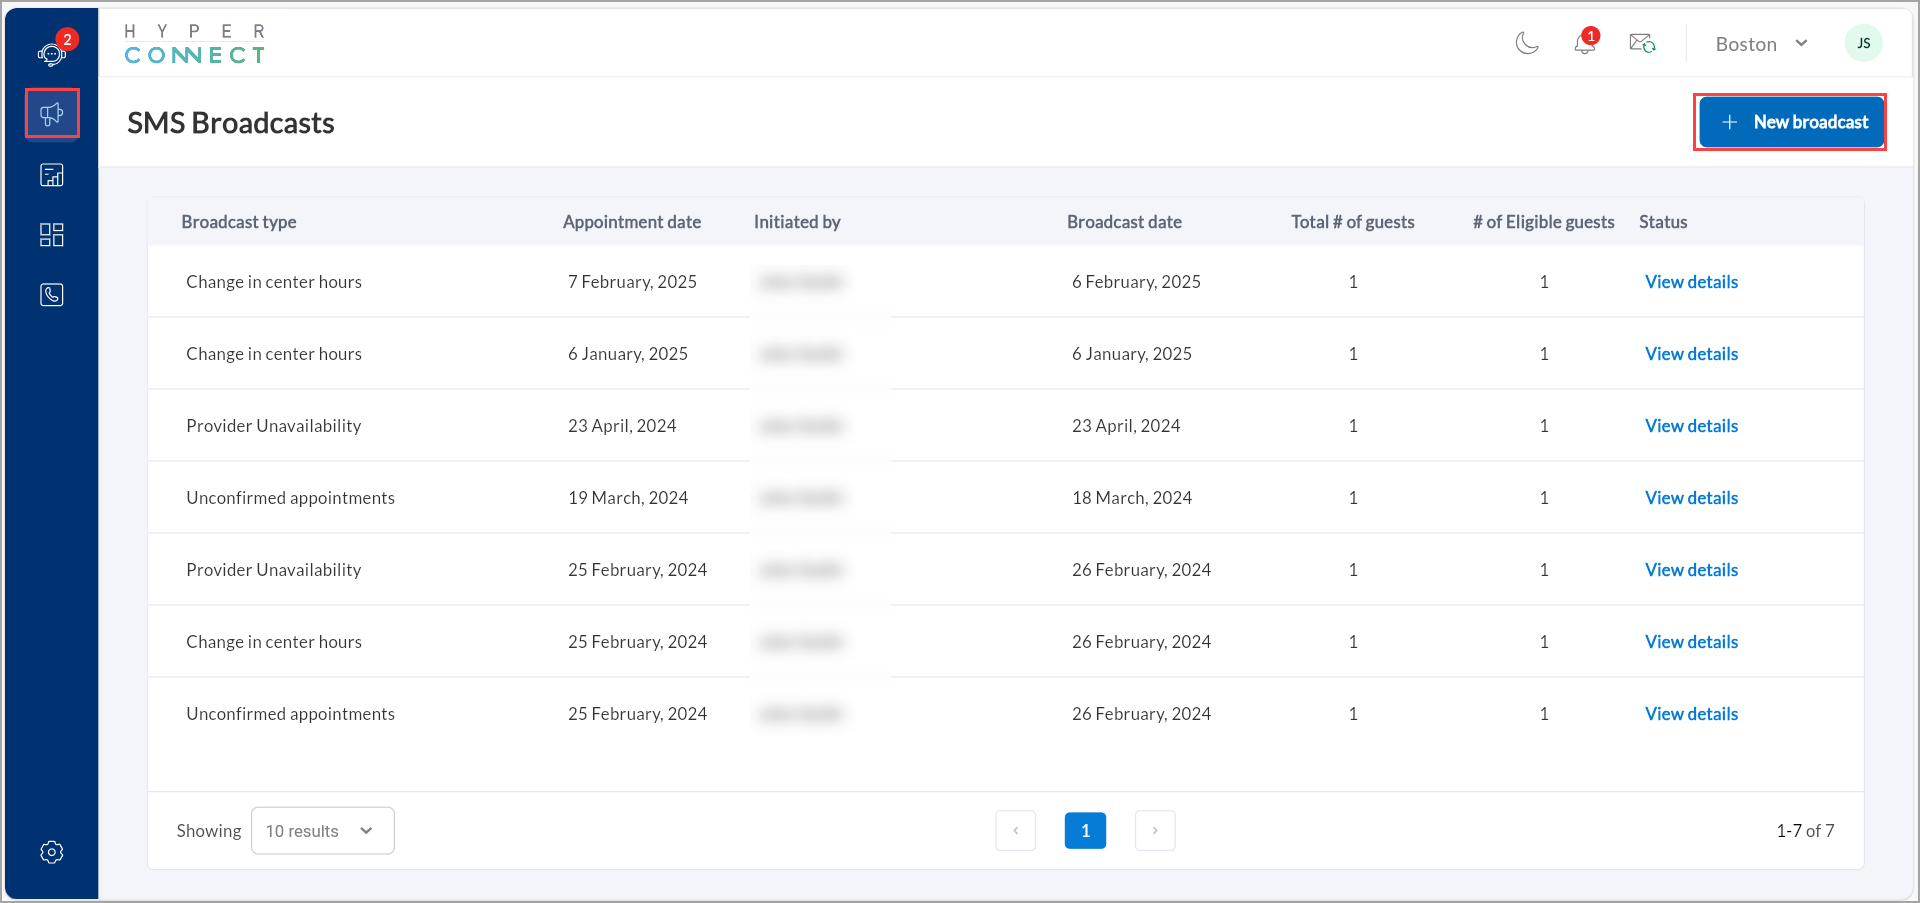
Launch HyperConnect.
Navigate to the Broadcast icon.
Click + New Broadcast.
Choose the broadcast type from the dropdown list.
Select the relevant appointment date using the calendar.
For Change in Center Hours and Provider Unavailability, you can select same day, or up to 3 months in advance.
For Unconfirmed Appointments, you can only select within 7 days of the current date.
Type the broadcast message in the text box.
Optionally, select the macros such as [FirstName] or [AppDate] to personalize the message.
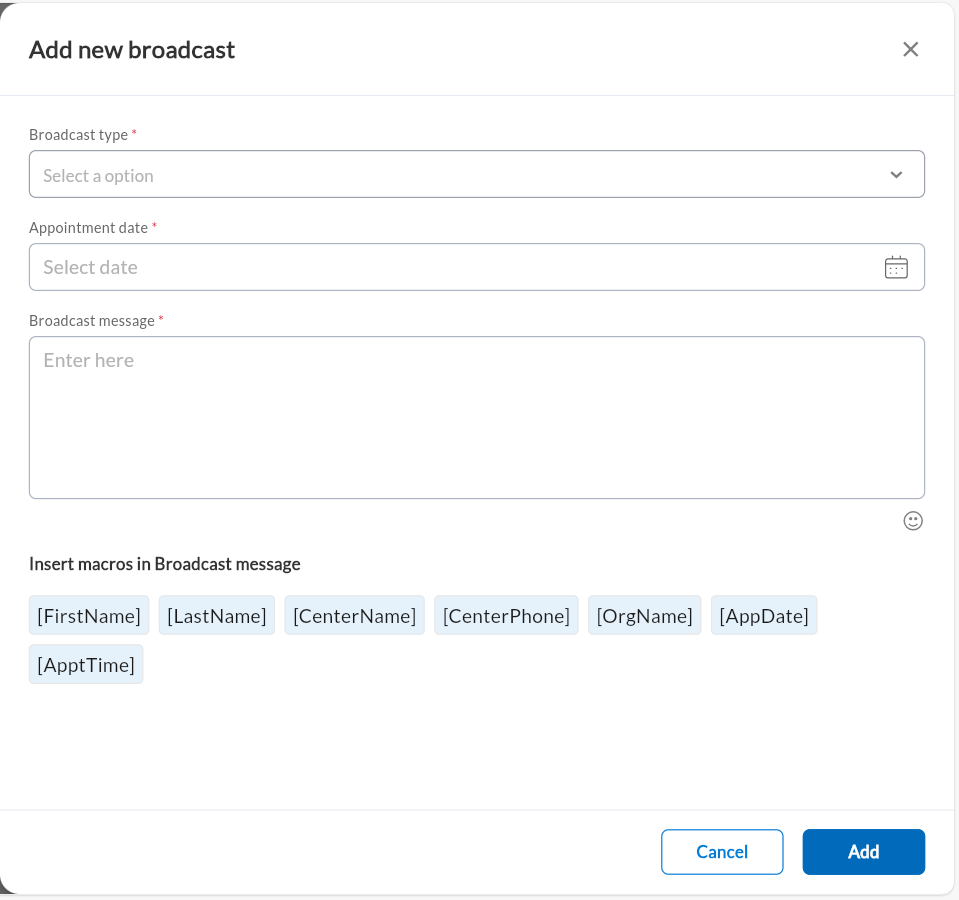
Click Add.
The guests with appointments on the affected date will be automatically listed at this stage. You will see the total number of guests your broadcast will be sent to, and a list of the guests with their names, phone numbers, and if they have opted out of receiving text messages.
When ready, click Send message.
Broadcast messages will appear in guest’s conversations so you can track replies.
Note
If the status is 'Failed', the broadcast message has not reached its intended recipient, and you will need to manually contact the guest to inform them.
If Show Guest Info is disabled under role permissions, guest phone numbers will appear masked in the dashboard.