Verifone P400 Plus
Connect the Verifone P400 Plus card reader to your network
Tip
Disclaimer
For information about IP addresses, you can refer to the external help article Adyen domain and IP addresses.
The article mentioned above pertains to the configuration of third-party products; Zenoti bears no responsibility for the accuracy, legality, or content of the external sites listed in these articles or for any subsequent links.
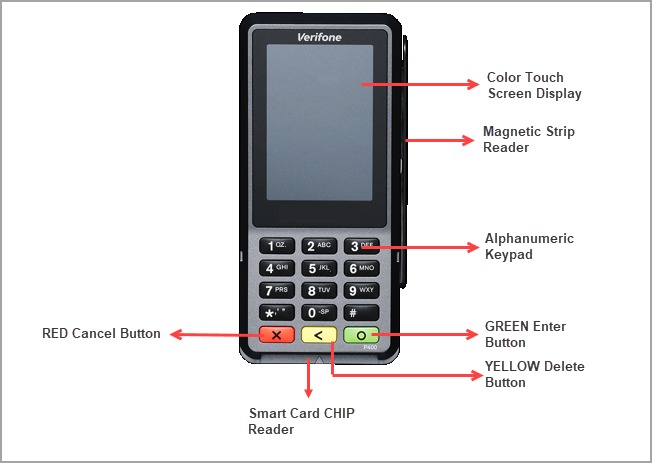
See the following image for a quick reference of the device and its package components:
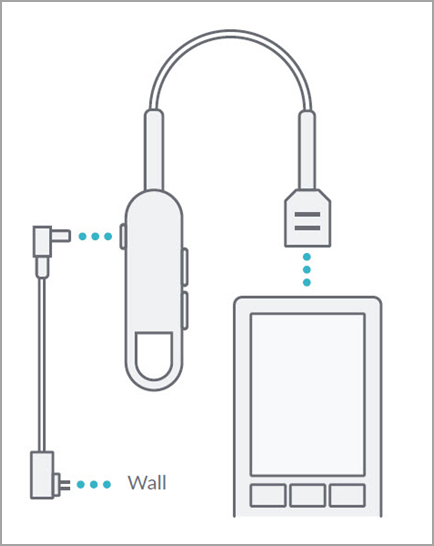
To attach the connector cable to the device, open the latch behind the device, attach the cable to the port.
Attach the power cord to the port on the connector cable. Plugin the adapter to the power supply.
There is an option to connect the device to the ETH port. But it is recommended to take advantage of the device’s wireless connectivity and connect it to the wireless network.
Tap Configure Network.
Tap Wi-Fi and turn on the Wi-Fi toggle..
Tap Add Network.
The device scans for nearby WiFi networks and lists all the available networks.
Tap on the network that you want to connect to.
Enter the password for the network.
Use the green circle button as the Enter key.
Press the red X button until you are back at the home page.
Use the ethernet cable to connect the Verifone P400 Plus device to the internet
Attach the connector cable to the device.
Attach the power cord to the RS232 port on the connector cable. Plugin the adapter to the power supply.
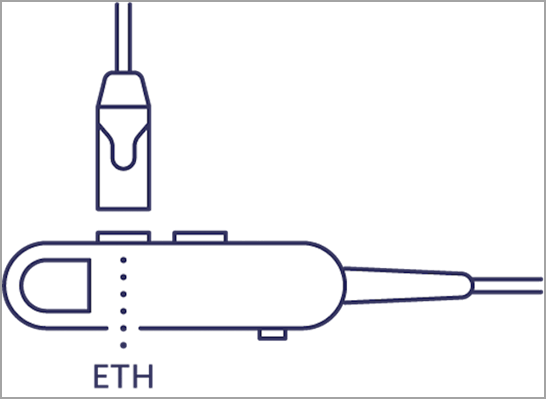
Connect the ethernet cable to the ETH port on the connector cable. Follow the instructions as per the images below:
Add another WiFi network on the Verifone 400 Plus device
Press the number 9 key and then the Green button.
Enter the Admin Menu PIN and press the Green button.
Note
Contact your Zenoti Customer Success Manager for the Admin Menu PIN code of your device.
Tap Network.
Tap WiFI.
Note
A WiFi connection is already active. We need to add a new network and get connected to it.
Tap Add Network.
The device will scan for available networks and will list all of the networks.
Select a network.
Enter the password of the network.
After you enter the password, press the Green button.
To change the current network, tap the network and change the status (enabled to disabled, or vice versa)
Zenoti Payments: Add Verifone P400 Plus as a terminal in Zenoti
After you configure Zenoti Payments, it is recommended that you add Verifone P400 Plus as a terminal to start receiving payments through card transactions.
At the organization or center level, click the Configuration icon.
Search for and select Payment processor onboarding from under Payments.
For Zenoti Payments, expand to view more options and select Terminals.
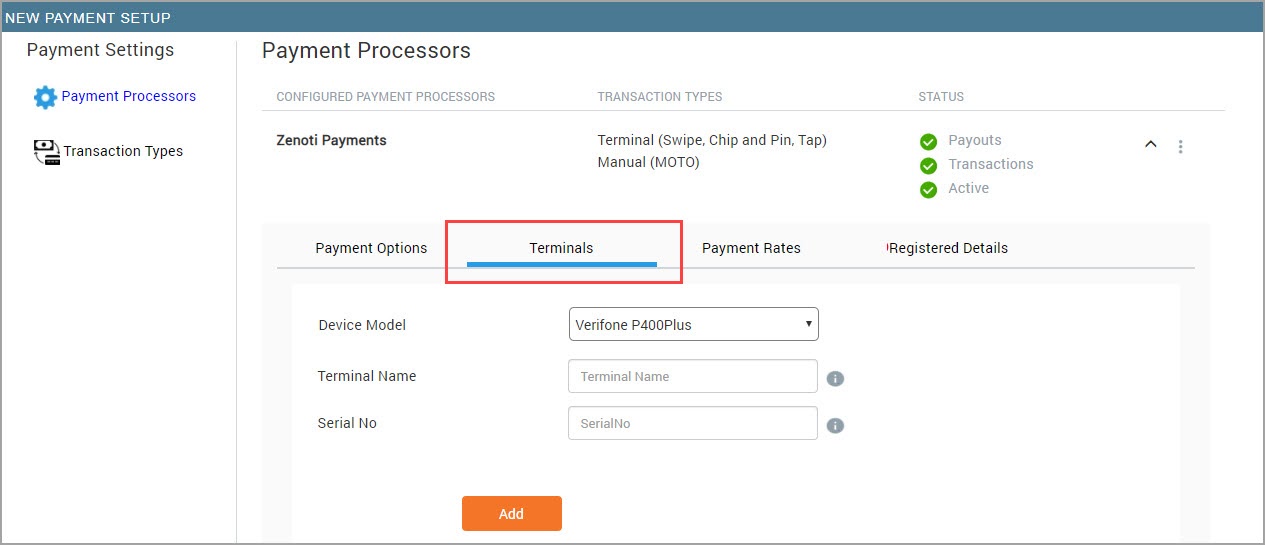
Select the Terminal section.
Enter the following information:
- Terminal Name: Enter the name of the device.
- Serial Number: Enter the serial number of the device. The serial number is printed on a label behind the device.
Click Add.
The terminal is added and you can use it to make card transactions.