Zenoti Payments - Reconciliation
This article explains how Zenoti Payments reconciliation works and helps you understand how to match your Zenoti transactions with your deposits, payouts, and processor reports.
Overview of Zenoti Payments reconciliation
Reconciliation is important for businesses (small and large) in the wellness industry, as this helps prevent fraud and corrects financial statement errors, resulting in smoother operations.
Zenoti understands this need and allows you to perform a reconciliation of your collections and payouts. The Reconciliation report displays a list of all of your collections and compares it with the payouts received. This gives you a complete picture of what your collections were and what your payouts were for a given time.
The Reconciliation report allows you to do the following:
Verify if each collection is deposited into your bank account.
Automatic reconciliation of payouts and collections in case of no mismatches.
Identify the deficit (if any) between the payouts and the collections.
Identify the reason for the payout mismatches for every transaction.
Reconcile manually the mismatches at the transaction level.
Before you begin
To enable Zenoti Payments Reconciliation Report, reach out to Zenoti Support.
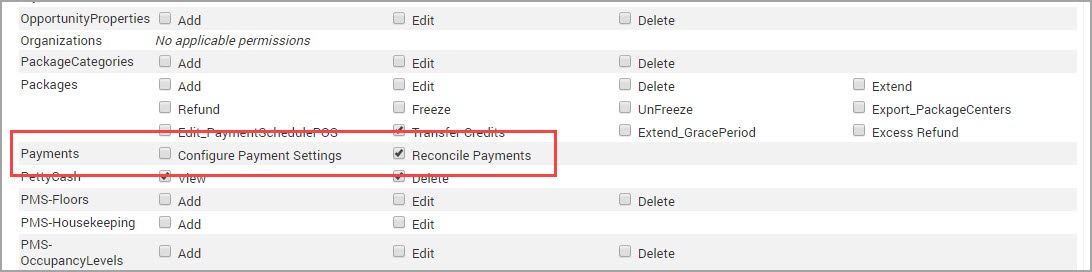
You can view the reconciliation report only if you have the Reconcile Payments role permission:
At the organization level, click the Configuration icon, and search for Security roles.
Under Security, select Security roles.
Select the employee role. Click the Permissions tab and expand Administrator.
In Payments, select the Reconcile payments check box.
Zenoti's Reconciliation report
The Reconciliation report is helpful to business owners and accountants.
Accuracy: It ensures that financial records are accurate by comparing transactions recorded in Zenoti with those in other systems like payment processors or bank statements.
Identifying discrepancies: It helps identify discrepancies between expected and actual revenue, payments, or refunds, allowing for timely correction of errors.
Financial integrity: By reconciling transactions, it maintains the integrity of financial data, which is essential for making informed business decisions and complying with regulatory requirements.
Fraud prevention: It can reveal discrepancies that may indicate fraudulent activities such as unauthorized transactions or theft.
Operational efficiency: Streamlining the reconciliation process, this report saves time and effort for staff, allowing them to focus on other important tasks.
At the organization or center level, click the Reports icon.
Search for and select the Reconciliation report.
Note
The first time you open the report, it is mandatory for you to set up your preferences.
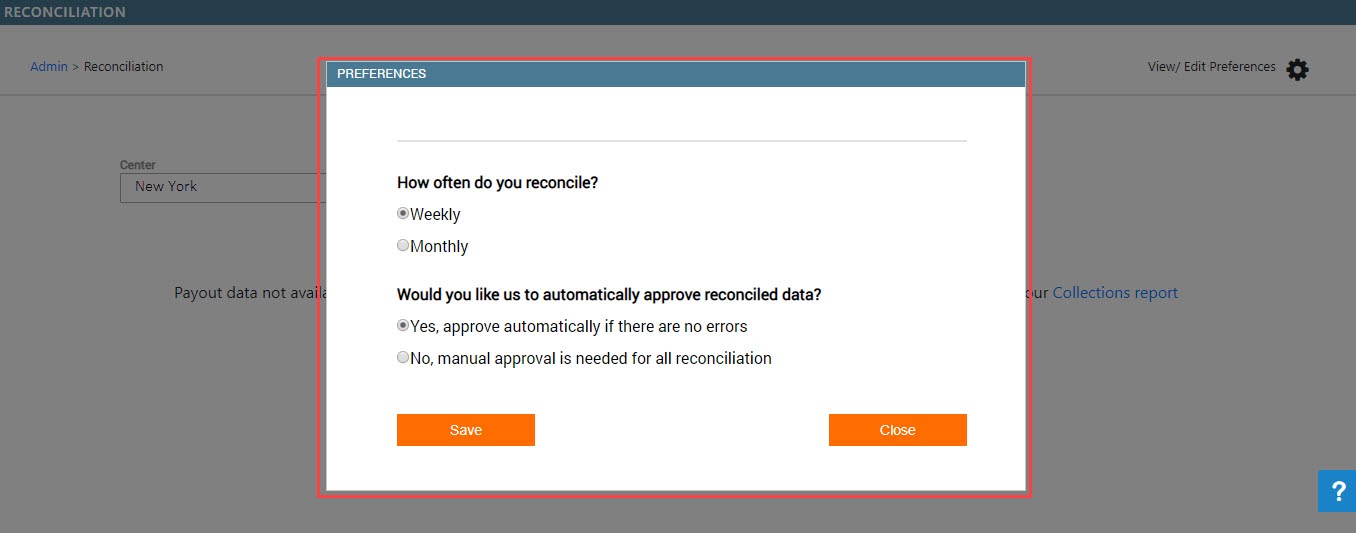
Weekly: Select this option to reconcile for a weekly payout period.
Note
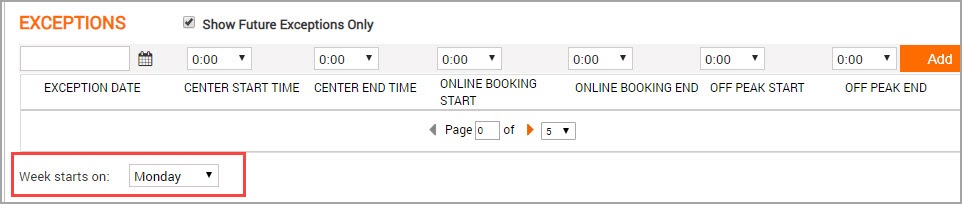
The beginning date for the reconciliation, for the preference Weekly, is picked up from the Week Starts On setting in the Hours tab of the center settings.
Automatic Approval: Specify Yes, if you want Zenoti to automatically approve the reconciliation report if there are no errors or No, if you want to manually approve the reconciliation report every time.
Note
The view of your dashboard is completely based on the options you select in the View/Edit Preferences window. If you set the preferences as Weekly, you will see a week wise data for reconciliation. Similarly, if you select Monthly, the dashboard displays month-wise data.
Monthly: Select this option to reconcile for a monthly payout period.
Select the filter criteria and run the report.
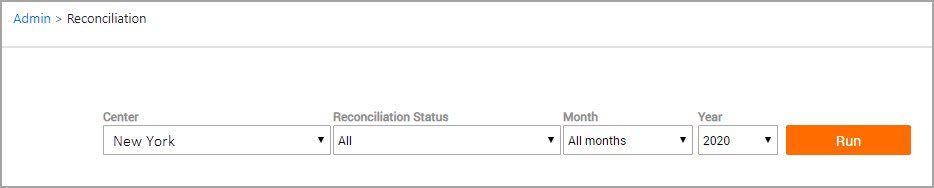
The report runs and displays the following:
You will see the following columns in this report:
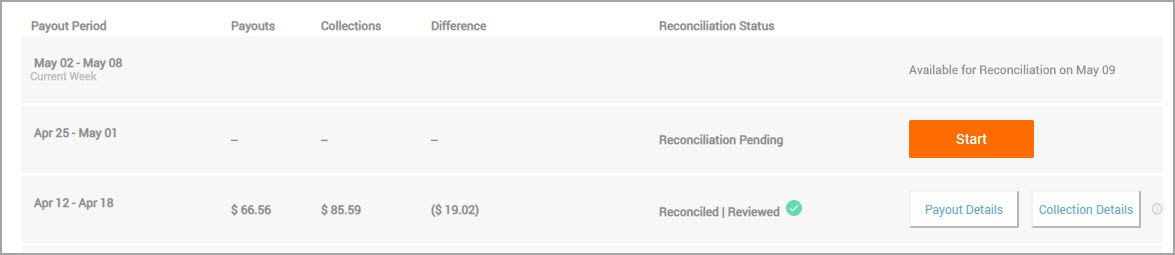
Payout Period: This column displays the period of reconciliation. The period of reconciliation will change based on the report preferences you set. For example, you may have set your preference to a week or a month. If you have selected a week, your payout period could be 1 March to 7 March. Similarly, if you have selected a month, your payout period could be 1 March to 31 March.
Note
The Zenoti reconciliation report allows you to reconcile the payouts and collections for the past week or past month (depending on the set preferences). Reconciliation of current week’s transactions can only be done in the following week.
Payouts: This column displays the payouts deposited in your bank account for the reconciliation period.
Collections: This column displays the collections received during the reconciliation period.
Difference: This column displays the difference between the payouts column and the collections column.
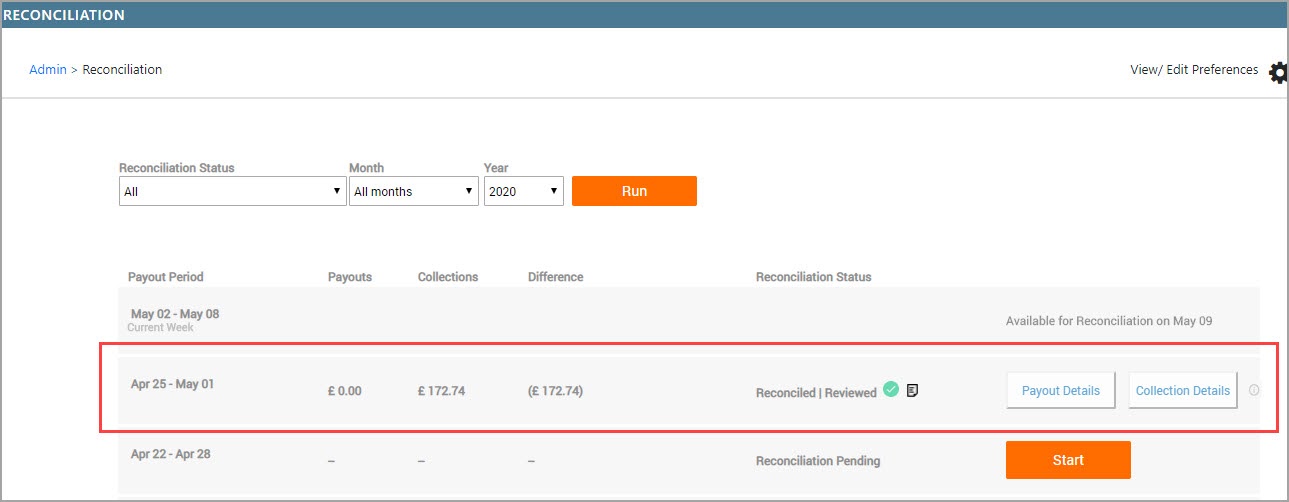
Reconciliation Status: This column displays either of the following statuses:
Reconciliation Pending: The reconciliation for the particular period is not yet run. Click Start to begin the reconciliation for the selected period.

Reconciled/Reviewed: The reconciliation for this period is done and you have successfully identified the collections and its corresponding payouts. Click Payout Details to view all the payout information for the given period. Similarly, click Collection Details to view the collections information for the given period.

Reconciled/Not Reviewed: The reconciliation for the particular period is run, but there are some mismatches that are yet to be reviewed. Click Review to proceed with the review of the mismatched transactions.

Not Reconciled/Not Reviewed: The reconciliation for this period is available but is not yet reconciled and reviewed. Click Review to proceed.

Impacts and considerations
The reconciliation report is only available for businesses on Zenoti Payments.
When an invoice is fully refunded, inclusive of provider tips, the tip payout details reflect this adjustment as a deduction from the employee's MyZen Wallet. Subsequently, the deducted tip amount is reversed to the guest's mode of payment,.
Features of the Reconciliation Report
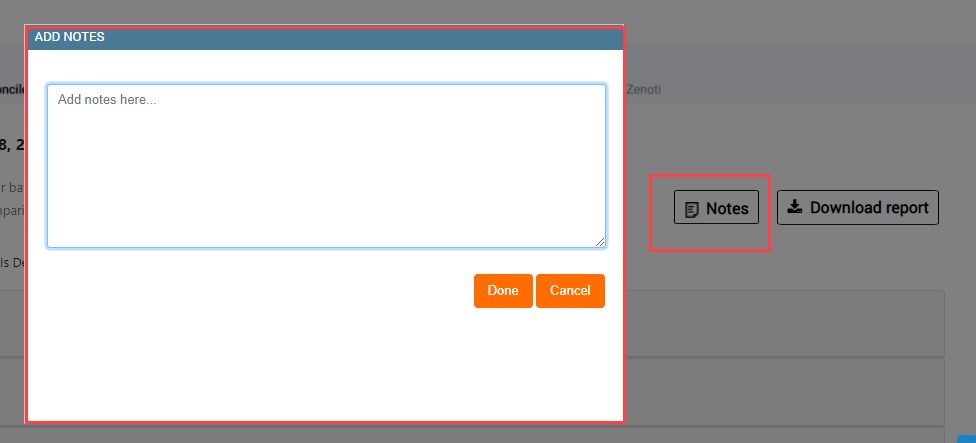
Add Notes: The reconciliation report allows you to add notes at every step of the reconciliation report. You can add details like how the reconciliation was done, make a note of the invoice numbers that required additional attention, or simply list down your process of reconciliation.
Download Report: You can download the reconciliation summary and the detailed report in an Excel or a .CSV format. This gives you the flexibility of reconciling the data in a method of your own.
Floating Bottom Panel: A floating total panel at the bottom displays valuable information such as Total Payouts, Total Deposits, and the Difference in the first step, and gives easy access to important buttons such as Review Later and Mark as Reviewed in the second step.


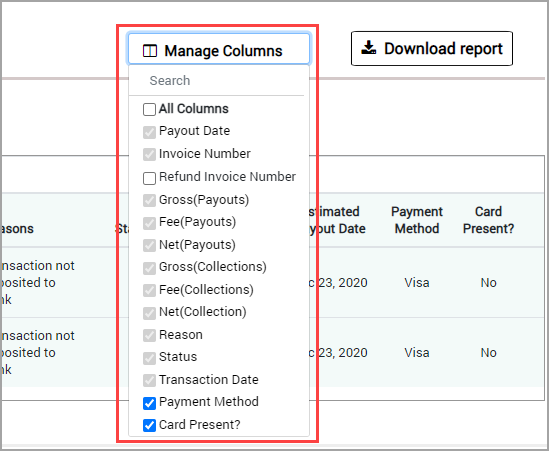
Manage Columns: This allows you to show to hide specific columns of the Reconciliation report as per your business needs.
Note
This feature only works for a few columns.
Reconcile your collections and payouts
Navigate to the Reconciliation page:
Organization level:
Click the Configuration icon.
Search for and select Reconciliation.
Center level:
Click the Configuration icon.
Search for and select Reconciliation.
Select the filter criteria and run the report.
The report runs and displays week-wise details of transactions that are available for reconciliation.
Click Start.
The report opens and you will notice two stages of the report.
Reconcile Bank Deposits to Payouts from Zenoti Payments
Reconcile Payouts to Collections in Zenoti

This means you must first reconcile your bank deposits to the payouts recorded in Zenoti and then proceed to reconcile those payouts with collections in Zenoti. This reverse method of reconciliation provides a clear picture and allows to track the payouts and collections systematically.
Note
Keep your bank account statement handy and then proceed further.
Scroll down to see the day-wise summary of payouts for the week or month (as per your set preferences).
Compare the payout amounts with the deposits in your bank statement for the day.
Use the slider to indicate if the payout amount and the amount deposited in the day.
By default, all the transactions will be marked as YES.
If the amount does not match the payout, mark the transaction as NO (to indicate the payout amount is different to the deposit amount), and enter the actual amount deposited. Zenoti will automatically calculate the difference and display it in the field provided.
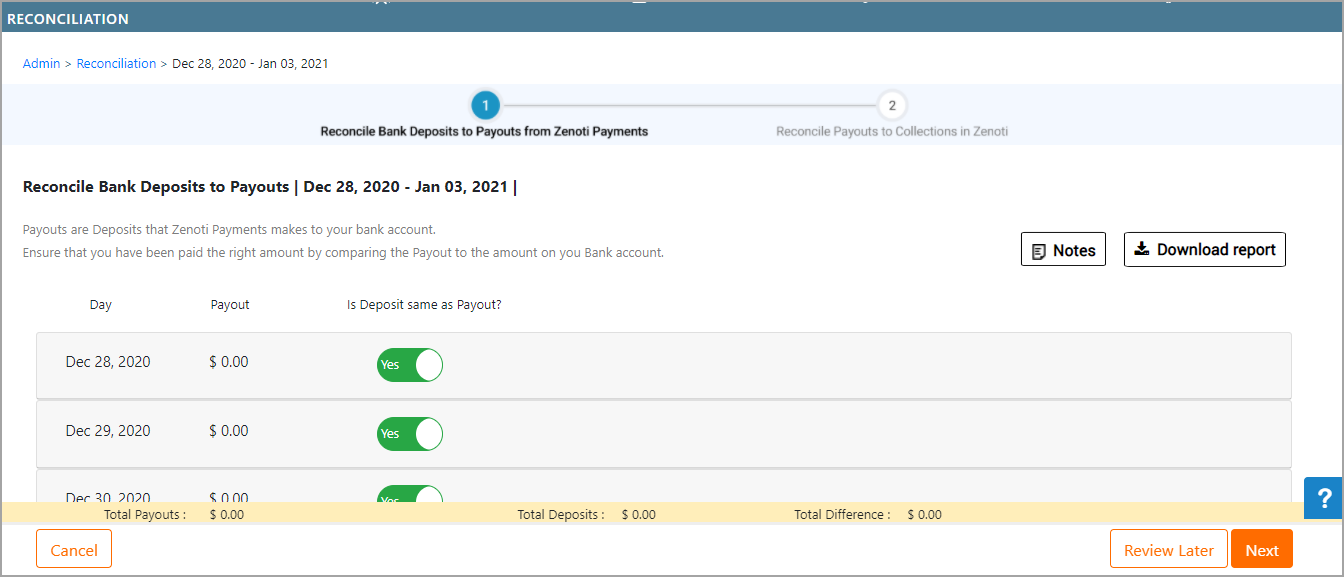
After you finish reconciling the payouts and the deposits, on the floating bottom panel, click Next.
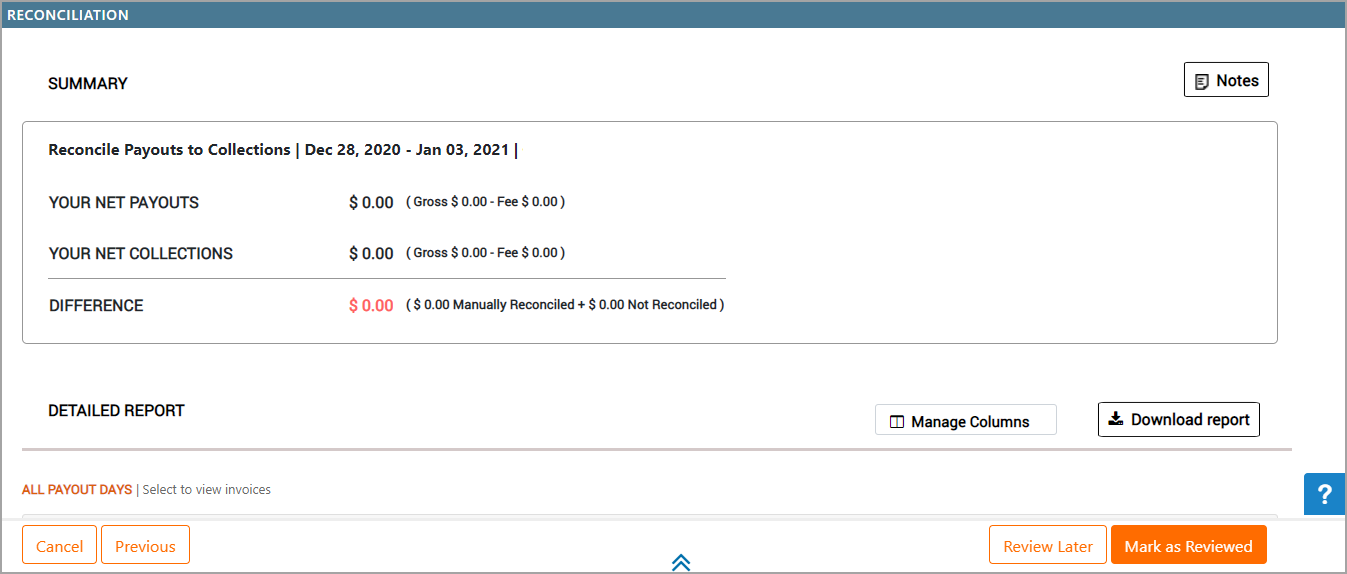
A summary of the reconciled payouts to collections appear and will display the following information:
Your Net Payouts: Net Payouts = Gross Payouts - Fee.
Your Net Collections: Net Collections = Gross Collections - Fee.
Difference: Net Payouts - Net Collections.
If there is a difference between the Net Payouts and the Net Collections, you will see the transaction-wise details for the mismatched invoices.
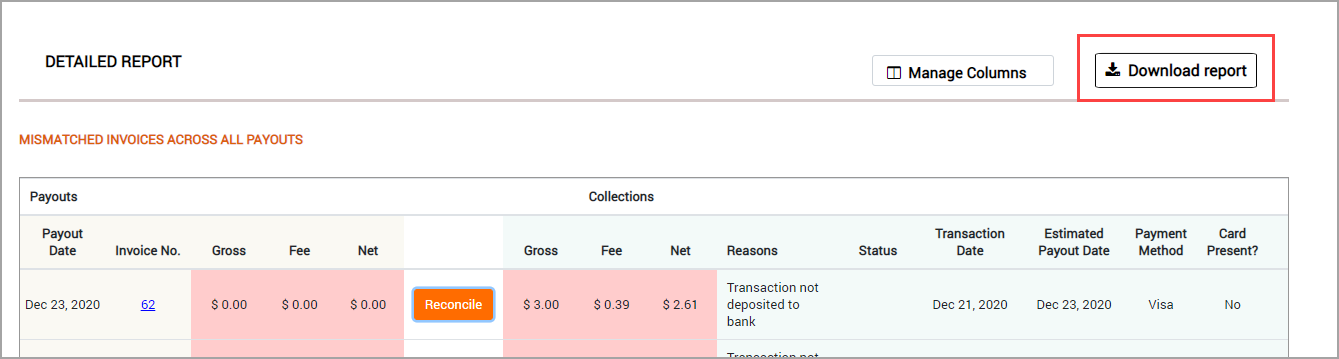
The Mismatched Invoices section consists of the following columns:
Payout Date: The date when you received the payouts to your bank account.
Invoice Number: The invoice number of the transaction on which the payout was made.
Gross Payout: This is the total amount that was sent to your bank account before deducting the processing fee. [Gross Payout = Net Payout + Fee]
Fee: This is the amount charged for processing the transaction by the bank.
Net Payout: This is the amount that is deposited into your bank account after the processing fee. [Net Payout = Gross Payout - Fee]
Gross Collection: This is the amount you collected after the transaction. This amount is the same as the invoice amount. [Gross Collection = Net Collection + Fee]
Fee: This is the fee charged by the bank for processing the transaction.
Net Collection: This is the amount that is sent to your bank account. [Net Collection = Gross Collection - Fee].
Reason: This is the reason for the mismatch in the invoices.
Status: The status of the deposit will be as follows:
Deposited: If the collections are deposited to your payout account, the status of such invoices will be Deposited.
Voided: Voided are the collections that are canceled after authorization. In such cases, you will see two rows of line items for the same invoice. One line item denotes collection after the authorization, and another after the cancelation.
Refunded: Refunded are the transactions that are returned to the guest after successful payment. Even for the refunded transactions, you will see two line items for a single invoice. One item denotes the credit of funds and the other denotes the debit of funds.
Chargeback: If there are any disputes on the invoice, you will see the status as Chargeback.
Note
A chargeback transaction will always be denoted in (-) negative value, as you are being charged for a failed dispute.
Chargeback Reversed: If there is a dispute on the invoice and after you submit the evidence, if the bank decides to rule the dispute in your favor, you will see that the chargeback is reversed. This transaction is denoted as (+) positive.
Transaction Date: This the date of the transaction.
Card Brand: This field denotes the brand name of the card. For example, VISA, Maestro.
Card Present?: This field denotes only two values. Yes or No. If the transaction in an invoice was done using a terminal (swipe, tap, or insert), you will see the value as Yes. For all other transactions (online, manual, saved card), you will see the value as No.

For every mismatched transaction, click Reconcile to manually review the payouts and the collections.
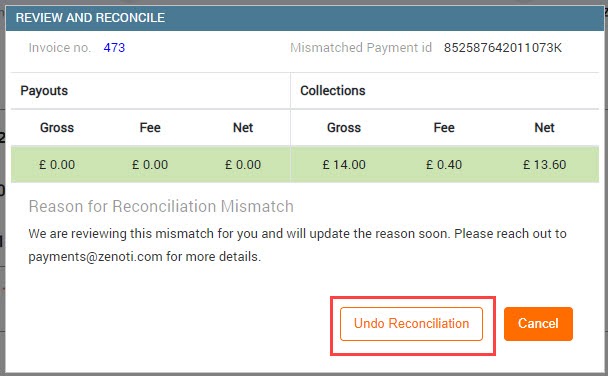
The Review and Reconcile pop-up window appears and gives you the reason for the mismatch of numbers for this transaction.
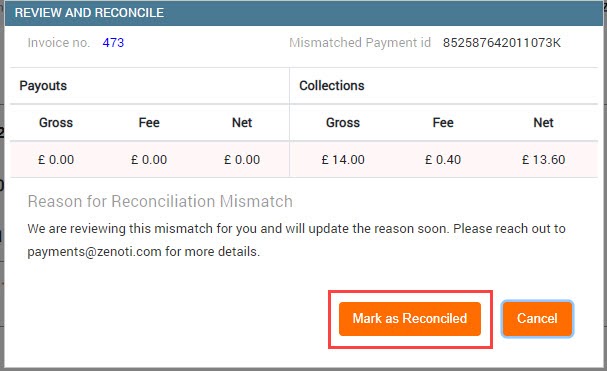
Click Mark as Reconciled.
The pop-up window closes and the line item is marked in green color, indicating that the mismatched invoice is now reconciled.

If you have marked the transaction as reconciled in error, click Manually Reconciled to reopen the Review and Reconcile pop-up window and click Undo Reconciliation.
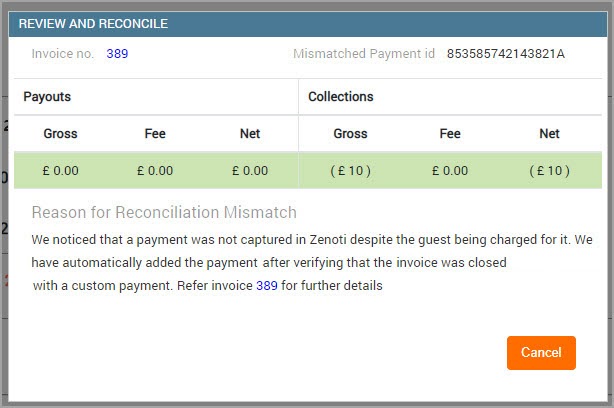
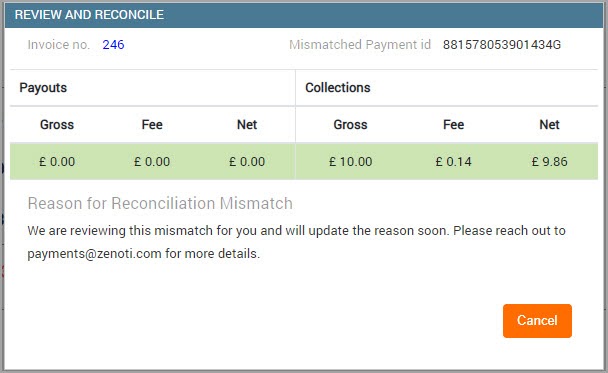
Note
Zenoti identifies the reason for the discrepancy and informs you of the same. For example, in the above image, you can see that the reason If Zenoti is unable to determine the exact reason for the discrepancy, you will see the following message:
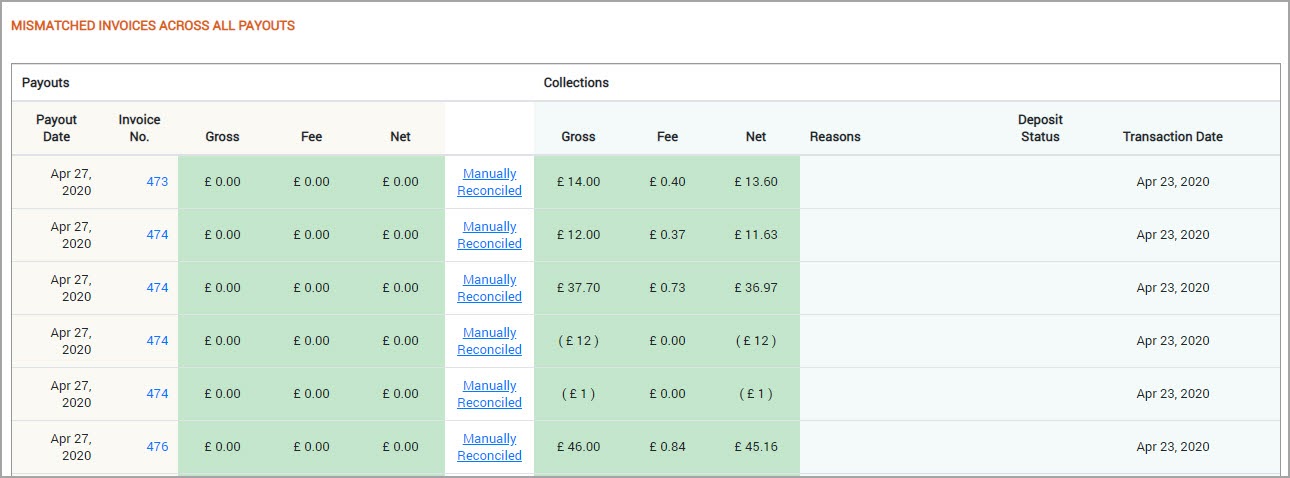
Repeat step 9 for every mismatched transaction in the list. After you reconcile all the transactions, your screen will look something like this:
Scroll down and click Mark as Reviewed.
The Add Notes pop-up window appears.
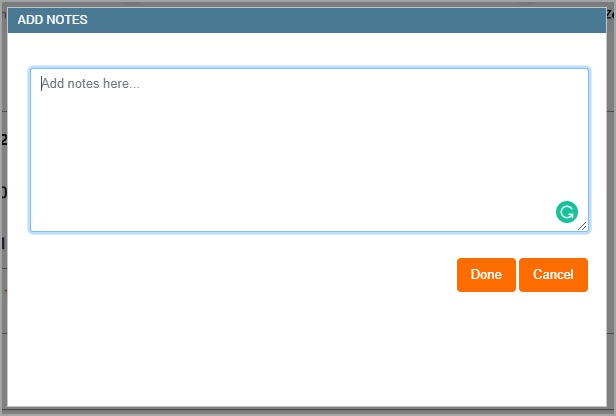
Enter the notes for the reconciliation. You can enter important information such as how you did the manual reconciliation, a number of the invoices that you may need to check later, and points to remember for your colleagues while doing a manual reconciliation.
Click Done.
The notes are added and you are redirected to the report main page.
The reconciliation status for the selected week will change to Reconciled/Reviewed.
You have successfully used the report to reconcile your bank deposits with your payouts, and payouts with corresponding collections.
Key terms
Term | Description |
|---|---|
Reconciliation | The process of matching Zenoti transactions against payouts, deposits, and processor reports to ensure financial accuracy. |
Processor Fees | Fees associated with card and payment processing, reflected in payout reporting. |
Transactions Report | A Zenoti report that shows individual payment transactions used for reconciliation. |
Payout Report | A Zenoti report summarizing all deposits, fees, adjustments, and settled amounts. |
Adjustments | Manual or automatic changes to payout amounts, such as refunds, chargebacks, or fees. |
Chargebacks | Disputed transactions where funds may be withdrawn or withheld during reconciliation. |