Call Transfer using Extensions
This article provides a detailed walkthrough of HyperConnect’s Call Transfers (internal) and Extensions sub-feature. The guide explains how to manage incoming calls, transfer calls between agents or devices internally, track call history, and monitor billing usage. With practical steps, key use cases, and a breakdown of critical features, this guide is designed to help administrators and users fully leverage the feature.
Overview
HyperConnect’s Call Transfers and Extensions feature streamlines communication by enabling efficient call routing and management. Whether you’re handling customer queries or facilitating internal communication, this feature ensures seamless transfers, uninterrupted customer service, and transparent billing for call activities.
Key Terms
Key term | Definition |
|---|---|
Call Transfer | The process of redirecting a call from one agent or device to another while ensuring the customer is never left unattended. |
Extension | A unique numeric identifier assigned to agents or devices for call routing. |
Call Continuity | A mechanism that ensures calls remain active even during transfer failures. |
Call Card | A consolidated record of all call details, transcripts, and recordings for a single session. |
Usage Dashboard | A HyperConnect sub-feature that displays real-time call and credit usage, including overage charges. |
Prerequisites
Before using the Call Transfers and Extensions feature, ensure the following:
Configuration: Extensions must be assigned to agents and devices in HyperConnect.
Access Roles: Only users with roles such as Administrator, Manager, or Owner can manage extensions.
Connectivity: Stable network connectivity is necessary for smooth call handling and transfers.
System Updates: HyperConnect must be updated to the latest version for all users.
Business Use Cases: Enhanced Communication and Efficiency through Call Transfers and Extensions
Scenario 1: Customer Support Efficiency
Challenge: A customer calls the support center with a complex billing issue that requires input from multiple departments. Traditionally, resolving such issues involves placing the customer on hold for long periods or transferring them to the wrong team, leading to frustration and wasted time.
Solution: Using HyperConnect's Call Transfers and Extensions feature, the support agent can quickly identify the most suitable agent or department based on the query. The call is seamlessly transferred to the relevant expert without disconnecting the customer. If the target agent is unavailable, the customer remains connected with the initial agent, ensuring continuity and avoiding unattended calls.
Outcome:
Reduced customers' wait-time and increased satisfaction.
Efficient resolution of complex queries by directing customers to the right resources.
Improved team coordination in handling customer concerns.
Scenario 2: Internal Collaboration
Challenge: Agents working in different departments often struggle with communicating directly for quick clarifications, leading to delays in resolving customer issues or executing tasks collaboratively.
Solution: With Extensions, agents can use HyperConnect to make direct, internal calls to their colleagues. For instance, an agent handling a customer query can call a colleague in a specialized department directly using their extension to quickly gather the required information. This eliminates the need for external communication tools or lengthy email exchanges.
Outcome:
Faster collaboration between team members.
Real-time sharing of critical information for quicker decision-making.
Enhanced productivity by reducing communication delays.
Key Benefits
Customer Retention: Improved customer experiences by resolving queries faster and reducing frustration.
Operational Efficiency: Streamlined internal processes by enabling direct communication between agents.
Scalability: A system that supports both customer-facing and internal collaboration needs, adaptable for large organizations.
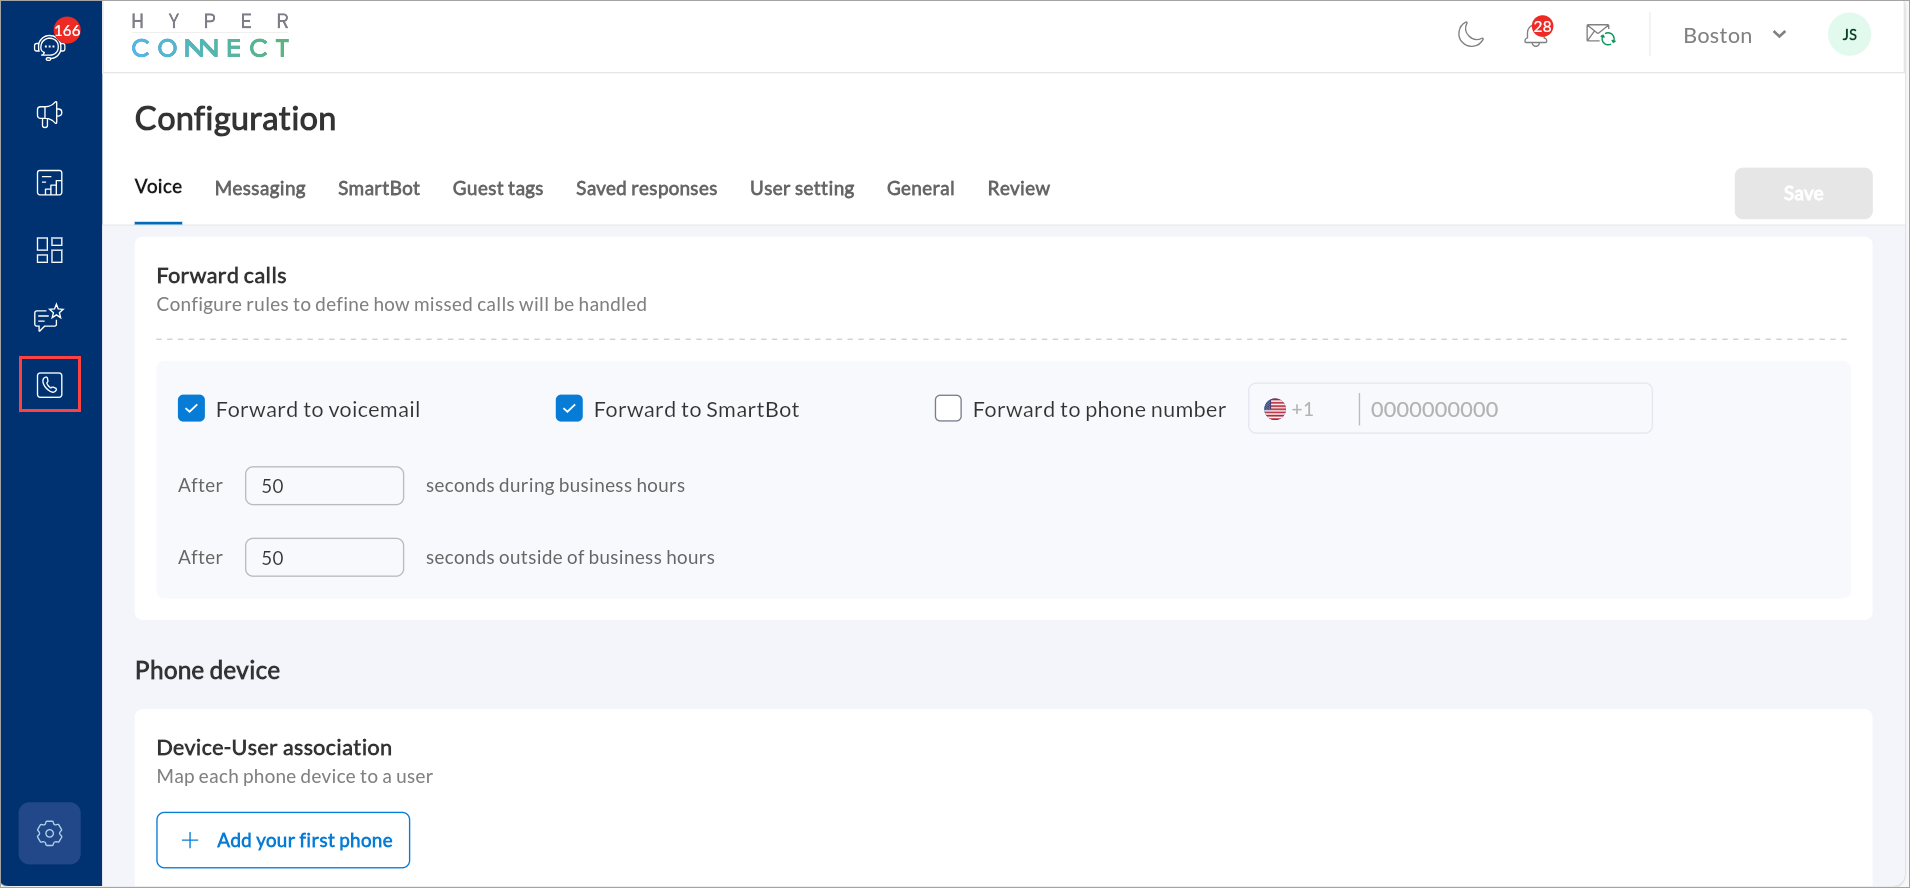
Handling Incoming Calls
When a call is received, all tagged devices within the call center ring simultaneously.
The first agent to answer will automatically remove the call from other devices’ screens.
The active call banner will display the caller's details for further actions.
Add Extensions
Adding extensions to new users in HyperConnect is essential for ensuring seamless communication within your organization. Follow the steps below to assign extensions to new users effectively:
Steps to Add Extensions to New/Existing Users
Navigate to the Call Extensions page.
Click +Associate extension.
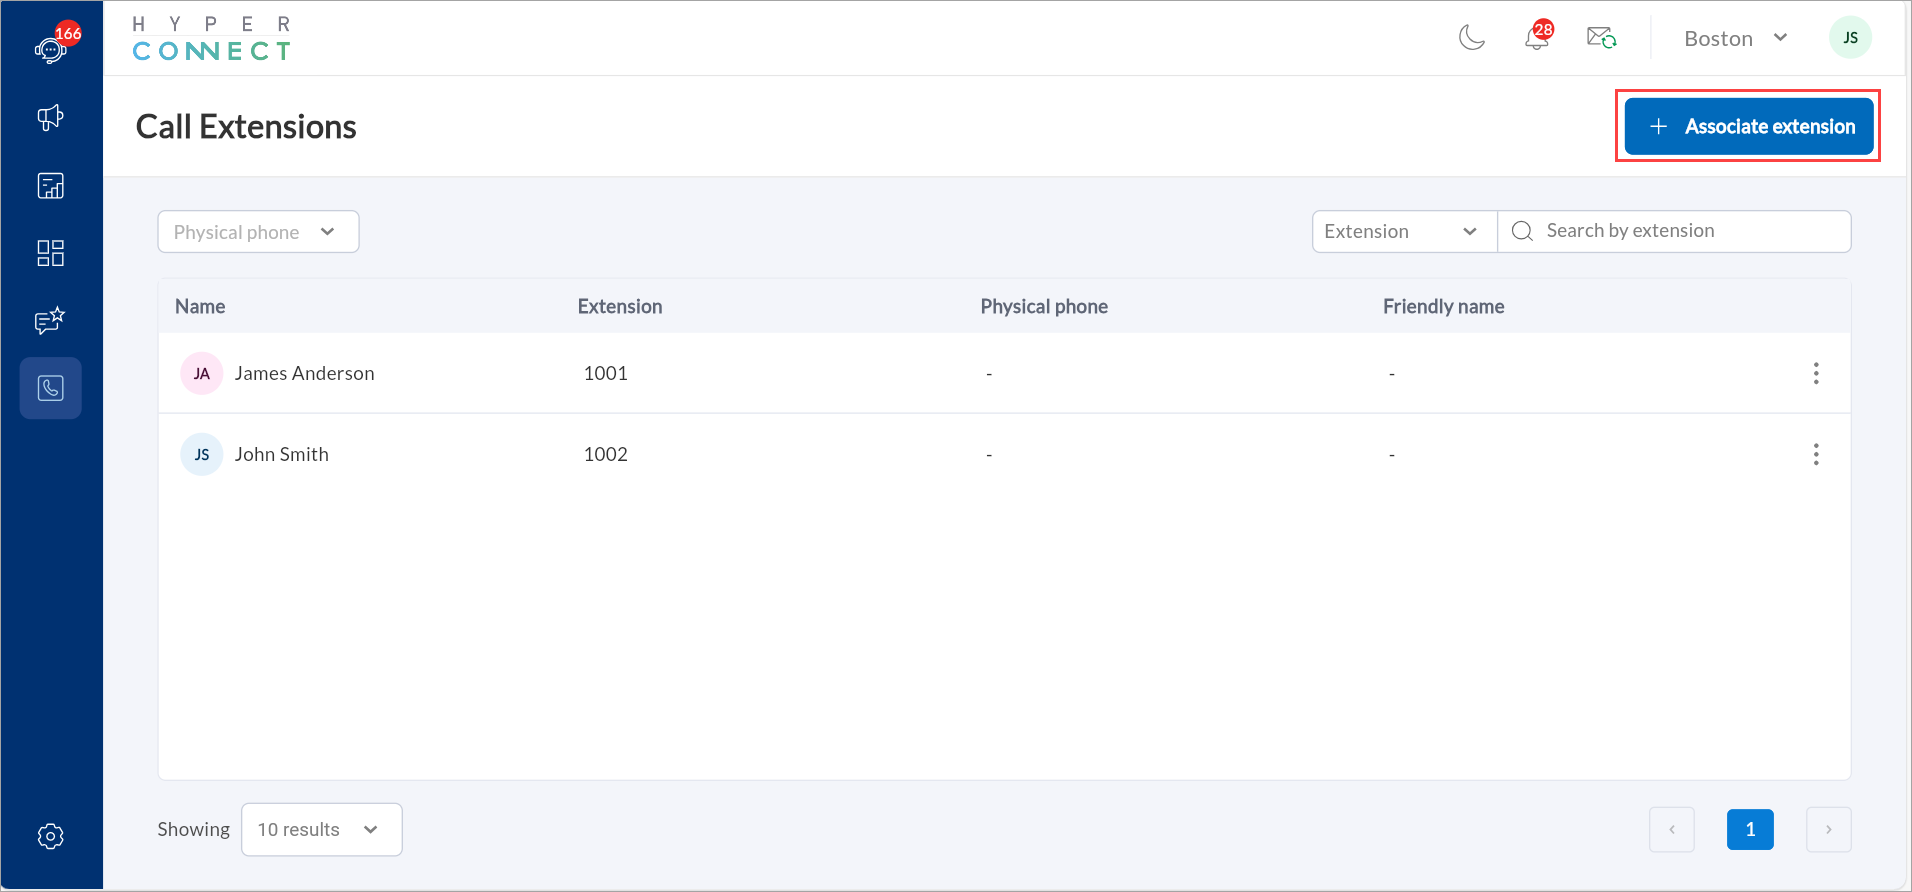
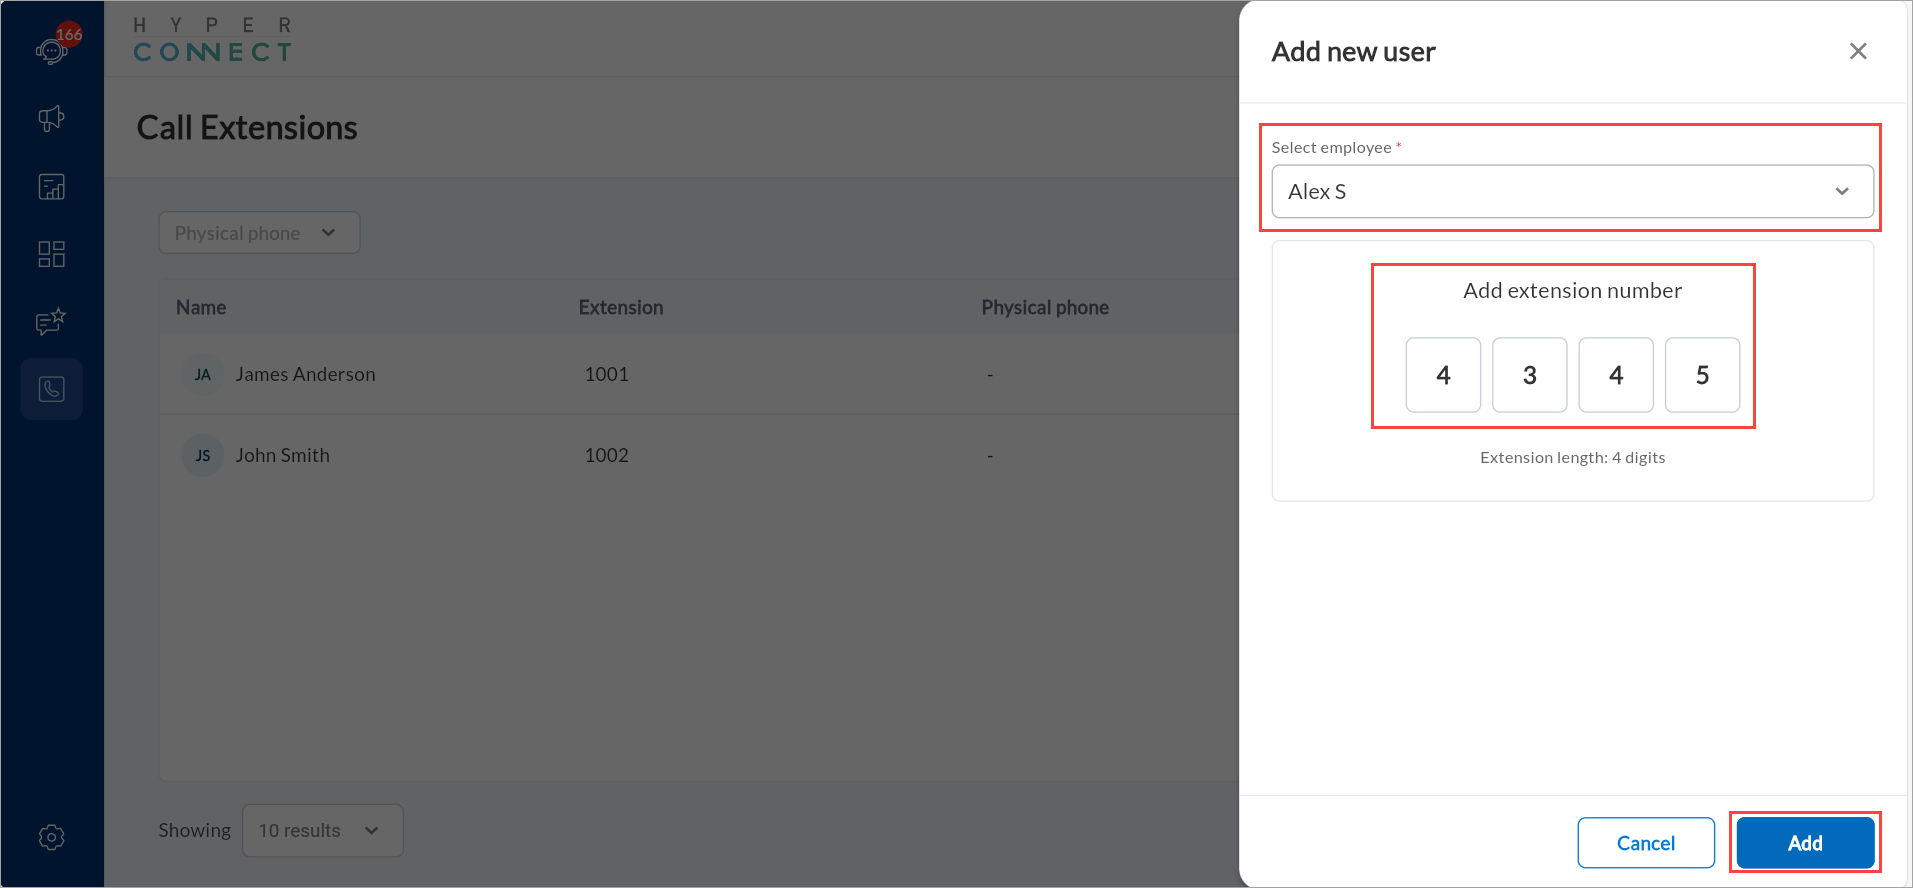
The Add new user slide-out panel appears.
You will see two tabs in this panel
Under the Employee tab: In the Employee field, select the user from the dropdown list.
Enter a unique 4-digit numeric extension (example: 9999). Verify that the extension number is not already in use.
Click Add.
Under the Phone Device tab: If in the Device–User Association setting, the Employee was selected as Dynamic, you will now see that the corresponding device appears under this Phone Device tab.
Select that particular device, assign an extension, and click Add.
Once saved, you can now transfer calls directly to that extension.
Search Options on Call Extensions Page
The search fields on the Call Extensions page make it easy for administrators and managers to quickly find specific extensions. These fields are especially helpful in larger organizations with many extensions. It saves time and improves overall operational efficiency.
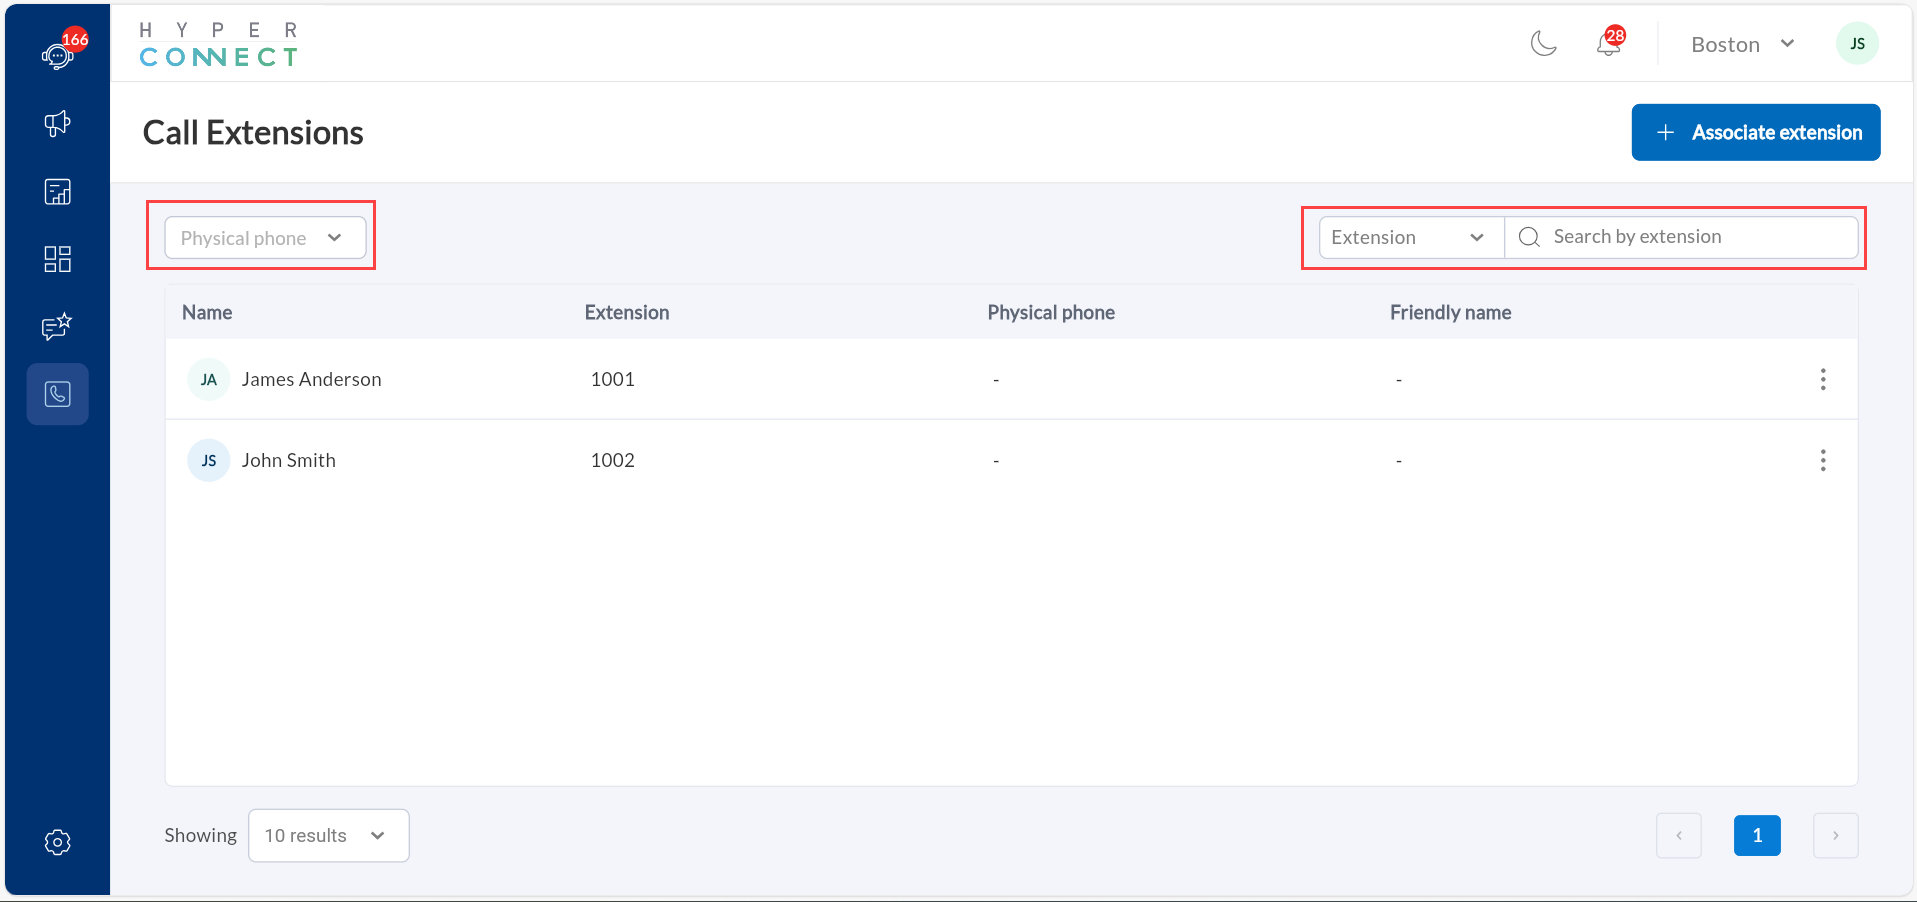
Dropdown Menu for Device Type: Filter extensions by device type (e.g., Physical Phone, Softphone) to view only relevant results.
Sort by Extension/Agent: Sort extensions/agents for faster identification in large datasets.
Search by Extension Field: Enter an extension number or partial number to dynamically filter and locate specific extensions or users.
Transfer Calls
This feature allows you to easily transfer active calls to another agent, location, or an external phone number using the in-call transfer feature. This ensures smooth handoffs, whether the guest needs specialized support or wants to reach a different branch or center.
Perform the following steps to transfer calls internally:
During an active inbound call from a guest, answer the call. The corresponding guest page appears.
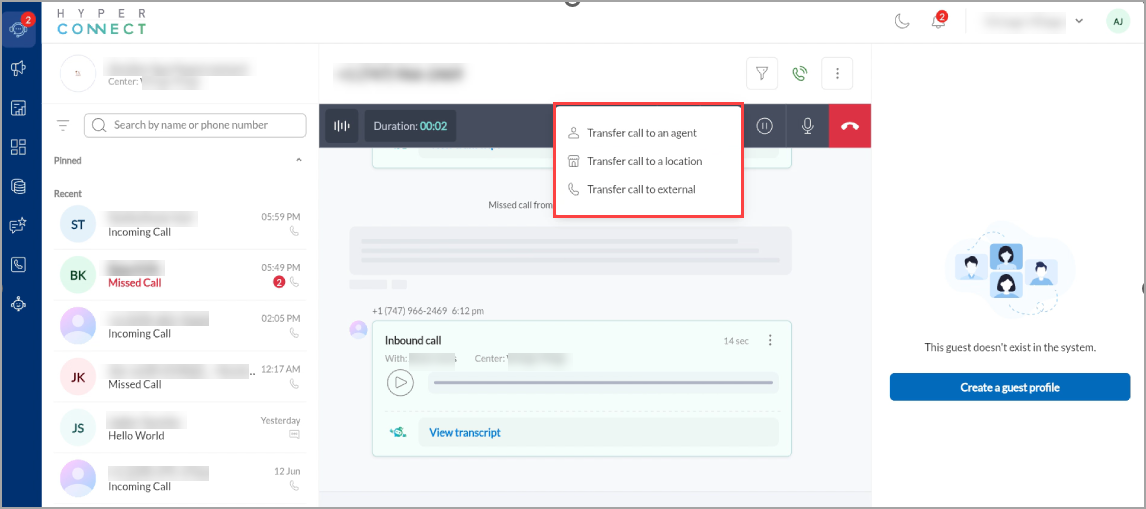
Click on the Transfer Call icon.
Choose the type of transfer: Choose the type of transfer:
Transfer call to a location: Redirect the call to another location within the network.
Transfer call to an agent: Redirect the call to a specific agent or device by selecting from a list of extensions.
Transfer call to external: Redirect the call to an external phone number outside the organization.
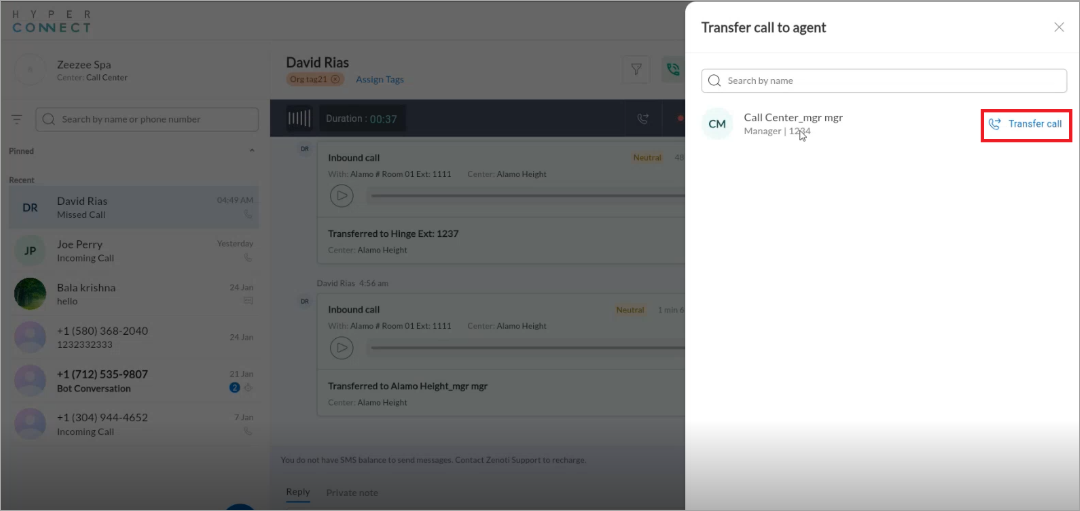
Select the desired agent or location from the displayed list of extensions.
Each extension entry will show the agent’s name and extension number for easy identification.
Click Transfer call to confirm the transfer.
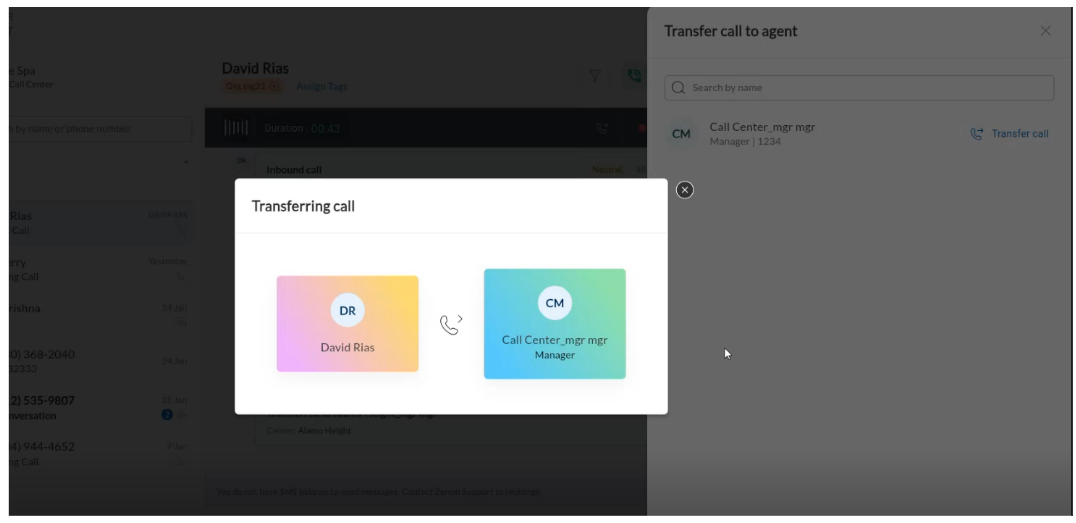
The following message appears transferring the call
Note
If the target agent declines or misses the call, the customer remains on hold with the initial agent.
There is no limit to the number of transfers within a single call session.
Each transfer is logged and accessible via the Call Card.
Manage Multiple Transfers
This feature in HyperConnect allows seamless redirection of calls between multiple agents or locations during a single session. This ensures uninterrupted communication, even for complex scenarios requiring input from multiple team members or departments.
Steps to Manage Multiple Transfers
Initiate the First Call Transfer:
During an active call, navigate to the Guest panel.
Click Transfer to Agent to begin the transfer process.
Select the target agent or location from the list of available extensions.
Confirm the transfer.
Initiate Another Transfer:
While on the active call with the transferred agent, click Transfer to Agent again.
Follow the same steps to choose the next target agent or location.
Repeat as Needed:
Continue transferring the call to additional agents or locations, as required.
Each transfer is logged, and the system ensures that no part of the call history is lost.
View Call Records
This feature in HyperConnect enables users to access and review detailed information about past calls. This includes transcripts, recordings, and activity logs, which are essential for training, compliance, and operational improvements. The records are consolidated into a Call Card, making it easy to retrieve all relevant information in one place.
Steps:
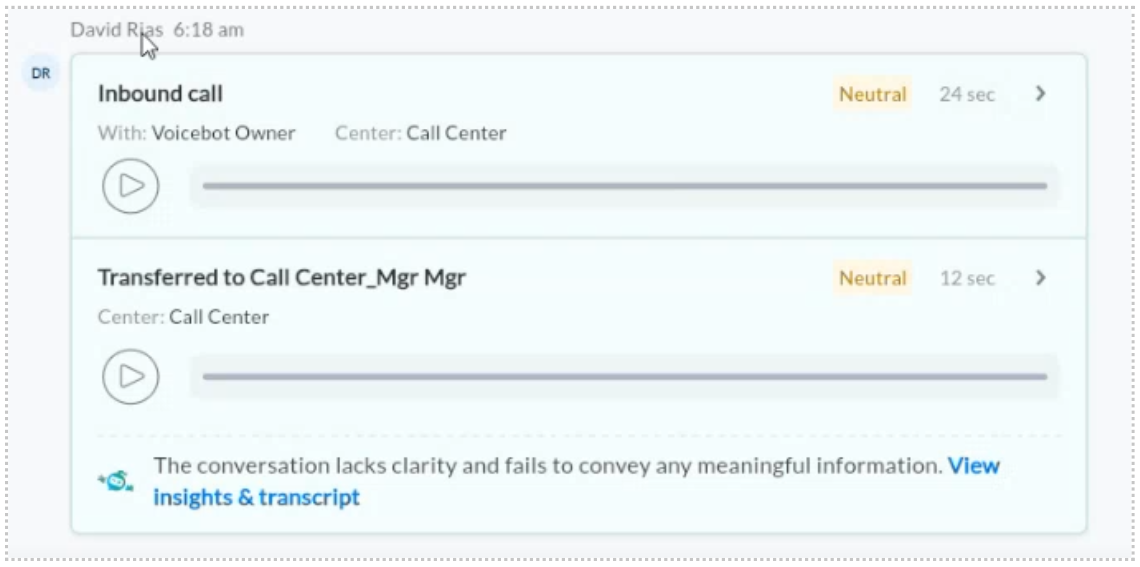
After completing the call, access the Call Card from the Dashboard page > Voice tab.
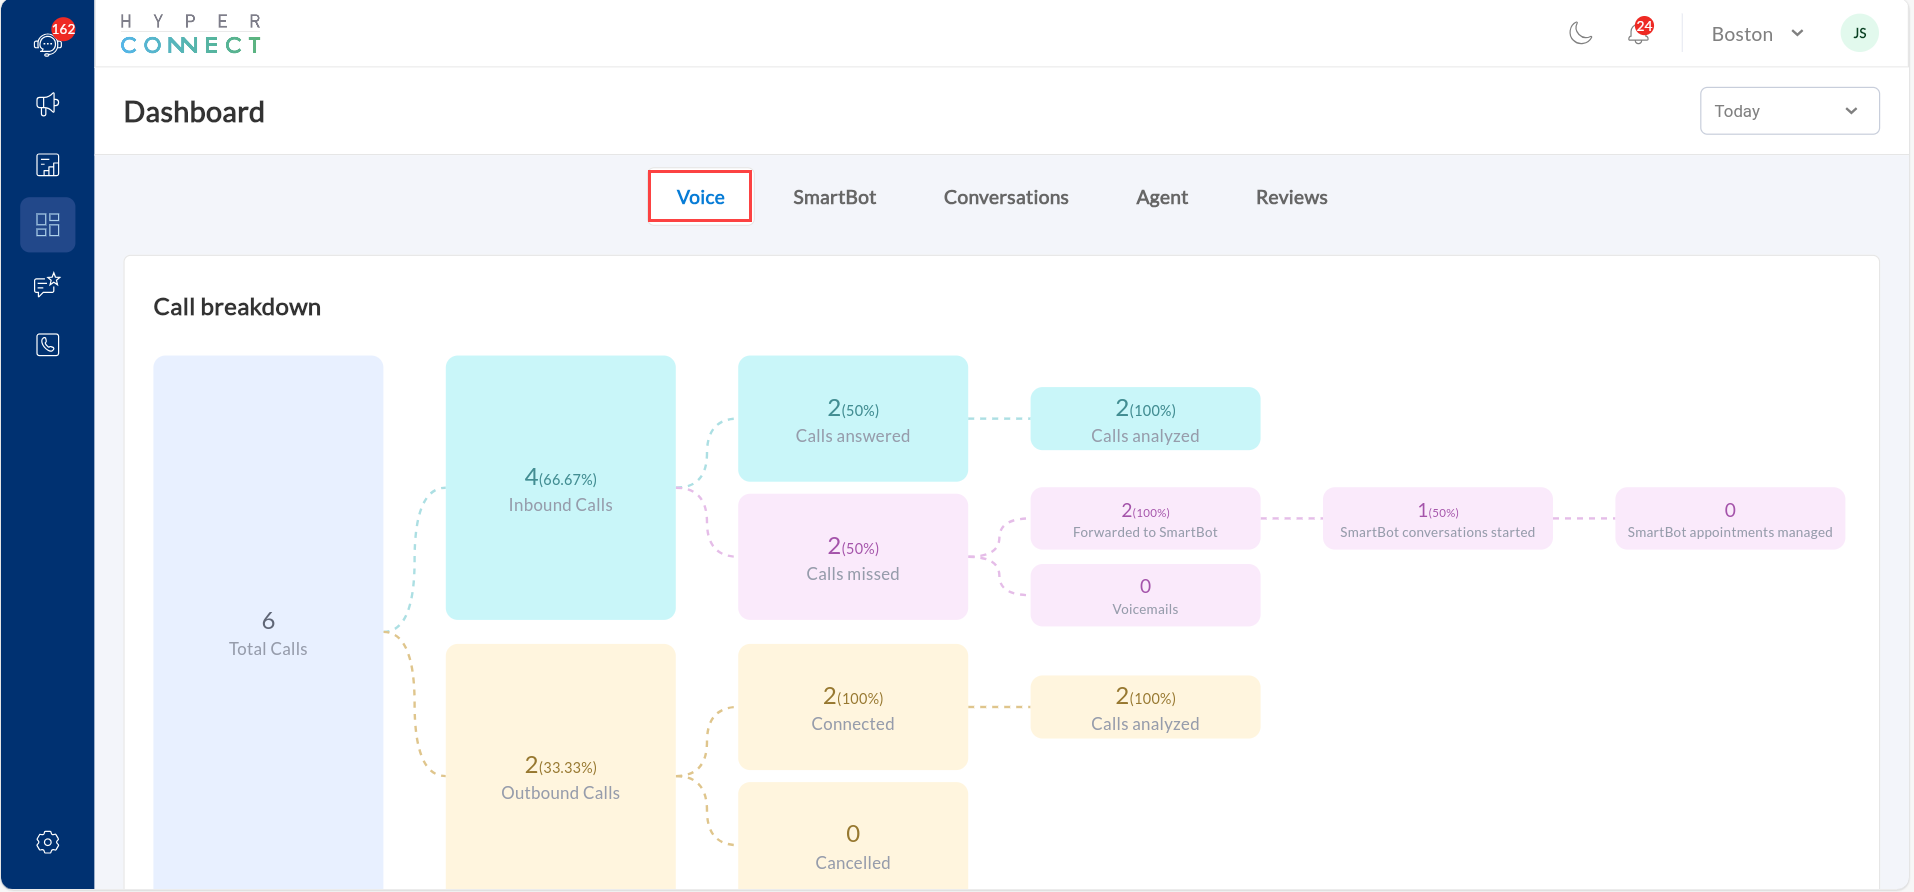
The Call Card provides:
A consolidated view of all call segments, including transcripts and recordings.
Separate sections for each agent or device involved in the session.
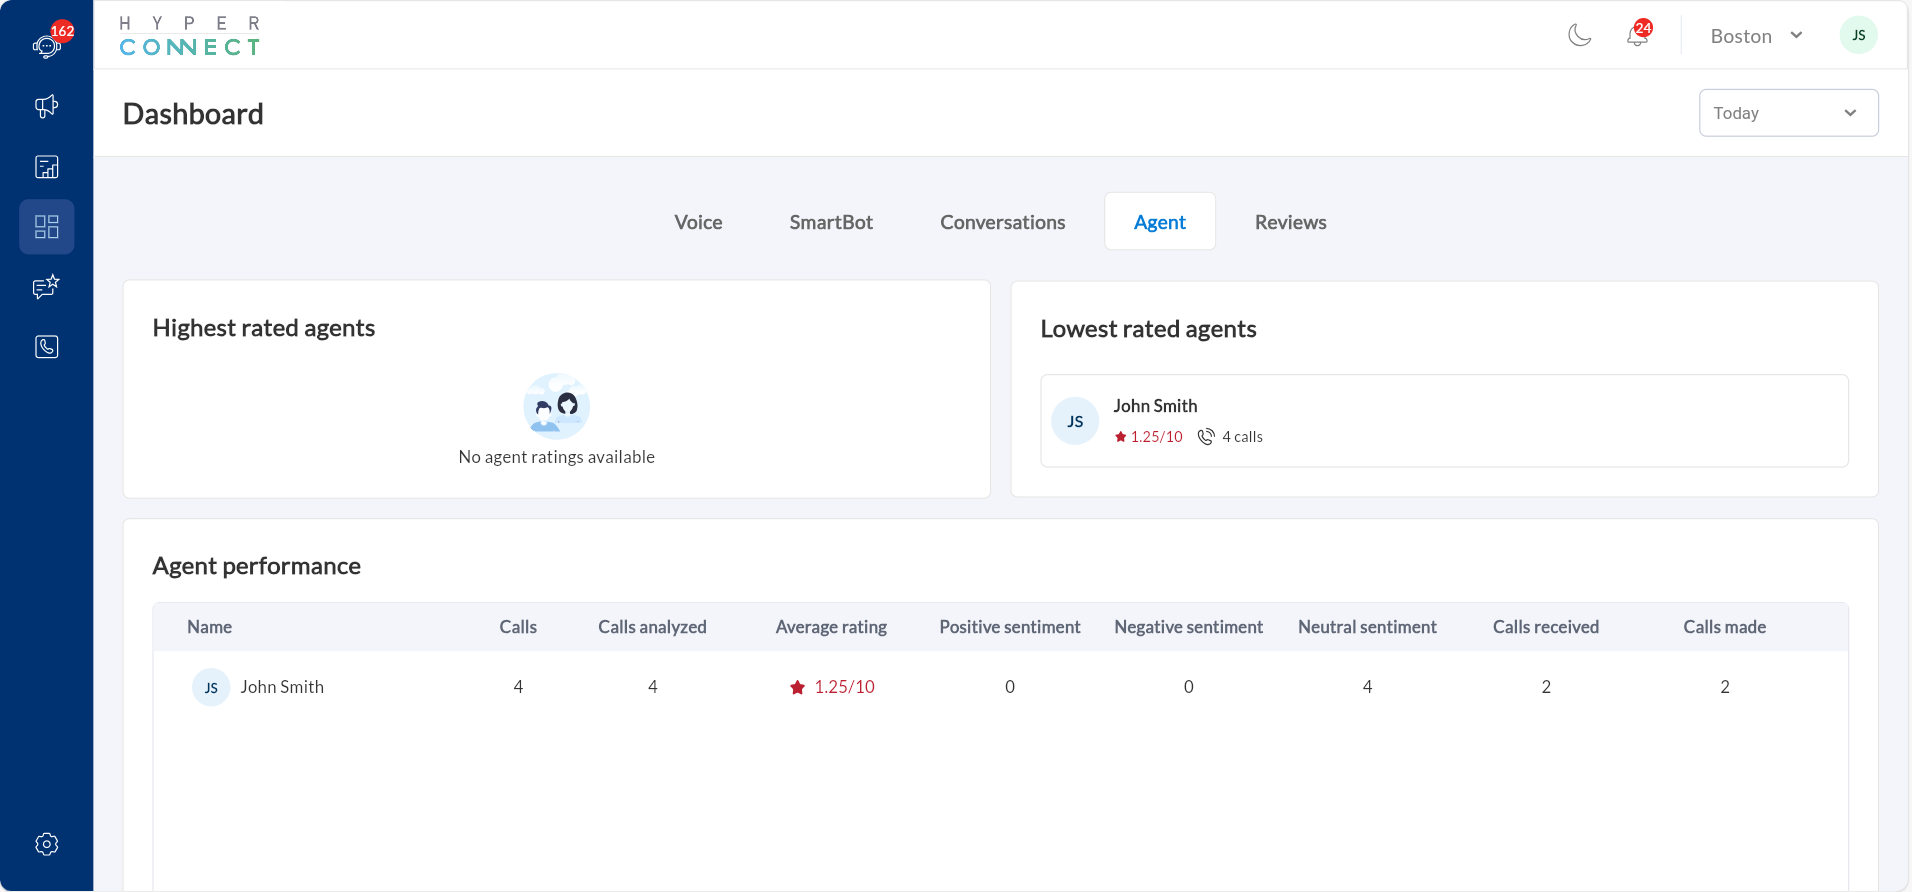
Use the Call Card to review call history for training or compliance purposes using Zeenie.
Navigate to the Agent tab that is specifically focused on Agent Performance and ratings. This also provides insights into agent activity, performance metrics, and customer sentiment.
Usage Insights
The Usage Insights dashboard for HyperConnect Communicate provides detailed metrics on the usage of voice minutes, SMS credits, and other communication features. Here's a breakdown of the information displayed:
Steps
Open the Usage Dashboard from the HyperConnect interface.
Open the Usage Dashboard from the HyperConnect interface.
Total credits allocated.
Current usage and remaining balance.
Overages incurred.
View billing notifications for alerts on exceeding included credits.
Use the filtering options to review usage data for specific timeframes (example, last month, this quarter).
Purpose of the Dashboard
Real-Time Tracking: Provides businesses with a clear and immediate overview of their resource consumption.
Proactive Alerts: Highlights overages to avoid unexpected costs and allow for better budgeting.
Actionable Insights: Enables businesses to analyze trends in usage and optimize their communication resources effectively.
Limitations
Transfers between call centers and locations are not yet supported.
Billing updates reflect a one-day delay due to system synchronization.
Certain features, like physical phone transfers, may require advanced setup.
Transfer a Live Call to Another Center
When a guest calls a location that is not their home center, or when a call needs to be handled by a specific team at another location, agents can transfer the call directly from HyperConnect without dropping the connection. The receiving center gets the call with full context -- the original guest number, the source center, the transferring agent’s name, and prior conversation history.
Transfer a Live Call to Another Center
While on a live call, click the Transfer icon in the call control bar.
Three options appear:
Transfer call to an agent
Transfer call to a location
Transfer call to external number
Select Transfer call to a location.
A side panel opens listing all centers in the organization.
Click a center name to expand its directory.
The directory shows individual agents with extensions, Ring Groups with a hover preview of members, and Fixed Order groups.
To ring the center’s main line, click Transfer call to center.
To send the call directly to a specific agent or group, click Transfer next to their name.
The call rings at the destination.
Once answered, the receiving agent sees the call in their HyperConnect inbox with: original guest number, source center name, transferring agent name, and prior conversation history.
The transfer is logged in the conversation thread on both the originating and receiving center.
What the receiving agent sees
The receiving agent sees an inbound call notification in HyperConnect.
Opening the conversation shows: the guest’s name and number, a transfer note indicating the source center and transferring agent, and the guest’s prior conversation history (messages, call logs, notes).
Every cross-center transfer is recorded in the conversation thread of both centers. The log includes: the time of transfer, the source center, the transferring agent, the destination center, and the destination extension or group.
Manage Group Extensions in Call Extensions
A group extension is a single extension number assigned to a team of agents. When a caller dials a group extension, the call rings all agents in the group simultaneously or in a defined sequence. Group extensions appear alongside individual agent extensions on the Call Extensions page in HyperConnect.
Use group extensions to ensure incoming calls are always answered, even when one agent is busy or unavailable.
The Call Extensions page lists all extensions, individual and group in a single table with the following columns:
Name: Extension or group name, with a group icon for ring groups
Extension: The extension number (e.g., 6060 for a group, 4041 for an individual)
Physical phone: Whether the extension is linked to a physical phone ("Linked" or "–")
Friendly name: A human-readable label for the extension
View group extensions
In HyperConnect, click the Call Extensions icon in the left navigation bar.
The Call Extensions page lists all extensions.
Group extensions are identified by the group icon (people symbol) displayed next to the extension name.
To see the members of a group extension, hover over the group icon.
A tooltip displays the agent names in the group (For example: “ Smith-john, Dan Scott, Ana Stone +1 more").
Configure routing order for a group extension
The routing order determines how incoming calls are distributed across agents in a group, either all at once (simultaneous ring) or one by one in a defined sequence.
On the Call Extensions page, locate the group extension you want to configure.
Click the group extension row to open its settings.
Set the routing order by arranging agents in the desired sequence.
Click Save.
Handle incoming calls to a group extension
When a call is placed to a group extension:
The call rings all agents in the group (or follows the configured routing order).
The incoming call notification appears in HyperConnect for each agent in the group.
The first agent to answer handles the call.
The call can be transferred to another agent if needed.
Call history for group extension calls is recorded under each participating agent's activity in HyperConnect.
Search and filter extensions
On the Call Extensions page, you can:
Filter by physical phone status: Use the Physical phone dropdown to show only extensions with or without a linked physical phone.
Search by extension number: Use the Search by extension field to quickly locate a specific extension.
These filters apply to both individual and group extensions.