Payment Express
Overview
Note
Zenoti supports Payment Express integration in Australia and New Zealand regions.
Zenoti supports Payment Express payment processor for online credit card processing and webstore transactions. You can set up multiple terminals to process payments.
Note
Two users should not use the same terminal simultaneously, which results in incorrect processing of payments.
Configuring Payment Express consists of the following:
Pre-requisites
You need the following hardware to configure Payment Express processing:
Terminals: Payment Express supports IPP350 and Move 5000 wireless terminals.
Power adapter and base station for the terminal.
Straight Ethernet cable.
The following details related to your Payment Express account: PxPay Userid, PxPay Key, Post Username, Post Password, Station, User, Key.
Configuring the IWL 250 Terminal
To configure IWL 250, follow these steps:
Connect the Power Supply unit into the power socket on the base unit and then in to the mains power.
Connect one end of the Ethernet cable to the Ethernet Socket on your base unit, and the other end to a corresponding socket on the Broadband router or LAN.
Place the terminal on the base if you haven't already done so.
The terminal now powers on. Press Enter on the terminal.
In the next screen, enter the Merchant number and press enter.
Note
You can see the Merchant number assigned to you on the
Payment Express welcome letter.
The terminal contacts each card acquirer which your terminal is configured to accept. and relevant messages are displayed.
Finally, the terminal will dial the Host computer to report the successful installation.
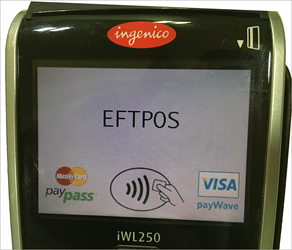
The Installation process is completed automatically, and the terminal displays the EFTPOS screen when it is ready for use.
If you are unable to power on the terminal or configure it to your network, you need to contact Payment Express for troubleshooting. It's recommended to integrate Zenoti with Payment Express only after your ensure that your terminal is properly configured.
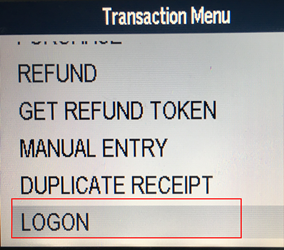
After the terminal is ready, to prepare the terminal for processing transactions, the Logon message is used. A Logon uses the assigned merchant number and terminal ID to log in to the banking switch. This is an optional process as the terminal automatically logs itself with the DPS host 10 seconds after connecting to the network. However if manual logon is required, please follow these steps:
Press the Menu/F button in the pin pad.
On the Transaction menu that is displayed, click Logon.
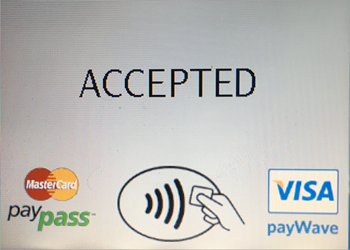
The terminal shows Accepted message on the screen.
Configure Payment Express in Zenoti
After you've successfully configured the IWL 250 terminal, you need to configure the
Payment Express processor in Zenoti is as follows:
To configure Payment Express in Zenoti:
At the organization or center level, click the Configuration icon.
Search for and select Payment processor onboarding from under Payments.
For Payment Express click Setup.
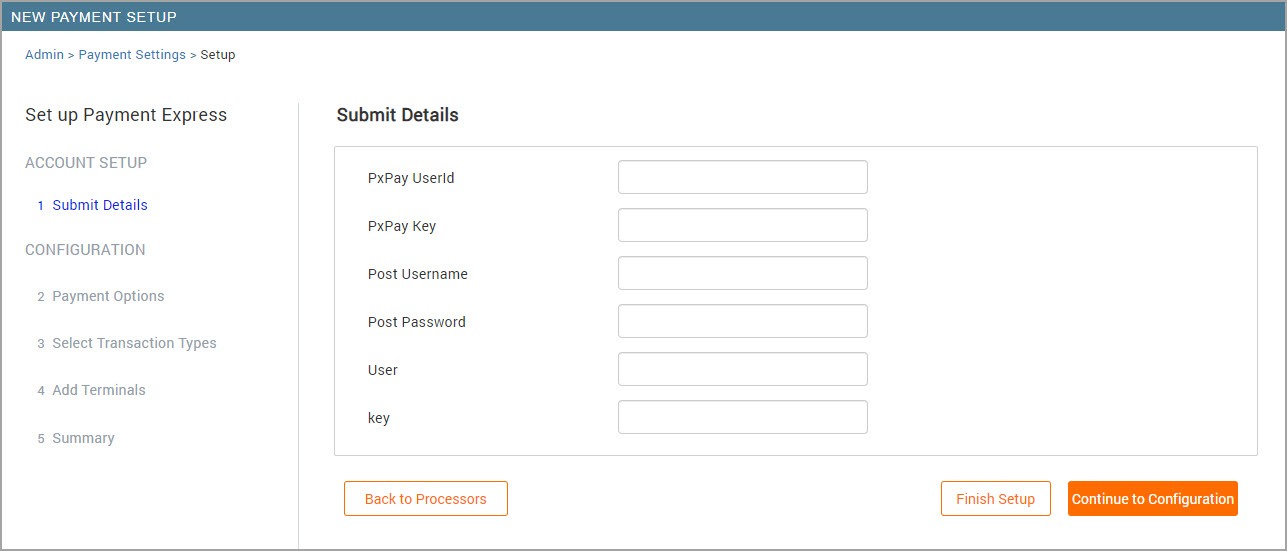
Complete the following fields:
PxPay Userid: Enter your Payment Express account's user id. The username is
sent to you with your Payment Express account. This is used for taking payments
from the Webstore and saving the cards to guest profile.
PxPay Key: Enter your Payment Express account's 64-character key. This key is
sent to you along with your Payment Express account. This is used for taking
payments from the Webstore and saving the cards to guest profile.
Post Username: Enter your PxPost username (provided by DPS Payment
Express). It is used for processing refunds.
Post Password: Enter your PxPost password (provided by DPS Payment Express).
It is used for processing refunds.
User: Enter username provided by DPS.
Key: Enter password provided by DPS.
Click Continue to Configuration to proceed with setting up payment options, transaction types, and terminals. If you wish to configure these settings later, click Finish Setup.
Configure Payment Options
If you proceed with Continue to Configuration, you must first set up your payment
options. Configure the following settings:
Allow Saving Cards on Web: Select this checkbox so that guest’s card details
can be saved on Zenoti.
Allow saving cards on Webstore and Mobile App: Select this checkbox so that
guest’s card details can be saved on the Webstore and Consumer Mobile App (CMA).
Configure Transaction Types
Configure the following settings:
Terminal: Select this checkbox to allow terminal transactions (card reader
transactions) on Payment Express for your center or organization.
Online: Select this checkbox to allow online transactions for Webstore and CMA
on Payment Express.
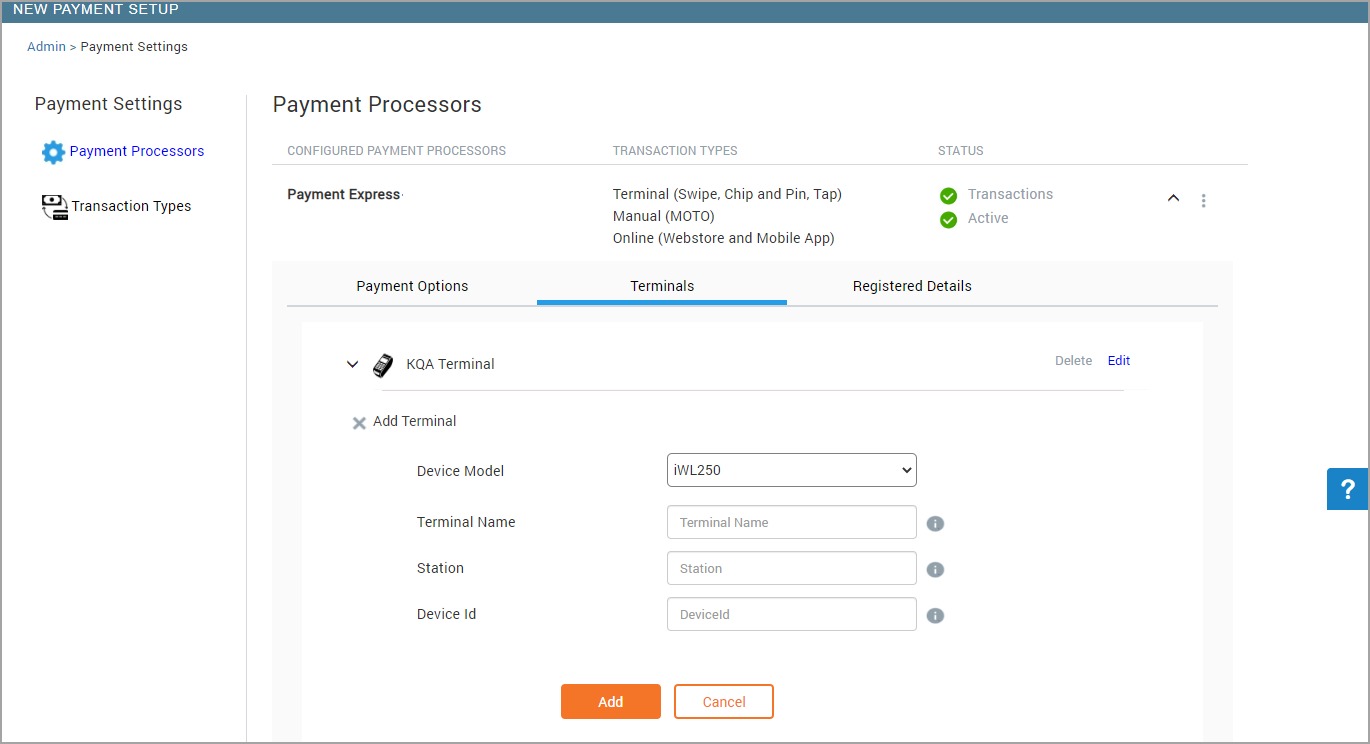
Add Terminals
Complete the following fields:
Terminal: Enter a name of your choice for the terminal.
Station: Enter the serial number unique to the device, usually printed on a sticker behind the terminal.
Device Id: Enter an identifier for your device consisting of up to 32 alphanumeric characters.
Click Add.
The terminal name appears on the screen.
You can edit the terminal by clicking the pencil next to the terminal's name.
Note
You cannot delete a terminal if it is the only one that is configured.
You have successfully configured the payment processor.
Collect card payments from POS
On the appointment book, click the appointment for which you want to collect the payment
Click Take Payment.
On the right hand side of the POS, under the Collect Payment section, click Credit/Debit.
The default terminal is selected. To change the terminal, click Change, and then select a terminal from the drop-down list.
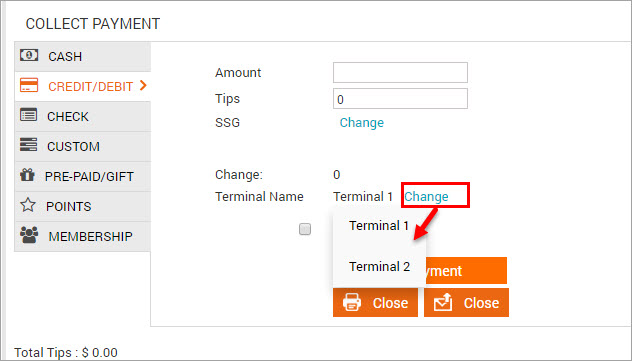
Click Add Payment. Zenoti shows the Transaction Started window.
Swipe or insert the guest's credit card on Payment Express terminal and start the transaction.
The Online Payment pop-up window opens and displays the status of the transaction as Processing.
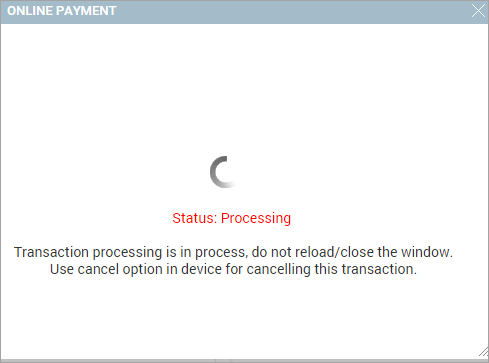
Depending on the outcome of the transaction, you will receive the Transaction Successful or Transaction failed alerts in Zenoti.
Note
If you want to cancel the transaction, do it directly by pressing the Cancel button on the terminal.
You cannot cancel the transaction by closing the processing window because the transaction still goes through the terminal, resulting in inconsistent data between Zenoti and Payment Express.
Configure the Ingenico iPP350 card reader for Payment Express
You can accept card payments on your desktop POS PC running on Windows OS by connecting the Ingenico iPP350 card reader terminal via a USB.
In this article, you will learn about the steps involved in connecting an IngenicoiPP350 card reader via USB to a Windows PC.
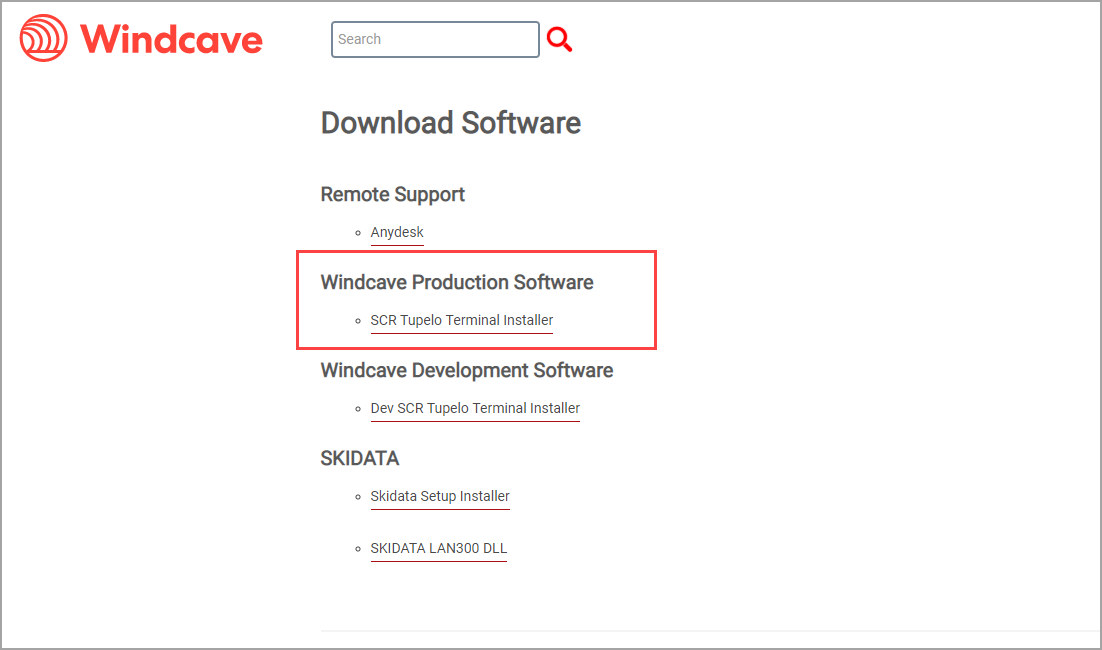
Download and install the drivers of the iPP350 (SCR Tupelo Terminal Software) on your Windows PC.
Note
Ensure to download the production version of the drivers.
Change the Connectivity Type to USB on the iPP350 card reader.
Edit the config file and change the currency from the default NZD to AUD.
Navigate to C:\Program Files (x86)\DPS\Eftpos_scr on your Windows PC.
Open the file pxscrcontroller_cfg in a notepad.
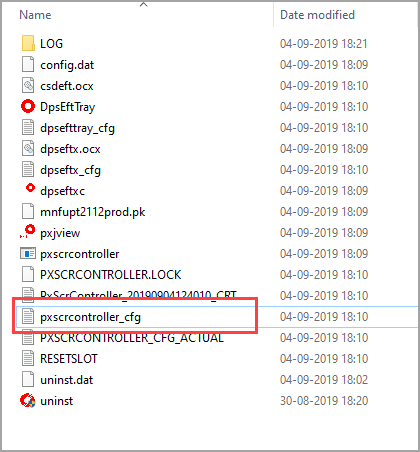
Edit the currency line. By default, the currency is set to NZD. Change it to AUD.
Save the file and close it.

Add iPP350 as a terminal in Zenoti.
After you add the Ingenico iPP350 as a terminal in Zenoti, you can start using it for collecting payments.
Note
Ensure that the service Payment Express SCR200 Controller is running for you to take the payments.
Add Ingenico Move 5000 as a terminal in Zenoti
You can use the card reader Ingenico Move 5000 as an alternative to the deprecated iWL250. The card reader Move 5000 supports the following payment methods:
Swipe
Chip and PIN
Contactless
The device comes with WiFi and 4G LTE connectivity, along with a touchscreen and a thermal printer.
Check the following image for a quick reference:

At the organization or center level, click the Configuration icon.
Search for and select Payment processor onboarding from under Payments.
For Payment Express, expand to view more options and select Terminals.
Configure the following settings:
Terminal Name: Enter the name to identify the terminal. This name will reflect on
the POS screen in Zenoti.
Station: Enter the serial number unique to the device. This is usually printed
behind the device on a label.
Device Id: The device id is provided by your payment provider. This device id
helps in the encryption of data and secures the data transfer. Enter an identifier
for your device. This id can consist of up to 32 alphanumeric characters.
Click Add.
Click Save.
Ingenico iPP350: Install SCR Tupelo Terminal software for Payment Express
After you download the SCR Tupelo Terminal Installer, you must set it up on your Windows PC. This will allow your terminal to interface with your POS system and allow you to make transactions using the card reader.
Supported OS: Windows XP Embedded, Windows Vista to Windows 10
Recommended RAM: 1GB or higher
Recommended CPU: 2.4 GHz Single Core (minimum)
Firewall: Ensure to add an exception in your firewall for the Payment Express software.
Ensure to download the production version of the SCR Tupelo Terminal Installer.
The device iPP350 should be connected to your PC via USB during the
installation.
To install the SCR Tupelo Terminal software follow the steps below:
Connect the iPP350 device to your PC via USB.
Run the installer wizard to install the SCR Tupelo Terminal.
The installer opens.
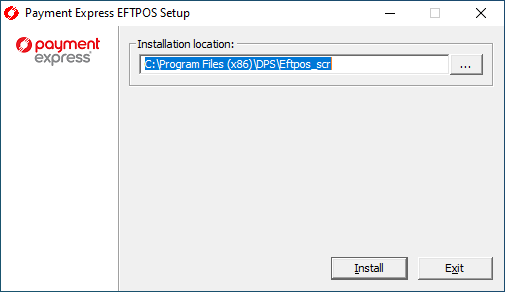
Select the installation location and click Install
The End User License Agreement (EULA) appears.
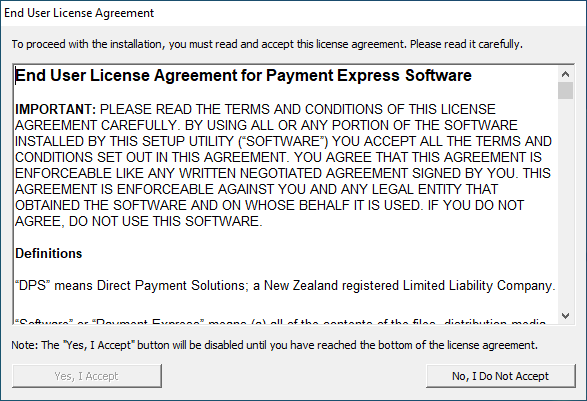
Scroll down to the end of the agreement and click Yes, I Accept.
The EFTPOS software will start to download.
After the download, Ingenico Drivers Installation window appears.
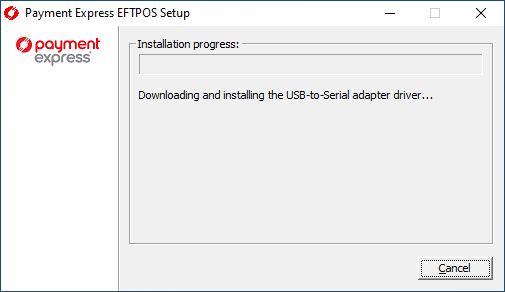
Click Next to continue.

Select the installation location of the Ingenico drivers.
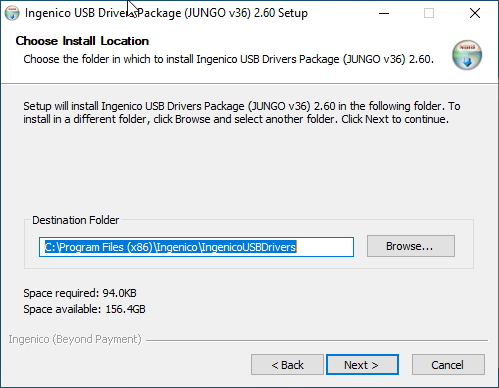
Click Next.
The USB Driver Parameters screen appears.
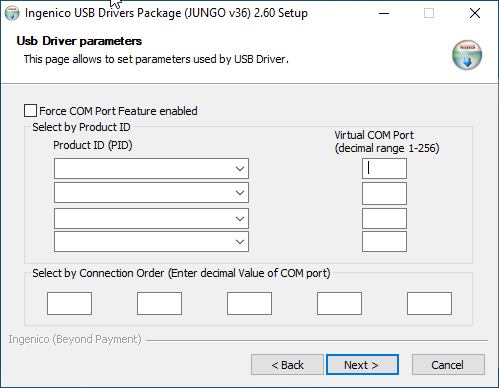
Click Next. - Do not enter any information in this screen.
The Advanced Parameters screen appears.
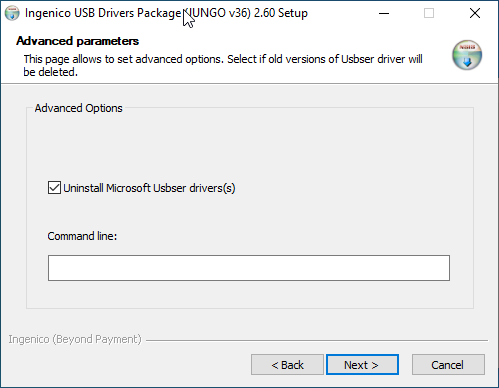
Click Next. Do not enter anything on this screen.
The Choose Start Menu Folder screen appears.
Select the appropriate folder and click Install.
The installation runs.
Click Finish after the installation is done.
The installer will now download PxScrController application, configuration file, and any required components for the EFTPOS functionality and the integration.
After the download and installation, you will see a pop-up stating that EFTPOS is installed successfully.
Payment Express: Change the connectivity type of the iPP350 card reader
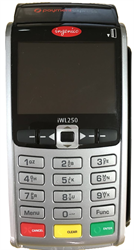
When you purchase the Ingenico iPP350 device, it may not be configured to the USB mode. In this article, you will learn how you can change the connectivity type for the device to USB.
Refer to the following image for a quick reference of the device:
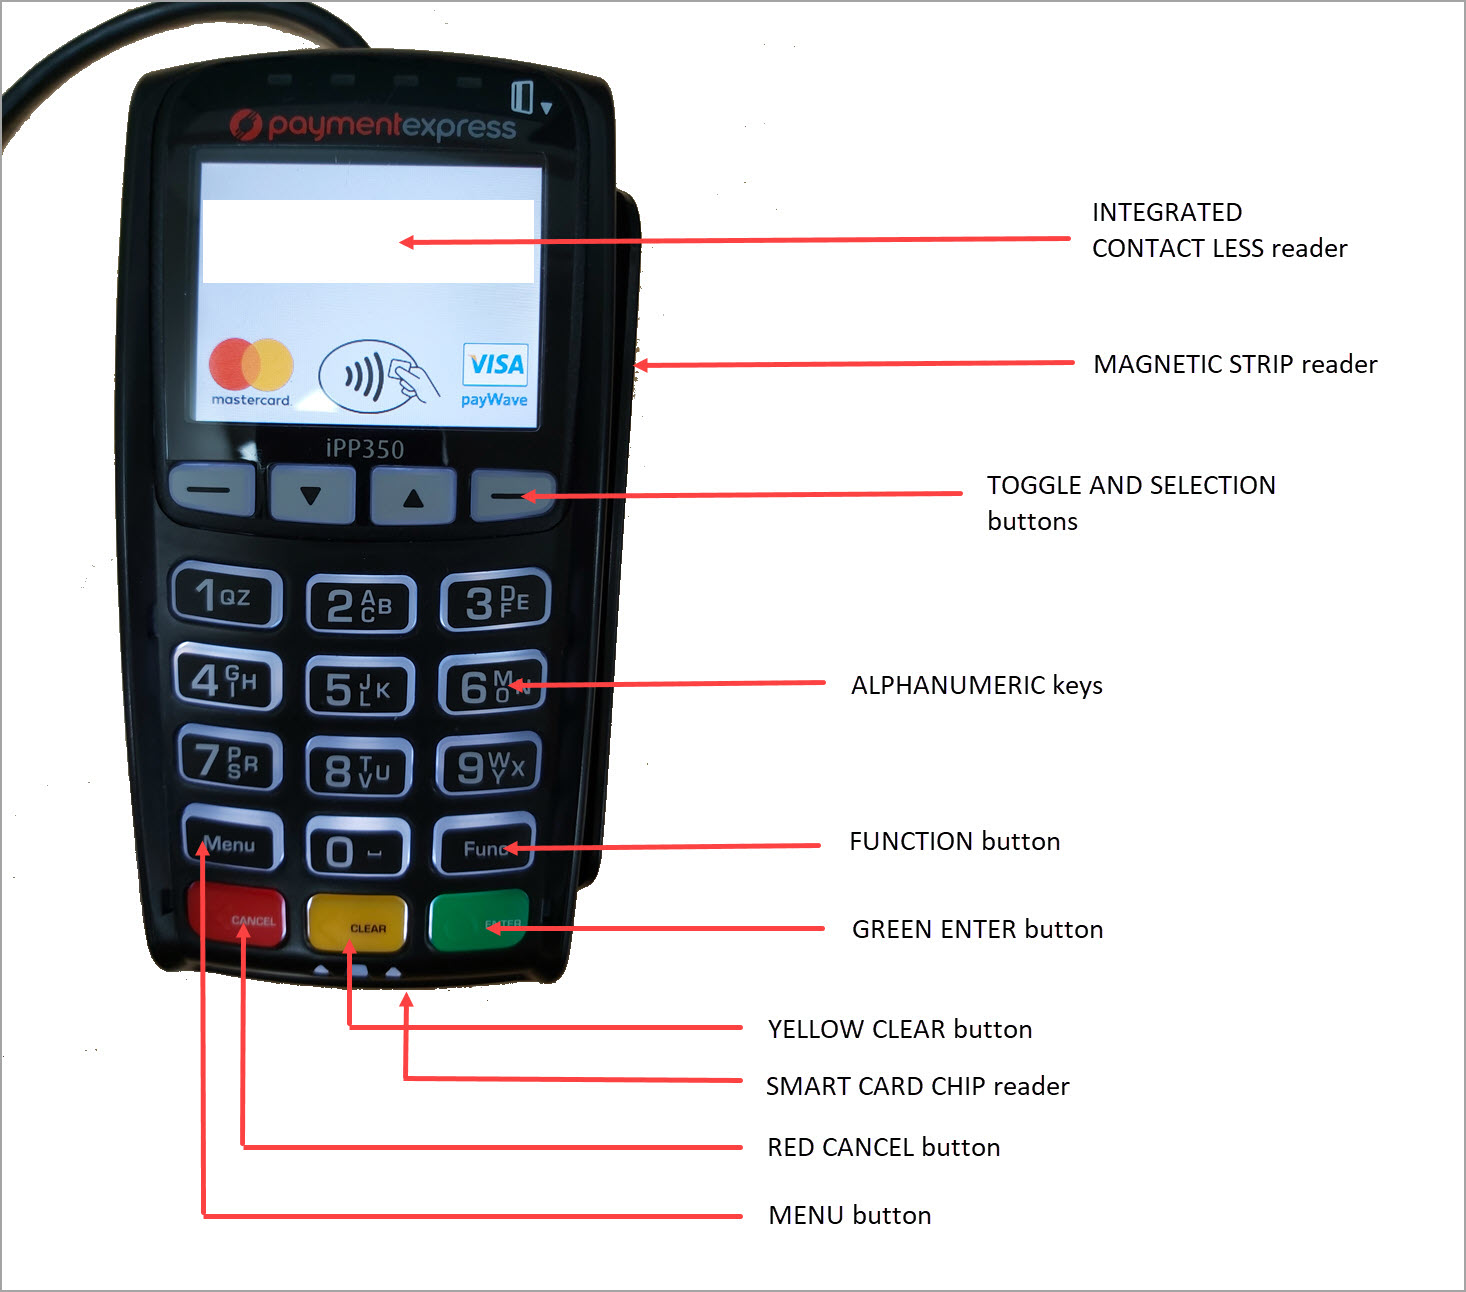
To enable USB mode on iPP350 device
Hold the Clear button (Yellow color) and the Function button (FUNC) for two seconds.
The device reboots and the Payment Express logo appears.
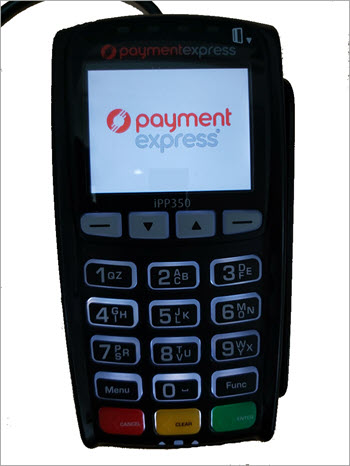
Press the Clear (Yellow) button when the Payment Express logo appears.
You are prompted to enter the menu code.
Enter the code 5210.
The Configurations screen appears.
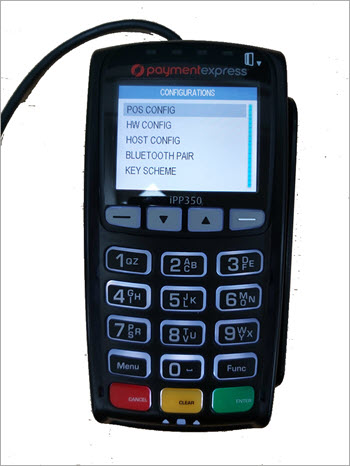
Select POS Config and press the green Enter button.
Select Connection Type and press the green Enter button.
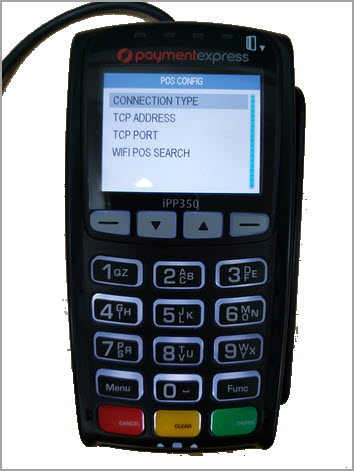
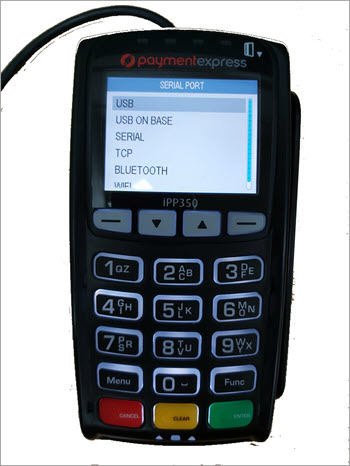
Select USB and press the green Enter button.
The USB mode for the device is enabled.
Press the red Cancel button to go back.
The Configurations screen re-appears.
Select Host Config and press the green Enter button.
Select Network and press the Enter button.
Select Forward By POS and press the Enter button.
The setup for the device is complete.
Add Ingenico iPP350 as a terminal in Zenoti
You must add the Ingenico iPP350 as a terminal in Zenoti to use the card reader and perform transactions.
Note
This is only applicable if your payment processor is Payment Express.
To add Ingenico iPP350 as a terminal in Zenoti
At the organization or center level, click the Configuration icon.
Search for and select Payment processor onboarding from under Payments.
For Payment Express, expand to view more options and select Terminals.
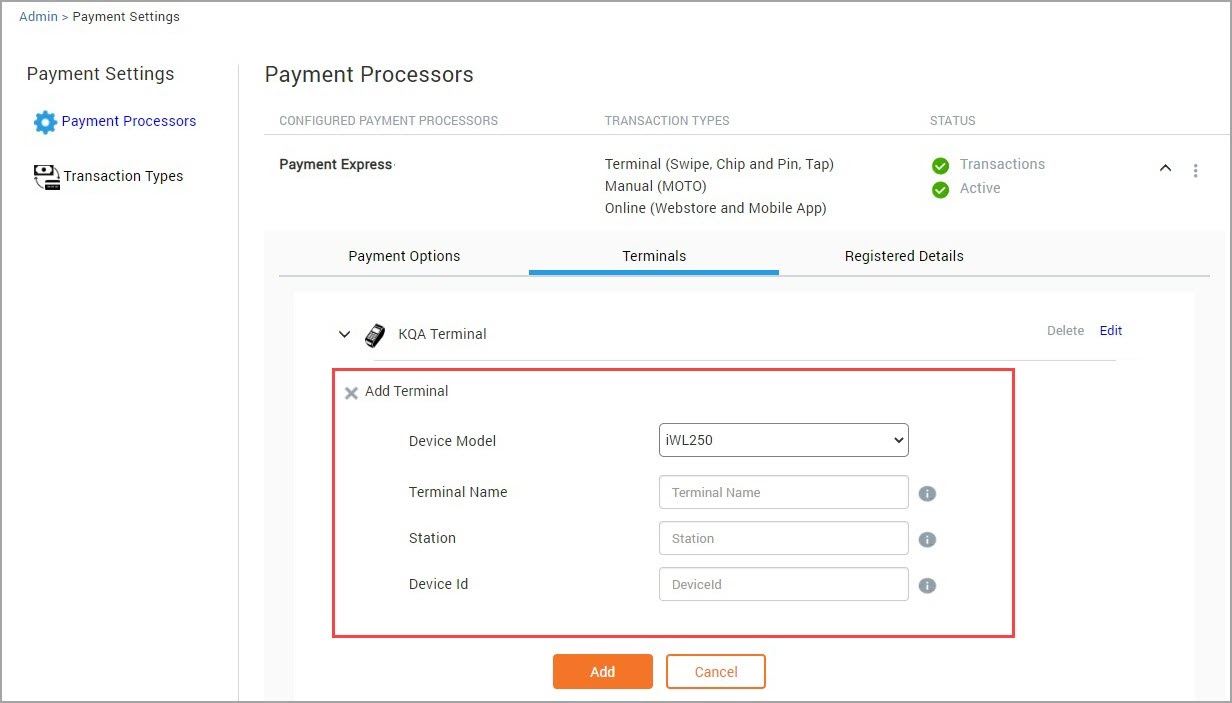
From the Device Model dropdown list, select Ingenico iPP350.
Enter the following details:
Terminal Name: Enter the name to identify the terminal. This name will reflect on the POS screen in Zenoti.
Station: Enter the serial number unique to the device. This is usually printed behind the device on a label.
Device Id: The device id is provided by your payment provider. This device id helps in the encryption of data and secures the data transfer. Enter an identifier for your device. This id can consist of up to 32 alphanumeric characters.
Click Add.
Click Save.