Accounting Integration (Onboarding)
Onboarding: Set up and authorize QuickBooks Online
Depending on whether you use the cash or accrual accounting method, the procedure to set up and authorize QBO will differ slightly. For each method, you also have to set up how Zenoti posts journal entries and invoices to QBO.
Important
Ensure that you have an account created on QuickBooks Online (QBO).
Based on the accounting method and the data type of posting, you can configure QBO in one of the following ways:
Cash accounting - Invoices
To enable posting Invoices created in Zenoti in to QBO, you must set up the following:
In QBO, create the following chart of accounts and items for Revenue.
Item type
(in Zenoti)
Item name
(create in QBO)
Item code
Item type
Account name
(create in QBO)
Account type
Service
Service
Service
Service
Zenoti Service Revenue
Revenue
Product
Product
Product
Inventory/Service
Zenoti Product Revenue
Revenue
Classes
Class
Class
Service
Zenoti Class Revenue
Revenue
Gift cards
Gift cards
Gift cards
Service
Zenoti Gift Cards Revenue
Revenue
Prepaid cards
Prepaid cards
Prepaid cards
Service
Zenoti Prepaid Cards Revenue
Revenue
Memberships
Membership
Membership
Service
Zenoti Membership Revenue
Revenue
Package
Package
Package
Service
Zenoti Package Revenue
Revenue
In QBO, create the following chart of accounts for Redemption and Collections.
Payment type
Account name
(create in QBO)
Account type
Cash
Zenoti Undeposited Funds - Cash
Bank or Other Current Asset
Card
Zenoti Undeposited - Card
Bank or Other Current Asset
Check
Zenoti Undeposited - Check
Bank or Other Current Asset
Custom
Zenoti Undeposited - Custom
Bank or Other Current Asset
Gift card redemption
Zenoti Gift Cards Revenue
Revenue
Prepaid card redemption
Zenoti Prepaid Cards Revenue
Revenue
Membership redemption
Zenoti Membership Revenue
Revenue
Package redemption
Zenoti Package Revenue
Revenue
For the US region: In QBO, enable Automated Sales Tax. More information
For other regions: In QBO, configure tax rates as per local requirements. More information
Navigate to the Integrations tab as follows,
At the organization level, click the Configuration icon.
Search for and select Accounting from the Integrations section.
Expand the Accounting tab.
Under the Configuration tab, expand the Provider section.
Select QuickBooks Online as the accounting platform, then click Continue.
On the Financials dialog box, click Advanced Configuration.
Set the Use Live Key toggle to Yes.
Important
This tab is visible only after you configure the invoice and sync settings in the Configuration tab.
Important
If you have multiple locations, you must configure locations in QBO and switch on the Multi-Location switch in Zenoti.
Expand the Authorize tab.
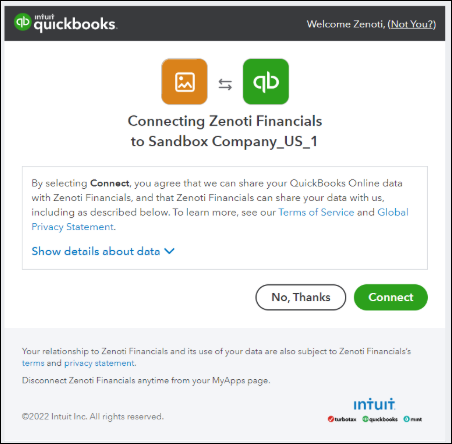
Click Authorize . A new tab opens in the browser asking for access to your QBO account.
Note
If you have a single organization created for your business on QBO, you will see the following window:
Sync Guest, Items, Chart of Accounts, and Locations.
Expand the Manual Sync section.
For Accounts, click Get.
For All Items, click Get.
For Guests, click Post.
For Locations, click Get.
Map Tax Rate to Chart of Accounts.
Expand the Tax Rate Mapping section.
For each tax group in Zenoti, map it to the respective tax rate in QBO.
Expand the Payments Mapping section.
For each payment type in Zenoti, map it to an account name in QBO. Refer to the table in Step 2 of this procedure.
Test whether the sync is set up properly.
Expand the Manual Sync section.
For Sales and Refunds, select a date, then click Post.
Now go to QBO and verify that the sync was completed correctly.
Accrual accounting - Journal entries
In QBO, create the following chart of accounts for revenues and tax liabilities.
Account name to create in QBO
Account type in QBO
Item type in Zenoti
Zenoti Service Revenue
Revenue
Service
Zenoti Product Revenue
Revenue
Product
Zenoti Class Revenue
Revenue
Classes
Zenoti Gift Cards Liability
Other Current Liabilities
Gift Cards
Zenoti Prepaid Cards Liability
Other Current Liabilities
Prepaid Cards
Zenoti Membership Liability
Other Current Liabilities
Membership
Zenoti Package Liability
Other Current Liabilities
Package
Zenoti Sales Tax Liability
Other Current Liabilities
Taxes
In QBO, create the following chart of accounts for redemptions and collections.
Account name to create in QBO
Account type in QBO
Payment type in Zenoti
Zenoti Undeposited Funds - Cash
Bank or Other Current Asset
Cash
Zenoti Undeposited - Card
Bank or Other Current Asset
Card
Zenoti Undeposited - Check
Bank or Other Current Asset
Check
Zenoti Undeposited - Custom
Bank or Other Current Asset
Custom
Zenoti Gift Cards Liability
Other Current Liabilities
Gift Card Redemption
Zenoti Prepaid Cards Liability
Other Current Liabilities
PPC Redemption
Zenoti Membership Liability
Other Current Liabilities
Membership Redemption
Zenoti Package Liability
Other Current Liabilities
Package Redemption
Navigate to the Integrations tab as follows,
At the organization level, click the Configuration icon.
Search for and select Accounting from the Integrations section.
Expand the Accounting tab.
Under the Configuration tab, expand the Provider section.
Select QuickBooks Online as the accounting platform, then click Continue.
On the Financials dialog box, click Advanced Configuration.
Set the Use Live Key toggle to Yes.
Important
This tab is visible only after you configure the invoice and sync settings in the Configuration tab.
Important
If you have multiple locations, you must configure locations in QBO and switch on the Multi-Location switch in Zenoti.
Expand the Authorize tab.
Click Authorize. A new tab opens in the browser asking for access to your QBO account.
Note
If you have a single organization created for your business on QBO, you will see the following window:
To allow Zenoti to access your QBO account, click Connect.
Sync the Chart of Accounts and Locations.
Expand the Manual Sync section.
For Accounts, click Get.
If you have multiple locations, for Locations, click Get.
Map the configured Chart of Accounts.
Expand the Items Mapping section.
For each item type in Zenoti, map it to an account name in QBO. Refer to the table in Step 1 of the Prepare QBO procedure.
Expand the Payments Mapping section.
For each payment type in Zenoti, map it to the respective Chart of Accounts in QBO. Refer to the table in Step 2 of the Prepare QBO procedure.
Test whether the sync is set up properly.
Expand the Manual Sync section.
For Sales and Refunds, select a date, then click Post.
Now go to QBO and verify that the sync was completed correctly.
Accrual accounting - Invoices
To enable posting Invoices created in Zenoti in to QBO, you must set up the following:
In QBO, create the following chart of accounts and items for Revenue.
Item type
(in Zenoti)
Item name
(create in QBO)
Item code
Item type
Account name
(create in QBO)
Account type
Service
Service
Service
Service
Zenoti Service Revenue
Revenue
Product
Product
Product
Inventory/Service
Zenoti Product Revenue
Revenue
Classes
Class
Class
Service
Zenoti Class Revenue
Revenue
Gift cards
Gift cards
Gift cards
Service
Zenoti Gift Cards Liability
Other Current Liabilities
Prepaid cards
Prepaid cards
Prepaid cards
Service
Zenoti Prepaid Cards Liability
Other Current Liabilities
Memberships
Membership
Membership
Service
Zenoti Membership Liability
Other Current Liabilities
Package
Package
Package
Service
Zenoti Sales Tax Liability
Other Current Liabilities
In QBO, create the following chart of accounts for Redemption and Collections.
Payment type
Account name
(create in QBO)
Account type
Cash
Zenoti Undeposited Funds - Cash
Bank or Other Current Asset
Card
Zenoti Undeposited - Card
Bank or Other Current Asset
Check
Zenoti Undeposited - Check
Bank or Other Current Asset
Custom
Zenoti Undeposited - Custom
Bank or Other Current Asset
Gift card redemption
Zenoti Gift Cards Liability
Revenue
Prepaid card redemption
Zenoti Prepaid Cards Liability
Revenue
Membership redemption
Zenoti Membership Liability
Revenue
Package redemption
Zenoti Package Liability
Revenue
For the US region: In QBO, enable Automated Sales Tax. More information
For other regions: In QBO, configure tax rates as per local requirements. More information
Navigate to the Integrations tab as follows,
At the organization level, click the Configuration icon.
Search for and select Accounting from the Integrations section.
Expand the Accounting tab.
Under the Configuration tab, expand the Provider section.
Select QuickBooks Online as the accounting platform, then click Continue.
On the Financials dialog box, click Advanced Configuration.
Set the Use Live Key toggle to Yes.
Important
This tab is visible only after you configure the invoice and sync settings in the Configuration tab.
Important
If you have multiple locations, you must configure locations in QBO and switch on the Multi-Location switch in Zenoti.
Clear the Post Journal Entries checkbox.
Expand the Authorize tab.
Click Authorize . A new tab opens in the browser asking for access to your QBO account.
Note
If you have a single organization created for your business on QBO, you will see the following window:
Sync Guest, Items, Chart of Accounts, and Locations.
Expand the Manual Sync section.
For Accounts, click Get.
For All Items, click Get.
For Guests, click Post.
For Locations, click Get.
Map Tax Rate to Chart of Accounts.
Expand the Tax Rate Mapping section.
For each tax group in Zenoti, map it to the respective tax rate in QBO.
Expand the Payments Mapping section.
For each payment type in Zenoti, map it to an account name in QBO. Refer to the table in Step 2 of the Prepare QBO procedure.
Test whether the sync is set up properly.
Expand the Manual Sync section.
For Sales and Refunds, select a date, then click Post.
Now go to QBO and verify that the sync was completed correctly.
Onboarding: Set up and authorize Xero
Depending on whether you use the cash or accrual accounting method, the procedure to set up and authorize Xero will differ slightly. For each method, you also have to set up how Zenoti posts journal entries and invoices to Xero.
Important
Ensure that you have an account created on Xero.
Based on the accounting method and the data type of posting, you can configure Xero in one of the following ways:
In Xero, create the following chart of accounts for revenues and tax liabilities.
Account name to create in Xero
Account type in Xero
Item type in Zenoti
Zenoti Service Revenue
Revenue
Service
Zenoti Product Revenue
Revenue
Product
Zenoti Class Revenue
Revenue
Classes
Zenoti Gift Cards Revenue
Revenue
Gift Cards
Zenoti Prepaid Cards Revenue
Revenue
Prepaid Cards
Zenoti Membership Revenue
Revenue
Membership
Zenoti Package Revenue
Revenue
Package
Zenoti Sales Tax Payable
Other Current Liabilities
Taxes
In Xero, create the following chart of accounts for redemptions and collections.
Account name to create in Xero
Account type in Xero
Payment type in Zenoti
Zenoti Undeposited Funds - Cash
Bank or Other Current Asset
Cash
Zenoti Undeposited - Card
Bank or Other Current Asset
Card
Zenoti Undeposited - Check
Bank or Other Current Asset
Check
Zenoti Undeposited - Custom
Bank or Other Current Asset
Custom
Zenoti Gift Cards Revenue
Revenue
Gift Card Redemption
Zenoti Prepaid Cards Revenue
Revenue
PPC Redemption
Zenoti Membership Revenue
Revenue
Membership Redemption
Zenoti Package Revenue
Revenue
Package Redemption
Important
If you have multiple locations, you must configure locations in Xero and switch on the Multi-Location switch in Zenoti.
Navigate to the Integrations tab as follows,
At the organization level, click the Configuration icon.
Search for and select Accounting from the Integrations section.
Expand the Accounting tab.
Under the Configuration tab, expand the Provider section.
Select Xero as the accounting platform, then click Continue.
On the Financials dialog box, click Advanced Configuration.
Set the Use Live Key toggle to Yes.
Important
This tab is visible only after you configure the invoice and sync settings in the Configuration tab.
Important
If you have multiple locations, you must configure locations in Xero and switch on the Multi-Location switch in Zenoti.
Expand the Authorize tab.
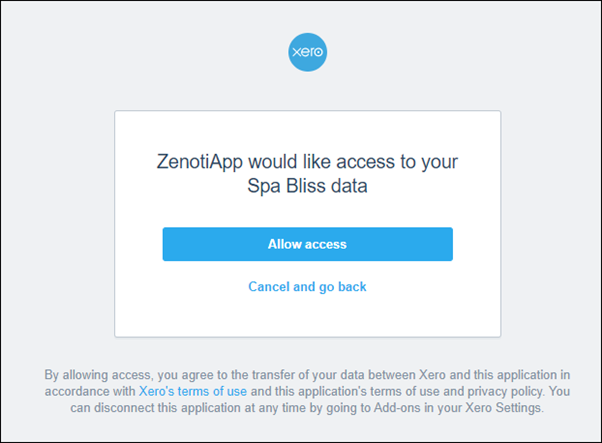
Click Authorize. A new tab opens in the browser asking for access to your Xero account.
Note
If you have a single organization created for your business on Xero, you will see the following window:
Sync Chart of Accounts and Locations.
Expand the Manual Sync section.
For Accounts, click Get.
For Locations, click Get.
Map Item Type to Chart of Accounts.
Expand the Items Mapping section.
For each item type in Zenoti, map it to the respective chart of accounts in Xero.
Item type in Zenoti
Chart of accounts created in Xero
Service
Zenoti Service Revenue
Product
Zenoti Product Revenue
Classes
Zenoti Class Revenue
Gift Cards
Zenoti Gift Cards Revenue
Prepaid Cards
Zenoti Prepaid Cards Revenue
Membership
Zenoti Membership Revenue
Packages
Zenoti Package Revenue
Taxes
Zenoti Sales Tax Payable
Expand the Payments Mapping section.
For each payment type in Zenoti, map it to an account name in Xero. Refer to the table in Step 2 of the Prepare Xero procedure.
Test whether the sync is set up properly.
Expand the Manual Sync section.
For Sales and Refunds, select a date, then click Post.
To enable posting Invoices created in Zenoti in Xero, you must set up the following:
In Xero, create the following chart of accounts for revenues and tax liabilities.
Item type
(in Zenoti)
Item name
(create in Xero)
Item code
Item type
Account name
(create in Xero)
Account type
Service
Service
Service
Service
Zenoti Service Revenue
Revenue
Product
Product
Product
Inventory/Service
Zenoti Product Revenue
Revenue
Classes
Class
Class
Service
Zenoti Class Revenue
Revenue
Gift cards
Gift cards
Gift cards
Service
Zenoti Gift Cards Revenue
Revenue
Prepaid cards
Prepaid cards
Prepaid cards
Service
Zenoti Prepaid Cards Revenue
Revenue
Memberships
Membership
Membership
Service
Zenoti Membership Revenue
Revenue
Package
Package
Package
Service
Zenoti Package Revenue
Revenue
In Xero, create the following chart of accounts for Redemption and Collections and select the Enable payments to this account checkbox.
Payment type
Account name
(create in Xero)
Account type
Cash
Zenoti Undeposited Funds - Cash
Bank or Other Current Asset
Card
Zenoti Undeposited - Card
Bank or Other Current Asset
Check
Zenoti Undeposited - Check
Bank or Other Current Asset
Custom
Zenoti Undeposited - Custom
Bank or Other Current Asset
Gift card redemption
Zenoti Gift Cards Revenue
Revenue
Prepaid card redemption
Zenoti Prepaid Cards Revenue
Revenue
Membership redemption
Zenoti Membership Revenue
Revenue
Package redemption
Zenoti Package Revenue
Revenue
In Xero, configure tax rates as per local requirements. More information
Select the Enable payments to this account checkbox.
Navigate to the Integrations tab as follows,
At the organization level, click the Configuration icon.
Search for and select Accounting from the Integrations section.
Expand the Accounting tab.
Under the Configuration tab, expand the Provider section.
Select Xero as the accounting platform, then click Continue.
On the Financials dialog box, click Advanced Configuration.
Set the Use Live Key toggle to Yes.
Important
This tab is visible only after you configure the invoice and sync settings in the Configuration tab.
Important
If you have multiple locations, you must configure locations in Xero and switch on the Multi-Location switch in Zenoti.
Clear the Post Journal Entries checkbox.
Expand the Authorize tab.
Click Authorize. A new tab opens in the browser asking for access to your Xero account.
Note
If you have a single organization created for your business on Xero, you will see the following window:
Sync Guest, Items, Chart of Accounts, and Locations.
Expand the Manual Sync section.
For Accounts, click Get.
For All Items, click Get.
For Guests, click Post.
For Locations, click Get.
Map Tax Rate to Chart of Accounts.
Expand the Tax Rate Mapping section.
For each tax group in Zenoti, map it to the respective tax rate in Xero.
Expand the Payments Mapping section.
For each payment type in Zenoti, map it to an account name in Xero. Refer to the table in Step 2 of the Prepare Xero procedure.
Test whether the sync is set up properly.
Expand the Manual Sync section.
For Sales and Refunds, select a date, then click Post.
To enable posting Invoices created in Zenoti in Xero, you must set up the following:
In Xero, create the following chart of accounts for revenues and tax liabilities.
Account name to create in Xero
Account type in Xero
Item type in Zenoti
Zenoti Service Revenue
Revenue
Service
Zenoti Product Revenue
Revenue
Product
Zenoti Class Revenue
Revenue
Classes
Zenoti Gift Cards Liability
Other Current Liabilities
Gift Cards
Zenoti Prepaid Cards Liability
Other Current Liabilities
Prepaid Cards
Zenoti Membership Liability
Other Current Liabilities
Membership
Zenoti Package Liability
Other Current Liabilities
Package
Zenoti Sales Tax Liability
Other Current Liabilities
Taxes
In Xero, create the following chart of accounts for redemptions and collections.
Account name to create in Xero
Account type in Xero
Payment type in Zenoti
Zenoti Undeposited Funds - Cash
Bank or Other Current Asset
Cash
Zenoti Undeposited - Card
Bank or Other Current Asset
Card
Zenoti Undeposited - Check
Bank or Other Current Asset
Check
Zenoti Undeposited - Custom
Bank or Other Current Asset
Custom
Zenoti Gift Cards Liability
Other Current Liabilities
Gift Card Redemption
Zenoti Prepaid Cards Liability
Other Current Liabilities
PPC Redemption
Zenoti Membership Liability
Other Current Liabilities
Membership Redemption
Zenoti Package Liability
Other Current Liabilities
Package Redemption
Important
If you have multiple locations, you must configure locations in Xero and switch on the Multi-Location switch in Zenoti.
Navigate to the Integrations tab as follows,
At the organization level, click the Configuration icon.
Search for and select Accounting from the Integrations section.
Expand the Accounting tab.
Under the Configuration tab, expand the Provider section.
Select Xero as the accounting platform, then click Continue.
On the Financials dialog box, click Advanced Configuration.
Set the Use Live Key toggle to Yes.
Important
This tab is visible only after you configure the invoice and sync settings in the Configuration tab.
Important
If you have multiple locations, you must configure locations in Xero and switch on the Multi-Location switch in Zenoti.
Expand the Authorize tab.
Click Authorize. A new tab opens in the browser asking for access to your Xero account.
Note
If you have a single organization created for your business on Xero, you will see the following window:
Sync Chart of Accounts and Locations.
Expand the Manual Sync section.
For Accounts, click Get.
For Locations, click Get.
Map Item Type to Chart of Accounts.
Expand the Items Mapping section.
For each item type in Zenoti, map it to the respective chart of accounts in Xero.
Item type in Zenoti
Chart of accounts created in Xero
Service
Zenoti Service Revenue
Product
Zenoti Product Revenue
Classes
Zenoti Class Revenue
Gift Cards
Zenoti Gift Cards Liability
Prepaid Cards
Zenoti Prepaid Cards Liability
Membership
Zenoti Membership Liability
Packages
Zenoti Package Liability
Taxes
Zenoti Sales Tax Liability
Expand the Payments Mapping section.
For each payment type in Zenoti, map it to an account name in Xero. Refer to the table in step 2 of the Prepare Xero procedure.
Test whether the sync is set up properly.
Expand the Manual Sync section.
For Sales and Refunds, select a date, then click Post.
To enable posting Invoices created in Zenoti in Xero, you must set up the following:
In Xero, create the following chart of accounts for revenues and tax liabilities.
Item type
(in Zenoti)
Item name
(create in Xero)
Item code
Item type
Account name
(create in QBO)
Account type
Service
Service
Service
Service
Zenoti Service Revenue
Revenue
Product
Product
Product
Inventory/Service
Zenoti Product Revenue
Revenue
Classes
Class
Class
Service
Zenoti Class Revenue
Revenue
Gift cards
Gift cards
Gift cards
Service
Zenoti Gift Cards Liability
Other Current Liabilities
Prepaid cards
Prepaid cards
Prepaid cards
Service
Zenoti Prepaid Cards Liability
Other Current Liabilities
Memberships
Membership
Membership
Service
Zenoti Membership Liability
Other Current Liabilities
Package
Package
Package
Service
Zenoti Package Liability
Other Current Liabilities
In Xero, create the following chart of accounts for Redemption and Collections and select the Enable payments to this account checkbox.
Payment type
Account name
(create in Xero)
Account type
Cash
Zenoti Undeposited Funds - Cash
Bank or Other Current Asset
Card
Zenoti Undeposited - Card
Bank or Other Current Asset
Check
Zenoti Undeposited - Check
Bank or Other Current Asset
Custom
Zenoti Undeposited - Custom
Bank or Other Current Asset
Gift card redemption
Zenoti Gift Cards Liability
Other Current Liabilities
Prepaid card redemption
Zenoti Prepaid Cards Liability
Other Current Liabilities
Membership redemption
Zenoti Membership Liability
Other Current Liabilities
Package redemption
Zenoti Package Liability
Other Current Liabilities
In Xero, configure tax rates as per local requirements. More information
Select the Enable payments to this account checkbox.
Navigate to the Integrations tab as follows,
At the organization level, click the Configuration icon.
Search for and select Accounting from the Integrations section.
Expand the Accounting tab.
Under the Configuration tab, expand the Provider section.
Select Xero as the accounting platform, then click Continue.
On the Financials dialog box, click Advanced Configuration.
Set the Use Live Key toggle to Yes.
Important
This tab is visible only after you configure the invoice and sync settings in the Configuration tab.
Important
If you have multiple locations, you must configure locations in Xero and switch on the Multi-Location switch in Zenoti.
Clear the Post Journal Entries checkbox.
Expand the Authorize tab.
Click Authorize. A new tab opens in the browser asking for access to your Xero account.
Note
If you have a single organization created for your business on Xero, you will see the following window:
Sync Guest, Items, Chart of Accounts, and Locations.
Expand the Manual Sync section.
For Accounts, click Get.
For All Items, click Get.
For Guests, click Post.
For Locations, click Get.
Map Tax Rate to Chart of Accounts.
Expand the Tax Rate Mapping section.
For each tax group in Zenoti, map it to the respective tax rate in Xero.
Expand the Payments Mapping section.
For each payment type in Zenoti, map it to an account name in Xero. Refer to the table in Step 2 of the Prepare Xero procedure.
Test whether the sync is set up properly.
Expand the Manual Sync section.
For Sales and Refunds, select a date, then click Post.