Manage payments for multiple businesses within a single center
This article outlines how payment processing works when multiple legal entities operate within a single center. It also covers the setup required to link Business Units (BUs) with the correct Stripe accounts and configure payouts accordingly.
Overview
Zenoti supports separate payment processing for businesses with multiple legal entities operating within a single center. Example – If your business includes both a Spa and a Medspa, and these are separate legal entities, you may want to process their payments separately and receive separate payouts. This ensures clean accounting records, as you will receive separate payment reports (such as the 1099-K form in the US or its equivalent in other regions).
Key benefits
Ensures smooth financial reconciliation and tax compliance.
Provides enhanced reporting for individual Business Units (BUs).
Notes:
Use Zenoti BUs to represent your legal entities.
You may create multiple BUs for a single legal entity if needed.
Ensure that each BU includes only its relevant products and services.
On POS, if an appointment includes items from multiple Business Units (BUs), payment cannot be processed. A message will be displayed stating Payment cannot be completed. Please ensure all selected items belong to the same Business Unit.
When creating a service, product, or package, you must associate it with a specific Business Unit (BU).
If a package includes services from multiple Business Units, the system must generate an error message and prevent package creation.
If all services within a package belong to the same Business Unit, the system should allow package creation.
Ensure that all existing services are correctly assigned to their respective Business Units.
Enable payments for multiple businesses within a single center
Reach out to your Zenoti representative.
Zenoti payments setup
This feature is currently available with Stripe Express.
With this functionality, businesses can:
Ensure seamless financial reconciliation by processing payments separately for different BUs.
Receive separate payouts for each legal entity, keeping accounting records organized.
Enhance reporting capabilities by generating individual financial reports for each BU.
Create separate Stripe accounts for each of your distinct legal entities.
Link your Stripe accounts with the center by visiting the Center configurations page.
Link your Stripe accounts with your BUs.
Navigate to Split payout section under Center configurations to link the payment accounts to each of the BU.
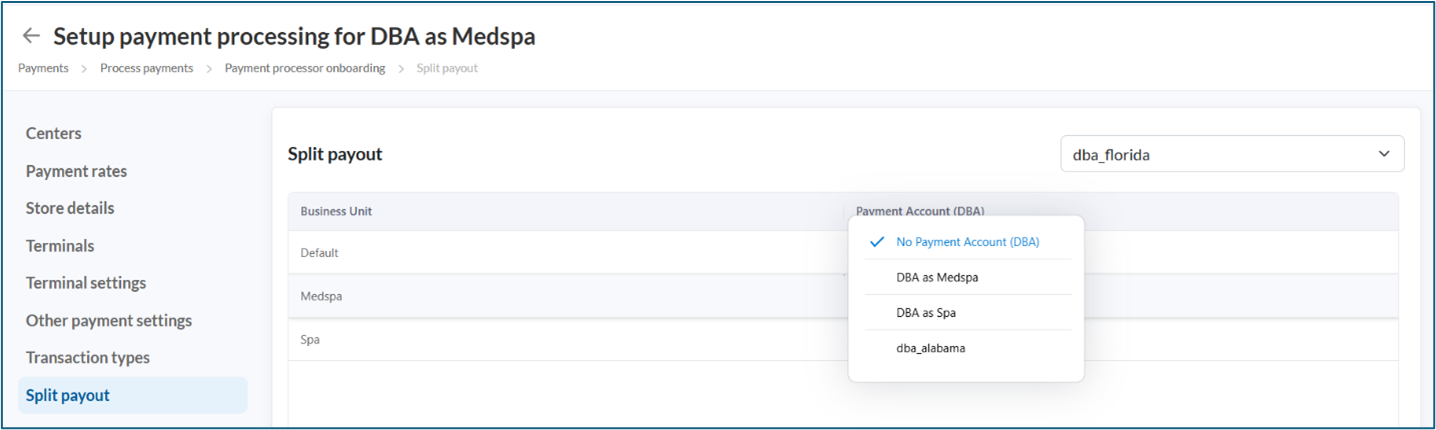
Ensure correct center is selected in the drop down.
All payment accounts linked to the center will be available to be mapped to the BUs of the center.
Associate the correct payment account for each of the BUs.
You can link multiple BUs to the same payment account.
Create Stripe payment account
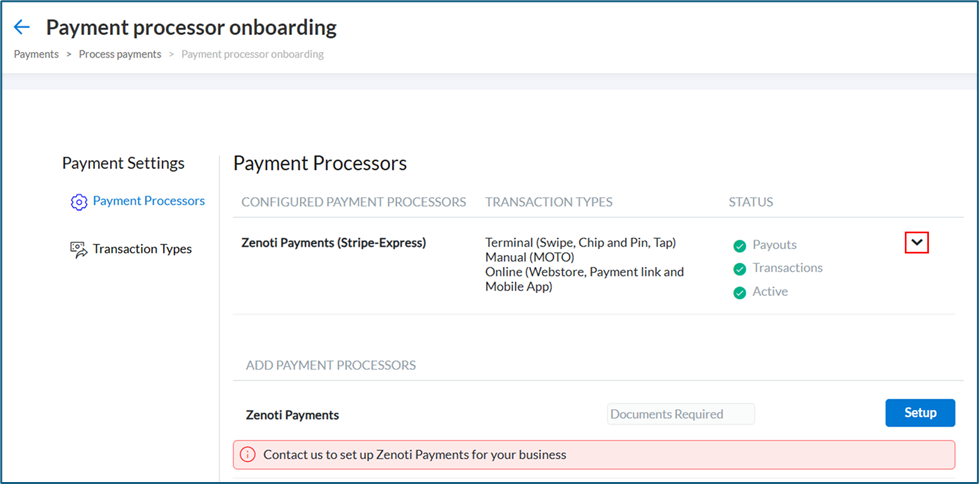
From the center level, navigate to Configurations > Payments > Payment processor onboarding.
Click the caret icon ^.
Click +Add a new business (if you want to add a new business).
Select Zenoti Payments (Stripe Express) and click Start setup.

Click Start Submission.
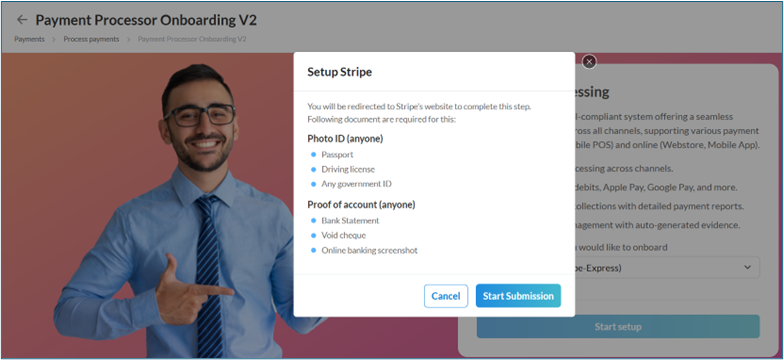
Enter Email address and the Business Registration Number and click Continue.

Note: You will be redirected to the Stripe website to complete the creation of your Stripe account. You will need to provide your legal business details along with bank information for payout.
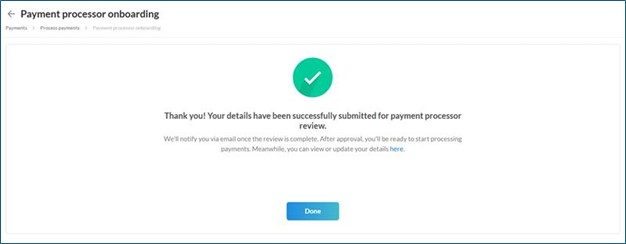
Once the setup is complete, you will be automatically routed back to Zenoti to proceed with configuring Stripe for multi-business payment processing.
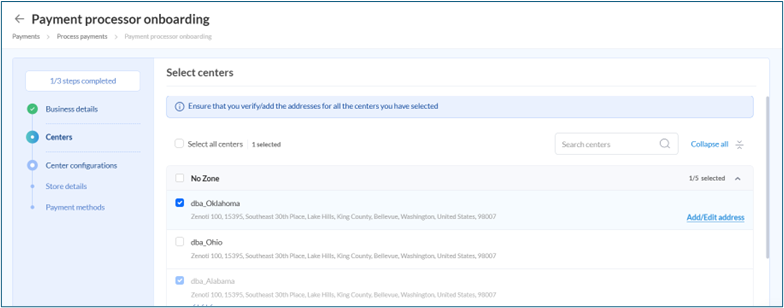
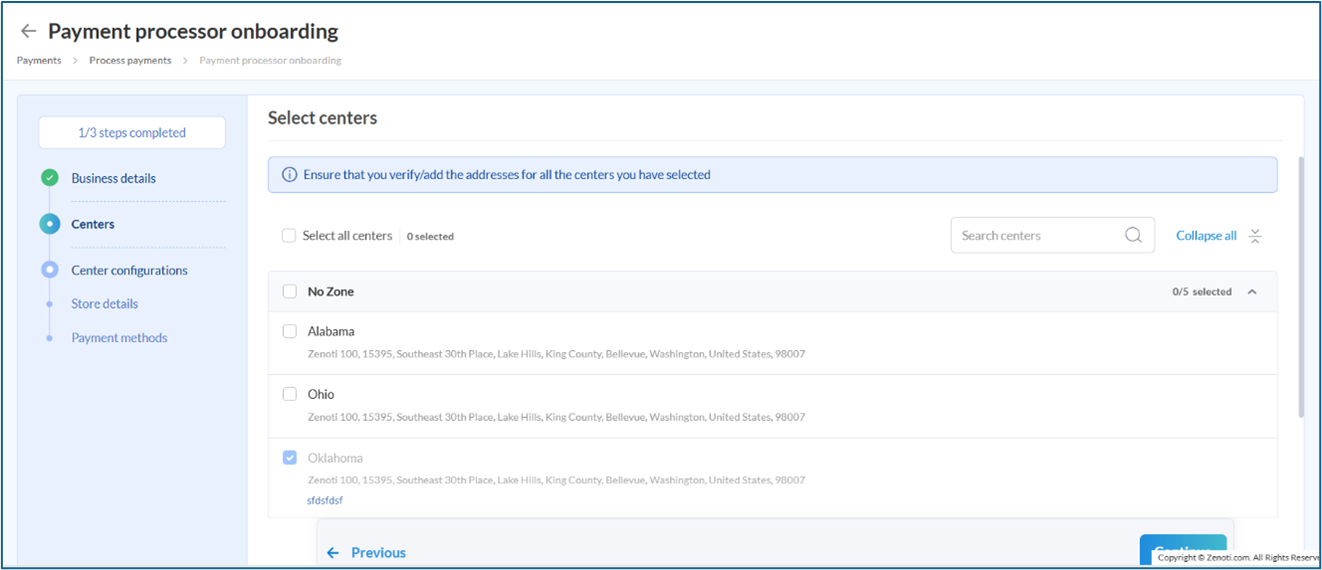
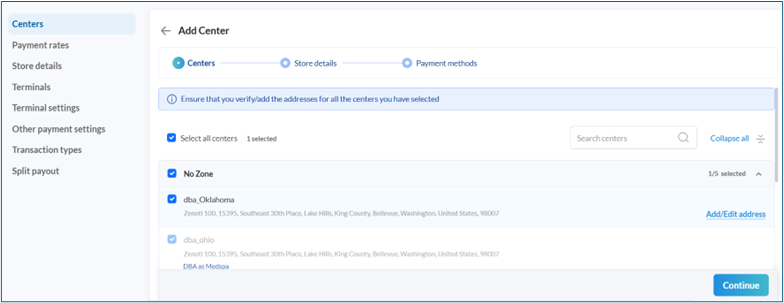
Select centers.
Select all centers that belong to the same legal entity you mentioned during the onboarding process.
You can link centers at any time after completing the onboarding process.
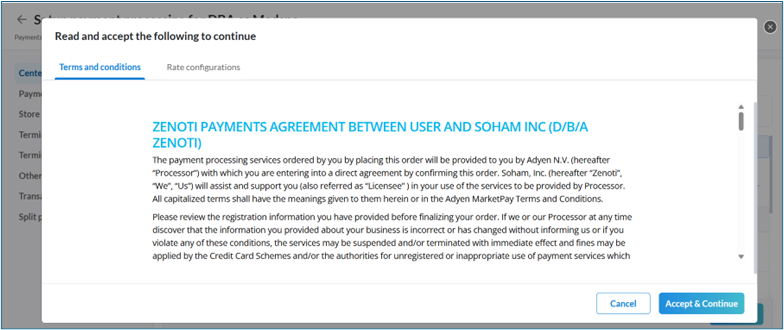
Review and accept Terms and conditions and Rate configurations and click Accept & Continue.

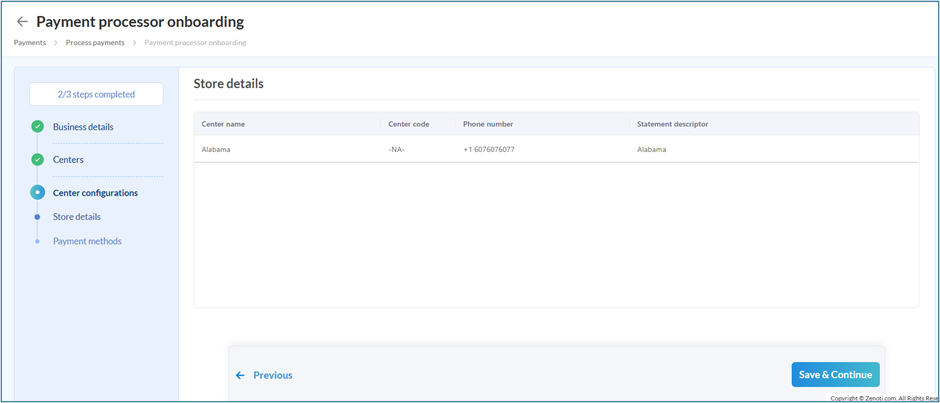
Update Store details if required.
Important: Please note that the Statement descriptor field will appear on your guests' bank or credit card statements.
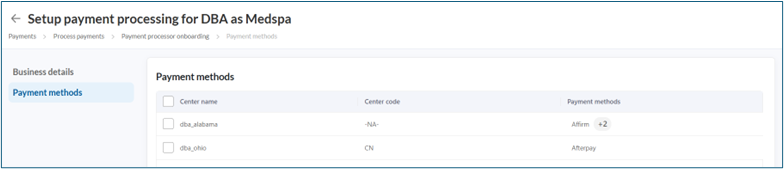
Add Payment methods to the centers and complete the setup.
All payment methods are enabled by default for all centers. If you wish to disable a specific payment method (e.g., Amex) for a particular center, you can do so.
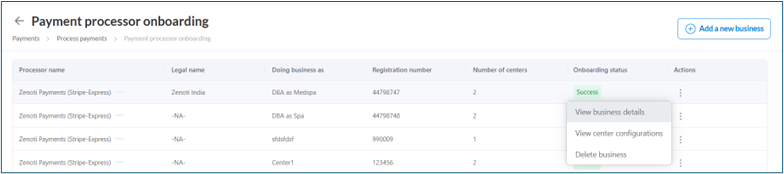
After your Stripe account is set up, you can perform various actions on the same by clicking on the caret icon after you navigate to Payment Processors page.
View business details
You can view your payment account details by visiting this section. Click the three-dot menu under Actions to View business details. This section displays a few basic details. To update your business-related information, navigate to the Stripe dashboard and make the necessary changes.
Note: View business details needs a sign-in and an email verification as it contains confidential information.
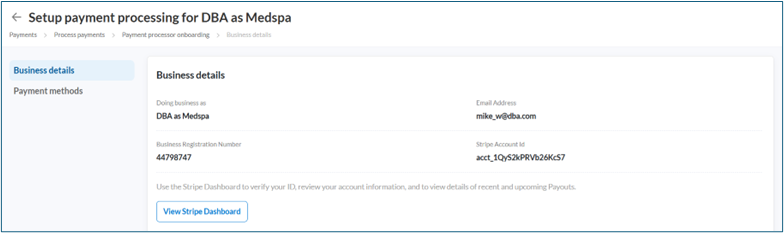
Note: View Stripe Dashboard takes you to the Stripe website, sign in with your Stripe credentials.
View center configurations
For center specific details and configurations, navigate to Center configurations.
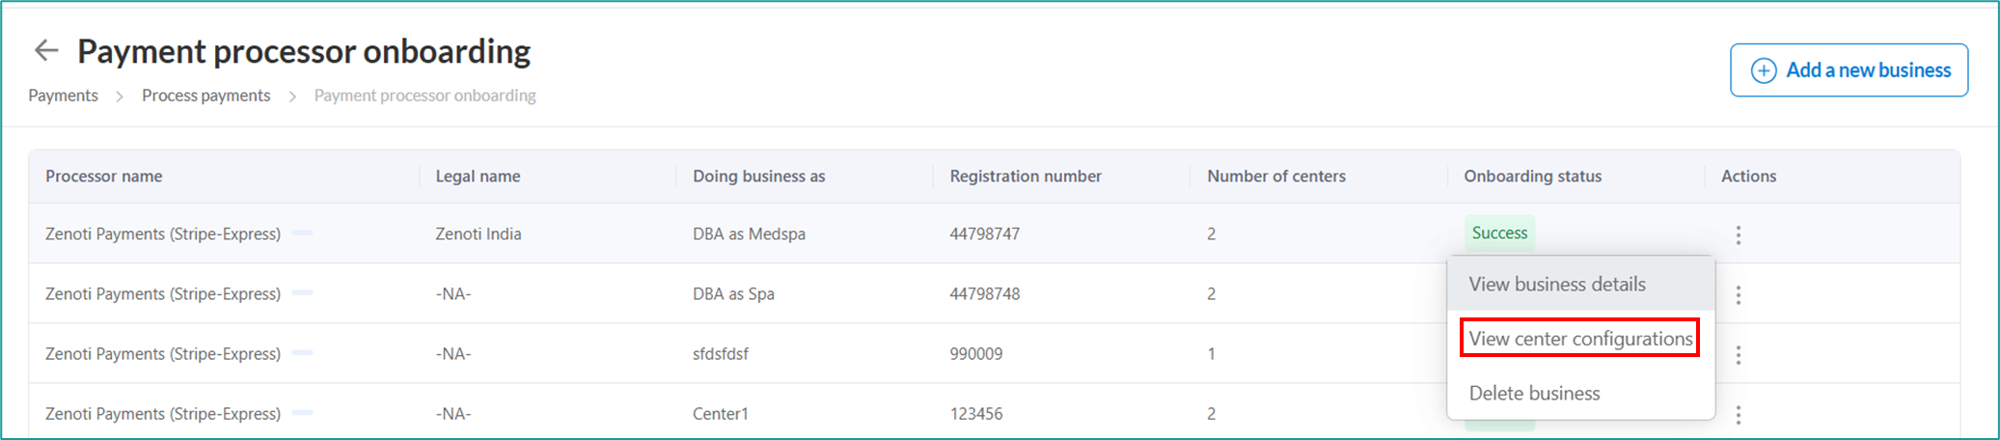
Centers
You are redirected to a list of all centers linked to your payment account.
View all centers linked to the business, including their addresses and status, to check if they are ready to process payments and receive payouts.
Click the three-dots to Delink a center.
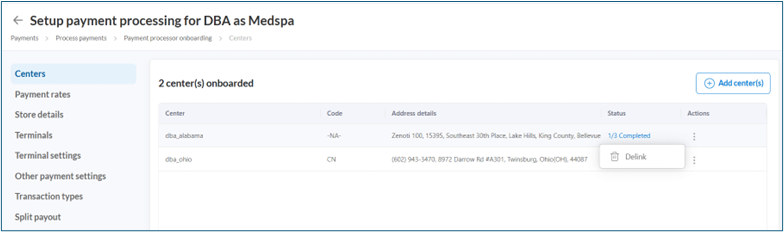
Click +Add centers to add a center.
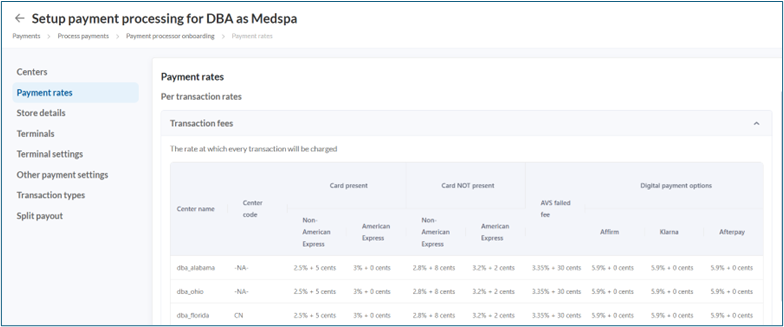
Payment rates
Review Payment rates for all the cenetrs linked to the payment account.
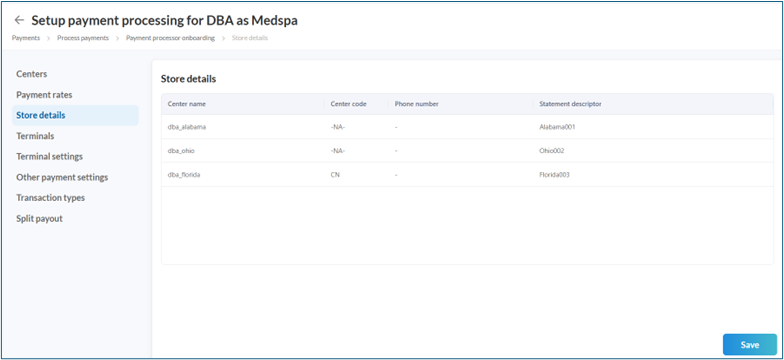
Store details
Click Store details, verify and click Save if any edits are made on the page.
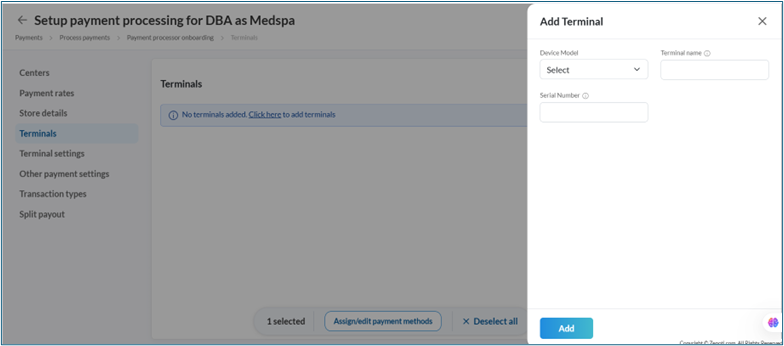
Terminals
View all terminals added to a particular center here.
Click to add terminals to a center.
Add Device Model, Terminal name and Serial Number and click Add.
Terminal settings
Click Terminal settings to view, enable and set up TIPS SETTINGS.
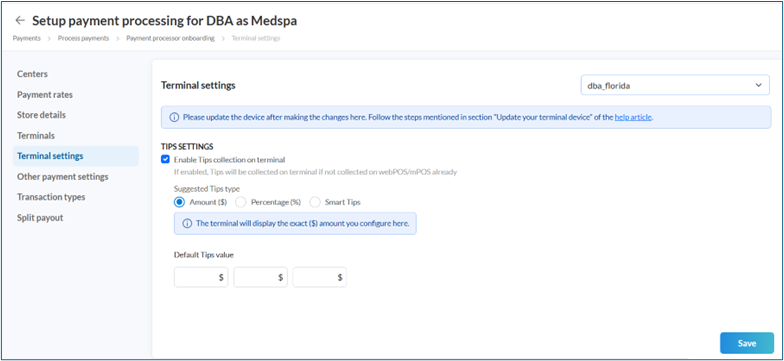
Click Save if you make any updates.
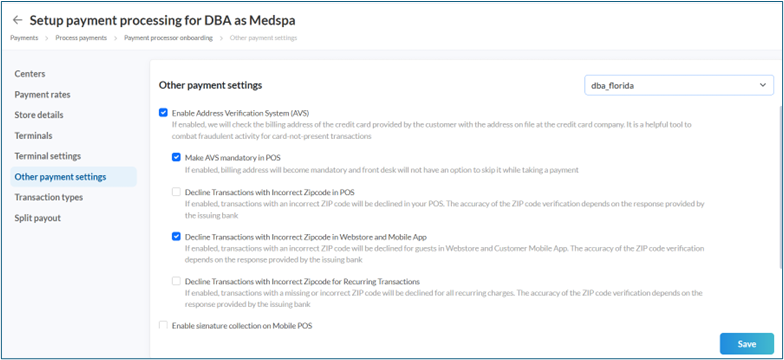
Other payment settings
Select as required and click Save.
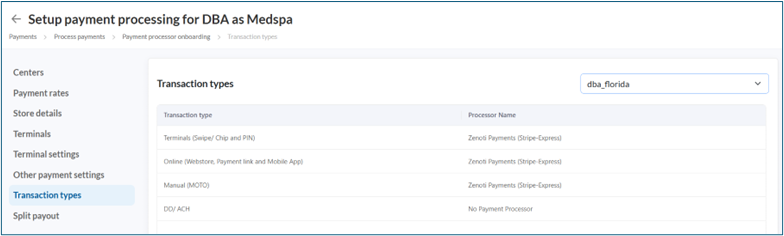
Transaction types
Verify transaction types.
You can specify the payment processor for each of the transaction types. Please note that in order to do so, you have to configure different payment processor in the center.
Term | Description |
|---|---|
Business Unit (BU) | A grouping in Zenoti representing a legal entity. |
Split payout | Configuration that maps BUs to payment accounts for separate payouts. |
Stripe Express | Payment processor used for multi-business payment processing. |
Payment account | Stripe account linked to a BU for payouts. |
Center configurations | The settings area to map accounts, terminals, and center-level options. |
Statement descriptor | Text shown on guest bank/card statements |
Terminal settings | Configuration options for payment terminals. |
Transaction types | Categories of transactions mapped to processors. |