Instructor app
Overview of the instructor app
In this article, you will learn how to navigate the instructor app and explore Classes.
After logging into the Zenoti Mobile app, the first screen you see is the list of classes. Based on the device you are using, iOS or Android, you can navigate to Classes in the following ways:
iOS
From the menu options at the bottom of the screen, navigate to Classes.
If an instructor is assigned to multiple centers, tap Settings and select Center to switch to the relevant center.

Android
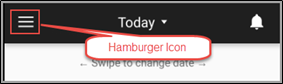
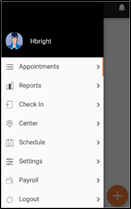
To view the menu options, click the hamburger icon.
To view and manage substitution, from the menu, navigate to Schedules.
If an instructor is assigned to multiple centers, tap Center to select the relevant center.
Classes tab
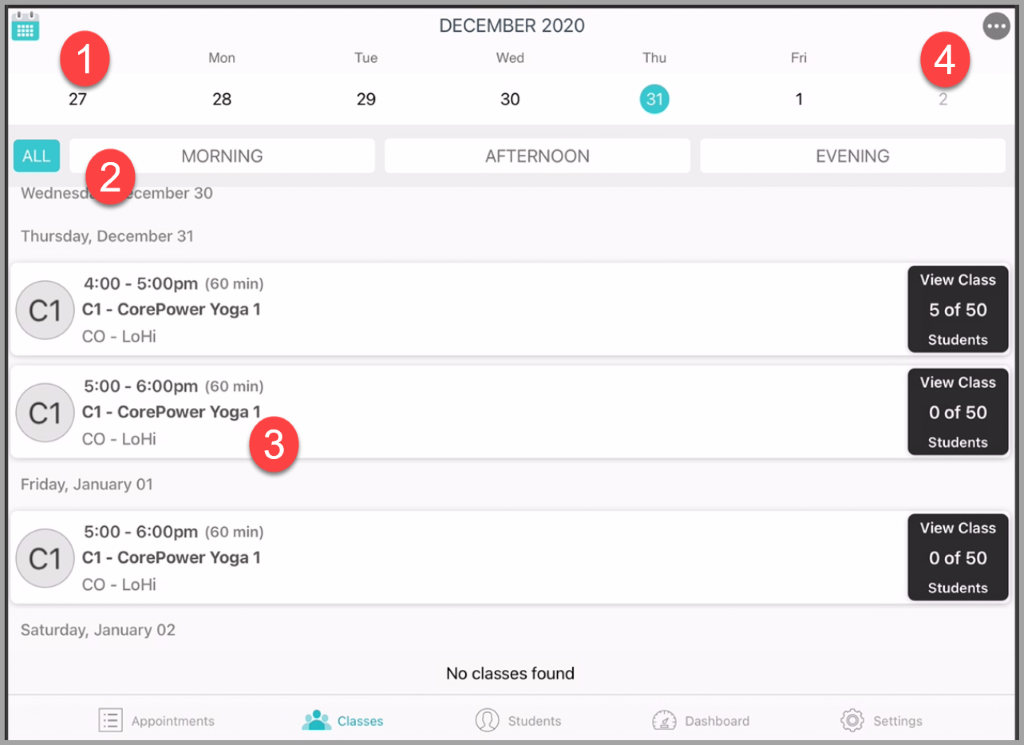
The classes menu on the instructor app allows you to view the following:
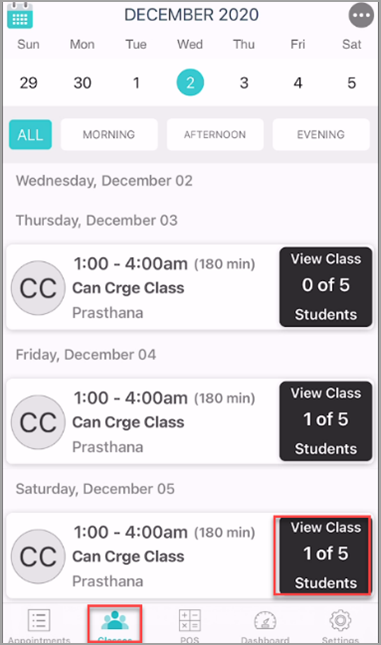
The Calendar Icon
This icon allows you to select specific dates and swipe left or right to navigate between months.
The Filters Bar
The filters allow you to filter classes based on the time of the day. You can filter classes scheduled in the morning, afternoon, and evening or all times of the day.
The Class Details Pane
You can view class details (date, time, duration of the class) and the number of students enrolled in the class.
The More Icon
This icon allows instructors to access the substitution management screen.
Login to the instructor app
To start using the Instructor app, you must install the Zenoti Mobile app on your authorized devices (iOS or Android).
Open the Zenoti Mobile app on your device.
In the Account field, enter the URL to the Zenoti website.
In the Username and Password fields, enter the same username and password you use to login to the Zenoti website on your desktop.
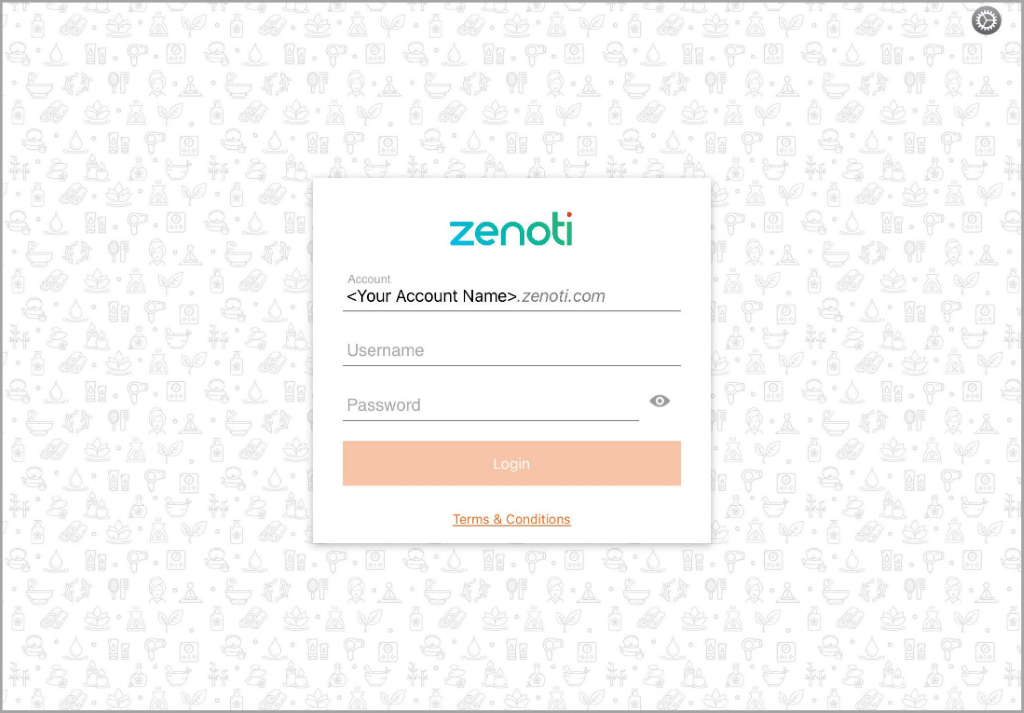
Congratulations! You have logged in to the Instructor App. You can now view the calendar, request a substitute, view class details, and perform other classes-related actions.
Note
To update the instructor profile details or picture, you will have to log in to Zenoti web and go to the Catalog tab. If you're an instructor, contact the studio manager to update your details on Zenoti web.
Manage a membership on instructor app
You can access your student’s profile (with appropriate role permissions) to view details related to the membership and make changes, such as to upgrade, downgrade, freeze, waive, cancel, and reinstate a membership.
Upgrade/downgrade
On the Guest Profile page, tap the Summary tab.
Locate Membership Details, and then tap Details.
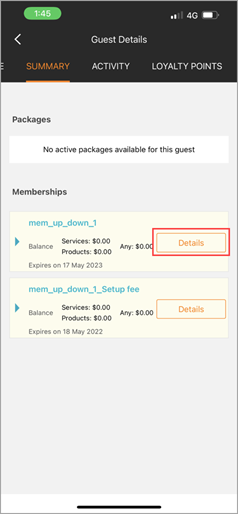
Tap the Membership actions menu.
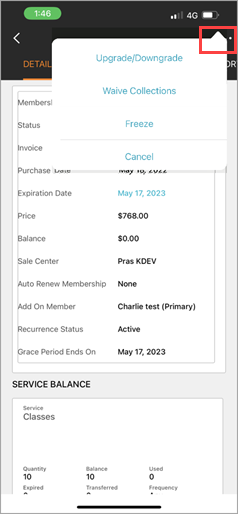
Tap Upgrade/Downgrade.
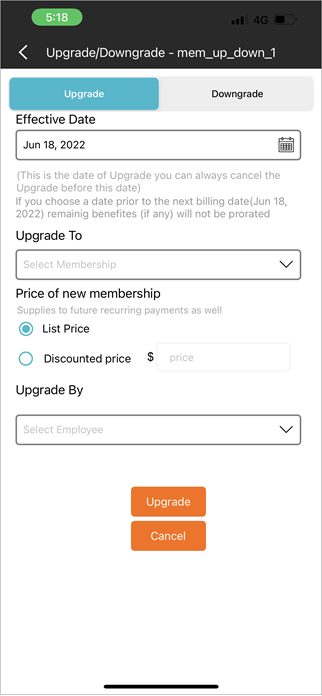
Select the Type of transaction - Upgrade or Downgrade.
Enter the date from which the change is effective. This date can be in the future.
From the Upgrade To (or Downgrade To) list, select the membership to which the customer wants to move.
From the Price of new membership options, select the price to apply. You can choose to apply the List Price or give the Discounted Price. If you choose the latter, enter the discounted price in the $ box.
From the Upgraded By list, select the employee making the sale.
Tap Upgrade.
Freeze
On the Guest Profile page, tap the Summary tab.
Locate Membership Details, and then tap Details.
Tap the Membership actions menu.
Tap Freeze.
In the Freeze from field, select the date on which you want to freeze the membership.

In the Unfreeze on field, do one of the following:
To keep an open-ended freeze period, select the Manual option.
To select a specific date to automatically unfreeze the membership, select a date using the calendar.
In the Freeze Type field, select what aspects of the memberships are put on hold. You have two options to select from:
The first option lets you put all benefits on hold and shift the date of next payment by the duration of the freeze period.
The second option lets you allow your guests to use their benefits while skipping payments during the freeze period.
In the Freeze fee box, enter a one-time fee or a recurring fee that you want to charge the customer.
Select One time or Recurring options depending on whether the charge you entered is one-time or recurring.
Type any helpful notes in the Comments box about the freeze.
Click Save.
Note
You cannot freeze a membership with the following membership status: Cancelled, Suspended, or Failed.
Waive collections
On the Guest Profile page, tap the Summary tab.
Locate Membership Details, and then tap Details.
Tap the Membership actions menu.
Tap Waive Collections.
On the Waive Collections window, enter the number of future charges that you want to skip.
Click Add.
Note
Note: This applies to charges that are coming in the future, and not to the unpaid ones that are past their due date.
For example, if a guest's membership charge was scheduled for yesterday and they haven't yet paid it, then when you waive one charge, it doesn't skip yesterday's charge. It will only skip the charge scheduled next.
If you want to let the guest accrue credit value or service credits that come with the charge, select the Award Credits checkbox.
After you waive the charge, the invoice for the charge is generated on the scheduled date for zero amount.
Cancel and reinstate
Cancel
On the Guest Profile page, tap the Summary tab.
Locate Membership Details, and then tap Details.
Tap the Membership actions menu.
Tap Cancel.
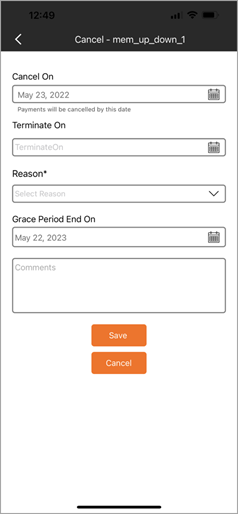
On the Cancel window, enter the following details:
Cancel On: Select the date from which you want to stop the collections for the membership. The default value is set to the current date, but you can change it to a later date.The status for Collection Status is set to Cancelled.
Terminate On: Select the date from which you want to stop the guest from using the remaining membership benefits. The default value is set to the date of cancellation, but you can change it to a later date.The status for Membership Status remains Active until the termination date is passed, then it changes to Cancelled.
For example, if you select Jan 1 as the cancellation date and Feb 1 as the date of termination, the collections stop from Jan 1, but the guest can use membership benefits until Feb 1.
Reason: Select a reason for the cancellation from the list. The reasons in the list are created at the organization level.
Comments: Type any useful notes around this cancellation. You can see this notes in the Appointments report.
Reinstate
On a cancelled membership details page, tap Reinstate.
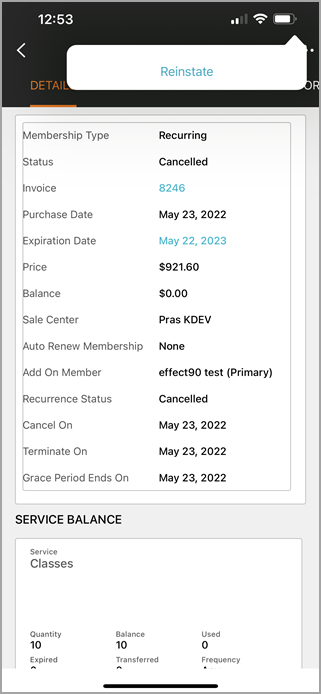
Next Scheduled payment date: Specify a date to begin the recurring payment collections for the membership. By default, Zenoti schedules payment collection to begin the next day.
Next Scheduled payment time: Specify a time to begin the recurring payment collections for the membership.
Expiry Date: Specify when the membership should expire.
Important
In a recurring membership with no expiry, the Expiry Date does not appear.
Click Save.
Sync schedules to your personal calendar on the instructor app
In the Instructor App, you can sync your class schedules to your iOS or Android calendars. This helps you integrate all your events (including other personal commitments) seamlessly into one calendar.
Note
Note: You can also sync your class and workshop schedules with your personal calendar through the ZMA V2 app on tablets.
Log in to Instructor app.

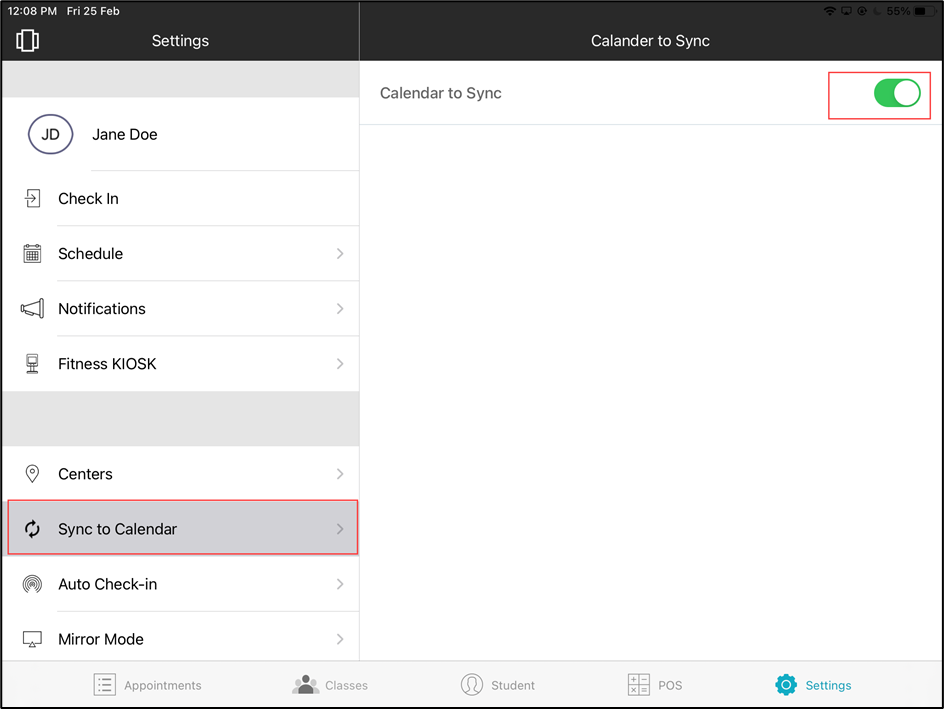
Tap Settings.
The Settings menu appears.
Tap Sync to Calendar.
Enable Calendar to Sync.
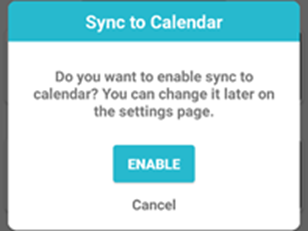
Note: When an instructor lands on the Classes schedules page, the app gives them the option to enable Sync to calendar.
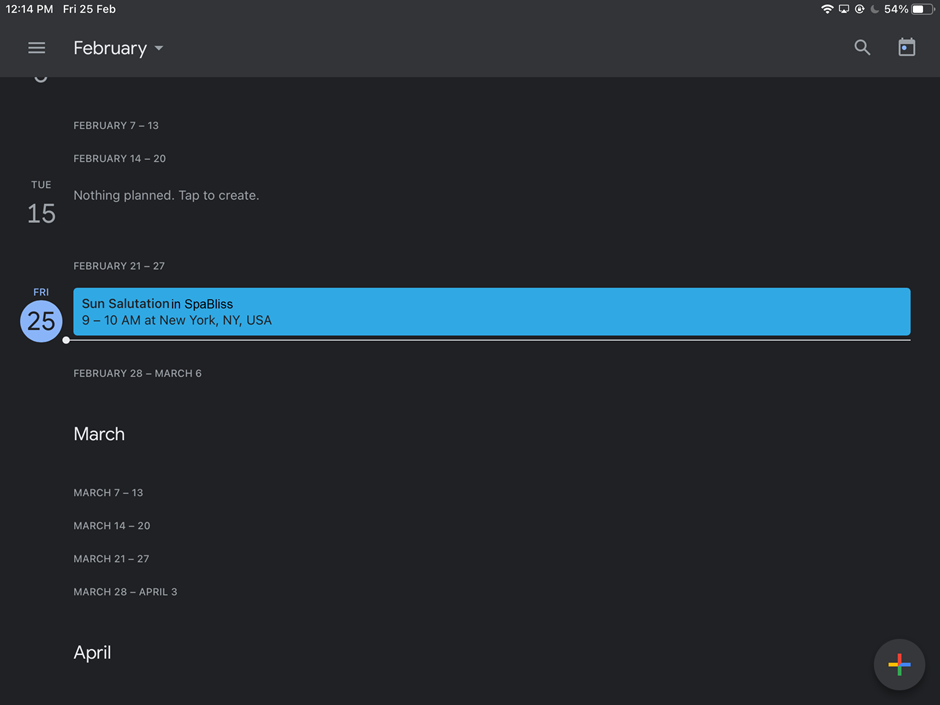
Class schedules are synced with your personal calendar.
Notes
Schedules get synced when the instructor lands on the class listings page.
Sync happens based on the last session update.
The sync covers events of the last three days, current day, and 10 days from the current day.
The following event details are captured:
Class name
Time
Center name
Zoom link
Description
The instructor will be reminded 30 minutes before the class
Terms and conditions form on the instructors app
In this article, you will learn how to view and complete a Terms and Conditions form for an enrolled and unenrolled student.
Log in to the Instructors App.
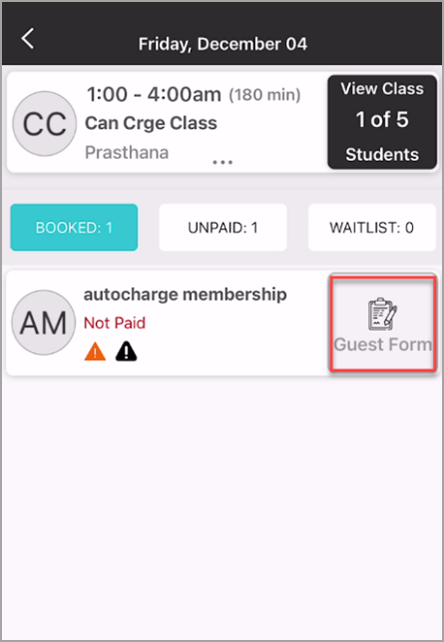
Go to the Classes tab.
Find the class the student is enrolled in.
Tap Guest Form.
Tap the lock icon, hand over the device to the student, and request them to fill in the T&C form.
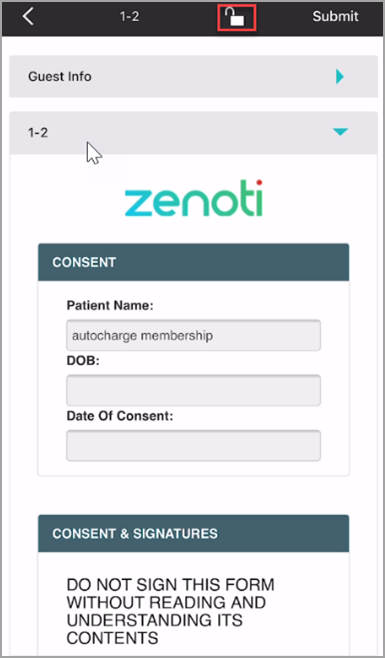
After the student returns the completed form, tap Submit.
Note
In this case, an unenrolled student is someone who is not added to the class roster but is an existing guest and has a profile on Zenoti.
Log in to the Instructors App.
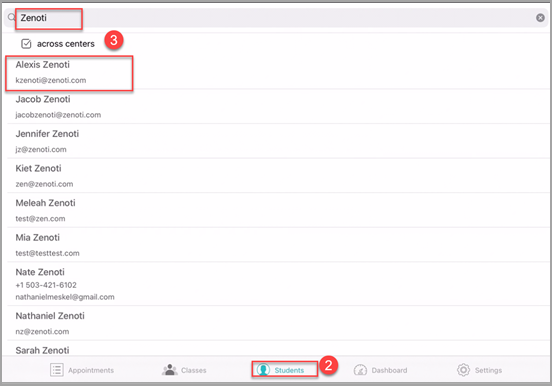
Go to the Students tab.
In the search field, enter the student's name, mobile number, or email address.
The search results appear.
Tap Forms Unified View.
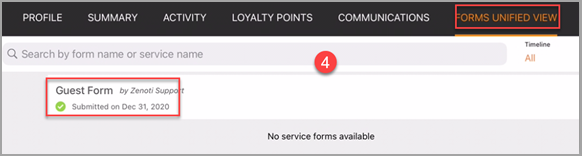
Tap Guest Form.
The T&C form opens.
Tap the lock icon, hand over the device to the student, and request them to fill in the T&C form.
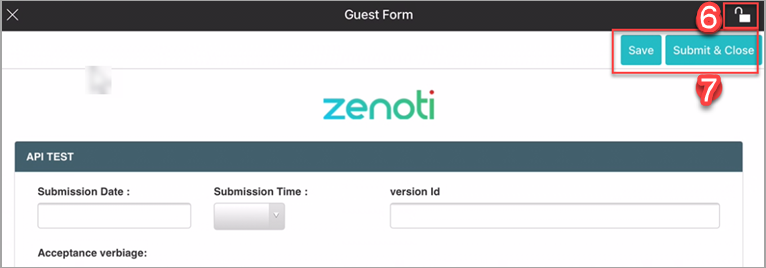
After the student returns the completed form, tap Submit & Close.
Request substitute on instructor app
When instructors are not available to teach a class, they can request a substitute to take over their sessions.
Note
This feature is available on ZMA v2 for tablets and mobiles.
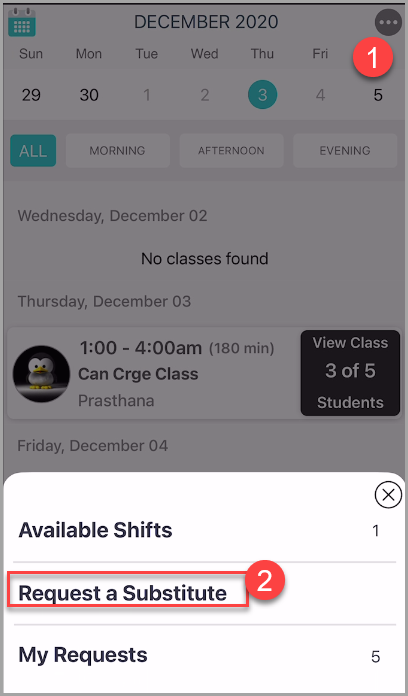
On the top right corner of the Classes menu, tap the More (…) icon.
From the available options, tap Request a Substitute.
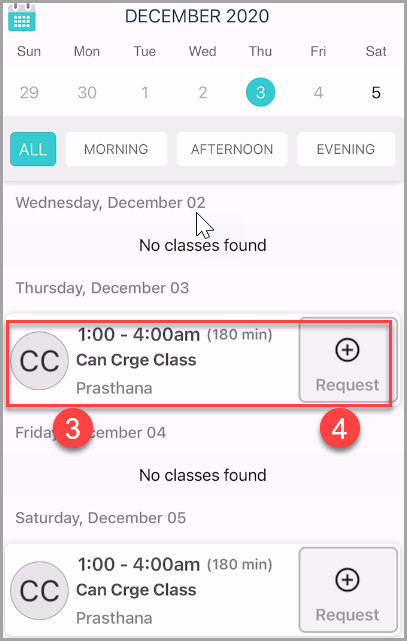
Navigate to the class for which you want to request a substitute.
Tap Request.
The request is generated.
Instructors who can teach the class for which a substitute request was raised will now be able to pick it up as per their availability.
Pick up classes on the instructor app
Once an instructor requests a substitute, the class becomes available on the Instructor app for other instructors to pick up.
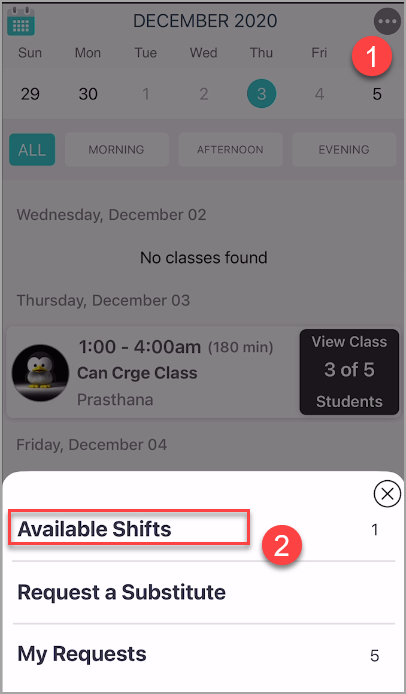
On the top right corner of the Classes menu, tap the More (…) icon.
From the available options, tap Available Shifts.
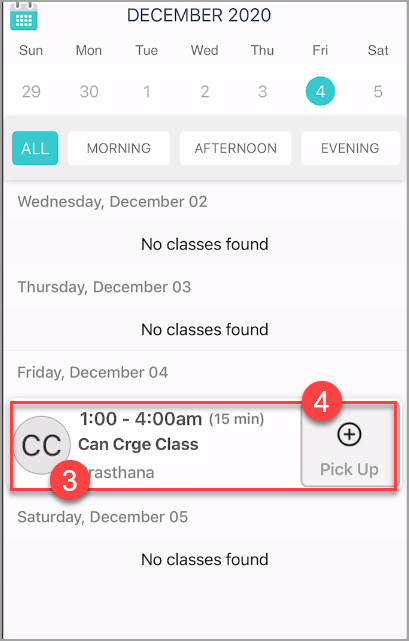
Navigate to the class which you want to pick up.
Tap Pick Up.
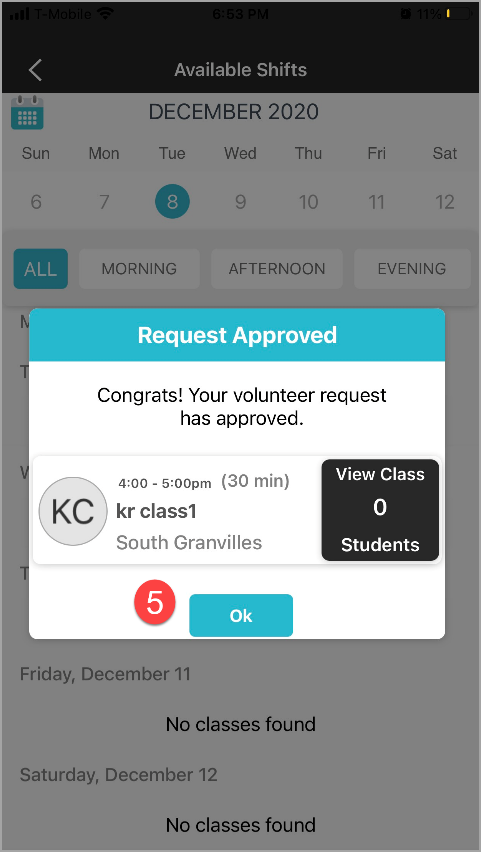
An alert will appear indicating the request has been approved. This means the instructor has picked up the class.
The class will now appear on the substitute instructor’s schedule.
Fitness: Review requests on instructor app
Once an instructor has requested a substitute, they can view and track the request to see if another instructor has picked up the class.
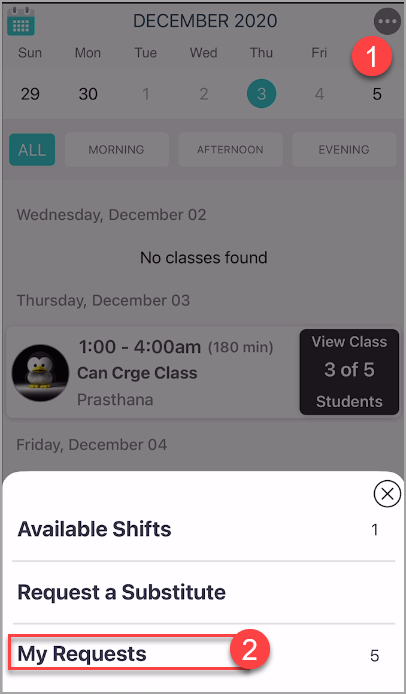
On the top right corner of the Classes menu, tap the More (…) icon.
From the available options, tap My Requests.
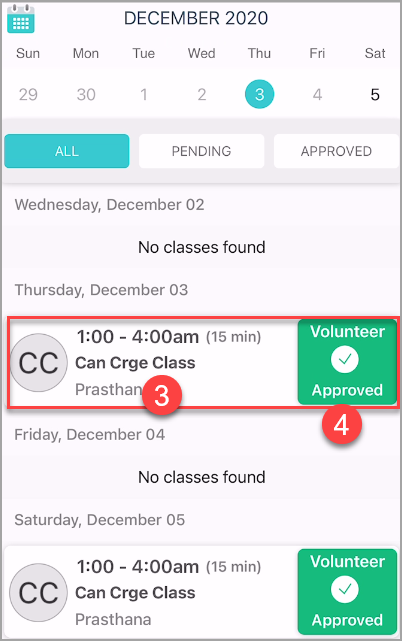
On the My Requests page, you can view classes for which requests have been sent.
Note
The page will have a record for six months. That is three months prior and three months after the current month. You can open the calendar to check the records for the months falling within the six months timeline.
You can view all the classes, or filter them out by status, Approved or Pending.
Approved: The status shows that the class has been picked up.
Pending: The status shows that the class is yet to be picked up.
Classes enrollment on instructor app
After a class has been set up, the instructor can enroll interested students in the class.
From the Classes tab, select a class in which you want to enroll the student.
On the bottom, tap the (+) symbol to search for a student.
Search for the student my name, email, or phone number.
Tap the student profile.
Tap Confirm to enroll the student in the class.
The student is enrolled in the class.
If a student has a Terms and Conditions form on file, they can then be signed-in.
Mark attendance as an instructor
When there is no front-desk staff to change the status of students’ attendance, the instructors themselves can mark a student as Cancel or No Show in the instructor app.
On the instructor app, open the class.
Locate the student for whom you want to mark attendance.
Tap the icon with the student image or name initials. A menu appears at the bottom of the screen.
On the menu, tap Cancel or No Show as required.
You have successfully marked a student as Cancel or No Show.
Redeem a guest pass from Zenoti Mobile
Front-desk staff can redeem a guest pass for a guest on Zenoti Mobile.
Log into the Zenoti Mobile Application.
Open the class schedule and go to a class.
Go to the guest profile page and tap Use Guest Pass.