Manage guest's experience in ZMA v2 on Phones
Create a new guest profile
Tap Appointments tab.
Tap Search icon on top right.
Tap the Add guest on the top right.
Enter the guest details.
Tap Save.
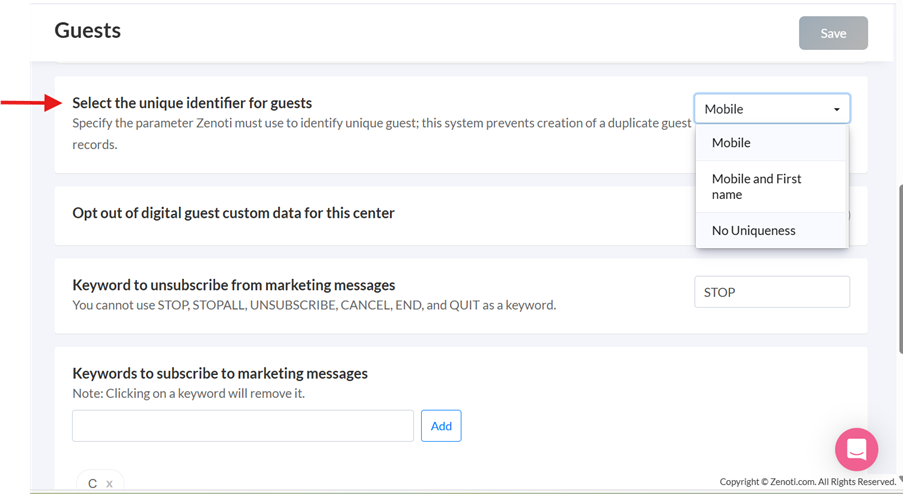
When you create a guest, Zenoti checks for duplicates based on your center’s uniqueness settings. Depending on how these are configured, the system checks across your center, zone, or entire organization. You can go to the Guests section in Configuration and set the unique identifier for guests.
Note
This setting is not available by default. If you want to enable this, contact your Zenoti representative.
Behavior varies by uniqueness type:
Center Uniqueness | Org (Can share mobile) | Zone Level Enabled | Alert/Warning | Result |
|---|---|---|---|---|
Mobile | No | Yes | Alert: If a guest is found in the zone with the same number | Guest creation blocked |
Mobile | No | No | Alert: If a guest is found in the org with the same number | Guest creation blocked |
Mobile | Yes | Yes | Warning: If a guest is found in the zone with the same number | Can ignore warning |
Mobile | Yes | No | Warning: If a guest is found in the org with the same number | Can ignore warning |
Mobile + First Name | N/A | Yes | Alert: If a guest is found in the zone with the same number + First name | Guest creation blocked |
Mobile + First Name | N/A | No | Alert: If a guest is found in the center with the same number + First name | Guest creation blocked |
Modify guest details
In the guest profile, tap Edit next to guest’s name.
Alternatively, tap the 3-dot menu and select Edit profile.
Make the necessary modifications.
Tap Save.
The following table provides an overview of actions you can perform as a front-desk staff to update or modify guest details:
Section | Actions |
|---|---|
Personal Info | Edit details such as customer ID, first name, last name, birthday, anniversary, and referral code. You can also block guests from editing their details. |
Address | Edit the guest's address. |
Preferences | Enter the base center and preferred language. Choose the guest's preference to receive transactional and marketing communications through email and text messages. If your guest wants to receive intake forms or other updates via email, you must enable the setting from the Guest Profile page. NoteAs part of the TCPA compliance, when creating a guest’s profile, the front-desk staff must take approval from the guest to receive marketing messages of your business. If the guest approves, enable the Receive Marketing Emails and Receive Marketing SMS settings.
|
Guest overview
The Guest Profile Overview in the Zenoti Mobile app enables front desk staff to quickly access essential guest information such as the following:
Full name, phone, email, birth date and profile icons
Most recent past and upcoming appointments
Active memberships and packages
Profile notes and alerts
Loyalty points and their worth
Preferences for marketing and communication channels
Cards on file
Note: Guest tabs are configurable, and the sequence can be set as per the preference.
More information