Actions on Point of Sale (POS)
The Point of Sale (POS) in Zenoti allows front desk staff to efficiently process transactions, manage invoices, and track purchases.
To access POS, click the POS icon from the Roster View or the Roster Home Page.
 |
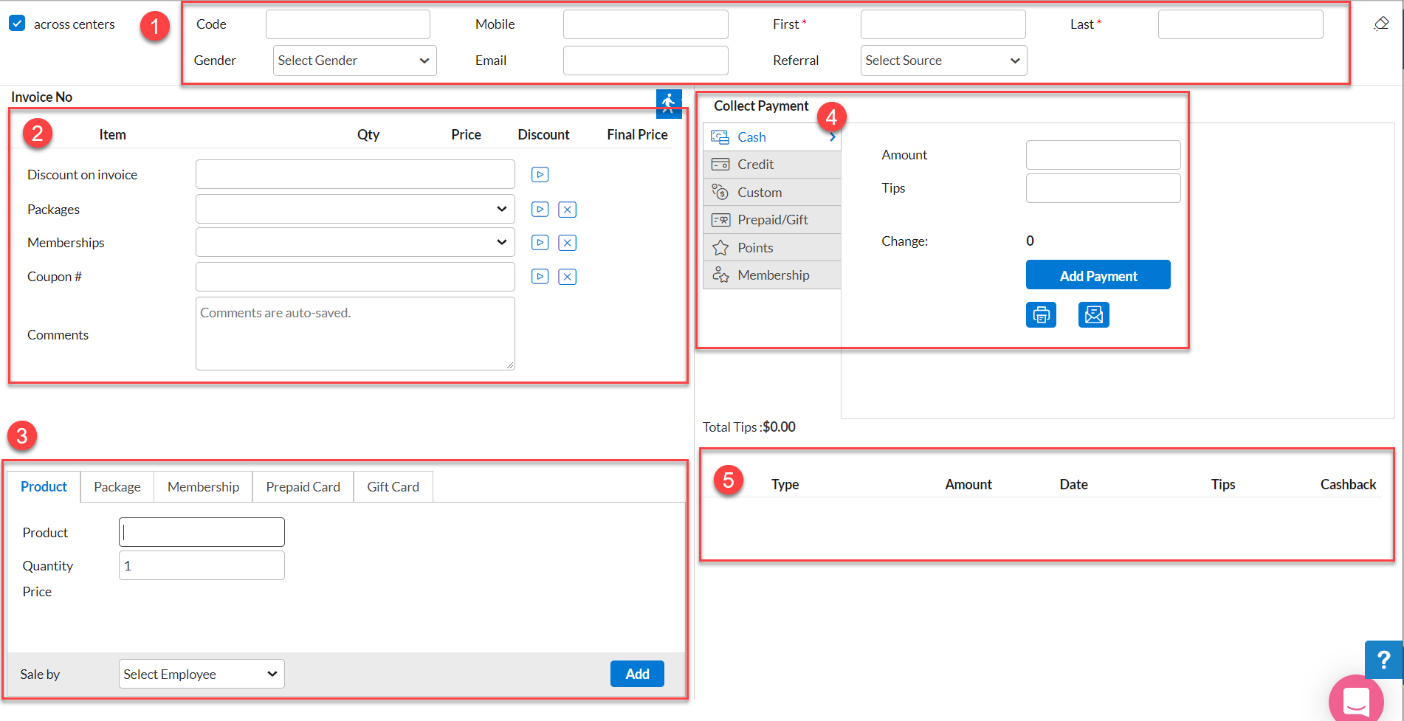
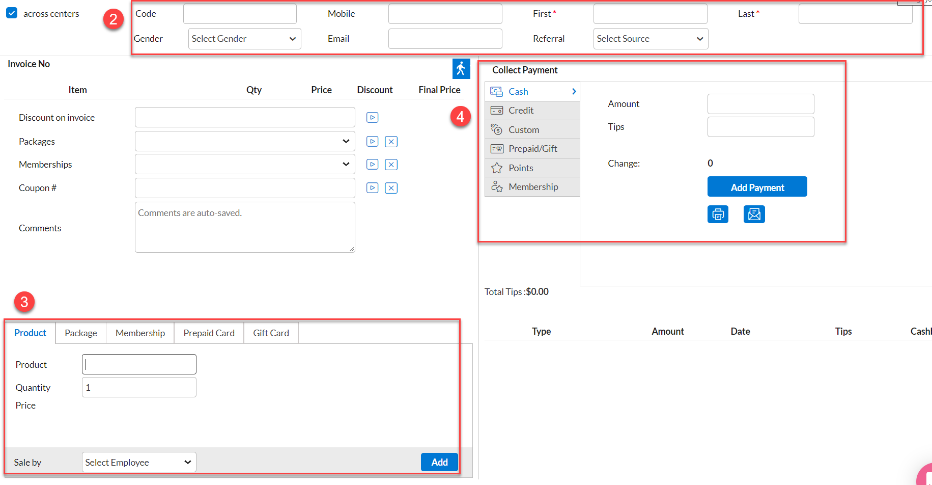
Invoice Sections Overview
The invoice is divided into key sections to streamline the transaction process:
Student or member information: Enter new student details or search for an existing memebr by first name, last name, email, or mobile number.
Invoice Items – Displays all items (e.g., retail products, class invoices). Allows applying manual discounts, adding campaigns, and entering comments.
Add Items – Enables adding retail products, memberships, class packs, or other services. Also, specify the Sale by employee for tracking purposes.
Payment Section – Select the student’s preferred payment method and click Add Payment.
Invoice Review & Closure – Displays collected payments. Once all payments are completed, click Close Invoice to finalize the transaction.
 |
Sell retail items
Click the POS icon to launch the Point of Sale.
Search for an existing student using first name, last name, email, or mobile number. If the student is new, enter their details. Fields marked with red asterisks (*) are mandatory.
Add Retail Items:
Scan the product barcode or manually enter the item by searching for its name or code.
Assign the Sale by the employee for commission tracking.
Clicking Add automatically lists the item in the invoice.
Collect payment
Collect payment by selecting the payment type and click Add Payment.
Once payment has been collected, Close Invoice.
You can either close and print a receipt, close and email a receipt, or simply close the invoice.
 |
Apply Discounts
Before front desk staff or receptionists can apply discounts at POS, the discounts must first be created at the organization level. Discounts are configured with predefined rules, such as applicable services, memberships, or products, and can be set for automatic application or manual selection. For complete details on discounts, refer to the create a discount article.
Membership discounts
Membership discounts are automatically applied to eligible retail items.
If a manual discount is applied, it overrides the membership discount.
For more information on managing membership discounts, refer to the membership redemption article.
Manual Discounts
You can apply a flat dollar amount discount or in percentage for sales on POS.
Membership discounts are applied automatically to all applicable retail items.
Applying a manual discount to retail items overrides the membership discount.
For example, if the membership applies 15% in retail, once you enter 30%- this will remove the 15% and only apply the 30% manual discount.
Steps to apply a manual discount:
Under the Discount column, enter the discount amount.
Example: 10 for $10 or 10% for a percentage-based discount.

Press the Enter key to confirm.
The discount is applied. Proceed to Collect payment and Close the invoice.

Add campaign discounts
On the invoice, click Select Campaign to expand the drop-down with a list of all available campaigns.
Search for the required campaign and click the play icon.
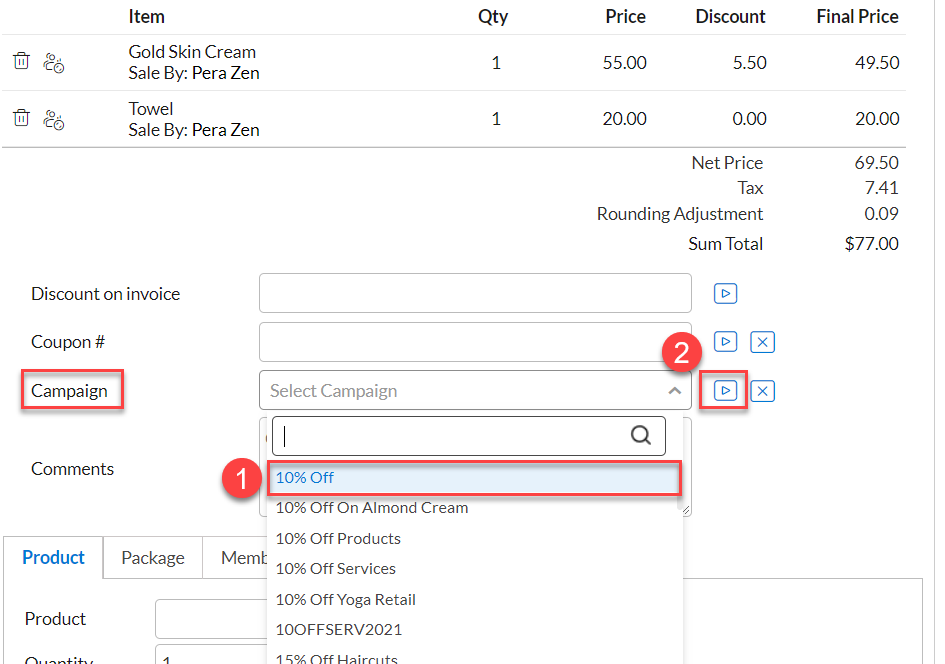
To remove a campaign, click Remove next to the respective item.
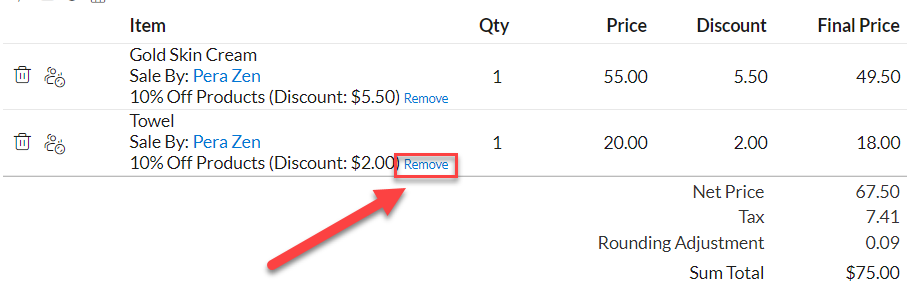
Collect payment and close the invoice.
Refund sold items
Refunding a retail item from the POS allows businesses to process returns efficiently while ensuring accurate transaction tracking. Refunds can be issued using the original payment method or converted into prepaid credits for future purchases. Refer to the following article for more information on refunds.
Redeeming a prepaid card (On-account balance)
A Prepaid Card (On-Account Balance) in Zenoti allows students to store credit that can be redeemed for purchases, including retail items, memberships, packages, and class sessions. This feature ensures seamless transactions and enhances customer convenience. Your center may have students who have an on-account balance. On-account deposits/ and balances are stored in Zenoti as prepaid cards.
To redeem the prepaid card:
Launch POS.
Access the POS from the Roster view.
Search for the student profile using their name, email, or phone number.
Select the student’s profile to proceed with the transaction.
Add items to the invoice.
Select the items the student wants to purchase, including retail items, memberships, packages, class packs, or gift cards.
The selected items are listed on the invoice.
Apply Prepaid Card as payment type.
In the Payment Section, select Prepaid Card or On-Account Balance as the payment method.
The system displays the available prepaid balance in the student’s account.
Enter the amount to be deducted from the prepaid balance.
If the available balance is less than the invoice total, the student must pay the remaining amount using another payment method.
Close the invoice.
Review the payments applied.
If the full payment has been collected, click Close Invoice.
The system will generate a receipt with the updated balance.
Impacts and considerations
If a prepaid balance is insufficient, the remaining amount can be paid via another payment method.
Refunds from transactions paid via a prepaid card are typically credited back to the prepaid balance unless a manual override is applied.
Some prepaid cards may have an expiry date, after which the balance is forfeited.
Additional balance can be added to a prepaid card via POS if the student wishes to increase their stored credit.
Gift card sale & redemption
Sell a Gift Card
Open POS.
Search for an existing student or enter information of a new student.
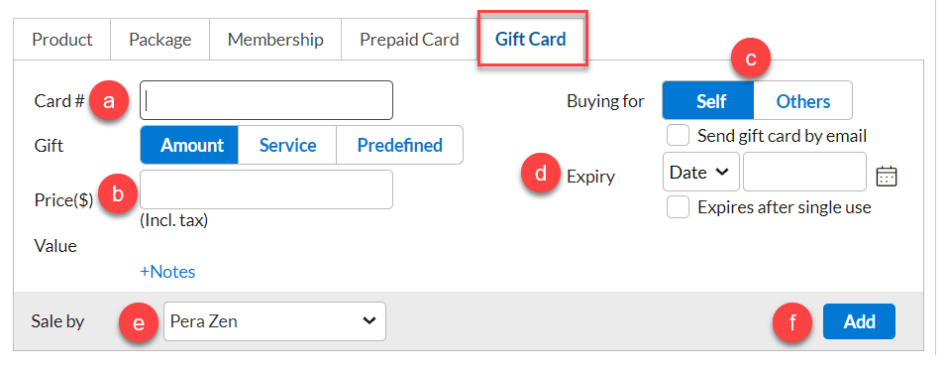
Select the Gift Card tab.
As per your business setup, the Gift card number will either pre-populate or you will have to scan the physical gift card
Enter the gift card amount.
Click on Others if the student buys a gift card for someone. If they are purchasing for themselves, select Self
Note
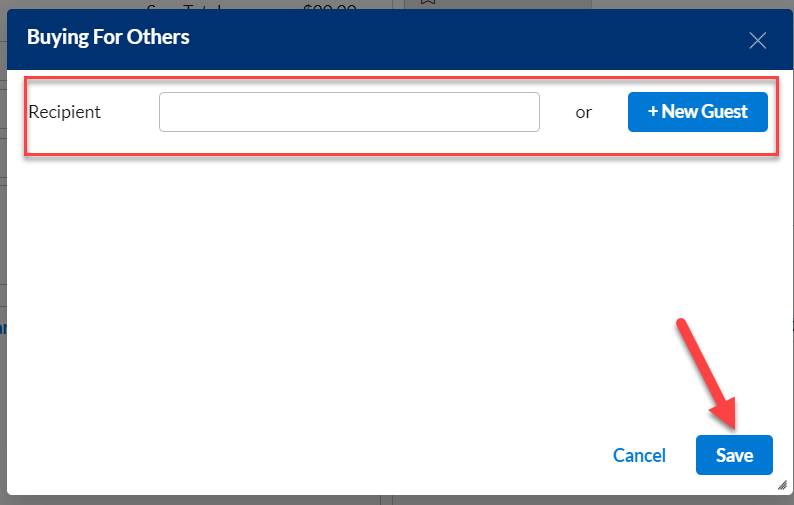
If the gift card is for Others, Buying for Others notification will appear. Add new Guest details or search for existing guest profiles. Click Save.
Add Expiry date if not already populated.
From the Sale By drop-down, select the staff selling the gift card.
Click Add.
Add payment and close invoice.
Redeem a Gift Card
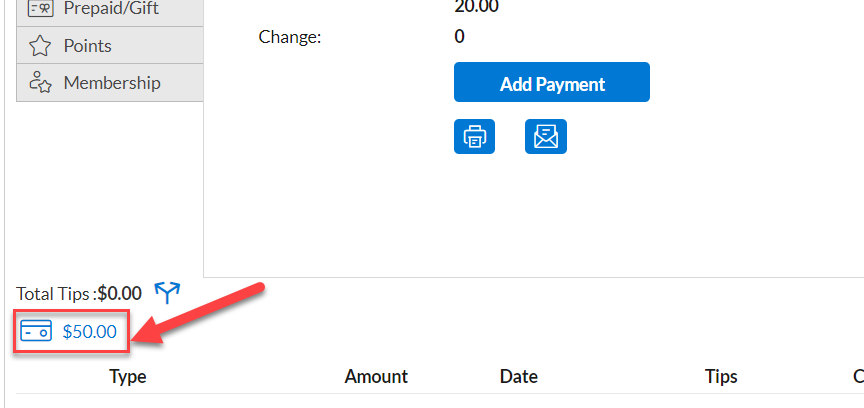
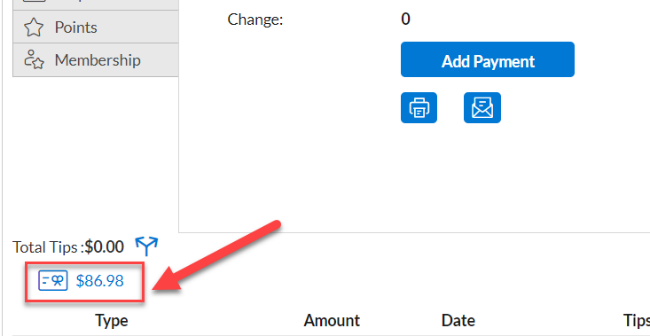
Open invoice to take payment.
The invoice will reflect any Gift card on the account. Click the Gift Card amount. The gift card icon is only shown when a student has a gift card on account.
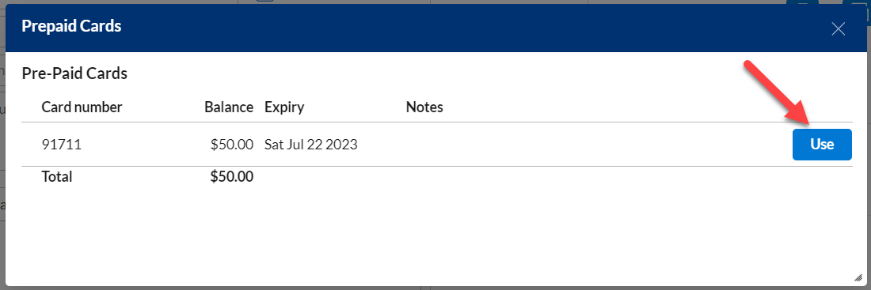
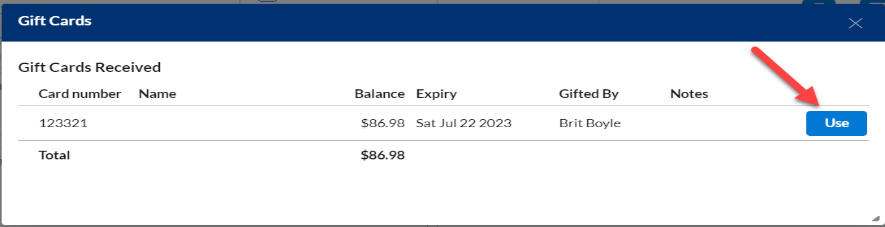
From the Gift Cards window, select the gift card to be used and click Use.
Add payment and close invoice.
Custom payment type
You may have customers who are using third-party payments (ex. Groupon). These will be listed in Zenoti as Custom Payment Types. If you do not see a particular custom payment type, please contact your manager/ corporate team.
Launch the POS.
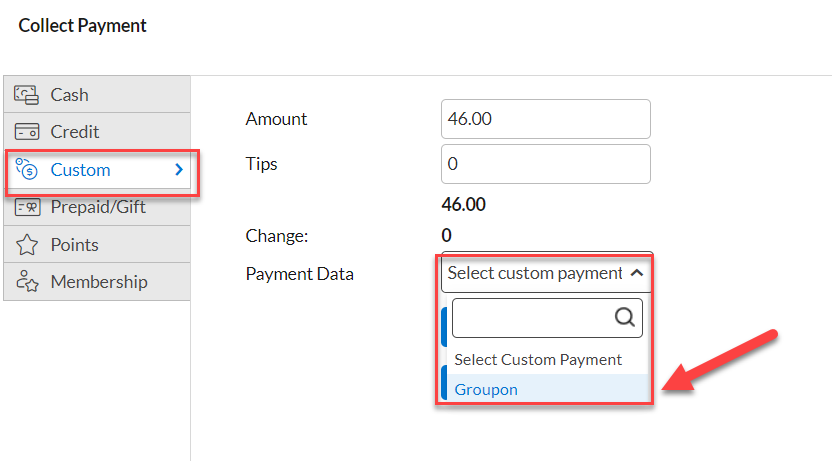
Select the Custom payment type option from the Collect Payment section.
Select the required custom payment from the Select custom payment dropdown.
Add payment and close the invoice.
 |
Register closure from the Roster
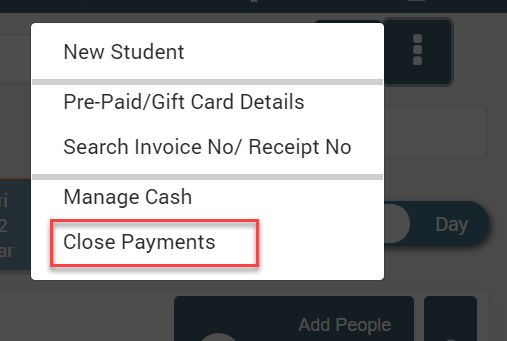
Navigate to the home page of the Roster view.
Select the More options or the 3 dots icon and click Close Payments.
On the Close Payments window, tally the amounts. You can use Currency count to enter cash denominations
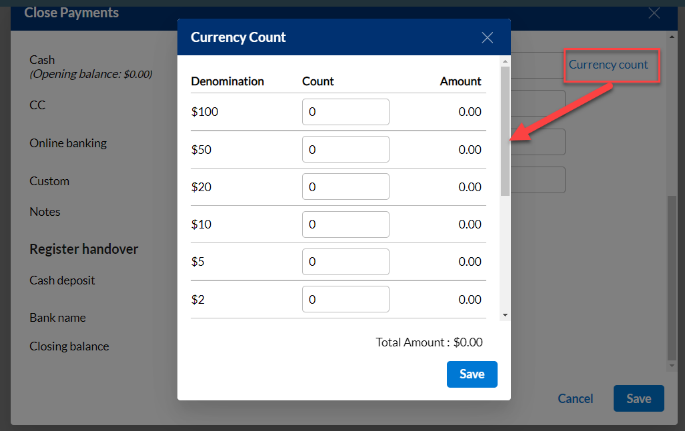
If there is a discrepancy, add notes in the Comments box.

Scroll down to Register handover. In the Cash Deposit section, enter the cash amount that you will withdraw from the register to deposit in the bank.
Important
Please follow the regulations and procedures followed by your business for retrieving money from the cash register.
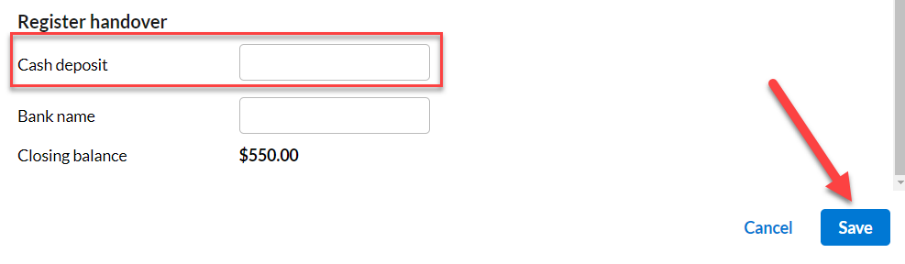
Click Save.