Set up the book now button on Facebook and Instagram
When you want the visitors of your Facebook and Instagram pages to be able to book your services directly from the page, you can configure the Book now button on your pages.
Note
If you configure the Book Now button at the organization level, and your center has a different Facebook or Instagram page, you can still configure it for the center.
You can configure the Book Now button only once for every center and organization.
If you set up the integration from Facebook, you do not need to set up the integration from Zenoti.
You can only set up the Facebook book now integration if Facebook supports the currency that your organization uses.
Refer to currencies supported by Facebook for the list of currencies.
Set up the book now button at the organization level
You should set up the book now button at the organization level when:
Your business has only one Facebook page for the whole business. This way, guests can select a center of their choice.
Your business has a main page and all franchisees have their own Facebook pages.
Perform these steps from Zenoti
At the organization level, click the Configuration icon.
Navigate to Online booking > Online booking settings > Webstore v2.
Select the Webstore v2 template and expand the Integrations section.
Expand Facebook and click Configure book now button.
Indicate whether you want to display the center selection pop-up when the guest lands on the webstore through the Book now button.
To connect to a Facebook account that is already logged in, click Continue as <Your name>.
To connect to a different account, click Log in to another account.
To connect Zenoti to Facebook, click Continue.
To choose your Business Manager to manage business assets (such as Facebook Page, Pixel, and Catalog), select a business manager account from the list, and click Continue.
Here, if the options are disabled, you can create a new Business manager account.
Do this:
Click Create new, enter the name of the new account, and click Continue.
To choose the Facebook page you want to connect to your Webstore, select a page from the list, and click Continue.
Here, if the options are disabled, you can create a new Facebook page.
Do this:
Click Create new, enter the name of the new account, and click Continue.
To add the Book Now button to your business's Instagram page, choose the Instagram business profile, and click Continue.
To choose the ad account for your business, select an ad account from the list, and click Continue.
Here, if the options are disabled, you can create a new Ad account.
Do this:
Click Create new, enter the name of the new account, and click Continue.
Choose the Meta Pixel (also known as Facebook Pixel) to use data from the Pixel to analyze guests’ booking patterns on your Webstore and click Continue
Here, if the options are disabled, you can create a new Facebook Pixel account.
Do this:
Click Create new, enter the name of the new account, and click Continue.
Review the Business Manager, Facebook Page, Instagram Profile, Ad Account, and Meta Pixel you selected, and click Continue.
To give Zenoti permission to manage the business extension, click Next.
You’re all set and a Book Now button is added to your Facebook and Instagram accounts. The Book Now button redirects the users to your Webstore for easy bookings.
Perform these steps from your business manager's account
Go into your Business manager account.
Select Zenoti and click Manage.
Verify that the Page action button is turned on.

Note
To reach the connection settings page, click Edit book now and click Edit.
Set up the book now button at the center level
Configuring the Book Now button at the center level ensures that, the guests who click the button from Facebook or Instagram will only see your center, not all of your business centers.
Perform these steps from Zenoti
At the center level, click the Configuration icon.
Navigate to Online booking > Online booking settings > Integrations.
Expand Integrations and click Configure book now button.
To connect to a Facebook account that is already logged in, click Continue as <Your name>.
To connect to a different account, click Log in to another account.
To connect Zenoti to Facebook, click Continue.
To choose your Business Manager to manage business assets (such as Facebook Page, Pixel, and Catalog), select a business manager account from the list, and click Continue.
Here, if the options are disabled, you can create a new Business manager account.
Do this:
Click Create new, enter the name of the new account, and click Continue.
To choose the Facebook page you want to connect to your Webstore, select a page from the list, and click Continue.
Here, if the options are disabled, you can create a new Facebook.
Do this:
Click Create new, enter the name of the new account, and click Continue.
To add the Book Now button to your business's Instagram page, choose the Instagram business profile and click Continue.
To choose the ad account for your business, select an ad account from the list, and click Continue.
Here, if the options are disabled, you can create a new Ad account.
Do this:
Click Create new, enter the name of the new account, and click Continue.
Choose the Meta Pixel (also known as Facebook Pixel) to use data from the Pixel to analyze guests’ booking patterns on your Webstore and click Continue
Here, if the options are disabled, you can create a new Facebook Pixel account.
Do this:
Click Create new, enter the name of the new account, and click Continue.
Review the Business Manager, Facebook Page, Instagram Profile, Ad Account, and Meta Pixel you selected. Click Continue.
To give Zenoti permission to manage the business extension, click Next.
You’re all set and a Book Now button is added to your Facebook and Instagram accounts. The Book Now button redirects the users to your Webstore for easy bookings.
Perform these steps from your business manager's account
Go into your Business manager account.
Select Zenoti and click Manage.
Verify that the Page action button is turned on.
Note
To reach the connection settings page, click Edit book now and click Edit.
Set up the Book Now Button from Facebook
The Book Now button allows your guests to quickly schedule appointments through your businesses' Facebook or Instagram pages. With just a few clicks, customers can select a service, choose a time, and confirm their appointment, making the process quick and intuitive.
Advantages of setting up the Facebook book now button
Centralized configuration: Manage all your centers from a single tab.
Mobile access: Configure the button directly from your phone.
Multi-center visibility: If you own multiple centers, you can easily identify which centers have configured the button.
Permissions required
To set up the Book Now button:
At the organization level, you must have the role of an administrator.At the organization level, you must have the role of an administrator.
At the center level, you must have the role of manager.
Note
If you have the role of the manager in 10 centers out of 100 centers, you can only configure the Book Now button for the 10 centers you manage.
To set up a book now button on Facebook and Instagram from Facebook
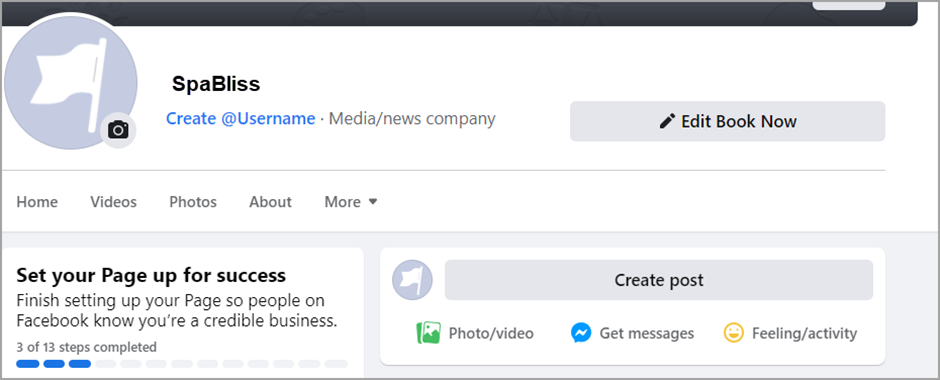
Log in to your business's Facebook page.
Click the three horizontal dots icon and select Add Action Button.
On the Action button screen, select Book now and click Next.
Select Connect to another tool and click Save.
From the list of available options, select Zenoti.
Enter the account name where you want users to be redirected to when they click the Book now button and click OK.
Enter your Zenoti login and password.
Depending on your security permissions, perform these steps:
To add the Book now button on the Facebook page for a center, under the Centers tab, next to the center you want to configure the Book now button, click Configure.
To add the Book now button on the Facebook page for the organization, go to the Organization tab and click Configure.
To confirm your identity, click Continue as <your name>.
To choose your Business Manager to manage business assets (such as Facebook Page, Pixel, and Catalog), select a business manager account from the list, and click Continue.
If the options are disabled, you can create a new Business manager by following these steps: Click Create new, enter the name of the new account, and click Continue.
Select your ad account and Pixel account.
Review the Business Manager, Facebook Page, Instagram Profile, Ad Account, and Meta Pixel you selected and click Continue. To view the Book now button, click View page.
Set up a book now button on Instagram from Instagram
You must have a professional account on Instagram to set up the Book now button. After you set up the book now button on Instagram, your guests can book appointments seamlessly through their Instagram App.
When you set up a Book now button on Instagram, you provide a faster way for your potential guests on Instagram to book appointments online.
Note
Your guests accessing Instagram from a desktop will not see the Book Now button.

Important
You must have a professional account on Instagram to set up the Book now button. If you have a personal account, you'll need to change the account type to professional to add the button.
You can only configure the Book now button on Instagram through the Instagram mobile app. Instagram on desktop does not support the Book now button.
If you do not have a Facebook account but have an Instagram account, you can set up the Instagram Book now button from Instagram only.
If you have the security role of a manager in 10 out of 100 centers, you can only configure the Book now button for the 10 centers you manage.
Advantages of setting up the Instagram Book now button from Instagram
You can configure all the centers you own from the same tab.
You can configure the Book Now button from your phone.
If you own multiple centers, you can see which all centers have configured the Book now button.
Permissions required to configure the Book now button
At the organization level, you must have the role of an administrator.
At the center level, you must have the role of manager
Open the Instagram app and log into your Business profile.
Select the Profile icon to view your profile.
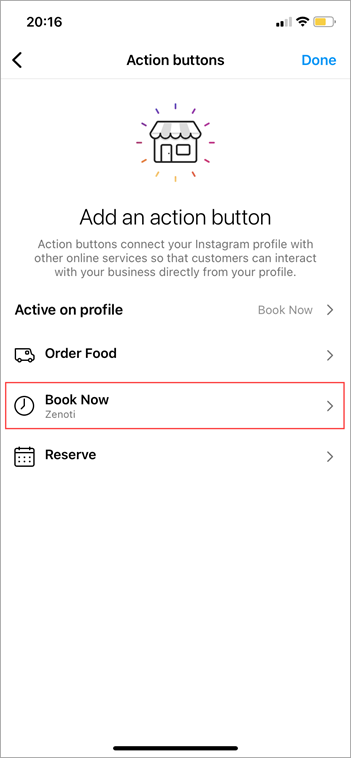
Choose Edit profile > Action buttons > Book now.
Select Zenoti.
Enter your Zenoti account name and click Continue.
Enter your Zenoti login and password.
Depending on your security permissions:
To add the Book now button to the Instagram page of your center, on the Centers tab, next to the center you want to configure the Book now button, click Configure.
To add the Book now button on the Instagram page for the organization, under the Organization tab, click Configure.

Click Continue as <your name> to confirm your identity.
Review the Business Manager, Facebook Page, Instagram Profile, Ad Account, and Meta Pixel you selected. Click Continue.
Note
Under the Active on profile setting, you should now see the Book now button listed, with Zenoti mentioned below it.
Use Facebook Pixel to track user behavior
Tracking user behavior helps businesses analyze guest's booking patterns. It also gives insights on how your guests book a service, which service is booked frequently, and which add-ons are most preferred.
Zenoti allows you to use Facebook Pixel to track user behavior.
Facebook Pixel triggers whenever a guest takes any action on your Webstore.
For example, when a guest purchases a product or books an appointment, Facebook Pixel receives these actions or events, which you can review from its Event Manager page.
This allows you to measure your guest’s purchasing patterns and booking behavior, thus allowing you to optimize your services for better bookings.
The following are the advantages of Facebook Pixel:
Behavior Tracking: Track the activity of your guest on the Webstore. This tracking provides vital information and statistics that will help in effective sales conversion and retargeting.
Data to Optimize Services: Facebook Pixel collects data that tells you how many times a service was viewed on your Webstore and how many times it was actually booked. With this simple piece of information, you will know which of the services have a high booking rate and which services have a low booking rate.
Gift Card Tracking: Facebook Pixel allows you to not only track the number of sales of the gift cards but also check the centers that sell a high number of gift cards. Also, you can view the most used gift card occasions and their corresponding templates. This information is critical for replicating higher sales of gift cards in multiple centers.
Create Facebook Ads: If you are planning to use Facebook Ads to boost your bookings, the data collected by Facebook Pixel will allow you to target your existing guests to drive conversions, retarget your guests, drive sales for a newly introduced service, and build targeted audiences.
Facebook Pixel by default tracks the following events:
Service Booking
Gift Card Purchase
Membership Purchase
Series Package Purchase
Check the following articles to install Facebook Pixel and to track your Webstore events:
Create a Facebook Pixel
Disclaimer
The steps in this article pertain to the configuration on a third party (Facebook) site. Zenoti is not responsible for any changes to these steps or processes. This information is provided for your convenience.
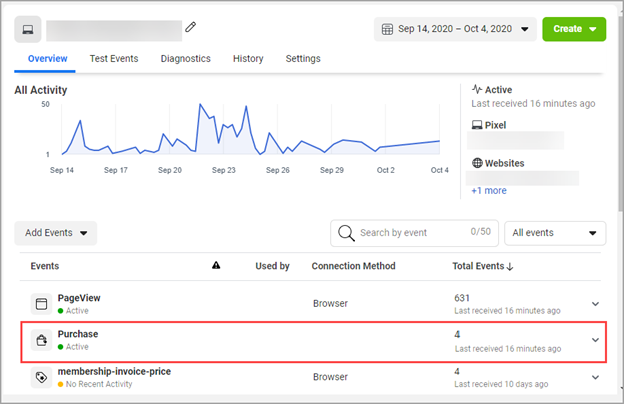
Facebook Events Manager shows the results of ad events or offline events such as booking conversions, audience targeting, retargeting, and user behavior.
To view the results in the Facebook Event Manager, you must first create a Pixel.
To create a Meta Pixel
Navigate to https://www.facebook.com/events_manager
Log in using your Facebook credentials.
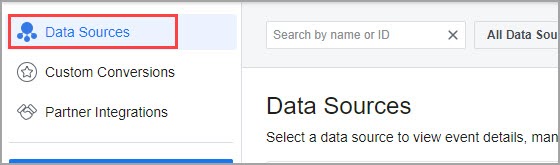
Ensure you select the option Data Sources.

In the Facebook Pixel section, click Get Started.
The Connect Website pop-up window appears.

Enter the following information:
Pixel Name: Enter a name for your Facebook Pixel. For example, Spa Bliss.
Website URL: Enter the URL of your Webstore. Forexample www.spabliss.zenoti.com.example www.spabliss.zenoti.com.
The Pixel is created and the homepage of the new pixel opens.
Note
You may see a pop-up, “Choose how you want to install the pixel code” appear. You must close the pop-up window.
From the pixel homepage, copy the Pixel ID.

You have successfully created a Facebook Pixel for user behavior tracking. You must paste this ID in the Facebook Pixel field of the Webstore V2 settings page to track user behavior.
Set up Custom Events
After you create a Facebook Pixel and paste the Pixel code on your Webstore, you can start tracking the service bookings and the Thank You pages that appear after every service booking by creating custom events.
The tracked conversions and events appear on the Facebook Events Manager. This allows you to view the service name that was booked, the center name where it was booked, and other details.
While setting up the Custom Events, Facebook Pixel allows you to track the following:
Buttons on the Webstore
Specific URLs of the Webstore such as the Thank You page
In this article you will learn the steps for tracking buttons as well as the URLs of specific pages of the webstore.
The following steps explain how you can track the Book Now or the Book Reservation button on the Webstore.
Navigate to your Facebook Event Manager
Your existing Facebook Pixel’s Overview tab appears.
Click the Settings tab.

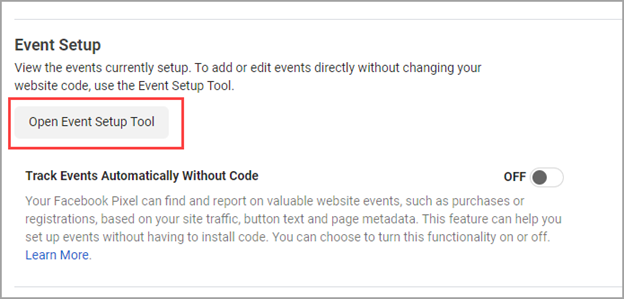
Scroll down to the Event Setup section and click the Open Event Setup Tool.
The Setup Events pop-up appears and prompts you to enter the URL of your website.
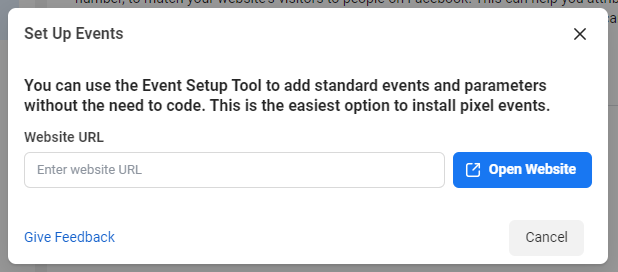
Enter the URL of your Webstore and click Open Website.
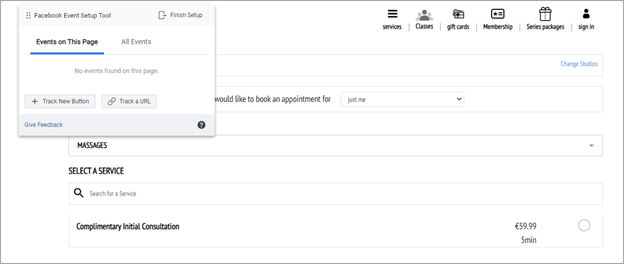
Your Webstore along with a Facebook Pixel helper opens.
Click + Track New Button.
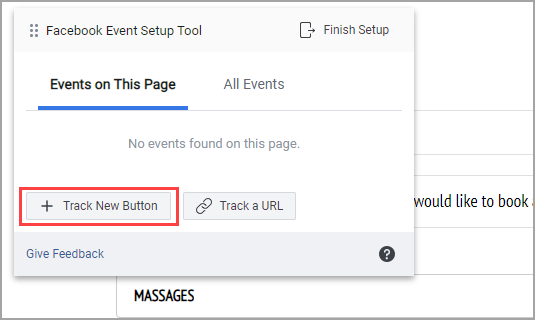
Facebook Pixel will identify all the available buttons on the web page and highlight those buttons.
Note
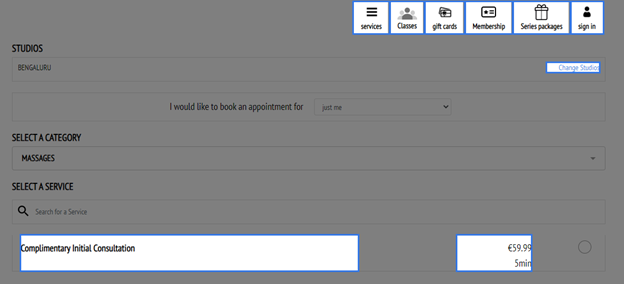
If you want to track the Book Now or Book Reservation button, you must go to the page where the button is available and then select the button accordingly.
Select the Book Reservation button to track.
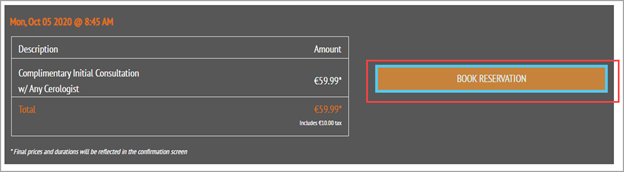
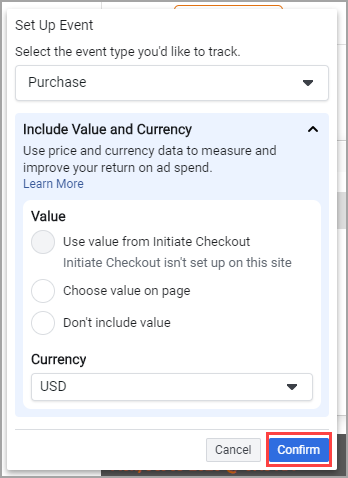
On the Facebook Pixel helper, select an event that is relevant to the button.
For example, for a Book Reservation button, you may want to specify the event as a Purchase or an Initiate Checkout.

Select the Value and Currency options and click Confirm.
Note
If you do not want to include the value and currency information, you can select the option Don’t include value.
The Setup Complete pop-up appears on the right-hand side of your screen.
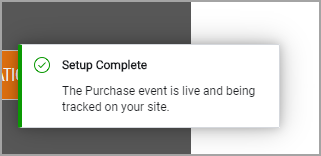
Whenever any guest books a reservation on the Webstore, the Facebook Pixel will record it as a purchase and show the same in the Facebook Event Manager.
Track Specific URLs of the Webstore
The Facebook Pixel allows you to set up custom events by tracking the URL of a particular webpage. This gives you information as to how many guests checked out the page, and how many completed a particular transaction.
For example, if you track the Thank You page of the Webstore, you will get to know how many of your visitors successfully completed a booking.
The following steps explain how to track the Thank You page for services on the Webstore.
Navigate to your Facebook Event Manager
Your existing Facebook Pixel’s Overview tab appears.
Click the Settings tab.
Scroll down to the Event Setup section and click the Open Event Setup Tool.
The Setup Events pop-up appears and prompts you to enter the URL of your website.
Enter the URL of your Webstore and click Open Website.
Your Webstore along with a Facebook Pixel helper opens.
Navigate to the Thank You page.
On the Facebook Pixel helper, click Track URL.
Select the appropriate event from the drop-down list.

From the Track the entire URL or a portion of the URL field, select URL Contains.
Enter a keyword for the URL.
For example, if you are tracking the Thank You page for service bookings, enter services/thankyou in the box.
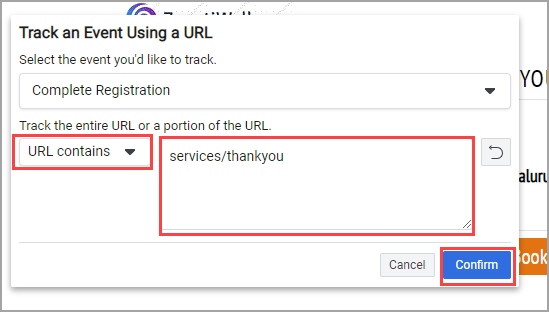
Click Confirm.
Setup is complete and the URL is now successfully added as an event for the Facebook Pixel to track.
Whenever your guests complete a booking and enter the Thank You page, the Facebook Event Manager will automatically add a record to this event.
Install Facebook Pixel
After you create a Facebook Event Manager account and create a Facebook Pixel, you must add the Pixel ID to your Webstore. This allows the Pixel ID to track the booking events and purchase events on your Webstore.
You can view the tracking metrics and booking events on the Facebook Event Manager.
To add the Facebook Pixel
At the organization level:
Click the Configuration icon.
Navigate to Online Booking > Online booking settings > Webstore V2.

Scroll down and expand Analytics.
In the Facebook Pixel ID field, paste the Facebook Pixel ID.

Click Publish.
You have successfully added the Facebook Pixel ID to your Webstore.
Events tracked by Facebook Pixel
When you add Facebook Pixel to your Webstore, it tracks service bookings and purchase of gift cards, memberships, and series packages.
In this article, we will see in the details of the events and their attributes tracked by the Facebook Pixel.
Series Package
When a guest purchases a series package on your Webstore, the “series-package” event and “series-package-invoice-price” are triggered.
The “series-package” event tracks the following attributes:
"
Name": Name of the selected series package.“
Id”: ID of the selected series package.“
Center-name”: Name of the center where the series package was purchased.“
Guest-email”: The email id of the guest who purchased the series package.“
Guest-mobile”: The mobile number of the guest who purchased the series package.
The “series-package-invoice-price” event tracks the following attributes:
“
Center-name”: Name of the center where the series package was purchased."
Sub-total": The subtotal of the invoice for the series package."
Tax": The tax component in the invoice."
Other-fee": The other fee component in the invoice."
Total": The total amount of the invoice.
Membership
When a guest purchases a membership on the Webstore, the “membership” event and "membership-invoice-price” are triggered.
The “membership” event tracks the following attributes:
"
Name": Name of the selected membership.“
Id”: ID of the selected membership.“
Center-name”: Name of the center where the membership was purchased.“
Guest-email”: The email id of the guest who purchased the membership.“
Guest-mobile”: The mobile number of the guest who purchases the membership.
The "membership-invoice-price” tracks the following attributes:
“
Center-name”: Name of the center where the membership was purchased from."
Sub-total": The subtotal of the invoice for the membership."
Tax": The tax component in the invoice."
Other-fee": The other fee component in the invoice."
Total": The total amount of the invoice."
invoice.Price.Final": The final price of the invoice.
Gift Card
When a guest purchases a gift card on the Webstore, the “gift-card” event and "gift-card-invoice-price” event are triggered.
The “gift-card” event tracks the following attributes:
"
Type”: The type of the gift card."
Name": Name of the gift card."
Template-id": Template Id of the gift card."
Quantity": This is the number of gift cards purchased."
Occasion-name": The occasion for which the gift card was purchased."
occasion-Id": The ID of the occasion."
Image-id”: The ID of the image that appears on the gift card."
Recipient-name": The name of the recipient who will receive the gift card."
Recipient-email": The email id of the recipient."
send-Time": The time at which the gift card is to be sent.
The "membership-invoice-price” event tracks the following attributes:
“
Center-name”: Name of the center where the gift card was purchased from."
Sub-total": The subtotal of the invoice for the gift card."
Tax": The tax component in the invoice."
Other-fee": The other fee component in the invoice."
Total": The total amount of the invoice.
Service
Based on the booking type, either a “service” or “day-package” event is triggered. The pricing details are captured in the "booking-invoice-price” event.
The “service” event tracks the following attributes:
"
Name": The name of the service booked."
Id": The ID of the booked service."
Center-name": The center where you booked the service."
Therapist-id": The therapist selected while booking the service."
Start-time”: The start time of the service.
The "booking-invoice-price” event tracks the following attributes:
"
Guest-count”: The number of guests booked in a service. This includes the number of guests for couples booking and group bookings.“
Center-name”: Name of the center where the service or day package was purchased."
Sub-total": The subtotal of the invoice for the service or the day package."
Tax": The tax component in the invoice."
Other-fee": The other fee component in the invoice."
Total": The total amount of the invoice.