Queue Incoming Calls in HyperConnect
This article explains how to configure and use Call Queuing in HyperConnect to manage high call volumes effectively by placing incoming callers in a virtual queue when agents are busy.
Overview
Call Queuing in HyperConnect allows incoming callers to be placed in a virtual line when all agents are busy. Instead of hearing a busy tone or being redirected to voicemail, Smart Bot, or the AI Receptionist, callers stay in queue until an agent becomes available. This ensures a seamless customer experience.
Call Queuing is ideal for high-volume businesses like salons, spas, and med spas, especially those with call centers or multi-location setups.
Call Queuing helps businesses:
Avoid missed calls due to agent unavailability
Reduce caller abandonment rates
Improve customer satisfaction
Enhance call-handling efficiency
How to configure
Access Phone Tree Configuration
Log in to HyperConnect.
Click the Settings icon.
Go to the Voice tab.
Navigate to Phone Tree Flows > Manage.
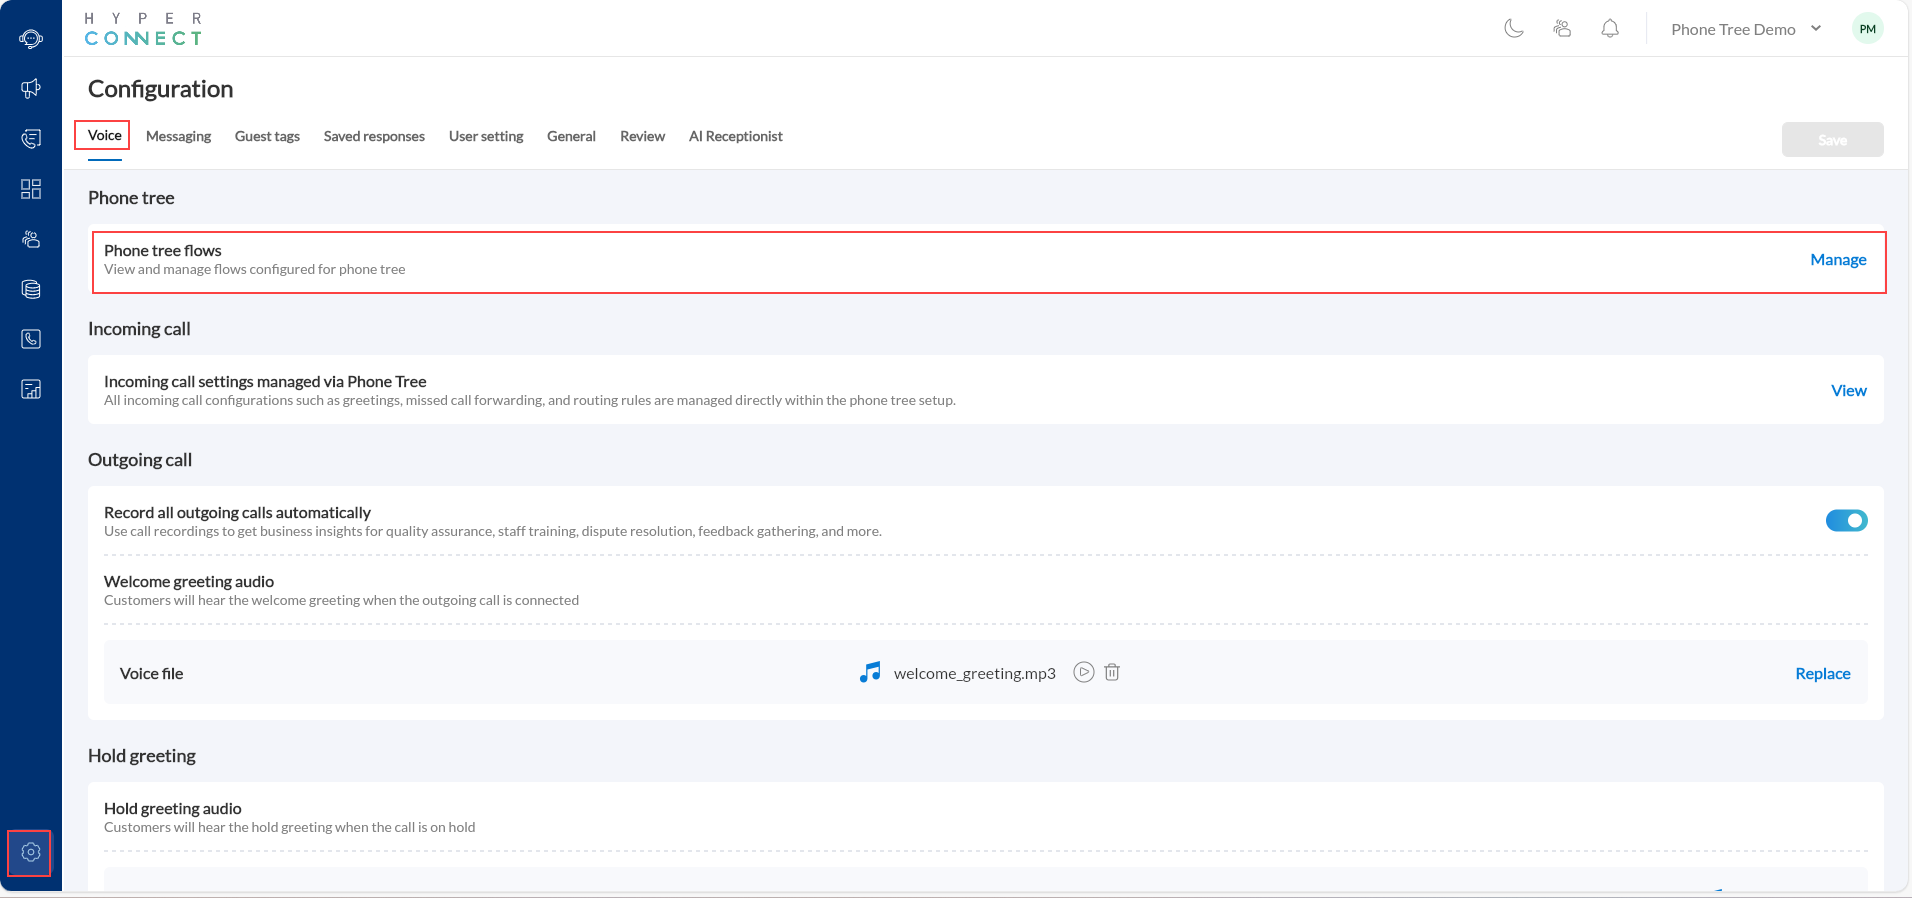
Choose to open an existing phone tree or create a new one.
Add and Configure the Queue Node
Inside the Phone Tree builder, drag and drop the Add in Queue node. The Add in queue widget enables you to define queue behavior, agent assignment rules, and audio configurations.
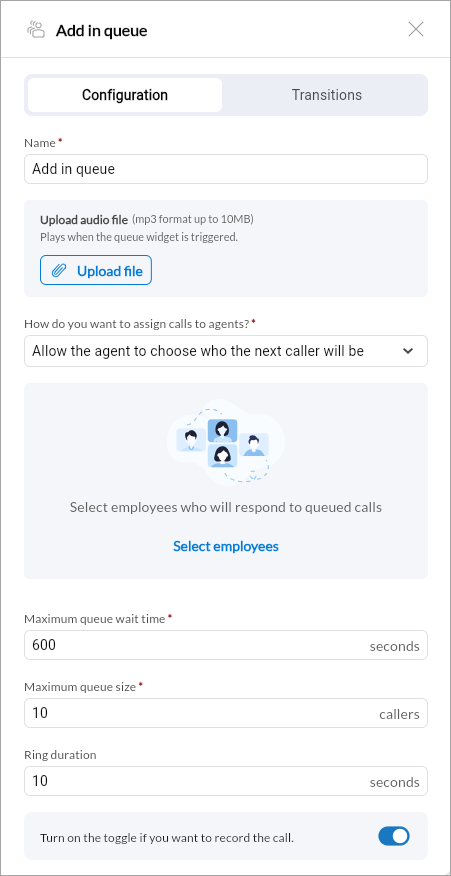
Configuration Tab
Give your queue a recognizable name (Example: Front Desk Queue).
Upload a hold music file in .mp3 format (up to 10MB). This audio plays while the caller waits in the queue.
Use short audio loops (less than 1 minute) to maintain a smooth playback experience.
Choose how queued calls are assigned to agents:
Allow the agent to choose who the next caller will be, or
Automatically assign to available agents.
Define which employees will respond to queued calls.
You can add multiple agents and arrange them in order of priority or utilization.
Note: Call routing is determined by agent utilization. For example, if one employee has handled 8 out of 10 calls and another has handled 2, the next call will route to the less utilized agent.
Specify how long a caller can wait in the queue (in seconds). Example: 600 seconds = 10 minutes.
After this time, the call is marked as a missed call and follows the next step in your flow. Example: routed to voice
Set the maximum number of callers allowed in the queue at one time.
Example: If the limit is 5, the sixth caller will be treated as a missed call.
Define how long each agent’s device will ring before the system moves to the next agent. Example: 10 seconds
Enable the toggle to record calls for training or quality purposes.
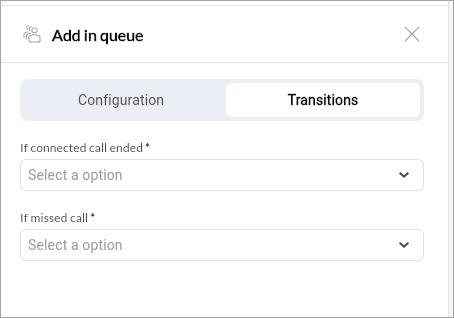
Transitions Tab
Use the Transitions tab to define what happens after specific call outcomes:
If connected call ended: Choose the next step (Example: End Flow or Transfer).
If missed call: Choose what should happen when no agents are available or the queue limit/time is exceeded (Example: Route to Voicemail).