Set Up and Manage Guest Medical Records
This article explains how to manage and monitor patient medical records from the guest profile.
Overview
The Medical Record tab in the guest profile is a centralized space to capture a patient's clinical information. This includes allergies, medical history, family history, medications, vitals, health and lifestyle details, and critical alerts. Providers can add, update, and monitor these records directly from the guest profile, ensuring accurate and timely care.
Note: The Medical Record feature is available on Zenoti Web and ZMA for tablets and mobiles.
Prerequisites
Ensure your form includes components from the Medical Record category when building it in the form builder. These components allow structured data to be captured and reflected within each section of the guest's record.
If the Medical Record components do not appear in the form builder, contact your Zenoti representative.
You must have Edit permission for Custom forms to add or modify Medical Record components.
Populate your allergen, medication, and condition databases at Configuration > Clinical setup > Medical Record before enabling master list search on a form. An empty database returns no search results.
Add allergies component to a form
At the organization level, click the Configuration icon.
Search for Custom forms, and under Forms, select Custom forms.
Open an existing form or click Add to create a new form.
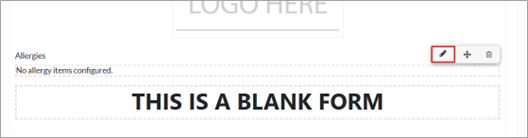
In the Design tab, from the Medical Record list, drag and drop the Allergies component onto the form.

Click Edit to open the component.
In the Data tab, under the Basic Configuration section, select how the question must be displayed by selecting either Show as radio buttons or Show as select boxes or both.


Select the Required checkbox to indicate the question is required to complete the form.
Enter the question to be shown on the form.
Select the options to be displayed on the form. To add more options, click Add Another, and search for and select the desired option.
Select Show additional fields when “Yes” is selected to display additional fields when guests select “Yes” in a radio button question.
Note: The Show additional fields option is available only when Show as radio buttons is selected and not when Show as select boxes or both are selected.
Under the Additional Configuration section:
Select the Allow adding from master list checkbox to expose a + Add search field on the form that pulls allergens from your organization's master list at Configuration > Clinical setup > Medical Record. This lets guests record allergies that are not in the predefined list.
Select Allow adding note for each allergy to display a field where guests can enter any additional information for each allergy.
Select Show section-level note to display a field where guests can enter any additional information for the entire section.
Click Save.
Add medications component to a form
At the organization level, click the Configuration icon.
Search for Custom forms, and under Forms, select Custom forms.
Open an existing form or click Add to create a new form.
In the Design tab, from the Medical Record list, drag and drop the Medications component onto the form.
Click Edit to open the component.
In the Data tab, under the Basic Configuration section, select how the question must be displayed by selecting either Show as radio buttons or Show as select boxes or both.
Select the Required checkbox to indicate the question is required to complete the form.
Enter the question to be shown on the form.
Select the options to be displayed on the form. To add more options, click Add Another, and search for and select the desired option.
Select Show additional fields when “Yes” is selected to display additional fields when guests select “Yes” in a radio button question.
Note: The Show additional fields option is available only when Show as radio buttons is selected and not when Show as select boxes or both are selected.
Under the Additional Configuration section:
Select the Allow adding from master list checkbox to expose a + Add search field on the form that pulls medications from your organization's master list at Configuration > Clinical setup > Medical Record. This lets guests record medications that are not in the predefined list.
Select Allow adding note for each medication to display a field where guests can enter any additional information for each medication.
Select Show section-level note to display a field where guests can enter any additional information for the entire section.
Click Save.
Add medical history component to a form
At the organization level, click the Configuration icon.
Search for Custom forms, and under Forms, select Custom forms.
Open an existing form or click Add to create a new form.
In the Design tab, from the Medical Record list, drag and drop the Medications component onto the form.
Click Edit to open the component.
In the Data tab, under the Basic Configuration section, select Enable Individual Medical History to display the Individual Medical History section.
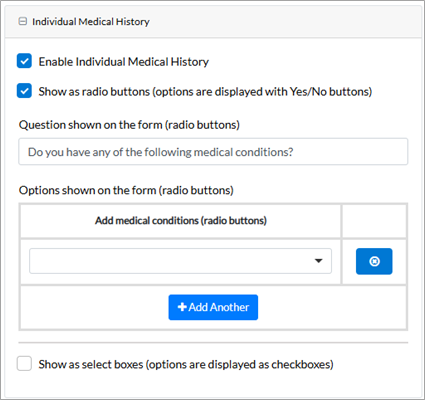
Select the Required checkbox to indicate the question is required to complete the form.
Enter the question to be shown on the form.
Select the options to be displayed on the form. To add more options, click Add Another, and search for and select the desired option.
Select Show additional fields when “Yes” is selected to display additional fields when guests select “Yes” in a radio button question.
Note: The Show additional fields option is available only when Show as radio buttons is selected and not when Show as select boxes or both are selected.
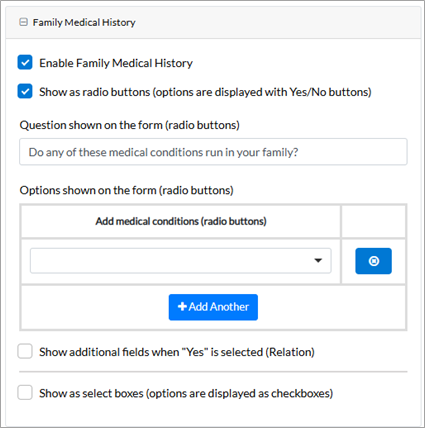
Select Enable Family Medical History to display the Family Medical History section.
Under the Additional Configuration section:
Select the Allow adding from master list checkbox to expose a + Add search field on the form that pulls medical conditions from your organization's master list at Configuration > Clinical setup > Medical Record. This lets guests record conditions that are not in the predefined list.
Select Allow adding note for each medical condition to display a field where guests can enter any additional information for each medical condition.
Select Show section-level note to display a field where guests can enter any additional information for the entire section.
Click Save.
About master list search
The Allow adding from master list option on the Allergies, Medications, and Medical History components lets the form-filler search your organization's full allergen, medication, or condition database from the form itself. You can use master list search alone or combine it with predefined options.
Note: The search results are pulled from your organization's database at Configuration > Clinical setup > Medical Record. If an item is missing from the database, staff can still add it as a custom entry from the Medical Record tab of the guest's profile.
How master list search combines with predefined options
Master list search and predefined options are not mutually exclusive. The three setup combinations are:
Predefined only: A fixed list of items is shown as radio buttons or checkboxes. The form-filler can record only the items on that list.
Master list only: Only the + Add search field is shown. The form-filler types to search the master list and selects items.
Predefined plus master list: The fixed list is shown alongside a + Add search field. The form-filler can quickly select common items from the fixed list and use + Add for anything else.
Note: Zenoti recommends keeping a short predefined list for the most common items and also enabling Allow adding from master list. This gives patients a fast way to confirm common allergies, medications, or conditions while still capturing anything unusual.
What the form-filler sees with master list search
When Allow adding from master list is enabled, the relevant section on the form displays an Additional Allergies, Additional Medications, or Additional Conditions area with a + Add button. The form-filler completes these steps:
Click + Add.
Enter the name of the allergen, medication, or condition.
Select the desired item from the search results.
Repeat for additional items as needed.
Note: Each selected item appears as a removable tag. To remove a tag, click the x next to it. All entries are saved automatically to the Medical Record tab of the guest's profile when the form is submitted.
Add health and lifestyle component to a form
At the organization level, click the Configuration icon.
Search for Custom forms, and under Forms, select Custom forms.
Open an existing form or click Add to create a new form.
In the Design tab, from the Medical Record list, drag and drop the Health & Lifestyle component onto the form.
Click Edit to open the component.
In the Data tab, under the Basic Configuration section, enter the question to be shown on the form.
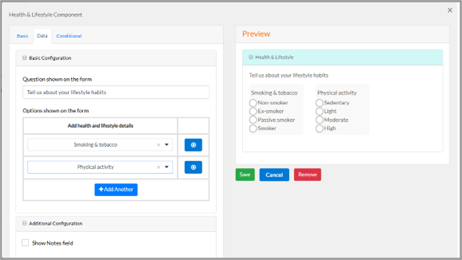
Select the Required checkbox to indicate the question is required to complete the form.
Select the options to be displayed on the form. To add more options, click Add Another, and search for and select the desired option.
Under the Additional Configuration section, select Show section-level note to display a field where guests can enter any additional information for the entire section.
Click Save.
Configure role permissions to set up medical records
The following security role permissions govern the actions you can perform when setting up medical records for your business. To manage these permissions:
At the organization level, click the Configuration icon.
Search for and select Security roles from under Security.
Select a role and click the Permissions tab.
Expand the Administrator section, and for Medical Record, select the View, Add, Edit, and Delete checkboxes, as required.
View: Users with this permission can view the Medical Record setup screen in Configuration.
Add: Users with this permission can add items when setting up Medical Record in Configuration.
Edit: Users with this permission can add items when setting up Medical Record in Configuration.
Delete: Users with this permission can add items when setting up Medical Record in Configuration.
Click Save.
Configure role permissions to manage guest medical records
At the organization level, click the Configuration icon.
Search for and select Security roles from under Security.
Select a role and click the Permissions tab.
Expand the Guest Manager section, and for Guest Medical Record, select the View, Add, Edit, and Delete checkboxes, as required.
View: Users with this permission can view the Medical Record tab in the guest profile.
Add: Users with this permission can add records to the Medical Record tab to the guest profile.
Edit: Users with this permission can edit records in the Medical Record tab in the guest profile.
Delete: Users with this permission can edit records in the Medical Record tab in the guest profile.
Click Save.
Set up Medical Record for your organization
You can set up and customize how Medical Record appears in the guest profile.
At the organization level, navigate to Configuration > Clinical Setup > Medical Record.
In the Define Page Structure section:
Use Configure Sections to turn on/off visibility of specific sections.

Note: The Critical Alerts and Notes sections are always visible and cannot be disabled.
Use Reorder Selected Sections to change the display order using drag and drop.
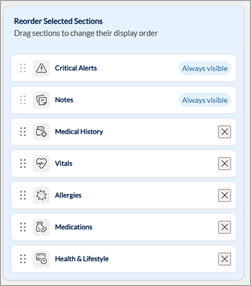
Note: The Critical Alerts and Notes sections are fixed at the top and cannot be reordered.
Click Save & Continue.
In the Allergies section, you can add custom allergies by searching and selecting them from a standard database. To do so, follow these steps:
Enter the name of the allergy.
Select the category of the allergy.
Click Add.
Click Continue.
In the Medications section, you can add custom medications by searching and selecting them from a standard database. To do so, follow these steps:
Enter the name of the medication.
Click Add.
Click Continue.
In the Medical History section, you can add custom medical conditions by searching and selecting them from an available database. To do so, follow these steps:
Enter the name of the medical condition.
If applicable, mark the condition as an allergy by enabling the toggle.
Click Add.
Click Continue.
In the Health & Lifestyle Questions section:
Click Add Custom Question to add a custom Health & Lifestyle question, if needed.
Enter the question text.
Enter the options for the question.
Click Add Option to add additional options to be displayed.
Click Add Question.
Use Configure Questions to turn on/off the visibility of specific questions.
Use Reorder Selected Sections to change the display order using drag and drop.
Click Save & Continue.
In the Vitals section:
Click Add Custom Vital to add a custom vital sign, if needed.
Enter the name of the vital.
Select the type of the vital. (Numeric or Alphabetical)
Click Add.
Use Configure Questions to turn on/off the visibility of specific questions.
Use Reorder Selected Sections to change the display order using drag and drop.
Click Save & Continue.
In the Critical Alerts Setup section:

Search for and select specific records from their respective sections, to automatically appear in the Critical Alerts section.
Click Save & Finish.
Note
Items added in the Allergies, Medications, and Medical History sections here populate the master list that the Allow adding from master list option searches when a form is filled out.
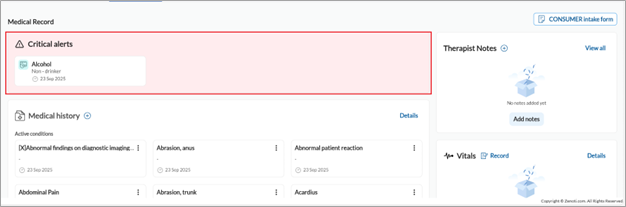
To access the Medical record page, navigate to the Medical Record tab in the guest profile.
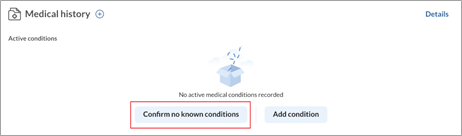
Confirm no known records
When a guest has no known records for a section (For example, no allergies or medical conditions), you can mark that explicitly.
To confirm a section has no records:
Click Confirm no known [records] (For example, Confirm no known conditions).
Click Mark as up to date to confirm that the information is accurate at the time of reviewing.
The date displayed above will automatically update to reflect the current date.
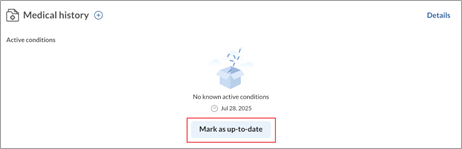
Note: You can always add a record later by clicking the + plus icon.

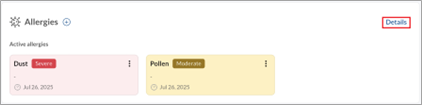
Active and resolved records
Only active records are displayed in each section of the Medical Record tab.
To change the status of a record:
Click the More options icon and tap Edit.
Select either Active or Resolved.
Click Save.
To view and manage resolved records for a section, click Details at the top of the section.
View records confirmed as non-existent
You can view records that are explicitly confirmed to not apply to the patient based on form responses.
To view these:
Go to the Details page of the relevant section (For example, Allergies, Medications, Medical History).
Click Confirmed non-allergies, Confirmed non-medications, or the corresponding option for that section.
Review the records that were confirmed as non-existent through the submitted form.
These confirmations help ensure accuracy in the patient's medical history and avoid duplicate or unnecessary entries.
Add notes to a section
To add notes to each section in the guest medical record, follow these steps:
Click Add notes at the bottom of the section.
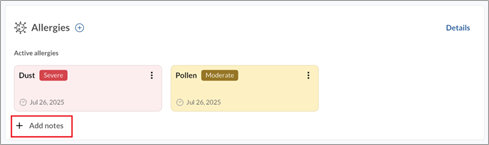
Enter the necessary information.
Click Save.
Manage medical records
Manage allergies
Go to the Medical Record tab in the guest profile.
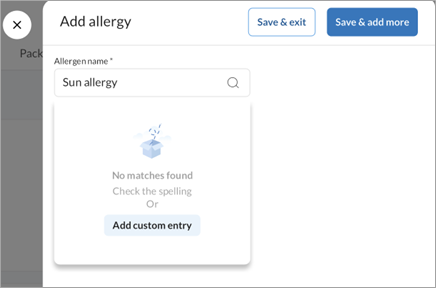
Click Add allergy or the + plus icon in the Allergies section.

Search for and select the name of the allergen.
If the allergen is not listed, you can add it as a custom allergen by tapping Add custom entry.
Select the Allergen category.
Search for and select the reactions associated with the allergen.
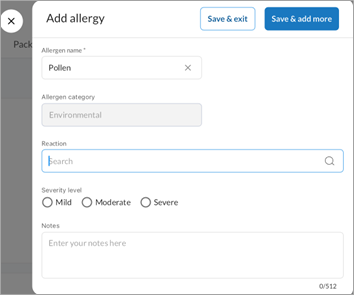
Select the severity level.
Enter any additional details about the allergy in the Notes field, if needed.
Click:
Save & exit to return to the main screen, or
Save & add more to continue adding allergies.
Click the More options icon and click Edit.

Update the allergy details as required.
Click Save.
Click the More options icon and click Delete.
Click Delete again to confirm.
Manage medical history
Go to the Medical Record tab in the guest profile.
Click Add condition or the + plus icon in the Medical history section.
Search and select the name of the condition.
If the condition is not listed, you can add it as a custom condition by tapping Add custom entry.
Select the type of the condition.
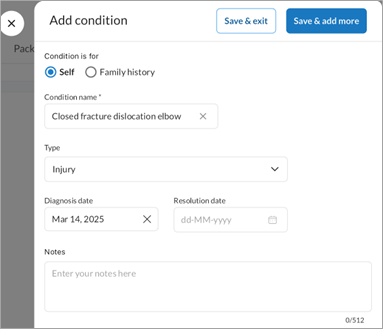
Enter the Diagnosis date and Resolution date of the condition, if applicable.
Enter any additional details about the condition in the Notes field, if needed.
Click:
Save & exit to return to the main screen, or
Save & add more to continue adding conditions.
Click the More options icon and click Edit.
Update the details of the condition as required.
Click Save.
Click the More options icon and click Delete.
Click Delete again to confirm.
Click Add family history.
Search for and select the name of the condition.
If the condition is not listed, you can add it as a custom condition by tapping Add custom entry.
Select the family member associated with the condition.
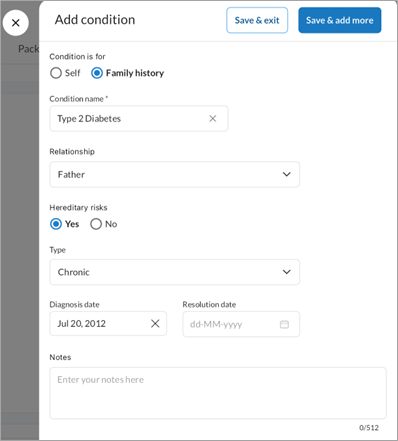
Select whether the specified condition has hereditary risks.
Select the type of the condition.
Enter the Diagnosis date and Resolution date of the condition, if applicable.
Enter any additional details about the condition in the Notes field, if needed.
Click:
Save & exit to return to the main screen, or
Save & add more to continue adding conditions.
Click the More options icon and click Edit.
Update the details of the condition as required.
Click Save.
Click the More options icon and click Delete.
Click Delete again to confirm.
Manage medications
Go to the Medical Record tab in the guest profile.
Click Add medication or the + plus icon in the Medications section.
Search for and select the name of the medication.
If the medication is not listed, you can add it as a custom medication by clicking Add custom entry.
Enter the Start date and End date of the medication, if applicable.
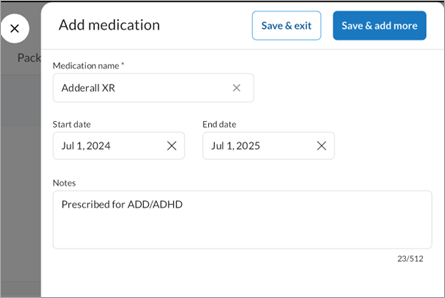
Enter any additional details about the medication in the Notes field, if needed.
Click:
Save & exit to return to the main screen, or
Save & add more to continue adding conditions.
Click the More options icon and click Edit.
Update the medication details as required.
Click Save.
Record vitals
Note
The Vitals section displays the most recent entry by default.
Use the Session drop-down list to view records for specific dates.
You can record multiple entries in a day. All entries for the selected day are shown.
Click Record vitals or Record at the top of the section.

Enter the vitals recorded for the patient (e.g., temperature, pulse, blood pressure).
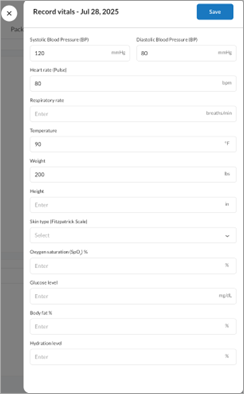
Click Save.
Click the Edit next to the entry.
Update the vitals entry as required.
Click Save.
Note: Editing an entry only updates the vitals for that session. To record a new set of vitals, click Record.
Click View last recorded vitals to quickly review the patient’s health status and vital signs.
Note
Note: When you record a new set of vitals and update the weight, the system automatically recalculates the BMI using the most recently recorded height. You do not need to enter the height again to calculate BMI.
Manage patient gallery
Providers can quickly access important files and images linked to the patient from the Gallery section.
Click the Show menu icon to upload images or files to the gallery.
Click View all or Details to switch to the gallery tab.
Manage critical alerts
Providers can highlight time-sensitive or serious records using the Critical alerts section. These appear at the top of the Medical Record tab.
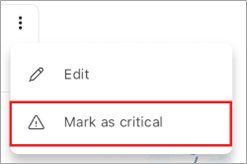
To mark a record as critical, Click the More options icon and click Mark as critical.
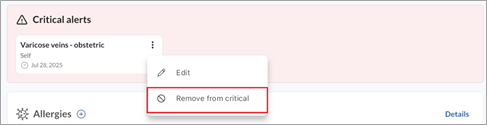
To remove a record from the Critical alerts section, Click the More options icon and click Remove from critical.
Add therapist notes to the Medical Record page
To add therapist notes to the guest medical record:
Click Add notes or the + plus icon in the Therapist Notes section.
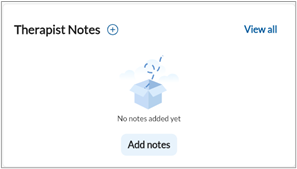
Enter the necessary information and click Save.
Note: You can add up to 20 therapist notes to a guest’s medical record.
View audit logs
To view the history of changes in any section:
Go to the Details page of that section.
Click Audit logs to view all activity.
Considerations
After you submit a form for the first time, data no longer flows from the form to the Medical Record tab.
Data in the Medical Record tab takes precedence and overwrites any prefilled or auto-filled data in the form.
If a user has two different appointments on the same day, the first Medical Record submission for an appointment form is recorded as Edited for subsequent submissions of the same form. However, submissions made for a different appointment form on the same day are recorded as Backdated.
Enabling Allow adding from master list on an existing form does not affect previously submitted forms and does not remove any predefined options already configured on the form.