Guest tasks for managing appointments
Book an appointment
The Consumer Mobile App allows your guests to seamlessly book an appointment on the mobile device at their convenience.
In this article, you will learn the steps involved in booking an appointment on CMA.
Open the CMA.
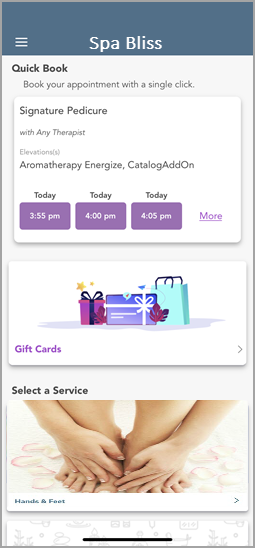
The home screen appears and displays the following:
Note
The information on the home screen varies based on the guest’s sign in.
Select a service category.
The Select a Service screen appears and displays all the available services.
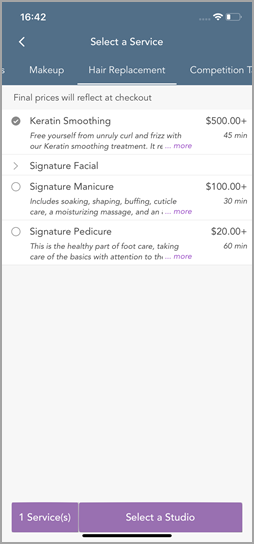
Select any one or multiple services.
Based on the configured setting the guest is prompted to log in to their account (if not already logged in). Zenoti checks for applicable service credits from active packages and memberships for the selected services.
If the guest has necessary service credits, they can proceed with the booking.
If guests do not have sufficient service credits, they are prompted to purchase a package or membership before booking. Clicking on the available option redirects them to the membership or series package purchase page accordingly. Once the purchase is completed, they can proceed with booking the service.
Select a center from the Centers list.
Note
You can change the text label that appears after “Select a” for this button.
If you call your center as studio, you will see the text label for the button as Select a Studio. If your center is called as a salon, you will see the text label for the button as Select a Salon.
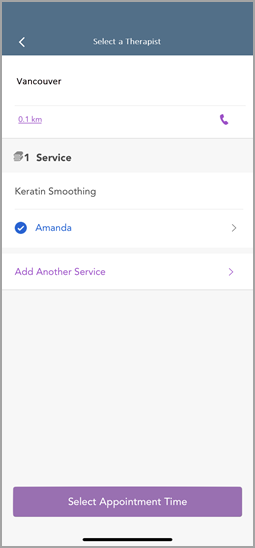
Select a provider from the list.
If a guest sees the message "No provider available for your current selection," it usually means the "Available Online" setting isn’t turned on. Check that each provider has Available Online enabled, and make sure the selected employees and services are set up for online booking.
Note
If the guest selects Specific provider and the therapist has the Allow bookings for only repeat guests setting enabled, the following scenarios apply for the guest:
Guest is logged in and has been served by the specific provider in the past: The guest can proceed with the booking with the specific provider.
Guest is logged in and has not been served by the specific provider in the past: The guest is not shown the specific service provider for any service.
Guest is not logged in and has been served by the specific provider in the past: The guest is asked to log in and if they have been served by the therapist in the past, they can proceed with the booking.
Guest is not logged in and has not been served by the specific provider in the past: The guest is prompted to log in first. Once logged in, they encounter an error message indicating the provider is unavailable, prompting them to select another provider.
If the therapist has Provider-specific durations enabled, the duration of the service or add-on can vary depending on the employee’s specific configuration. For example: A haircut may usually take 45 minutes, but a particular provider might complete it in 30 minutes. Similarly, an add-on like a head massage might reduce from 15 to 10 minutes depending on the provider.
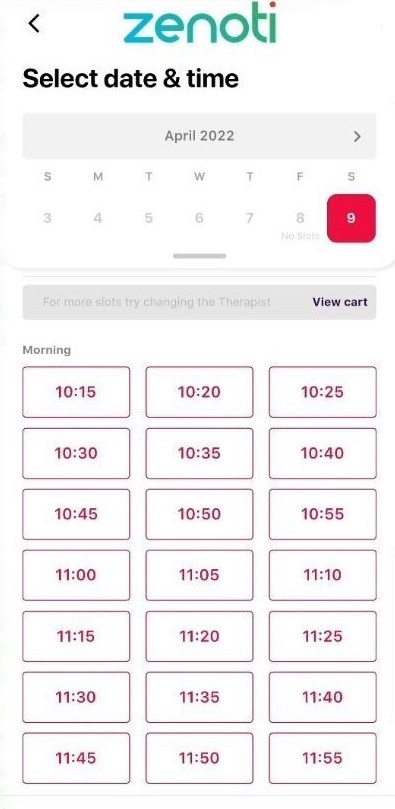
Tap Select Appointment Time.
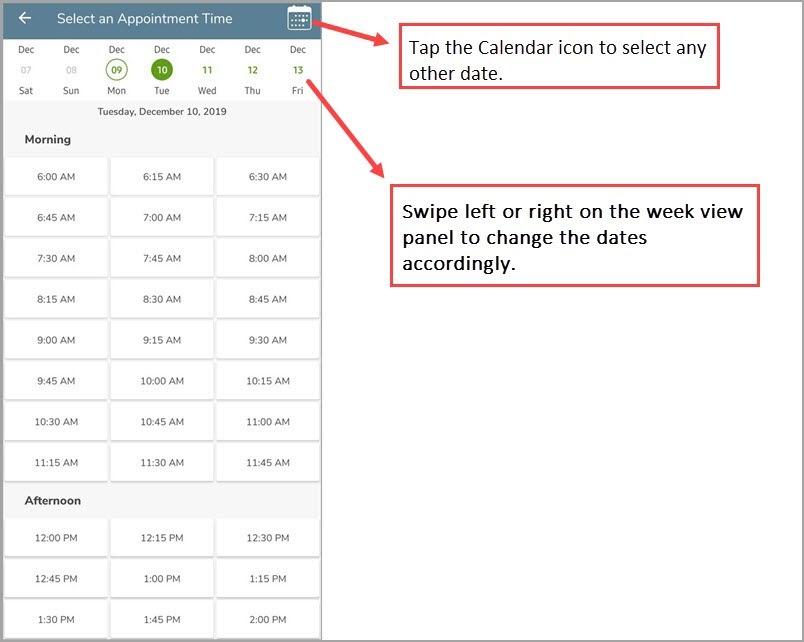
CMA displays all the available time slots for the day and for the selected provider.
The Sign In to Complete button appears.
Note
If you are already signed in, the Review Price screen appears. (Proceed to Step 9).
Tap Sign In to Complete.
Enter the email id and password.
The Review Price screen appears.
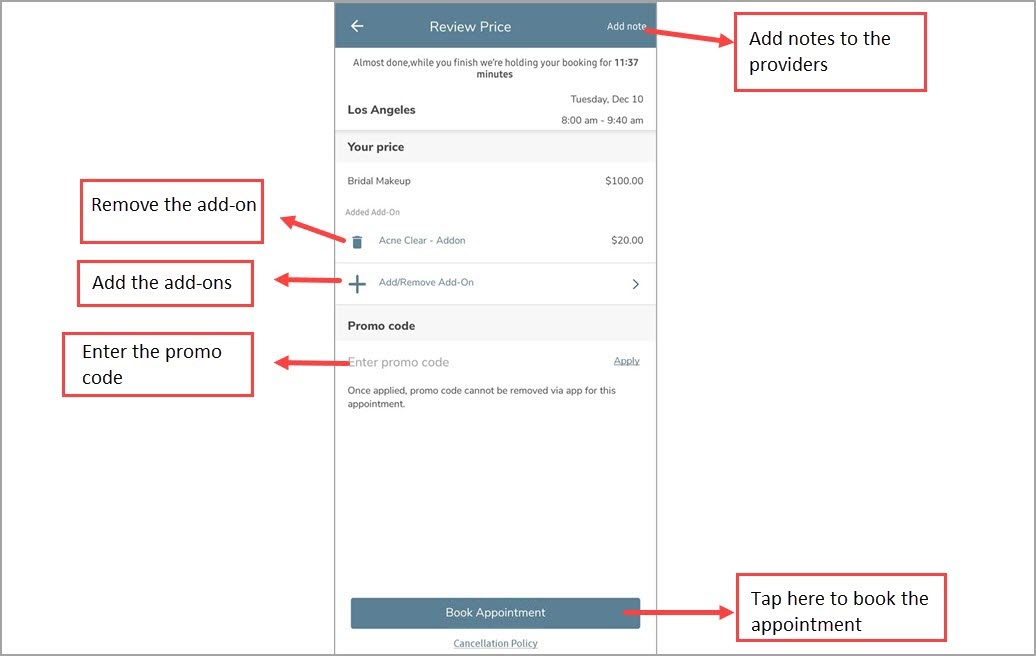
Tap Book Appointment.
The booking is done and the appointment confirmation screen appears.
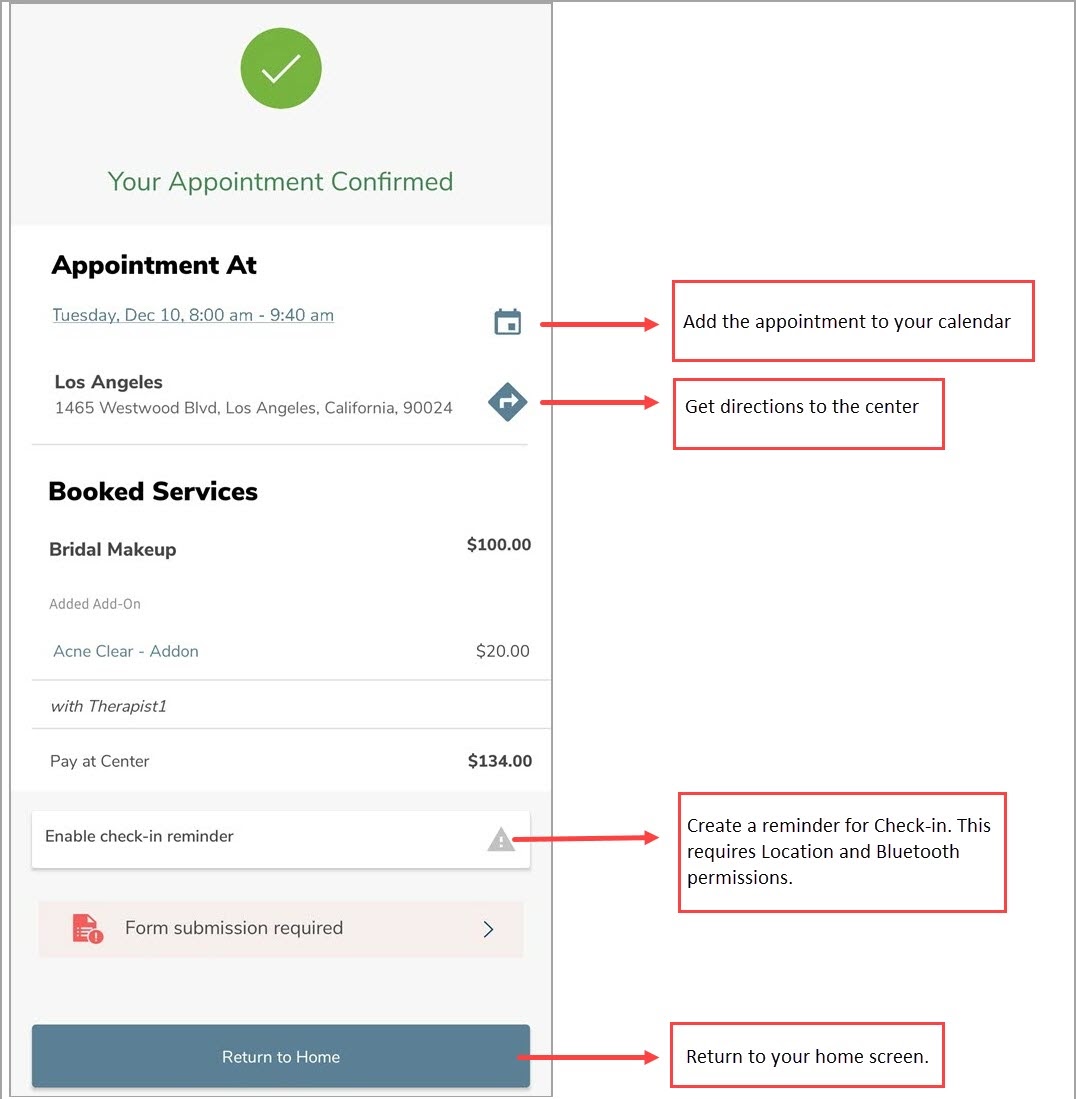
You will see the following options on the confirmation screen:
Add the appointment to your calendar: Tap the Calendar icon to add the appointment to your personal calendar.
Get directions: Tap the Directions icon to get the directions to the center. This will open the Maps application (Google Maps or Apple Maps) on your mobile device.
Enable Check-in Reminder: Enable this setting to receive a reminder as soon as you enter the premises of the center.
Note
Zenoti Go should be configured for the organization to use the check-in reminder.
Return to Home: Tap this button to return to the home screen.
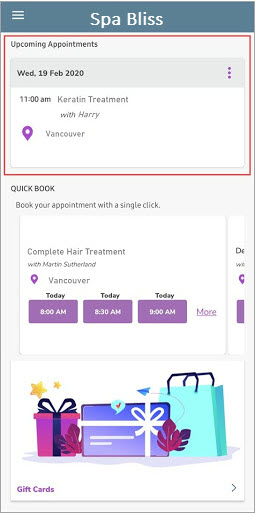
After booking the service, the home screen will display the Upcoming Appointments section.
Book an appointment using the provider-based booking flow in CMA
This article explains how guests can book appointments using the provider-based booking flow on CMA. This allows guests to begin their booking by selecting a provider instead of a service. It is ideal for businesses that focus on guest-provider relationships or want to promote key team members.
Overview
Guests often return not just for services, but for the trusted providers behind them, be it a favorite stylist or a long-time massage therapist. For salons, spas, and wellness centers that prioritize guest-provider loyalty, the provider-based booking flow enables guests to start by selecting a provider rather than a service. This personalized flow helps highlight top talent, increase rebooking rates, and improve overall guest satisfaction. After choosing a provider, guests see only the services that provider offers, making the experience more tailored and efficient.
Key Benefits
For Businesses:
Highlight key team members with deep links to the page with the provider’s services displayed, can be inserted into the customer’s website. Providers can also share these links with guests on social media through messages in their introductions.
Increase rebooking and guest loyalty by surfacing familiar faces.
For Guests:
Find your favorite stylist or therapist quickly
Search for providers by name
Discover new providers that fit your preferences
Prerequisites
The Enable provider-based booking setting must be turned on.
Providers should have services assigned and active schedules.
Deputed employees will only appear under their mapped centers if they have an active schedule.
Points to consider
If a provider has service restrictions or specific visibility rules, they may not appear for certain services.
How to book an appointment using the provider-based booking flow
To book an appointment on the CMA using the provider-based booking flow, your guest takes the following actions
As a guest, log in to CMA using the username and password or using a verification code.
Note
The information on the home screen varies based on the guest’s sign in.
From the Select a Service section, click Select Now to choose a therapist first.
A list of available providers appears with name, designation, profile image, and pronouns, if they are configured. You can also choose to search for a specific provider.
Select the stylist.
After a provider is selected, only services offered by that provider will appear.
Note
If your business calls your employees Providers or Technicians, you can configure the labels for employees. Learn how.
This way, when guests book appointments, they will see the label you have configured for your business, such as say Provider.
Note
If the guest selects Specific provider and the therapist has the Allow bookings for only repeat guests setting enabled, the following scenarios apply for the guest:
Guest is logged in and has been served by the specific provider in the past: The guest can proceed with the booking with the specific provider.
Guest is logged in and has not been served by the specific provider in the past: The guest is not shown the specific service provider for any service.
Guest is not logged in and has been served by the specific provider in the past: The guest is asked to log in and if they have been served by the therapist in the past, they can proceed with the booking.
Guest is not logged in and has not been served by the specific provider in the past: The guest is prompted to log in first. Once logged in, they encounter an error message indicating the provider is unavailable, prompting them to select another provider.
If the provider has the Restrict some providers from providing some services setting enabled, the therapist's name will not appear in the available list of therapists for those services.
Note
If the therapist has Provider-specific durations enabled, the duration of the service or add-on can vary depending on the employee’s specific configuration. For example: A haircut may usually take 45 minutes, but a particular provider might complete it in 30 minutes. Similarly, an add-on like a head massage might reduce from 15 to 10 minutes depending on the provider.
You can:
Add multiple services with the same provider
Mix and match services across different providers in the same booking
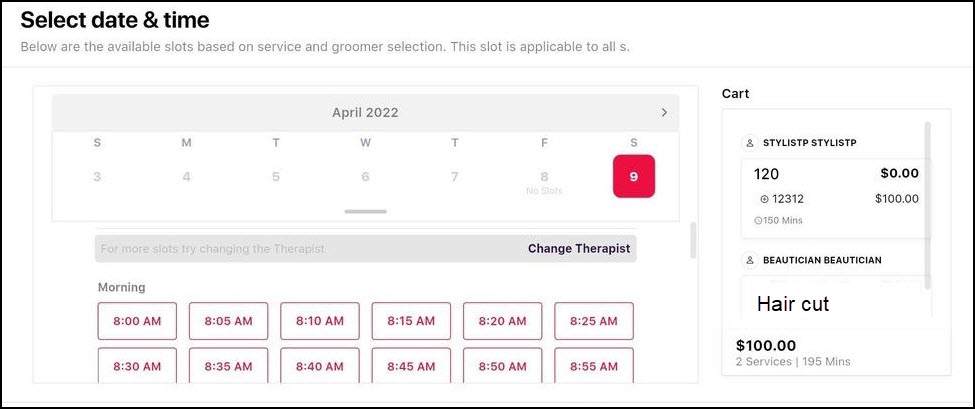
Select the preferred date and time for the appointment.
Select the preferred date and time for the appointment. CMA displays all the available time slots for the day and for the selected provider.
The Sign In to Complete button appears. If you are already signed in, the Review Price screen appears.
Click Sign In to Complete. Enter the email id and password.
Review the appointment date, selected services, final pricing, and click Book Appointment.
Note
You can also add a note to the providers to inform them about your preferences regarding certain products or services. For example, you can specify a type of hair shampoo to be used or specify hot water or cold water to be used during the hair wash.
You will see the following options on the confirmation screen:
Add the appointment to your calendar: Tap the Calendar icon to add the appointment to your personal calendar.
Get directions: Tap the Directions icon to get the directions to the center. This will open the Maps application (Google Maps or Apple Maps) on your mobile device.
Enable Check-in Reminder: Enable this setting to receive a reminder as soon as you enter the premises of the center.
Return to Home: Tap this button to return to the home screen.
CMA v3: Book an appointment
Learn how the guests can book an appointment on the Consumer Mobile App (CMA)
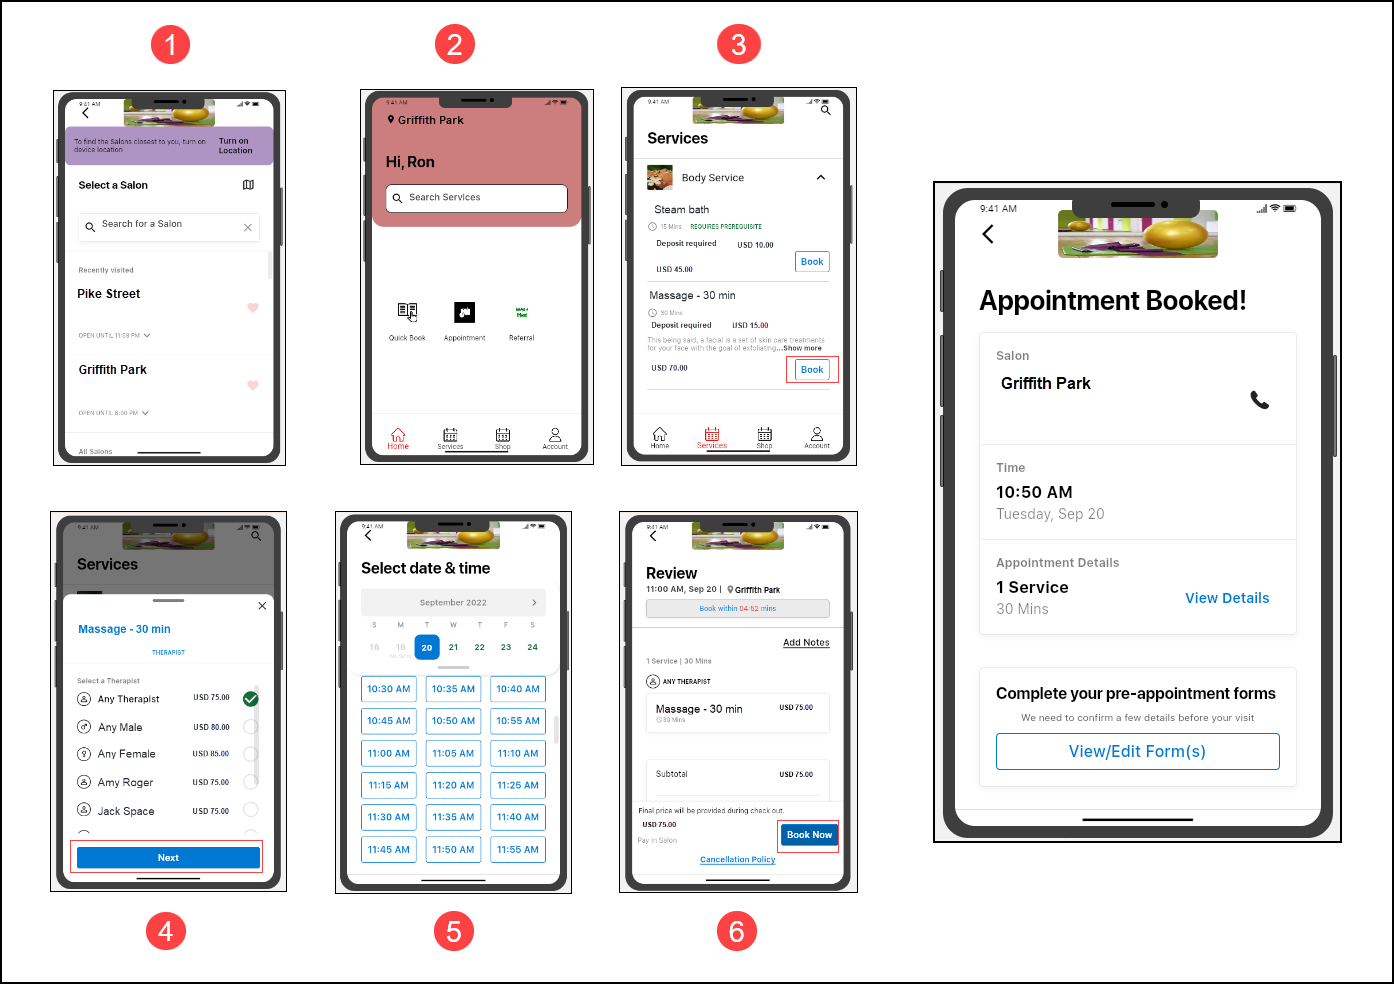
Sign in to Consumer Mobile App and select a center.
Note
Guests can search for the centers by using city names, state names, and zip codes but not with a center name.
Click Services.
To book a service, day package, and bundles under a service category, select the required option.
To select a therapist, choose from one of the options in the list of therapists.
Select the date and time for the appointment.
Review the booking and click Book now.
Reschedule an appointment
After booking an appointment on the Consumer Mobile App, there will be cases when the guests may want to reschedule the appointments due to various reasons. To accommodate this, Zenoti allows your guests to reschedule appointments, including those with services and day packages, to a new time.
Before You begin
You must enable Appointment Rescheduling on the app through advanced settings.
Note
Your guests cannot reschedule but can only cancel the appointment when inside the cancelation window.
For example, you set up the cancelation window to be active 3 hours before the appointment. For an appointment at 5:00 PM, the cancelation window will be active from 2:00 PM.
Janine has an appointment at 5:00 PM, she cannot reschedule the appointment after 2:00 PM as it falls within the cancelation window and she can only cancel her appointment.
This allows you to restrict last-minute reschedules.
To set up a cancelation window, at the organization level, navigate to Configuration > Appointment and Queue management > Pricing and penalty

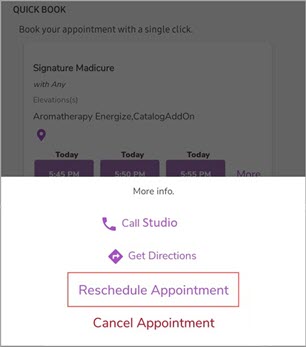
Reschedule from the home screen
In the Upcoming Appointments section, tap the three vertical dots.

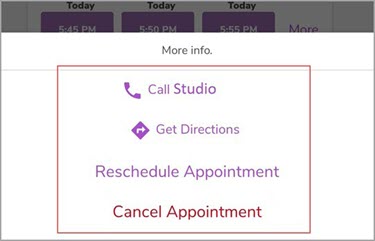
Call: Tap to open the phone app and call the center.
Get Directions: Tap to open the maps app and get location details of the center.
Reschedule Appointment: Tap to reschedule the appointment.
Cancel Appointment: Tap to cancel the appointment.
Note
Reschedule Appointment and Cancel Appointment are allowed only if you enable it for your app.
Tap Reschedule Appointment and select an available time slot.
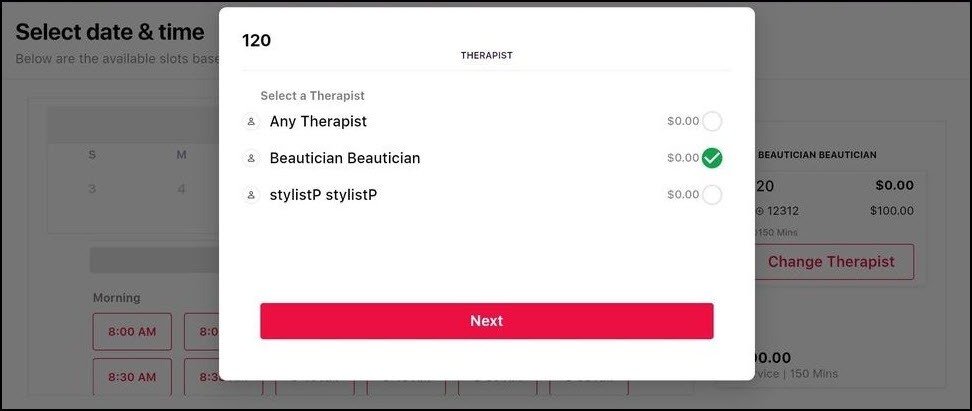
To select a therapist, tap Change Therapist.
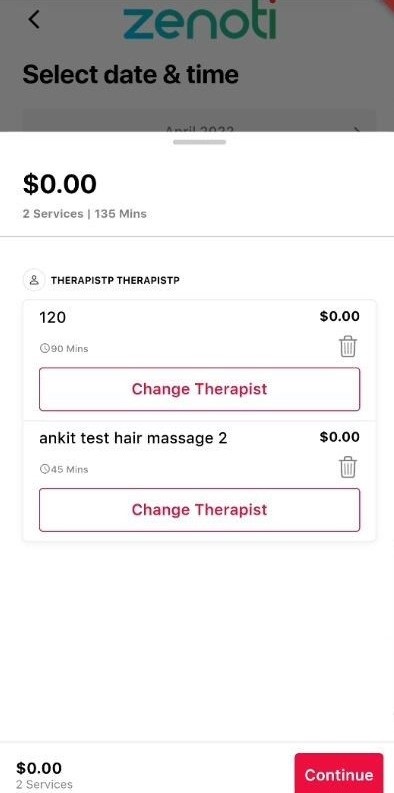
To book an appointment, tap Continue.
Reschedule from the Appointments screen
Log in to the CMA.
If you are a returning guest, the home page appears as soon as the guest launches the app. The center is also pre-selected.
To open the menu, on the top-left, tap the hamburger icon.
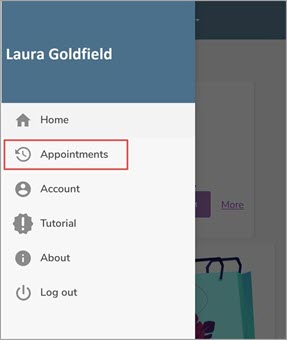
Tap Appointments and select the Upcoming appointments tab
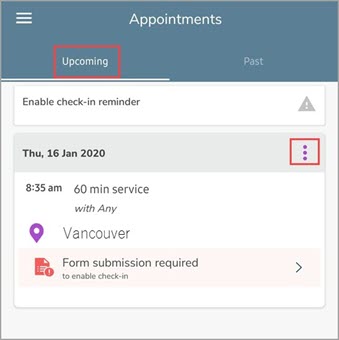
Tap the three vertical dots.
Tap Reschedule Appointment and select an available time slot.
Tap Change Therapist and select a therapist and tap Next.
To book an appointment, tap Book Now.
Cancel an appointment
When guests schedule an appointment on the Consumer Mobile App, there may be instances when they need to cancel for various reasons such as sudden commitments, unexpected events, or changes in plans.
Note
Businesses have the flexibility to decide between two options: enabling guests to self-cancel appointments or limiting this feature by hiding the Cancel button.
To allow guest to cancel their appointments, the Enable appointment cancelation setting must be enabled.
To limit appointment cancelation within a specified period, set up the configuration for Hide cancel button during the cancellation period.
Cancel appointments from the home screen
Log in to CMA.
The home screen appears and CMA displays the Upcoming Appointments section.
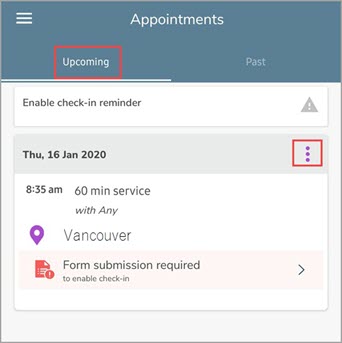
To view the list of appointments, navigate to the Upcoming Appointments section on the home screen.
Tap the More info icon (indicated by three vertical dots) beside the Upcoming Appointments section.
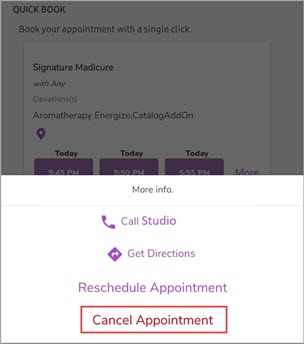
To cancel the appointment, click Cancel Appointment
To confirm the cancelation, click OK on the pop-up screen.
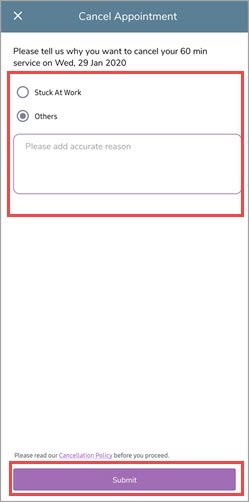
You will be prompted to enter a cancelation reason.
To provide a reason for cancelation, choose any of the pre-configured reasons or select Others.
To specify the reason for cancelation if you selected Others, provide a reason in the cancelation reason textbox.
Click Submit.
Cancel appointments from the Appointments screen
To cancel an appointment from the Appointment screen, you must follow these steps as a guest:
Log in to CMA.
If the guest is returning, then the home page appears as soon as the guest launches the app. The center is also pre-selected.
Click Account and navigate to Appointments.
To view the list of appointments, navigate to the Upcoming section.
Tap the More Info icon (indicated by 3 vertical dots).
To cancel the appointment, click Cancel Appointment on the Modify Appointment screen.
Note
When a guest clicks Cancel appointment and a cancelation fee is applicable, the following takes place:
Service credit check: If the redemption of service credit against the cancelation fee is enabled and the user has enough credits, the credits are deducted, the appointment is canceled, and a cancellation invoice is generated.
Insufficient credits or redemption of service credit against cancelation fee is not enabled: If there are not enough credits or redemption is disabled, Zenoti checks for saved cards.
No saved cards: A pop-up alerts the user of the fee, and the appointment is canceled with the front-desk staff collecting the fee manually.
Saved cards: If the guest has multiple cards, the most recent card is used to attempt payment. If successful, the appointment is canceled, and the invoice is closed. If the payment fails the front-desk staff must collect the fee manually.
Payment handling: If the payment is successful, Zenoti either confirms the cancelation, tracks pending payments or alerts the user of payment failure. This means that the front-desk staff has to collect the fee manually.
To confirm cancelation, click OK on the pop-up screen.
You will be prompted to enter a cancelation reason.
To provide a reason for cancelation, choose any of the pre-configured reasons or select Others.
To specify the reason for cancelation if you selected Others, provide a reason in the cancelation reason textbox.
Click Submit.
View upcoming and past appointments
Log in to the Consumer Mobile App.
Tap the hamburger icon on the top left to open the menu.
Tap Appointments.
The Upcoming and Past appointment tabs appear. Read more to understand about the Upcoming and Past appointment tabs.
Upcoming appointments
The Upcomingtab displays a list of all the upcoming appointments. Tap the more icon (indicated by three vertical dots) to find more options.
You can take the following actions in the Upcoming appointments tab:
Call the Center: Tap this option to open the phone app and make a phone call to the center.
Get Directions: Tap this option to open the maps app on your mobile device and get the location details of the center.
Reschedule Appointment: Tap this option to reschedule the appointment. Note: This option will not be available if the guest is within the cancelation window.
Cancel Appointment: Tap this option to cancel the appointment.
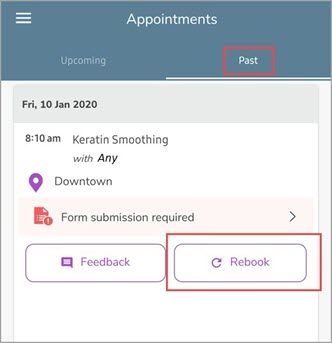
Past appointments
The Past appointments tab displays a list of all the appointments taken earlier.
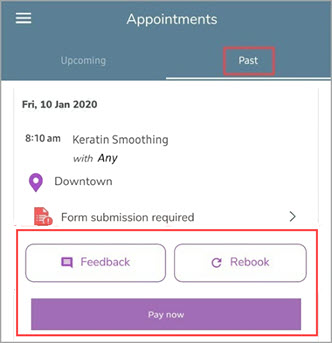
You can take the following actions in the Past appointments tab:
Feedback: Tap this option to submit feedback for the services taken earlier.
Rebook: Tap this option to rebook the services that were availed in this appointment. The provider is auto-populated based on the earlier selection. You can change the provider if you desire to do so.
Pay Now: Tap this option to pay for past appointments. If you already have a card added, you can select the card and proceed with payment. Otherwise, you can add a new card and make the payment.
Note
This option will only appear if the Self-Pay option is enabled by your organization.
Quick Book and Rebook the services
Quick Book
The Quick Book panel on the Consumer Mobile App displays five unique appointments booked by the guest earlier. This allows your guests to quickly book any one of the past five appointments without following the entire booking flow.
The guests just need to select an available time slot. That’s it. All of the services, providers and add-ons (if any) are auto-selected based on the earlier preferences.
Note
You can book services and bundles from the Quickbook section.
All the services and bundles in the appointment, add-ons (if any), and providers are automatically added based on the earlier appointment.
You cannot change the services included in the appointment.
For example, Sarah booked an appointment on February 2nd for Hair Wash and a Keratin Treatment. She uses the Quick Book panel and books an appointment on February 10th. Both the services (Hair Wash and Keratin treatment) will be added to the appointment.
Log in to CMA.
The home screen appears and displays the Quick Book panel.

Select any one of the services displayed on the Quick Book panel.
Specify a date and time.
Note
You cannot change the provider or add more services if you desire. To
view more available time slots, you can also tap More.
The Review Price screen appears.
Review the price and click Book Appointment.
You have booked the appointment.
Rebook the Services
Log in to CMA.
Tap the hamburger icon on the top left to open the menu.
Tap Appointments.
The Upcoming and Past appointment tabs appear.
Tap the Past appointments tab.
The Past appointments tab appears along with two options.
Tap Rebook.
The provider and the services are auto-populated.
Note
You can change the provider or add more services if you desire.
Specify a date and time.
Tap Book Appointment.
You have rebooked the appointment.
Note
When booking or rebooking an appointment, prerequisite conditions are checked before the appointment can proceed.
For example, if a guest books the Tattoo Removal service, the required Tattoo Removal Consultation must have been completed within 180 days; otherwise, the guest will be prompted to book or complete it first.