Onboard a Business to Zenoti Integrated Payroll
This article guides business owners and admins through the process of enrolling their business in Zenoti, including setting up Zenoti Integrated Payroll, verifying bank accounts, and ensuring tax compliance.
Zenoti Integrated Payroll refers to the structured payment of employee wages, incorporating deductions and tax compliance.
Zenoti Integrated Payroll currently supports businesses operating only in the United States, where tax forms like W-4, W-9, and Form 8655 ensure compliance.
Key terms
FEIN (Federal Employer Identification Number): Unique identifier for businesses used for tax purposes.
Zenoti Integrated Payroll: Feature to manage payroll disbursement for employees and contractors.
Form 8655 authorizes Zenoti to act as your payroll and tax reporting agent, allowing it to handle tax filings, payments, IRS communications, and penalty relief submissions on behalf of your business. During onboarding, Form 8655 and other authorization forms are automatically generated and signed. After completion, you can access it in the Tax Documents tab as Federal 8655.
Prerequisites
As a business owner or an admin as you prepare to onboard a business, prepare the following information and documents:
FEIN (Federal Employer Identification Number)
Legal business name and any trade names (DBAs)
DBA (Doing Business As) refers to a trade name or fictitious name under which a business operates that is different from its legal, registered name. For example: A company legally registered as "ABC Enterprises LLC" might operate under the trade name "ABC Cleaning Services" as its DBA.
Certificate of incorporation
Tax documents
Federal: EIN, Forms 941, 940, W-4, and 8655.
State: Tax identification numbers, registration documents, SUI rates.
Employee: I-9, W-2 (employees), and 1099 (contractors).
Other: Child support orders, previous payroll records.
Having these documents on-hand ensures a smooth setup and compliance with federal, state, and local tax regulations.
Onboard your business
Follow the steps below to onboard your business.
Login in with you Zenoti credentials.
Navigate to Configuration and click Payments.
Click Zenoti Integrated Payroll on the Payments page.
Note
You must have the Configure Payroll Payouts permission. To enable, refer to Enable Permissions for Zenoti Integrated Payroll.
Click Start set up on the Payroll payout page and start setting up payroll processing.
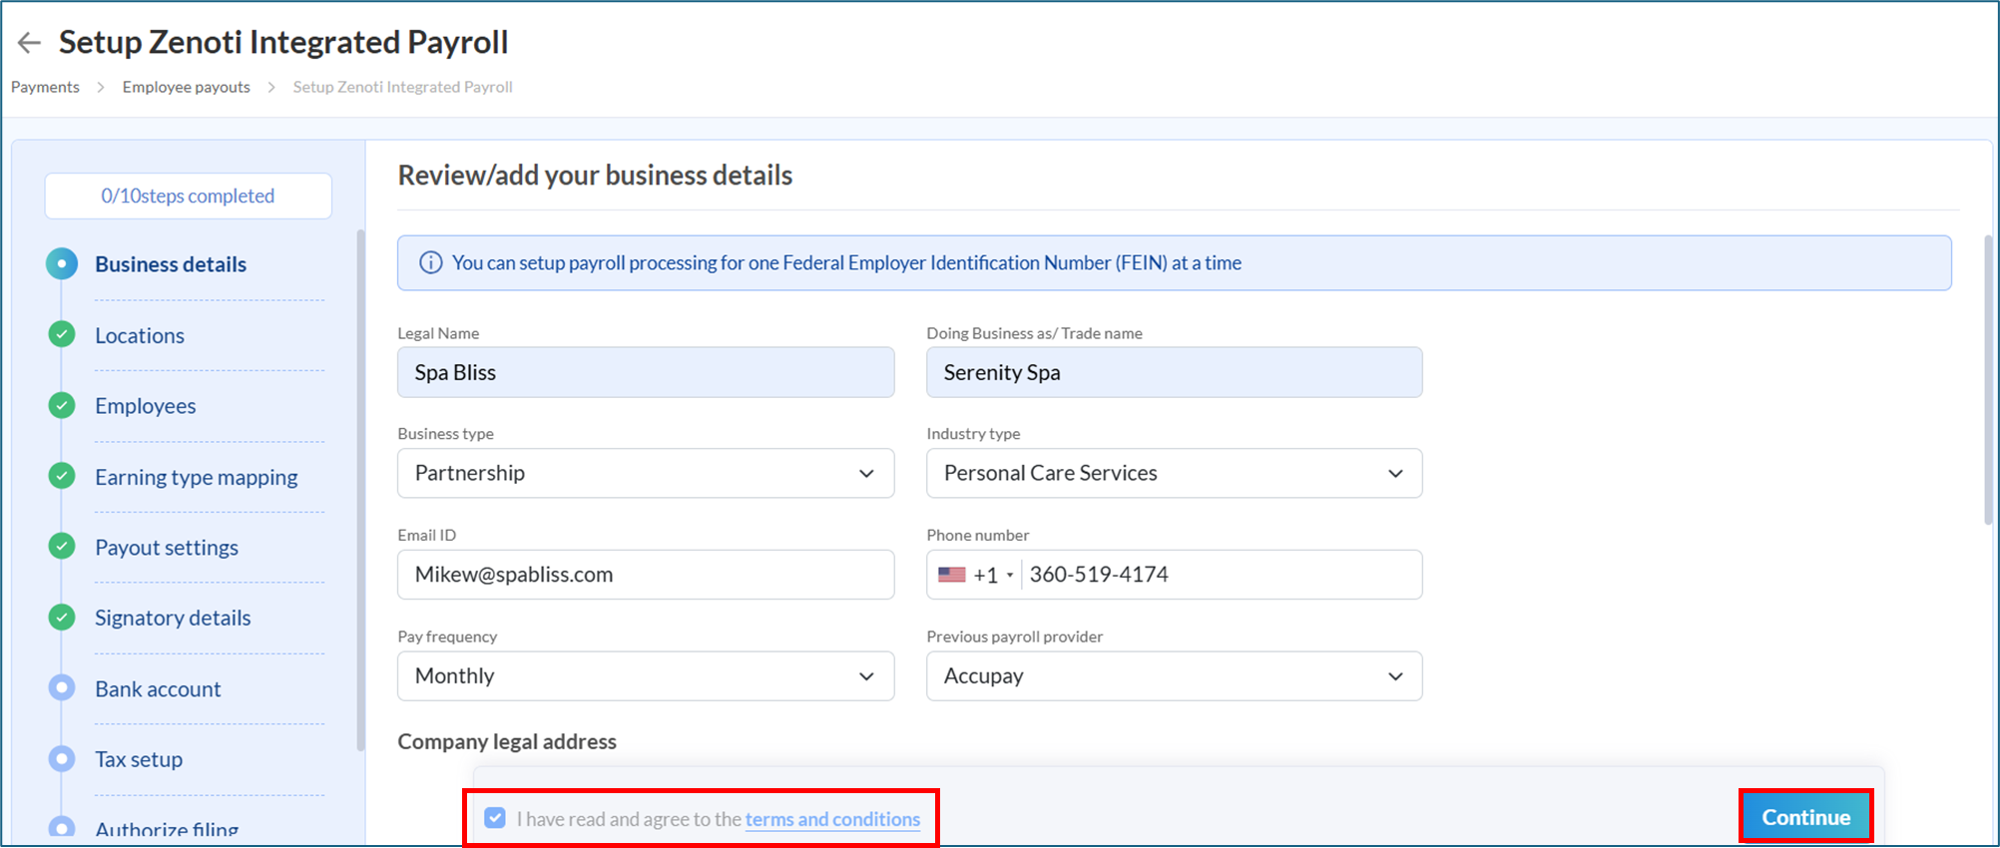
Review or add business details
Note
Payroll setup supports one FEIN at a time.
Select the checkbox labeled 'I have read and agree to the terms and conditions' to indicate your agreement.
Click Continue.
Note
If you are an inception company (that is, if you are a new business with no prior payroll provider), select No previous payroll provider for Previous payroll provider field.
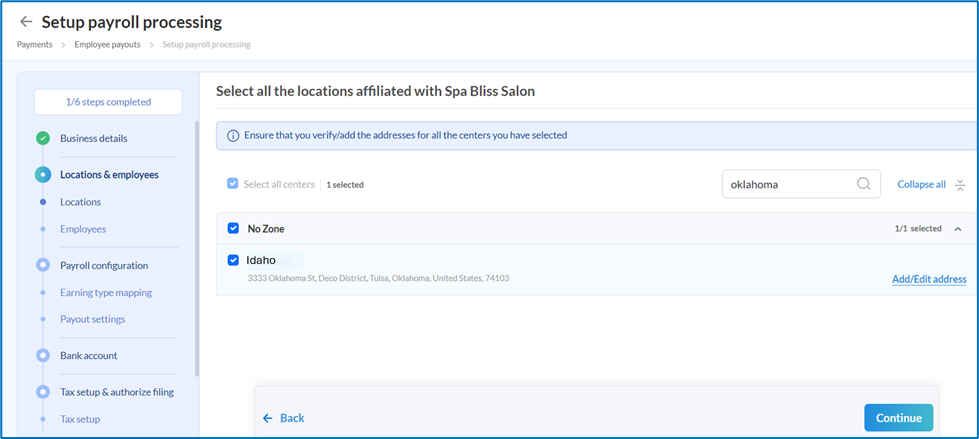
Review and add details for locations
Select all locations of the centers associated with the business or FEIN and click Continue.
If there are multiple centers with different FEINs, complete the onboarding process separately for each.
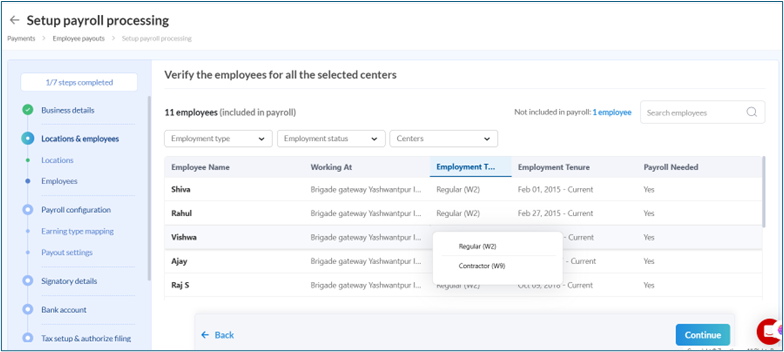
Review and add details for employees
Verify all employees for the selected centers.
Click Continue after you:
Ensure that employees are correctly categorized under Employee Type, as Regular or Contractor.
If you have contractors working for your business, mark their employment type as Contractor, and make any necessary updates.
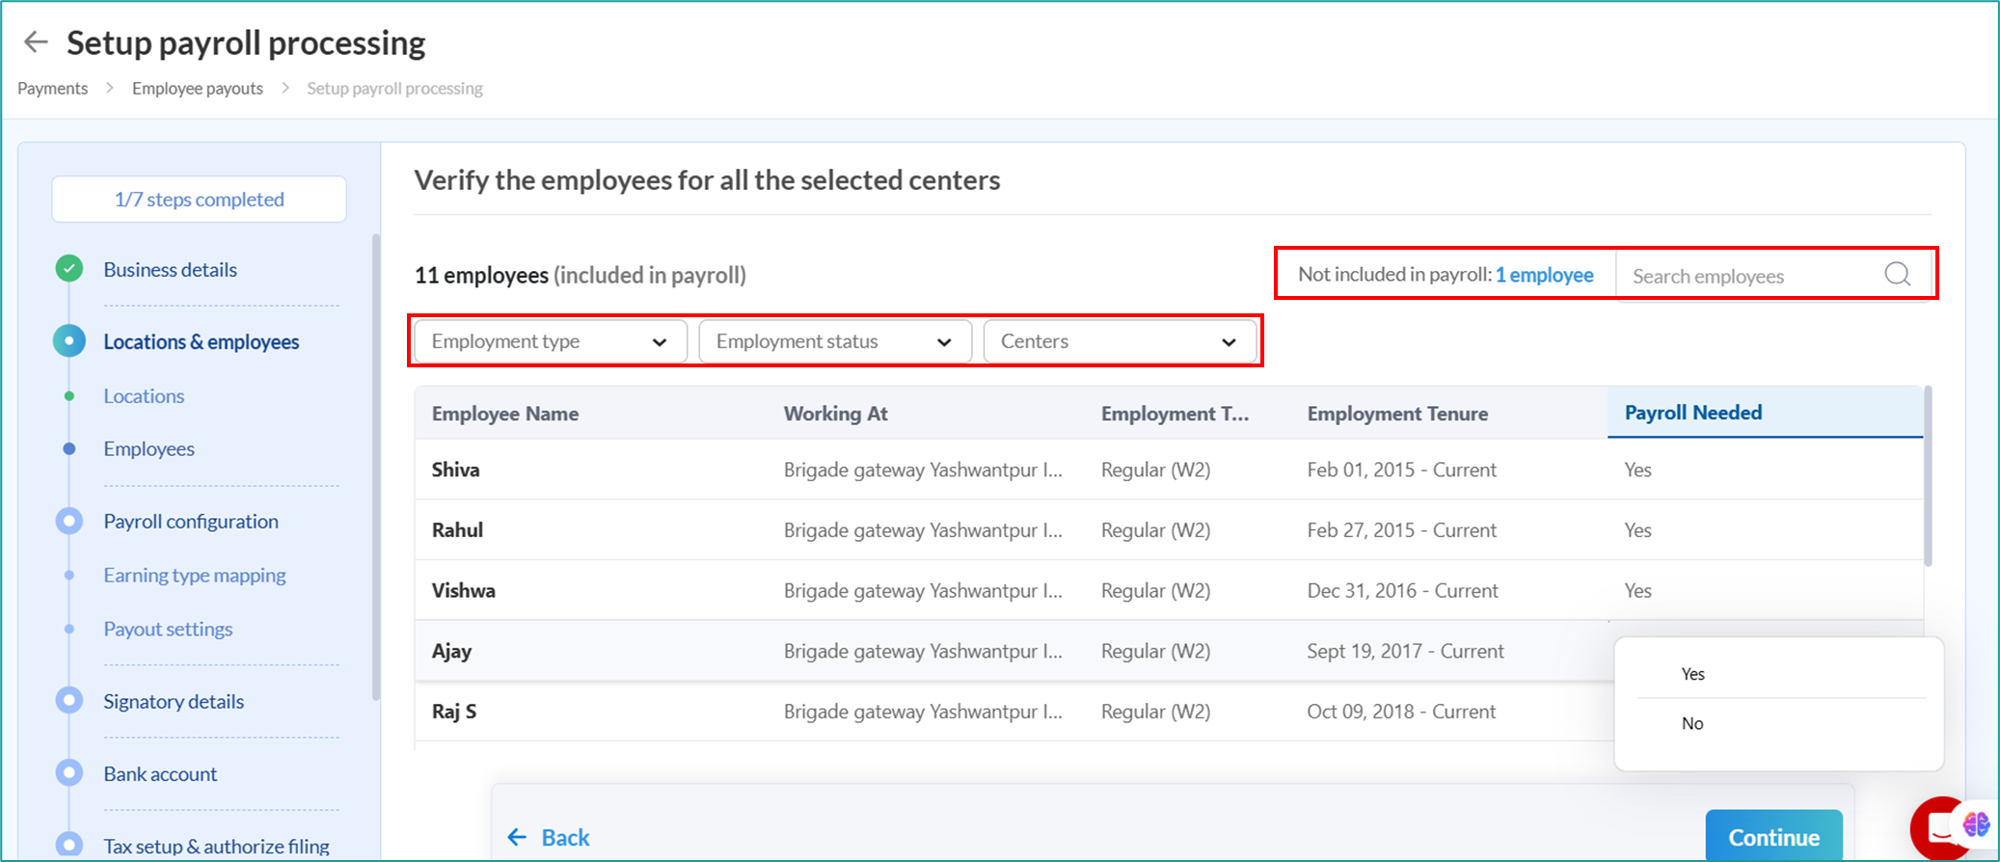
Use filters to:
View and search for employees.
Filter out defaults, duplicate and unwanted data.
Include or exclude employees from payroll.
You can review the list of employees and include or exclude them from payroll as required.
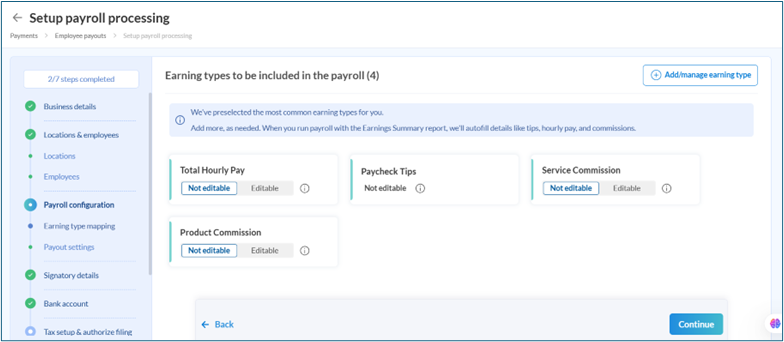
Review and set up earning type mapping
Add or modify default mappings as needed.
We have preset the most commonly used earning types as defaults. You can review and edit these earning types during payroll processing. Additionally, you can choose whether these earnings are editable and update the toggle as needed.
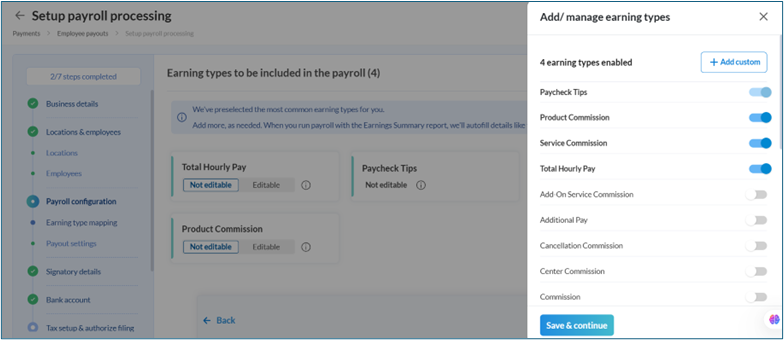
Click Continue or Add or manage earning type if you need to add more earnings or remove defaulted ones.
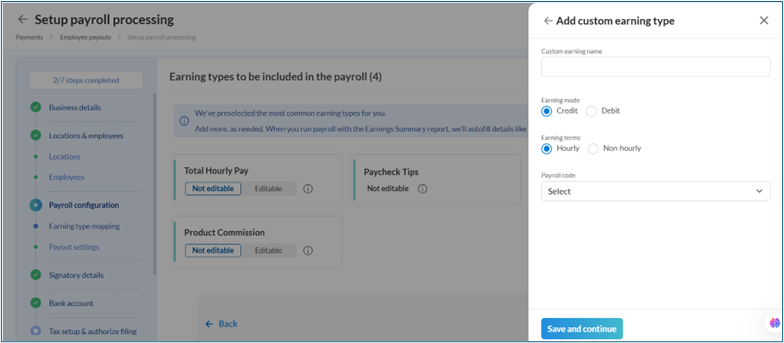
Enable the earning type you wish to add, click Save & Continue. Or, click +Add custom to add your own.
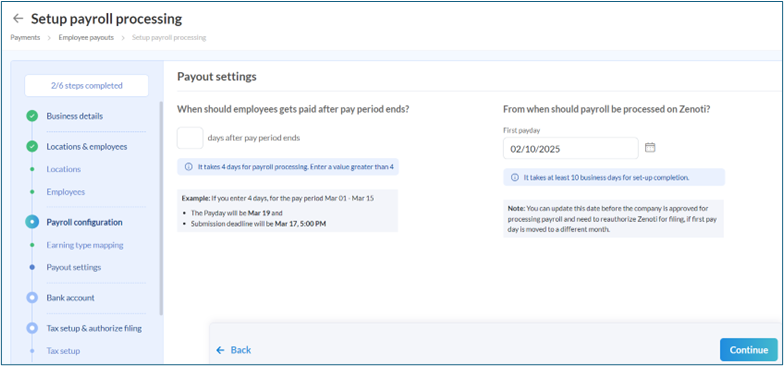
Review payroll settings
Set the number of days for payroll disbursement after the pay period ends on the Payroll settings page.
For example: For a bi-weekly pay period (March 01–15), with a 4-day payout window, payday is March 19 with the submission deadline at 5 pm on March 17.
Note
Zenoti only processes payroll submissions received before 5 PM (local center time) on the submission deadline day. Submissions made after 5 PM are processed on the next business day.
Select the first pay day from which payroll should be processed in Zenoti and click Continue.
Select the checkbox labeled 'I, payroll owner, have read and agree to Check Payroll User Service Terms. I certify that I am authorized to agree on behalf of the company' to indicate your agreement and click Get Started.
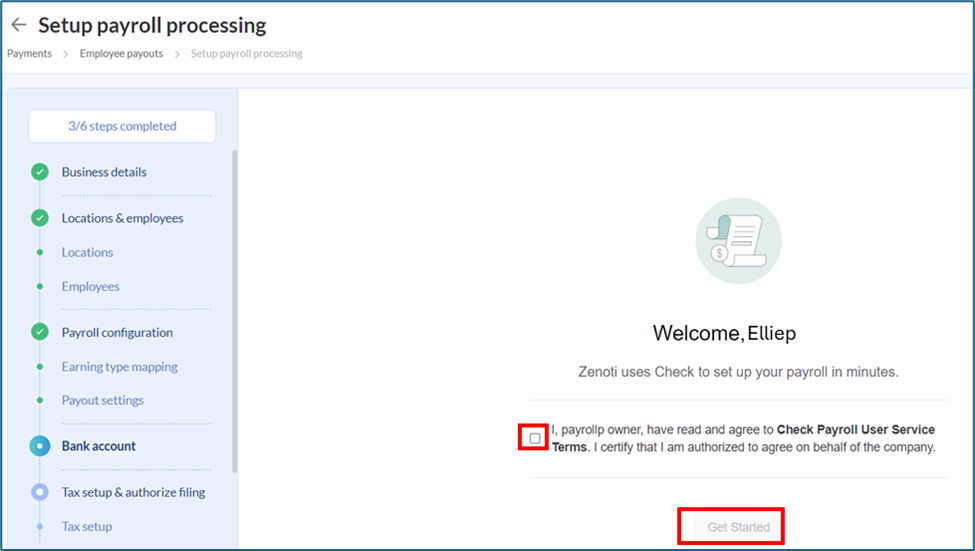
Note
Zenoti has integrated with Check Technologies for payroll and requires authorization before proceeding to the Bank Account setup step.
Check Technologies is a leading platform providing embedded payroll solutions, enabling businesses to seamlessly integrate payroll services into their applications.
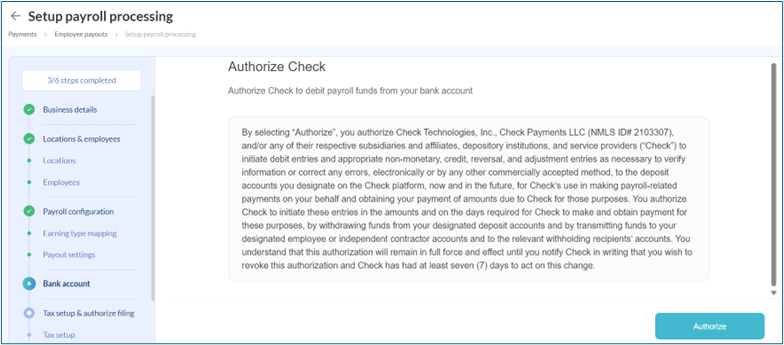
Click Authorize.
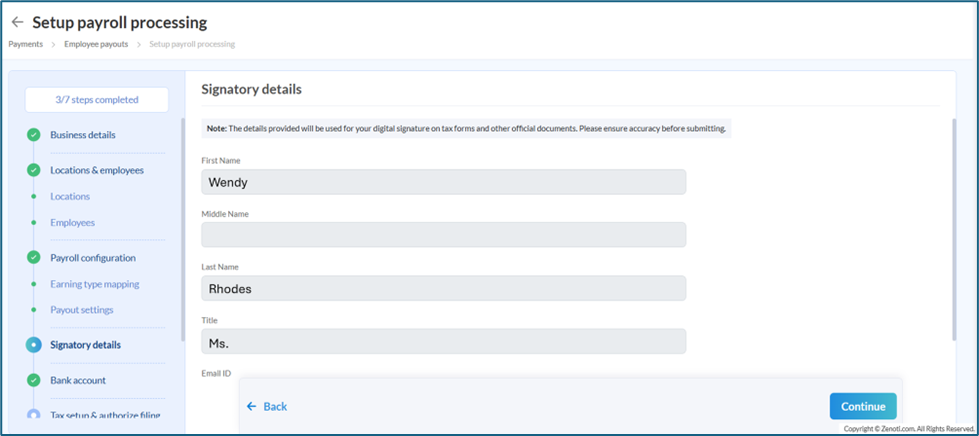
Verify signatory details
Verify or update the Signatory details and click Continue. The details provided will be used for your digital signature on tax forms and other official documents. Please ensure accuracy before submitting.
Connect or add a bank account
You must add the bank account from which Zenoti will debit payroll funds.
Select an existing bank account linked to your business or click Add a different bank account to add a new one.
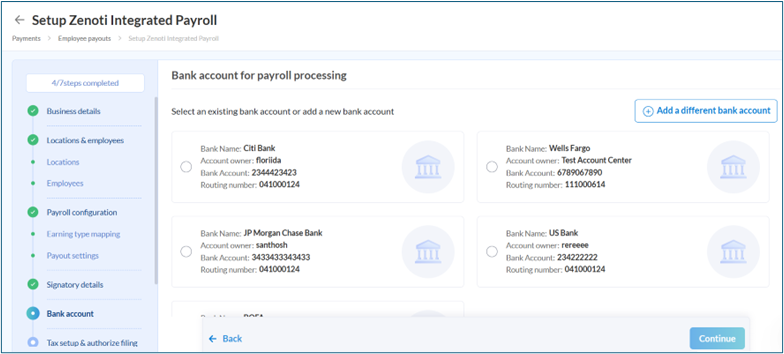
To add a new bank account, either log in to your bank and select the account for instant verification, or enter the full account number, routing number, and bank name for manual verification (which may take up to 4 business days).
Note
Note that if your company has multiple locations, Zenoti does not support center-level bank account mapping; only one bank account can be added for the entire company.
Remember, payroll debits can only be initiated from verified bank accounts.
You can add multiple bank accounts, but only one verified account can be set as the default for payroll payments.
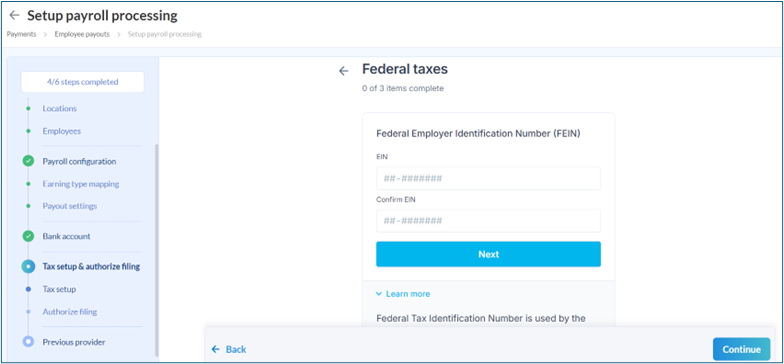
Review tax setup
Enter taxpayer information for each jurisdiction you do business in.
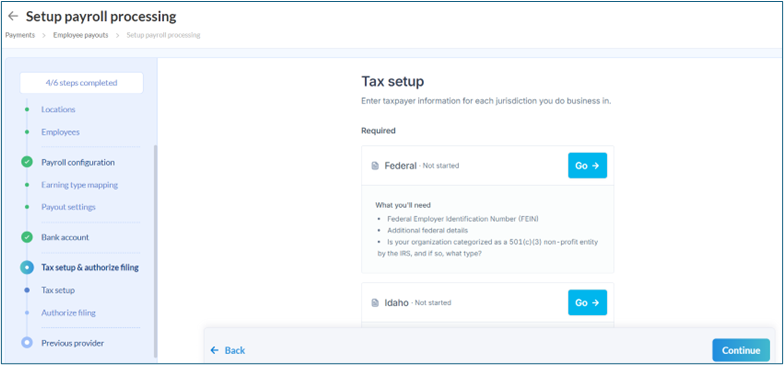
Enter FEIN (Federal Employer Identification Number) and click Continue.
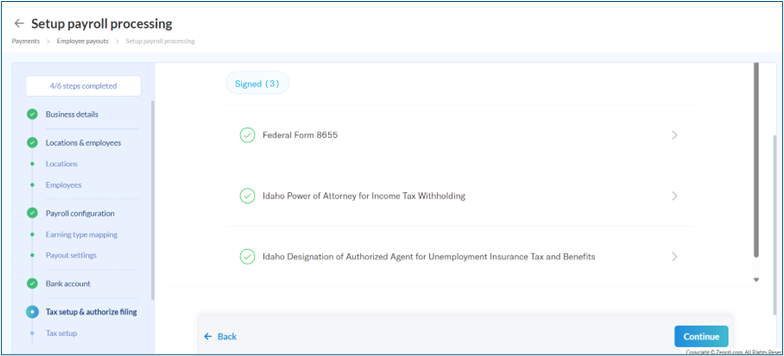
Authorize filing
Review and sign all the forms (Form 8655 and jurisdiction specific ones) to authorize Zenoti to process your payroll.
Review details of the previous provider
Follow the instructions and click Continue to provide access to your previous provider.
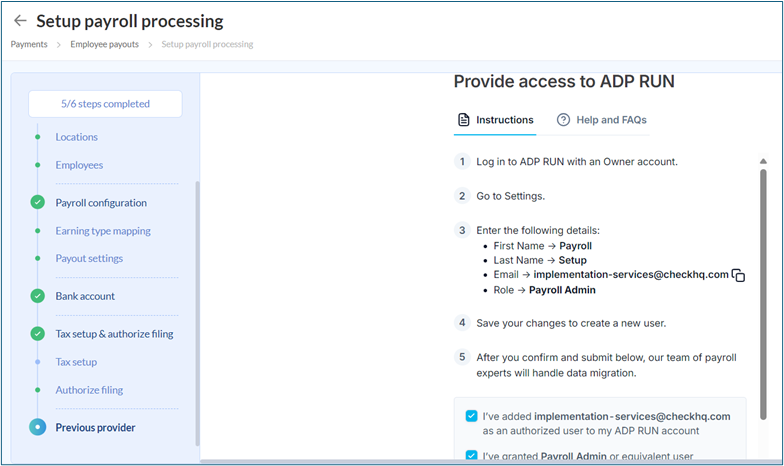
Note
The instructions may differ based on your earlier provider.
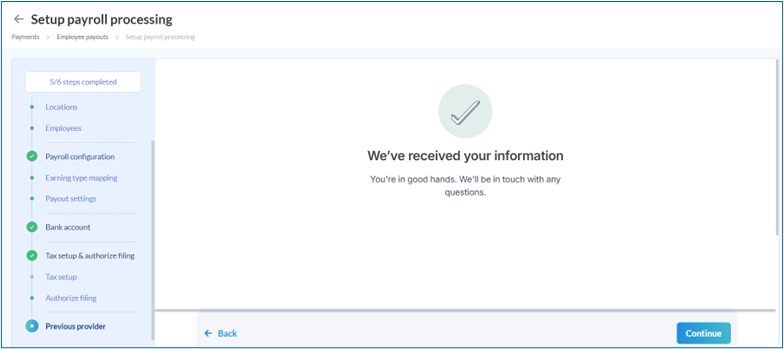
Click Continue.
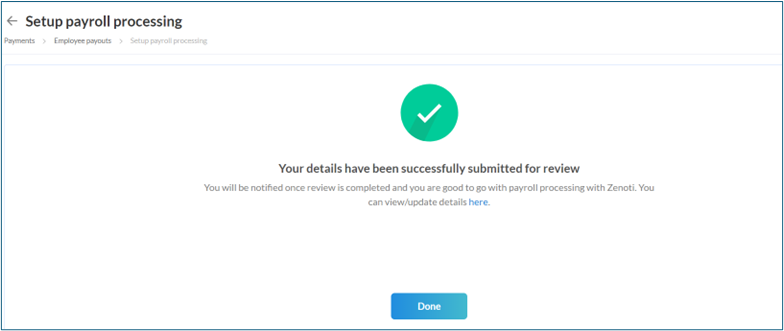
Click Done.
Note
If you have a single business set up, you will be taken to the tab view to review and update details.
If you have multiple businesses, you will see a summary view listing of all businesses with the following details:
Business Name (Doing Business As) - on hover, shows the legal name
FEIN (Federal Employer Identification Number)
Mapped centers (displays first center name + count of additional centers - click to see listing of all mapped centers)
Start Date
Onboarding Status and Actions