SSO integrations
Azure AD integration for Single Sign-on (SSO)
Single Sign-on (SSO) is a service that allows your employees access multiple applications within your organization using a single username and password,.
This eliminates the need for users to remember multiple login credentials for multiple applications.
What is Azure AD?
Azure Active Directory (Azure AD) is Microsoft’s enterprise cloud-based identity and access management (IAM) solution. It provides authentication to its cloud-based infrastructure and gives access to services such as Office 365.
What is Zenoti – Azure AD – SAML integration?
This integration allows you to link Zenoti with your enterprise software (Azure AD) via SAML SSO.
Your employees can seamlessly access information from Zenoti and Azure AD without any authentication issues using a single username and password.
This is a two-step integration:
Configure Azure AD SSO Integration
Configure Azure-SAML Integration in Zenoti.
Step 1: Configure Azure AD SSO Integration
Important
The following steps are to be performed on the Azure portal. Zenoti is not responsible for any changes to these steps or processes. This information is provided for your convenience.
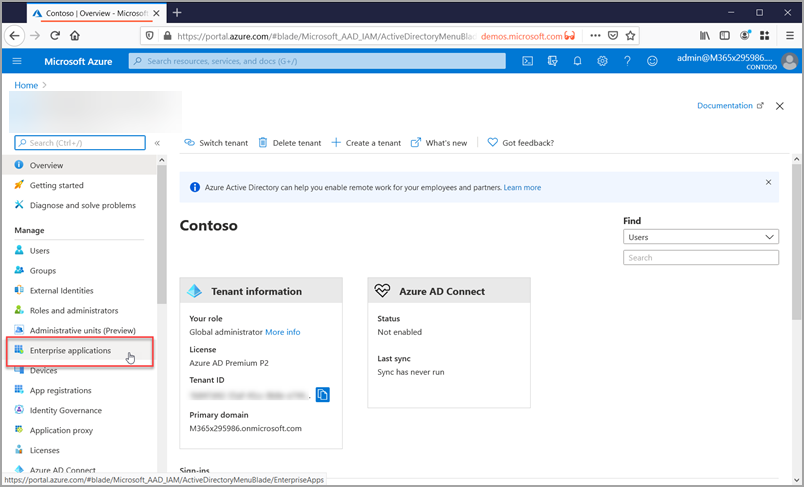
Log in to your Azure portal.
From the left panel, select Enterprise Applications.
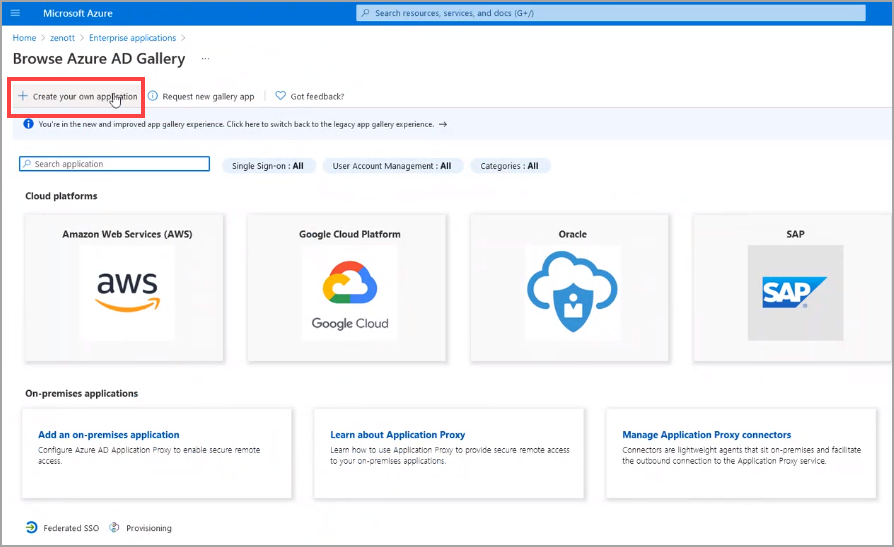
Click Create your own applications.
Azure will prompt you to enter the name of the application. You can enter the name of the application as "Zenoti".
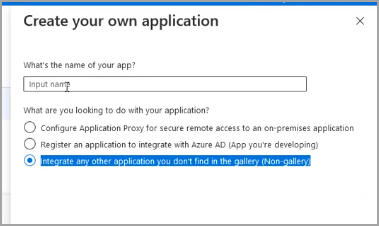
Enter the application name and from the list of options select Integrate any other application you don’t find in the gallery. (Non-gallery)
Click Create.
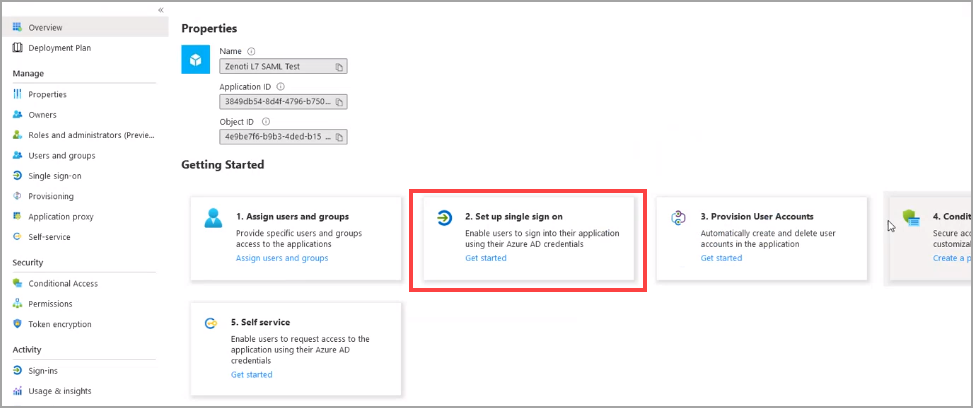
The application page will open.
From the Getting Started section, select option 2 – Set up single sign-on.
The single sign-on page opens.
From the select a single sign-on method section, select SAML.

The SAML based sign-on page opens.
For Basic SAML Configuration, click Edit.
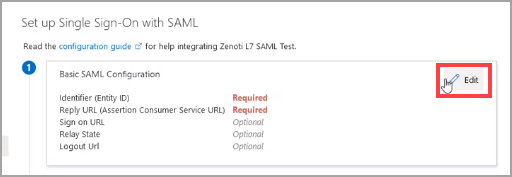
Enter the following details:
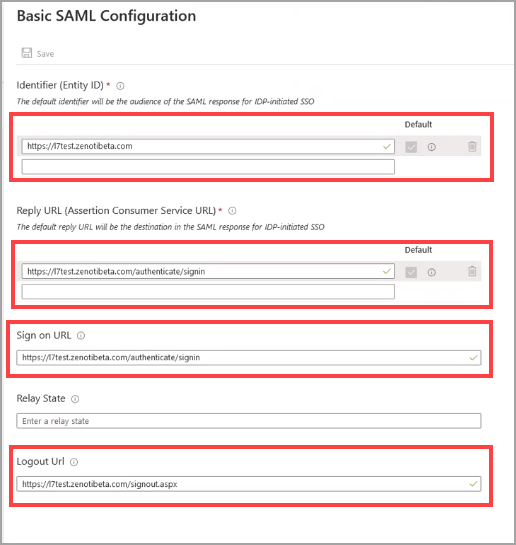
Identifier (Entity ID): Enter the Zenoti URL of your business. For example: if the Zenoti URL of your business is https://salon.zenoti.com, then enter the same.
Note
Select the Default check box.
Reply URL: Enter the reply URL. This is the destination of the SAML response. Add “/authenticate/signin” at the end of your Zenoti URL.
For example: If your Zenoti URL is https://salon.zenoti.com, the reply URL must be https://salon.zenoti.com/authenticate/signin.
Sign-on URL: Enter the same value as you enter in Reply URL.
> https://salon.zenoti.com/authenticate/signin.
Logout URL: Add “/signout.aspx” at the end of your Zenoti URL.
For example, if your Zenoti URL is https://salon.zenoti.com, your sign out URL must be https://salon.zenoti.com/signout.aspx.
Click Save.
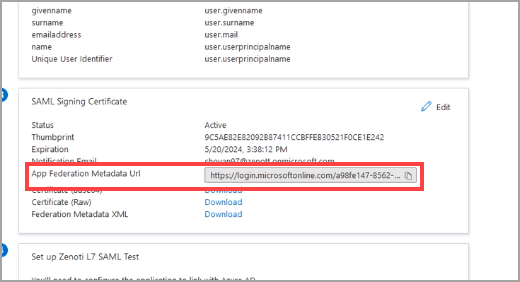
The application page reopens.
From SAML Signing Certificate section, open the URL in App Federation Metadata URL
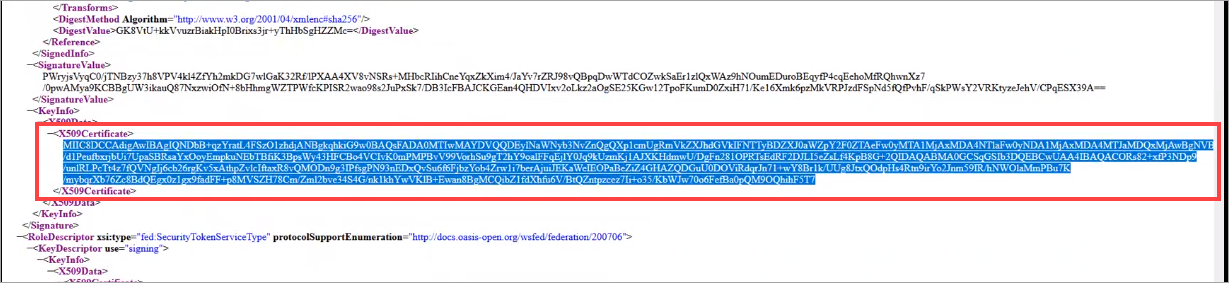
Scroll down and locate X509 Certificate.
Copy the entire value under X509 Certificate.
From the Set up <applicationname> test section, copy the value in Login URL.
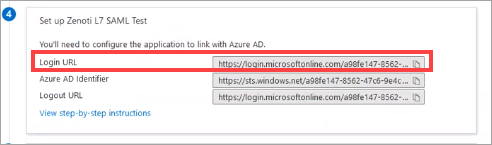
Keep these values handy as you must paste them in the Zenoti – step 2.
Step 2: Configure Azure-SAML Integration in Zenoti.
At the organization level, click the Configuration icon and navigate to Integrations.
Expand SAML.
Enter the following information:
Enable SAML check box: Select the Enable SAML check box.
Identity Provider Single Sign On: Paste the Login URL value from Azure in this field.
X509 Certificate: Paste the entire X509 certificate in this field.
Note
This was Step 13 under Configure Azure AD SSO Integration.
User Identifier: Enter the text “username” in this field.
Identity Provider Issuer: From Login URL, paste the alphanumerical GUID (Globally Unique Idenitifier) values after .com/. For example, if your Login URL is “https://login.microsoftonline.com/xxxxx-xxxx-xxxx-xxxx-xxxxxxxxxxxx/saml2”, copy the values that appear after .com/ and before/saml2. Paste the same in the Identity Provider Issuer field.
Provider Name: Enter the name of the SSO provider here.
Allow Direct Login: Select any one of the following options:
Zenoti Web: Select this option to enable SSO only for Zenoti Web.
Zenoti Mobile: Select this option to enable SSO only for Zenoti Mobile.
All: Select this option to enable SSO across Zenoti (Zenoti Web and Zenoti Mobile).
Enable SLO: SLO stands for Single Logout and allows you to log out of all Zenoti applications with a single click. To enable SLO, select the check box. The following settings appear:
SLO URL: Open your Azure portal and navigate to Overview > Endpoints. Copy the SAML-P sign out endpoint URL (last URL) and paste it into the SLO URL field.
Signature String: From SLO URL, paste the alphanumerical GUID (Globally Unique Idenitifier) values after .com/. For example, if the URL is “https://login.microsoftonline.com/xxxxx-xxxx-xxxx-xxxx-xxxxxxxxxxxx/saml2”, copy the values that appear after .com/ and before/saml2. Paste the same in the Signature String field.
Click Save.
You have successfully configured Azure-SAML SSO in Zenoti.
Single Sign-On with SAML
Single Sign-on (SSO) is a service that allows your employees to use their corporate sign-in credentials to access multiple work-related web applications they are authorized to use.
Zenoti supports SAML 2.0 (Security Assertion Markup Language), a SSO login standard that is becoming the technology of choice to provide cross-vendor single sign-on (SSO). This includes support for popular providers such as Azure AD, Google, and Okta.
If you are on SSO already, add Zenoti to your provider’s applications list. Next, configure your SSO providers details in Zenoti, so that your employees can access Zenoti with single sign-on.
In this article, you will learn how to configure your SSO provider in Zenoti.
Before you begin
Ensure that you add Zenoti to your SSO provider’s list of supported applications. The two fields below are usually common for all the SSO providers:
Single sign-on URL: Enter Zenoti web application’s URL. The URL will be https://<org name>.zenoti.com/authenticate/signin
Sign-on Method: Select SAML 2.0 as Sign-on method. After filling other details, the SSO providers show Setup Instructions.
From Setup instructions, write down the following details on your notepad:
- Identity provider’s URL
- X.509 certificate
- Identity Provider Issuer
You will need these details to configure your SSO provider in Zenoti.
Configure your SSO provider in Zenoti
At the organization level, click the Configuration icon.
Go to the Integrations tab.
Expand the SAML section and fill the following information:
a. Enable SAML: Select the checkbox to enable SAML to apply Single Sign-On for Zenoti.
b. Identity Provider Single Sign-on URL: Enter the Identity Provider URL in this field.
Note
Identity Provider URL will be available in the the setup instructions provided by your SSO provider after you add Zenoti to their list of applications.
c. X.509 Certificate: In the setup instructions, you get X.509 certificate with details such as version, serial number, signature algorithm. Copy-paste the certificate code into this field.
d. User Identifier: Enter your username registered with your SSO provider.
e. Identity Provider Issuer: Setup instructions provided by your SSO provider contains the Identity Provider Issuer details. Enter the same in this field.
f. Click Save.
Your employees can use their corporate sign-in credentials to log into Zenoti.
Things to remember
Enabling this integration means SSO is enabled for all employees in all the locations by default.
Username in Zenoti should match the email address of the employee.
For direct sign-in, or for employees whose SSO is turned off, use the URL https://<org name>.zenoti.com/signin.aspx.
SSO is supported in Zenoti Web, Zenoti Mobile, and MyZen.
After termination, employees must use their registered personal credentials to access the MyZen application. SSO will no longer be available.
SAML SSO cannot be used for guests. It is only for managing employee logins.
FAQ
Can I allow my employees to use their Zenoti credentials to login, instead of Single Sign-on?
Yes. You need to enable the checkbox Allow Force Login in the employee page to allow your employees to login to Zenoti using the username and password configured in their Employee page.
Note
The checkbox is available only when SSO is functional at your organization.