Manage opportunities
Create new opportunities
At the center level, click the Sales icon and navigate to Tracking > Opportunities.
Click Add.
Enter the details, such as name, description, guest name, sales owner, and priority.
Specify the next follow-up date with the guest.
Add other relevant information, such as the expected close date and notes.
Click Finish.
Things to remember
Though none of the fields are marked mandatory (*), it is a good idea to try and persuade the guest to give all details so that tracking and follow-up is easier.
To ensure that the sales owner knows about a new opportunity that is assigned to them, you need to configure settings to send automated notifications to the sales owner/employee.
You can sort the sales opportunities by all the columns in the list view: opportunity number, title, sales owner, guest, guest code, status, created date, follow-up date, price, and call disposition.
Other actions
Action | Perform these steps |
|---|---|
Add a new guest while creating an opportunity |
|
View opportunities
At the center level, click the Sales icon and navigate to Tracking > Opportunities.
Expand the Search for Opportunities by section.
To find specific opportunities, use the search filters, and then click Search.
You can enter or select values for one or more of the Keyword, Type, Owner, Guest, Priority and Status fields.
Note
You can view opportunities for all your centers if you are in the organization view or the organization level. If you are in the center view, you will only see opportunities relevant to your center.
Action | Perform these steps |
|---|---|
Save search criteria |
NoteThe search criteria you save appears in the View drop-down list on the top left corner of the screen under the Custom Search section. |
Reassign leads to new owners |
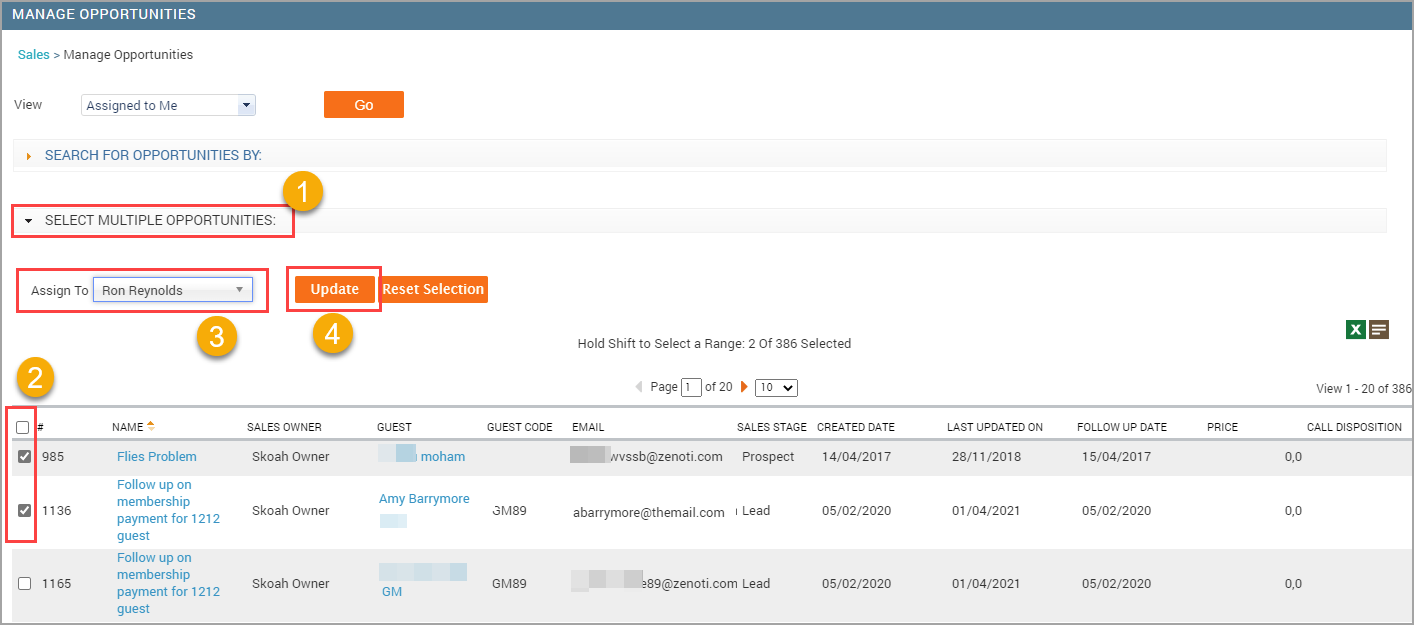 |
Modify opportunities
At the center level, click the Sales icon and navigate to Tracking > Opportunities.
Expand the Search for Opportunities by section.
Using the search filters, enter the required values, and then click Search.
Click the name of the sales lead.
Click the General tab.
Make the necessary modifications.
Click Save.
Action | Perform these steps |
|---|---|
Book an appointment through a sales lead |
|
Delete a sales lead |
|
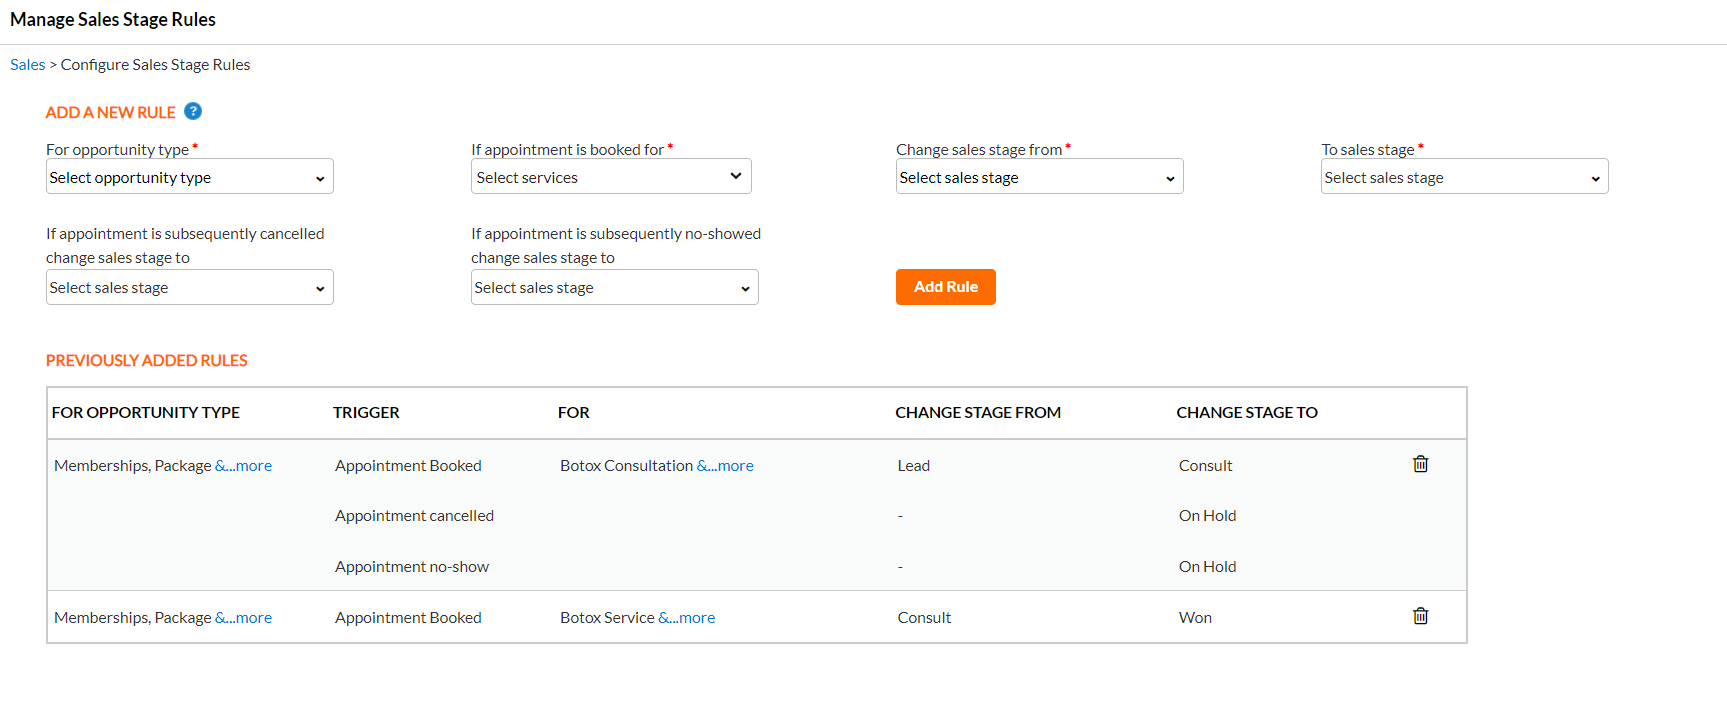
Create sales stage rules
Create rules to update the sales stage of opportunities automatically when guests book appointments. Configuring rules will reduce manual efforts in updating sales stages in opportunities.
For example, your organization has defined sales stages as Prospect, Lead, Consult, On Hold, and Won:
You can create a rule to update the sales stage of an opportunity from Lead to Consult if a guest books an appointment for a Botox Consultation.
You can create another rule to update the stage from Consult to Won if the same guest books an appointment for Botox Service.
You can configure this rule to update the sales stage from Won to On Hold when the guest subsequently cancels the appointment or doesn't show up for the service.
Note
To create sales stage rules, you must have the Configure Rules security role permission.
At the organization level, click the Sales icon and go to Tracking > Sales Stage Rules.
From the For Opportunity type list, select the required opportunity type(s). You can select multiple or all opportunity types. While executing the rule, Zenoti will update the sales stage of opportunities with selected opportunity types.
From the If appointment is booked for list, select the applicable services or service categories. Zenoti will execute the rule if an appointment is booked for the selected services.
From the Change sales stage from list, select one or more sales stages of opportunities which need to be updated.
From the To sales stage list, select the stage to which you want to update the opportunity.
Optional: You can select the sales stages to update the opportunity when the guest cancels the appointment or doesn't show up for the service.
Click Add Rule.