Configure Gantner
Gantner is a hardware company that provides devices for fitness, resort, and spa businesses to control door or room access. You can integrate your centers with Gantner to automate door access without involving the front desk staff.
With Gantner devices, you can:
Give members wristbands that work with a Gantner device to unlock doors in the studio.
Give members access to parts of a facility during off hours or 24/7.
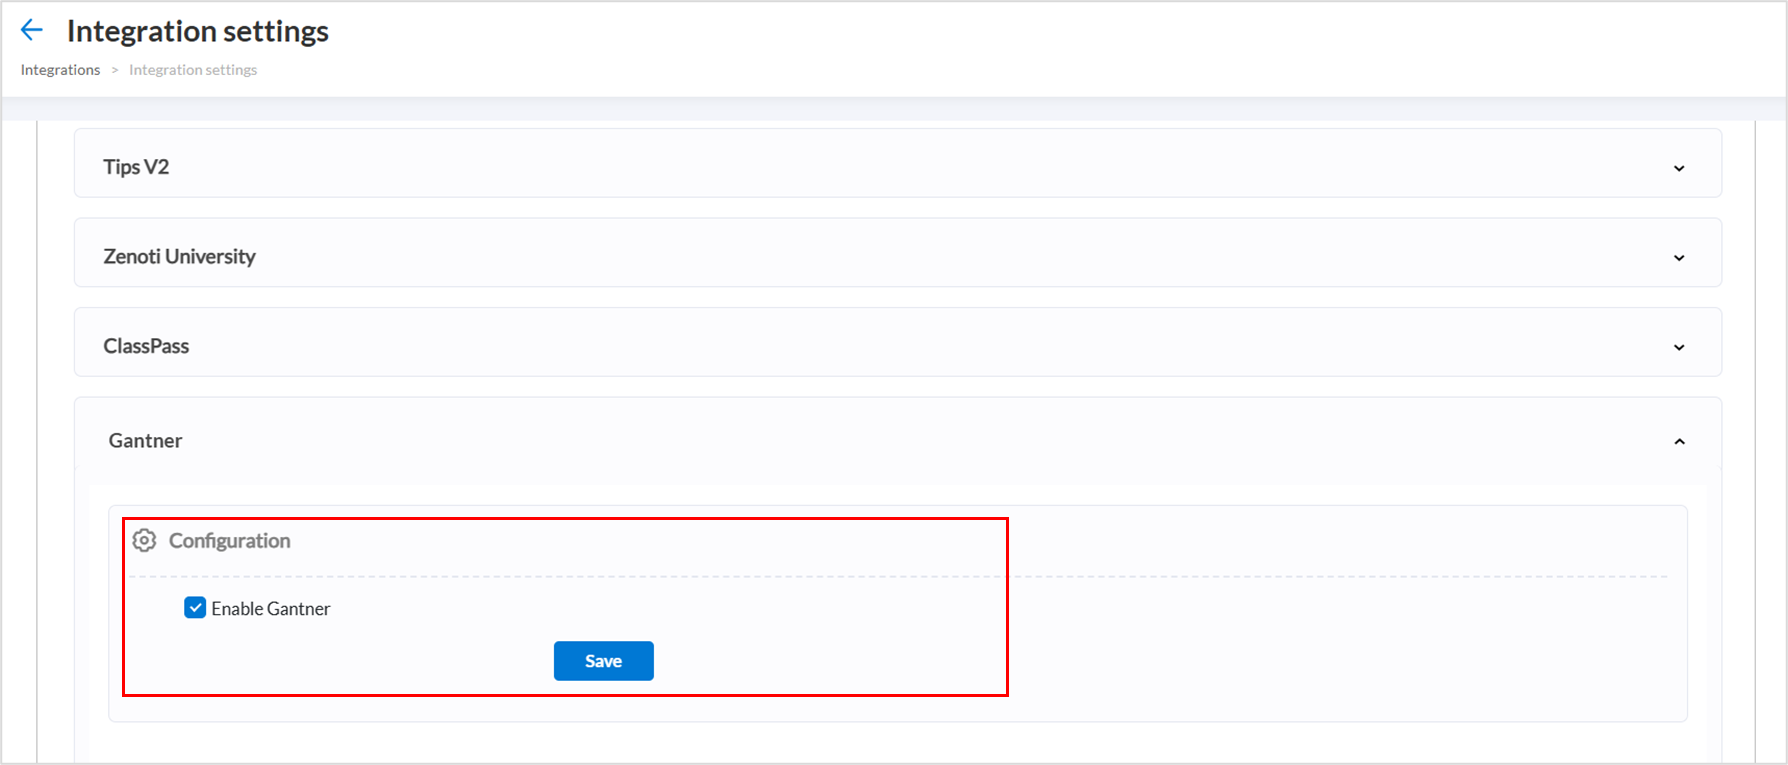
At the organization level, click the Configuration icon.
Navigate to Integrations > Integration settings.
Search and expand the Gantner option.
Check the Enable Gantner option.
Uncheck the Enable Gantner checkbox to disable Gantner integration for your organization.
Click Save.
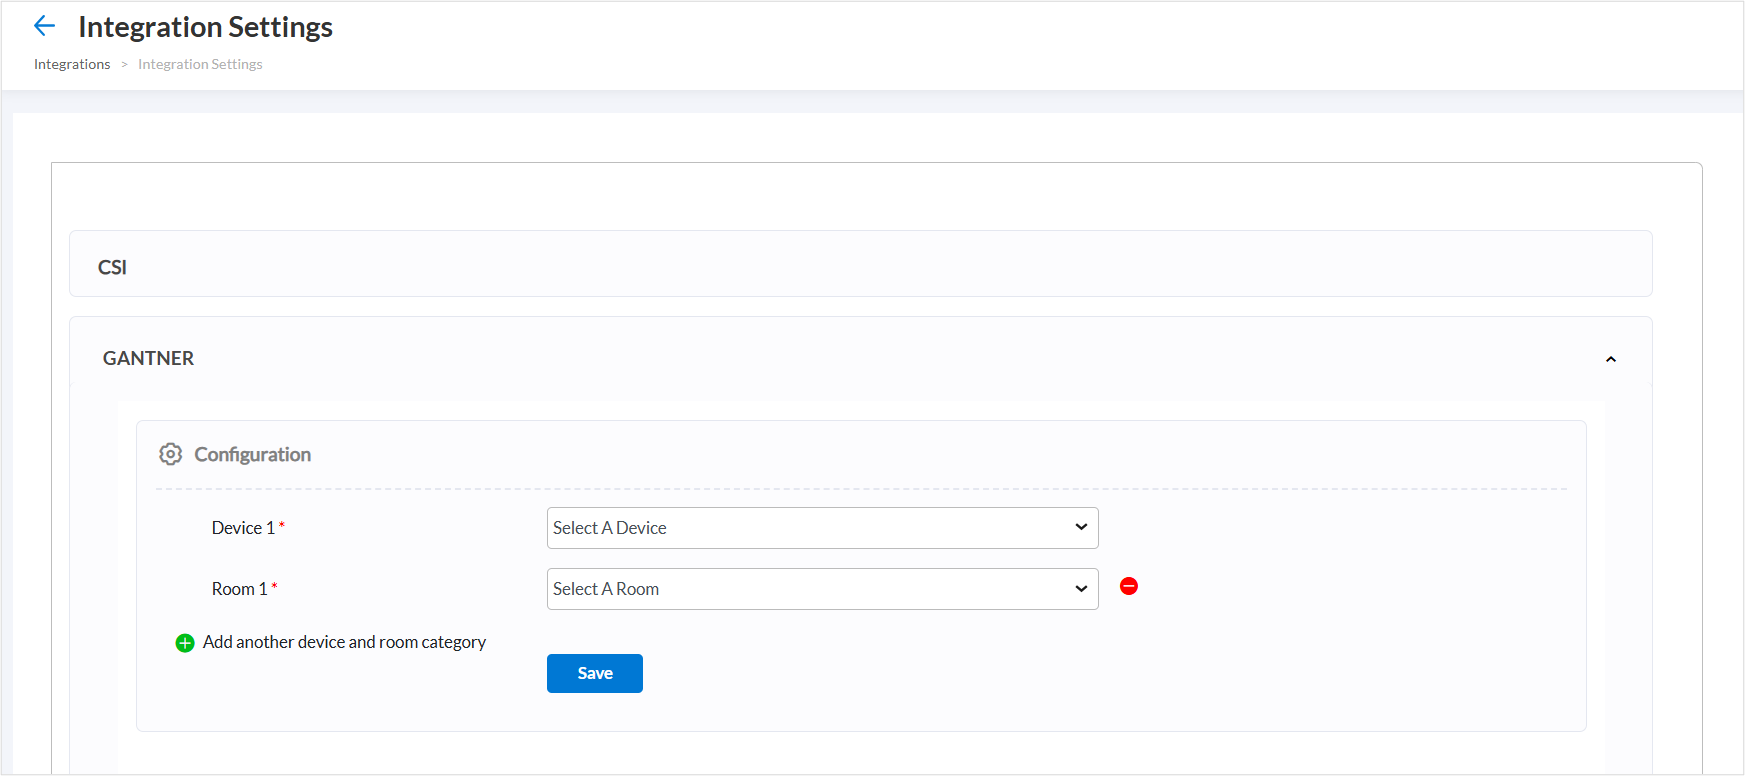
At the center level, click the Configurations icon.
Navigate to Integrations > Integration settings.
Search and expand the Gantner option.
Select a room and device from the respective drop-down lists.
Note
The Gantner device must be connected to the local system or terminal to appear in the device drop-down list.
To add another device and room category, click the green plus icon labeled Add another device and room category then select the appropriate device and room from the new row.
To remove an existing device and room category, click the red delete icon next to that entry.
Click Save
Set up app for Gantner integration
To configure Gantner devices to work with your center, create a backend app in Zenoti to interact with the Gantner external web server.
Follow these steps:
Create an app and generate an API key
At the organization level, click the Configuration icon.
Navigate to Integrations > Apps.
On the Manage Applications page, click Add.
Enter the required information for the General tab on the Create application page.
Name: Enter the name of the application. For example, the Gantner token.
URI: Enter the URL of your website or the application. In case of errors or issues in the app, URI information is used to contact the app developer.
Description: Enter a brief description of the app for which you are generating the API key.
Login User Type: Select the Employee option from the dropdown list. This app is configured for internal users, so the employee option is selected.
App Type: Select the application scope from the two available options.
Organization: Select this to enable the app for Gantner, across all centers in for your business.
Center: Select this if the app should work only for a specific center, with localized access and settings.
Source App: The Source App field specifies the type of application being integrated. This helps Zenoti determine the authentication and communication protocols that should be applied when the app interacts with external systems. Select the Botas the Source App from the dropdown list to enable secure, automated backend communication between Zenoti and the Gantner external web server.
Configure Redirect URLs (Optional): Leave the Post Login Redirect URL and Post Logout Redirect URL fields empty, as Gantner is a backend integration that does not require user redirection. Only populate these fields if your setup includes specific UI-based workflows or monitoring pages.
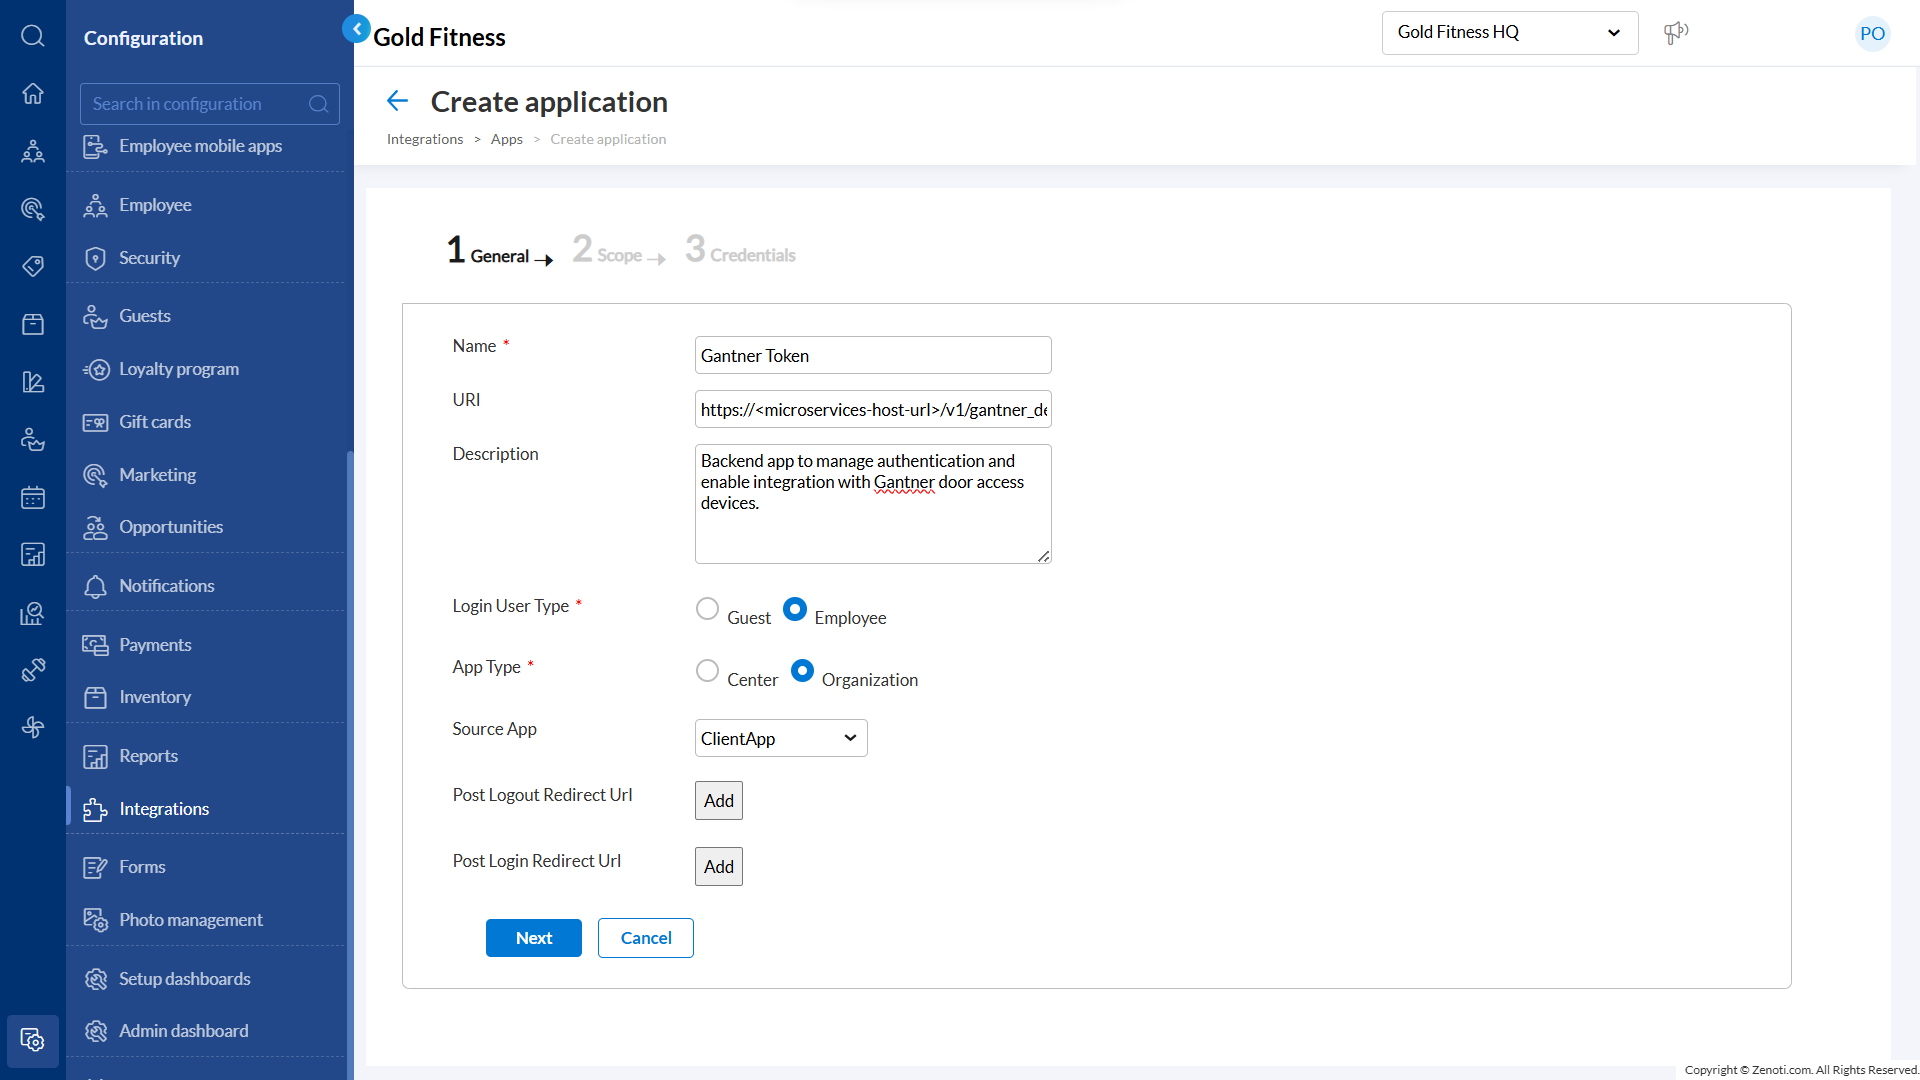
Click Next to set up the Scope details for the integration.
In the Scope page, select the Classes (Integrations) checkboxes under JWT AND APIKEY groups.

Click Next to set up the Credentials details for the integration.
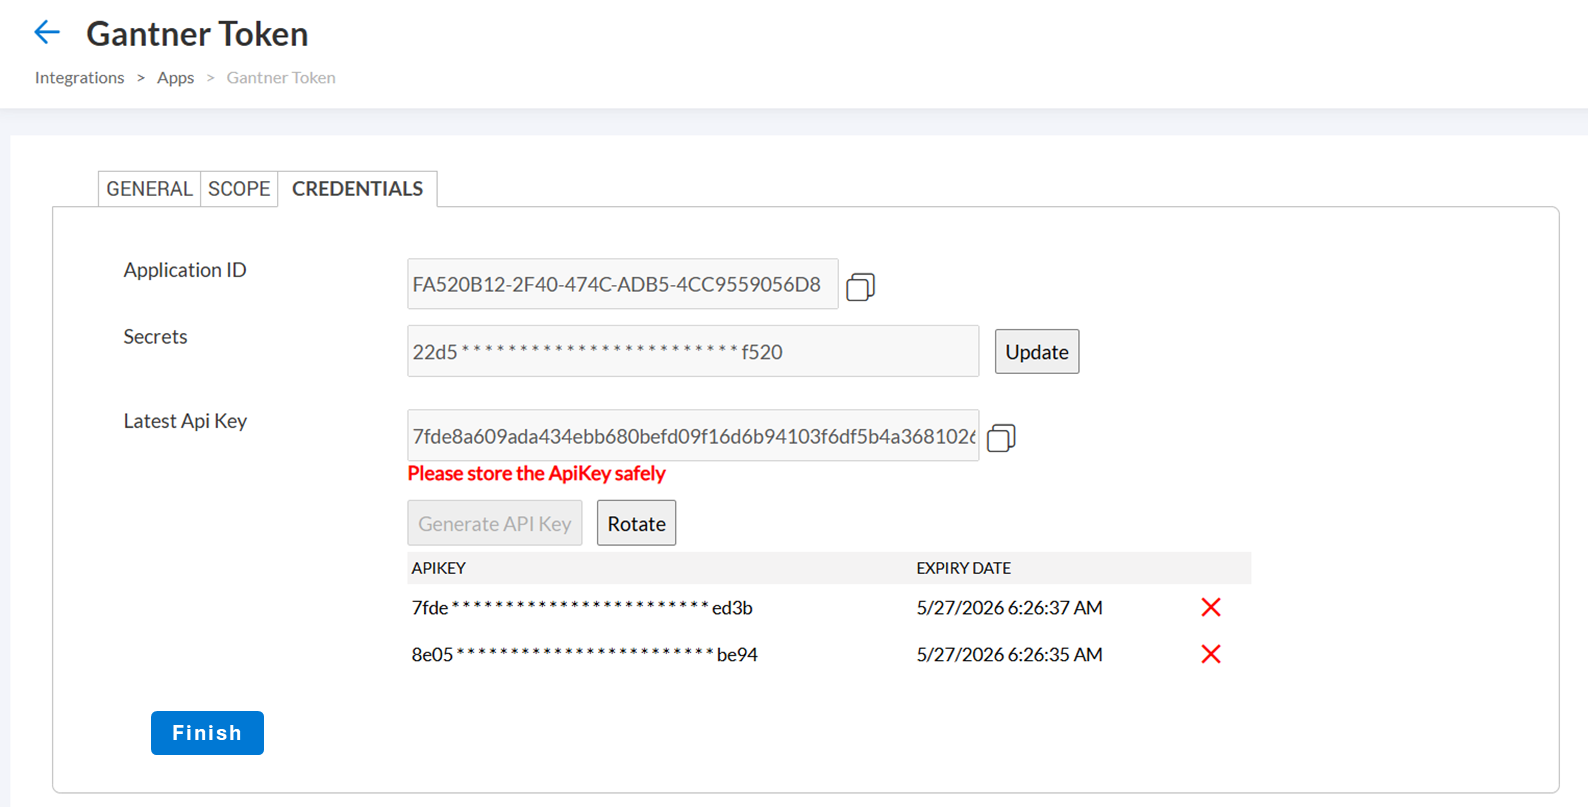
From the Credentials page, copy the Application ID and the Secrets to a notepad and click Generate API Key.
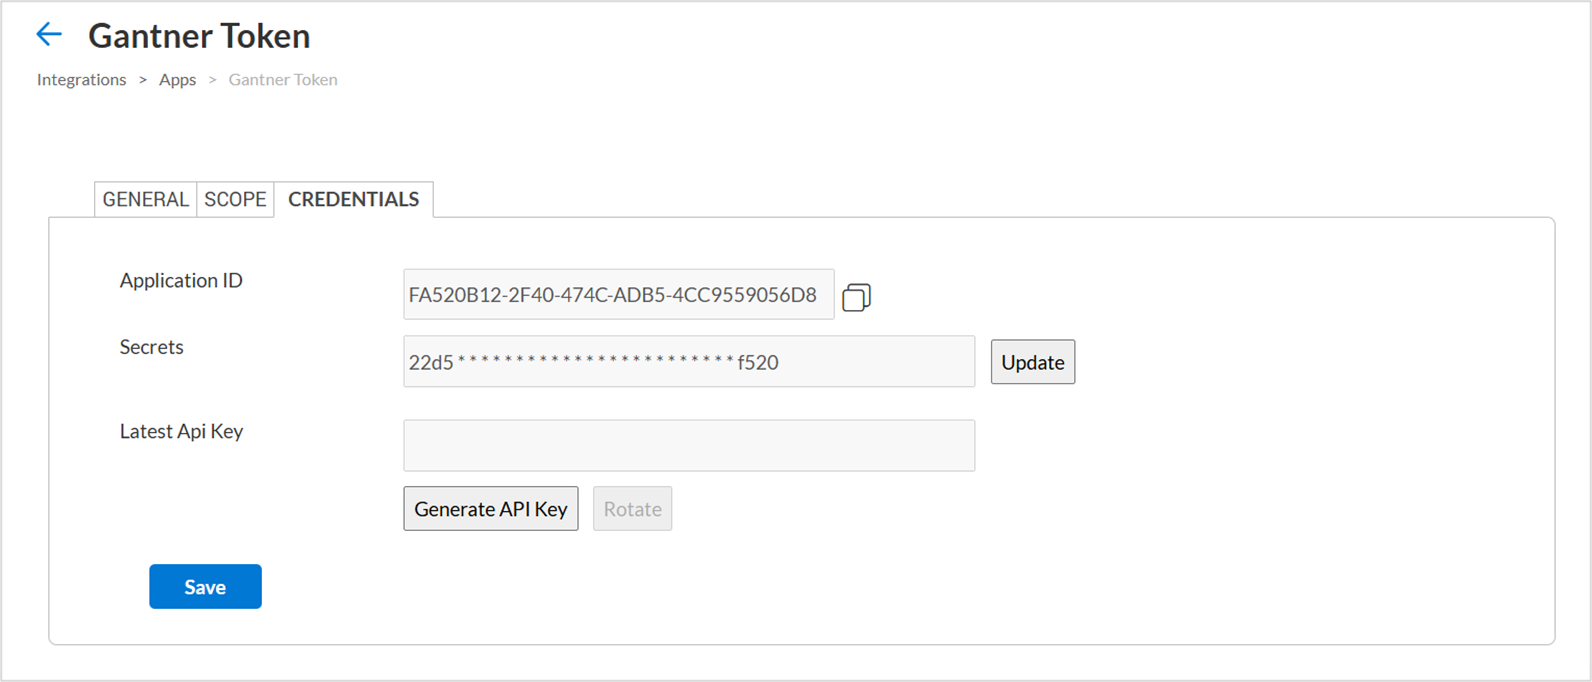
Note
Copy the Application ID and the Secrets before you leave the page. If you navigate away from this page, you must restart the API generation process from the beginning.
Copy the API key on your local system and click Finish.
After the app setup, follow these steps:
Note
Ensure microservices are hosted on the POD where you want the Gantner device to work. This is necessary for the Zenoti app to interact with your web app.
Configure the Gantner external webserver
Caution
The configuration steps involving third-party platforms—such as Gantner in this case—are subject to change at the discretion of the respective provider. We strongly recommend contacting Gantner directly to verify the accuracy and applicability of any external settings. Zenoti does not assume responsibility for changes or updates made by third-party services.
On your browser, look up the Gantner device IP.
On the login screen, enter the admin credentials.
Go to Device Configuration > External Webserver.
Enter the following details
Field
Description
Enable external Webserver
Select the checkbox
Server address
Enter the value in this format:
Tip
<microservices hosted url>/v1/gantner_devices/<gantner device serial number>/websocket?centerId=<center id>
Enable secure communication
Select the checkbox
Access token
Copy the access token from the backend app.
Reconnection timeout
Time in seconds. For example - 60
Save the changes.
Gantner integration for gym access
Managing member access efficiently is crucial for modern fitness and wellness centers, especially those operating beyond standard hours. Zenoti’s integration with Gantner enables automated door and room access using smart wearables. This helps in offering your guests a smooth, self-service experience without front desk dependency. This article covers the essential configuration steps in Zenoti to link your centers with Gantner hardware, ensuring secure and streamlined facility entry for your members.
To allow your business to integrate with Gantner, enable the following settings.
At the organization level, click the Configuration icon.
Navigate to Integrations > Integration settings.
Search and expand the Gantner option.
Check the Enable Gantner option.
Uncheck the Enable Gantner checkbox to disable Gantner integration for your organization.
Click Save.
At the center level, click the Configurations icon.
Navigate to Integrations > Integration settings.
Search and expand the Gantner option.
Select a room and device from the respective drop-down lists.
Note
The Gantner device must be connected to the local system or terminal to appear in the device drop-down list.
To add another device and room category, click the green plus icon labeled Add another device and room category then select the appropriate device and room from the new row.
To remove an existing device and room category, click the red delete icon next to that entry.
Click Save
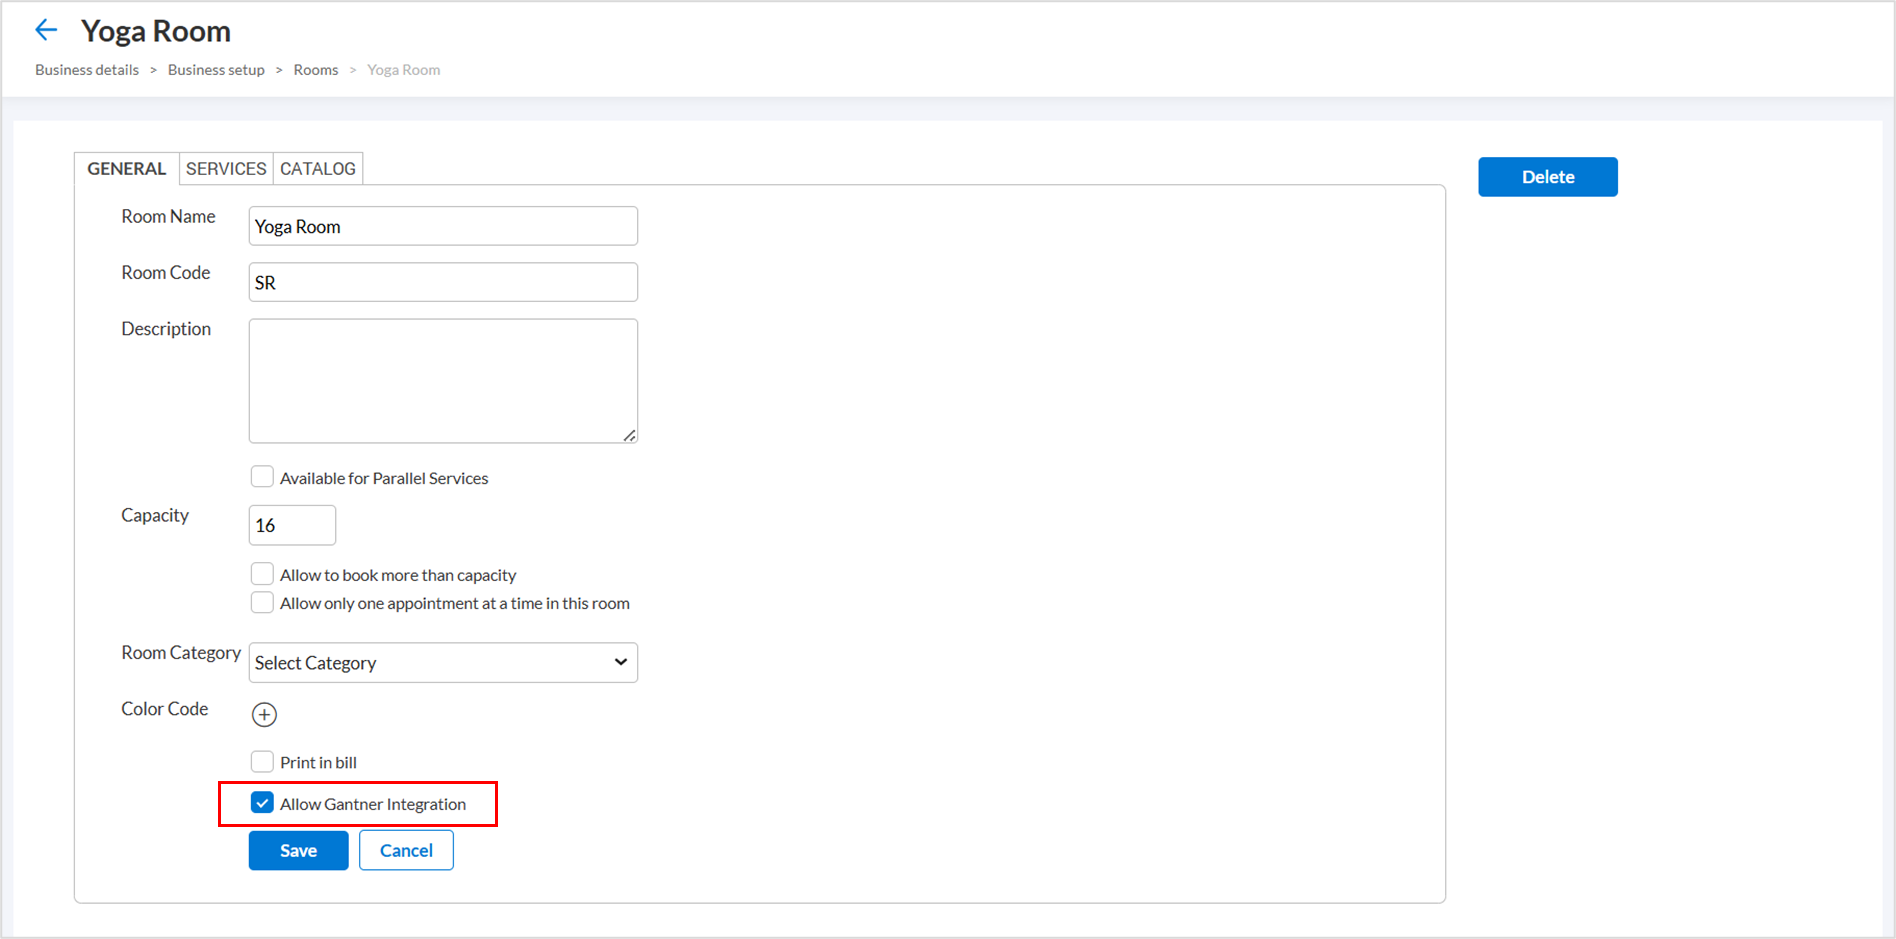
Room level
At the center level, click the Configuration icon and go to Business details.
Search and select the Rooms option under Business setup.
Select the required room and enable Allow Gantner Integration check box in the general settings.
Click Save to update the changes.
To learn how to set up Gantner devices, refer to Set up app for Gantner integration.