Zapier Integration
This article explains how to integrate Zenoti with Zapier to automate repetitive tasks without coding. With this integration, you can connect Zenoti events (such as guest creation, appointments, or employee updates) to actions in other apps like Gmail, Slack, or Facebook Lead Ads. For example, when a new guest is created in Zenoti, Zapier can automatically send a welcome email through Gmail.
In this article, you'll learn how to:
Set up Zenoti–Zapier integration
Use Zapier for automated actions
Understand supported triggers and actions
Create workflows at the center level
Convert Facebook leads into Zenoti opportunities
Overview
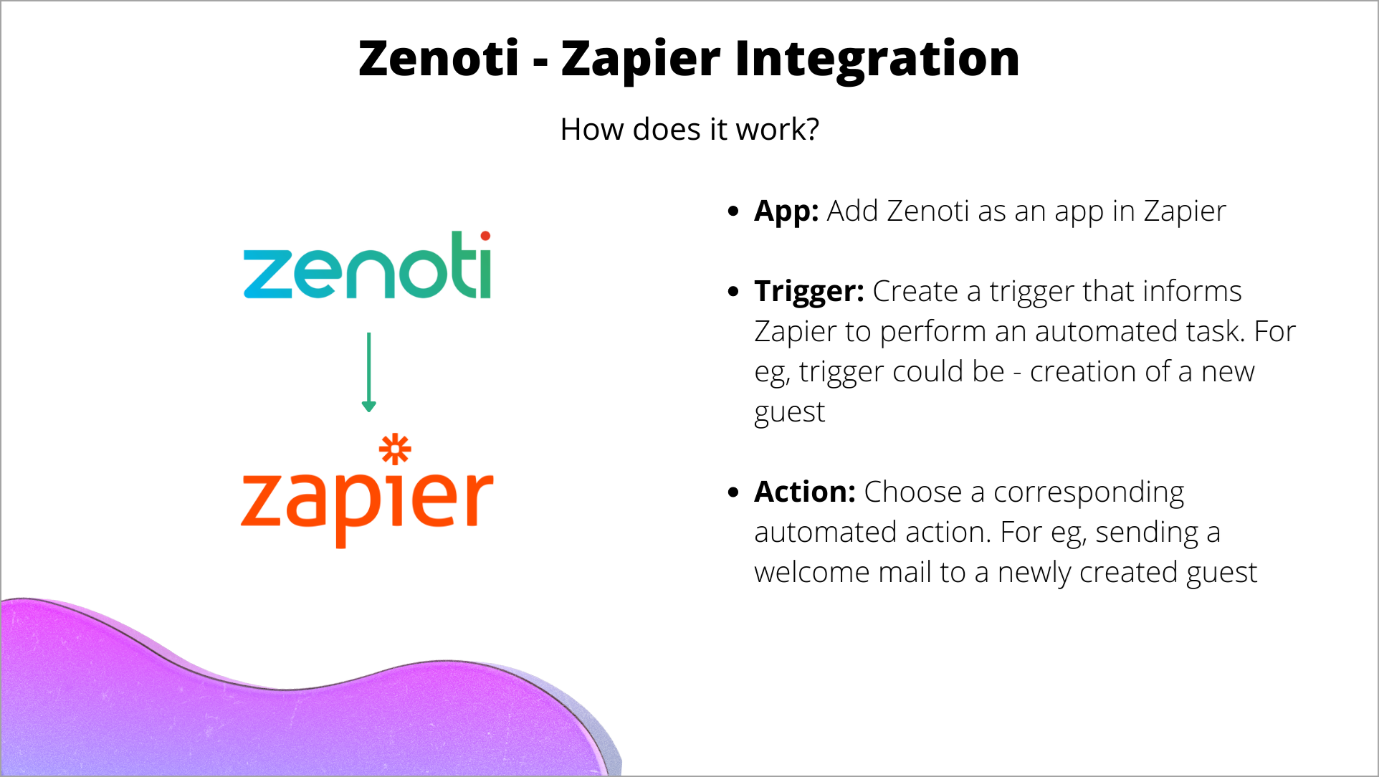
Zapier is a workflow automation platform that allows you to connect Zenoti with hundreds of third-party applications. By linking Zenoti events (triggers) to external app actions, businesses can save time, reduce manual work, and streamline operations.
The Zenoti–Zapier integration can be configured at the center level, allowing individual centers to create their own automation workflows while maintaining brand governance. Typical automations include:
Sending appointment reminders via Gmail or SMS
Logging new guests in Google Sheets
Notifying staff in Slack when appointments are booked
Automatically creating opportunities from Facebook leads
Key terms
Zap: A workflow created in Zapier that connects a trigger event in one app to an action in another.
Trigger: The starting event in Zenoti (e.g., Guest Create or Appointment Complete).
Action: The automated response in another app (e.g., Send email in Gmail).
Webhooks: Notifications sent from Zenoti to Zapier when a specific event occurs.
Center-level access: Ability for centers to manage their own integrations without requiring brand-level permissions.
Prerequisites
To use Zenoti–Zapier integration, ensure the following:
An active Zenoti API and Webhooks subscription (contact your CSM to enable).
A valid Zapier subscription (Premium plan required for some features like Facebook Lead Ads).
Credentials for both Zenoti and third-party applications you wish to connect (e.g., Gmail, Slack, Google Sheets).
How does it work?
Use Zapier for automated actions
Log in to Zapier using your credentials.
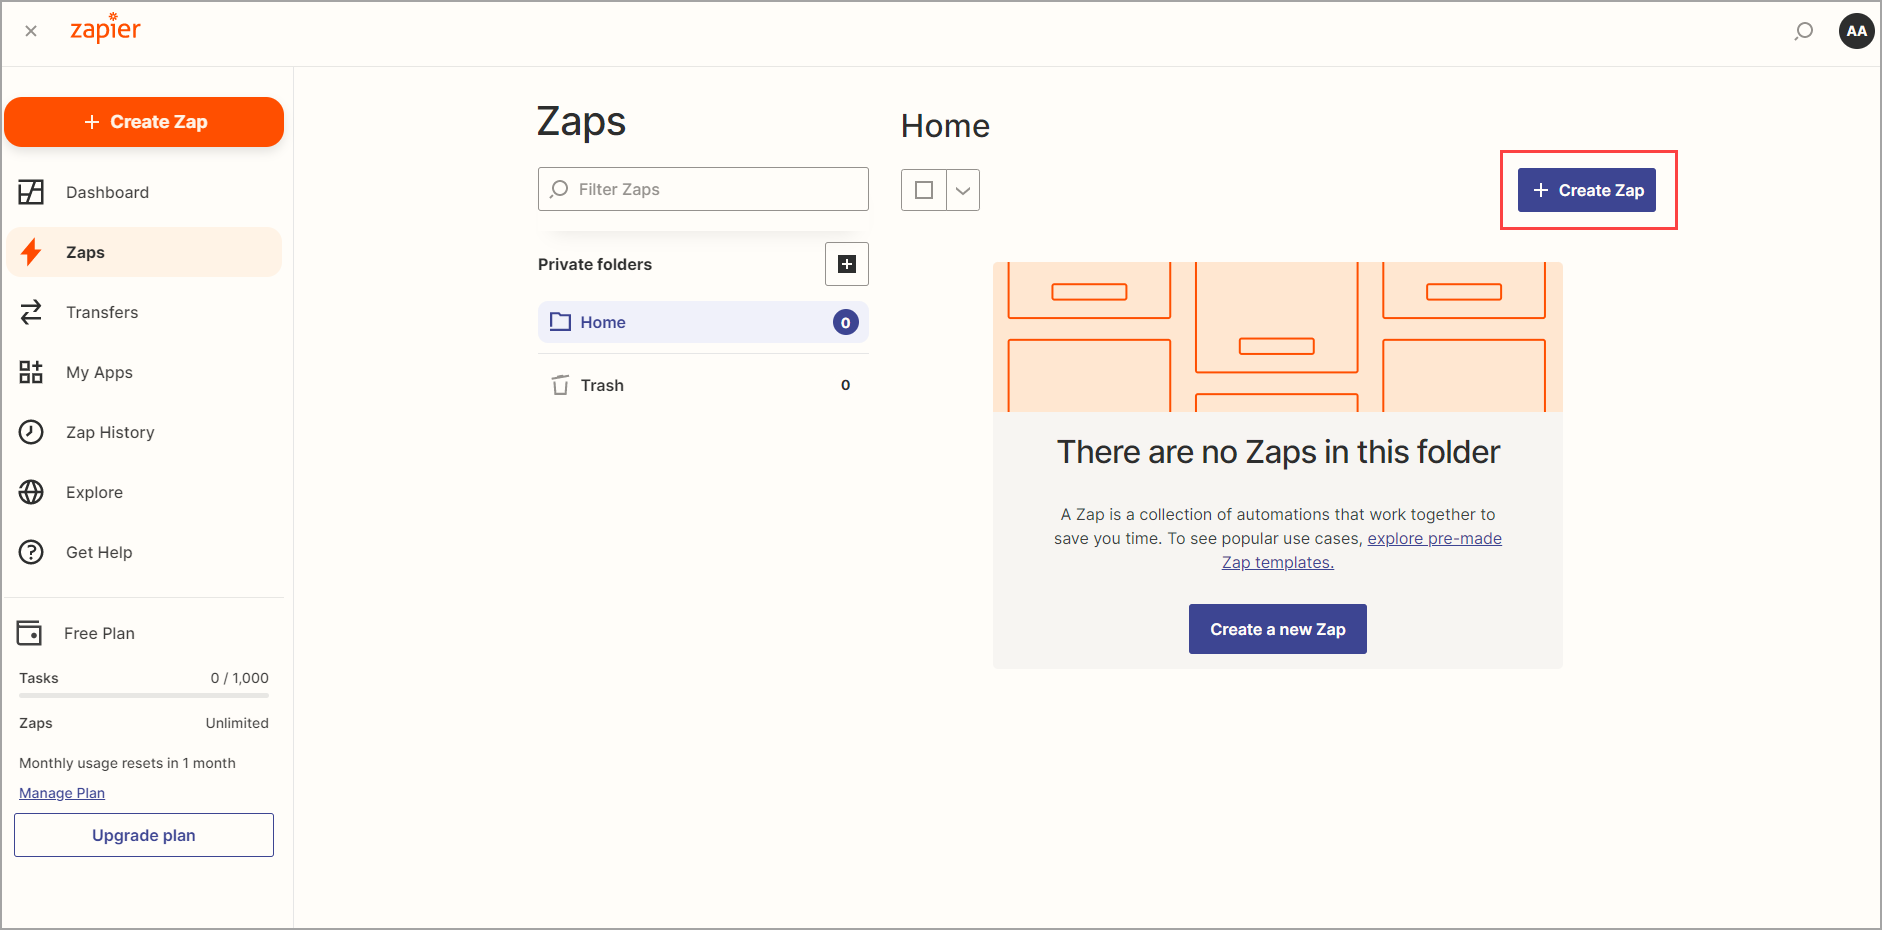
Click Create Zap.
Now add Zenoti as an application in Zapier.
In the search box, enter Zenoti.
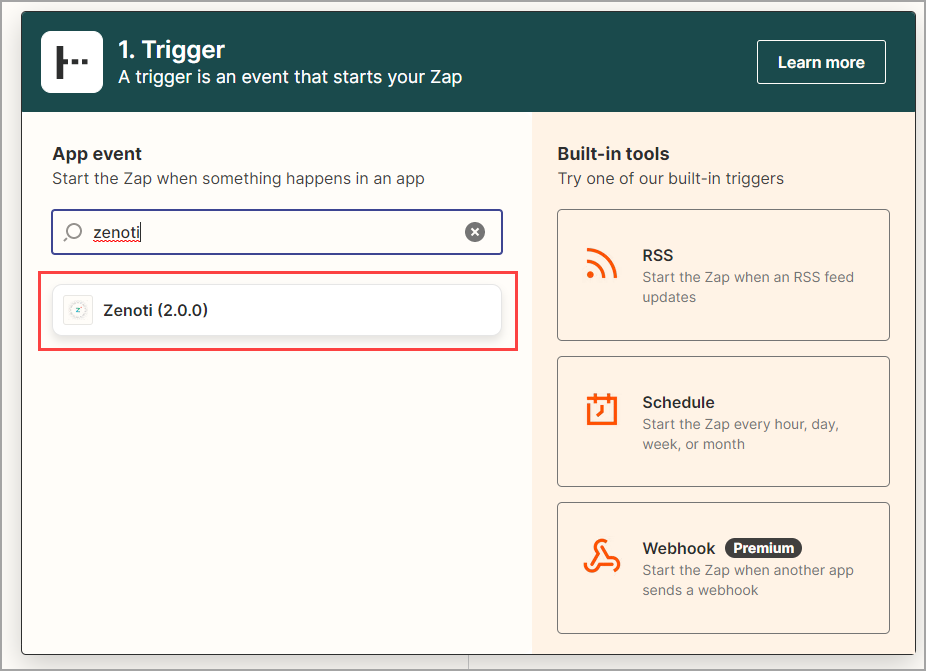
Zapier searches for Zenoti and displays the app.
Select Zenoti.
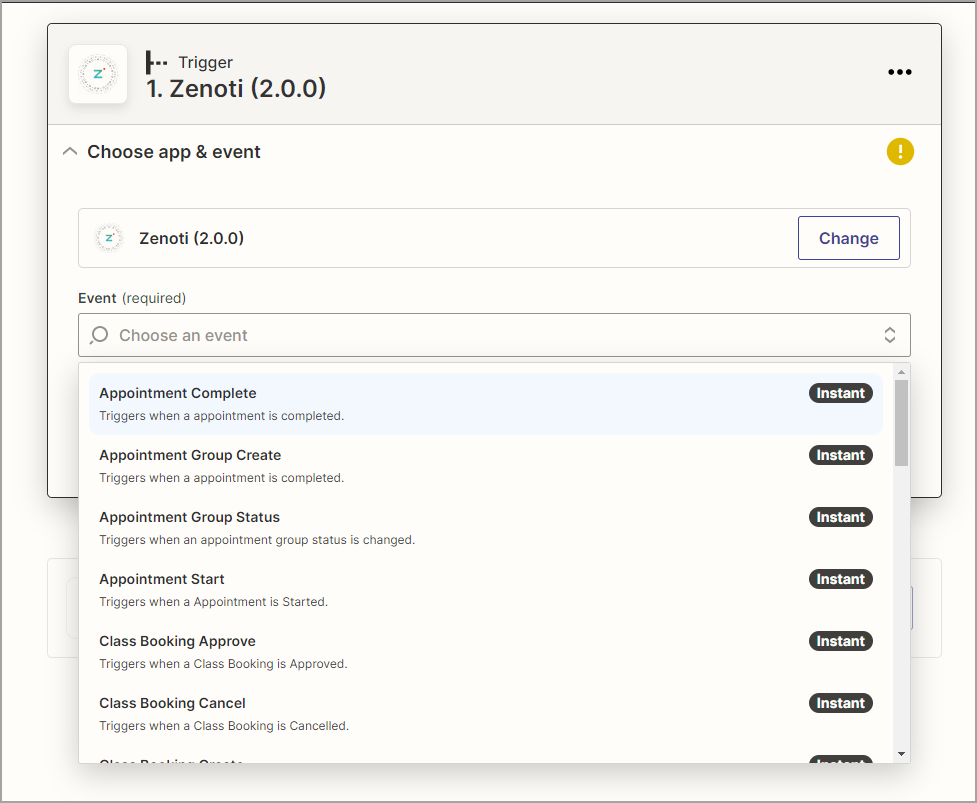
Select any one of the supported events (Refer to the end of the article for supported events.)
Click Continue.
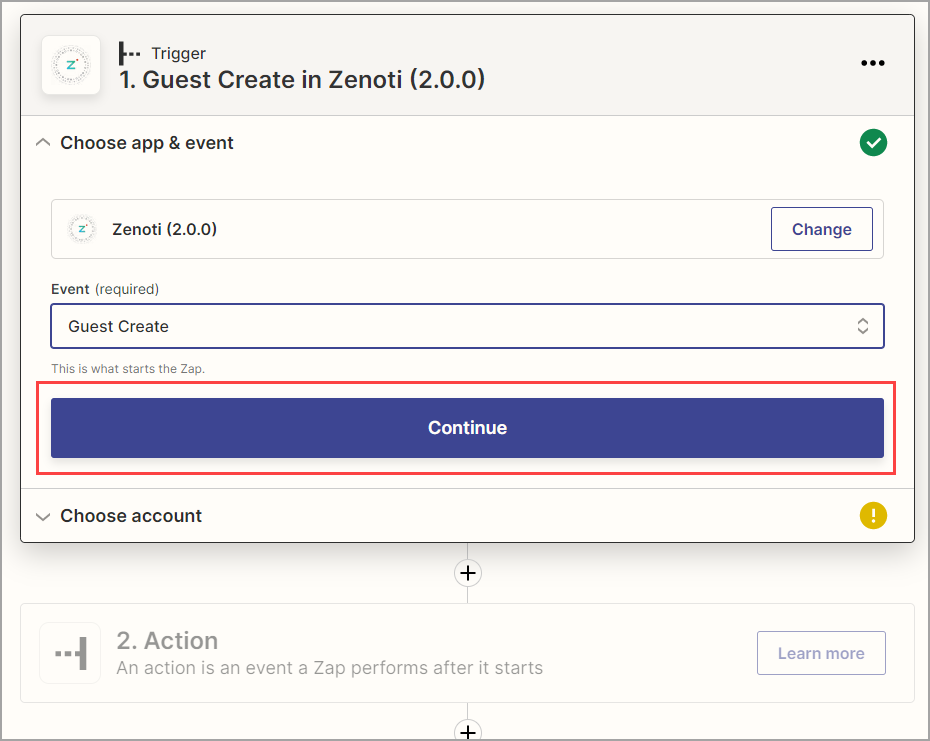
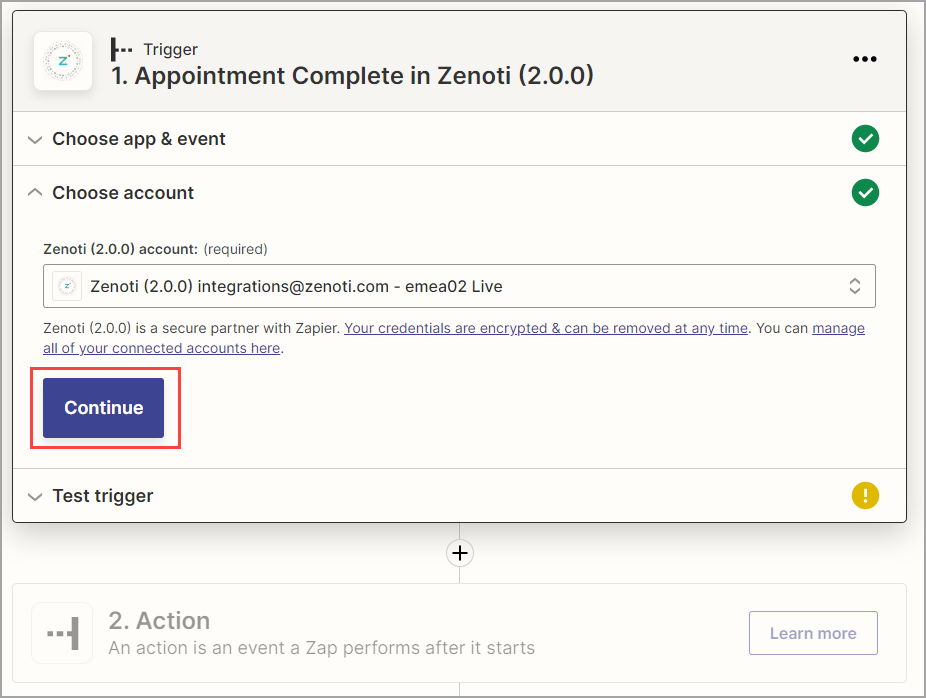
The Choose account section appears.

Click Sign in.
The Zenoti account access pop up opens.
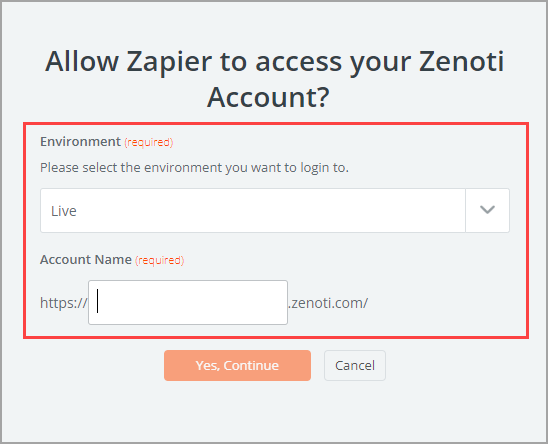
From the Environment drop-down list, select Live.
For Account Name, enter the name of your account (as it appears in Zenoti URL).
For example, if your Zenoti URL is https://spabliss.zenoti.com, enter the Account Name as spabliss.
Click Yes, Continue.
Enter your Zenoti credentials.
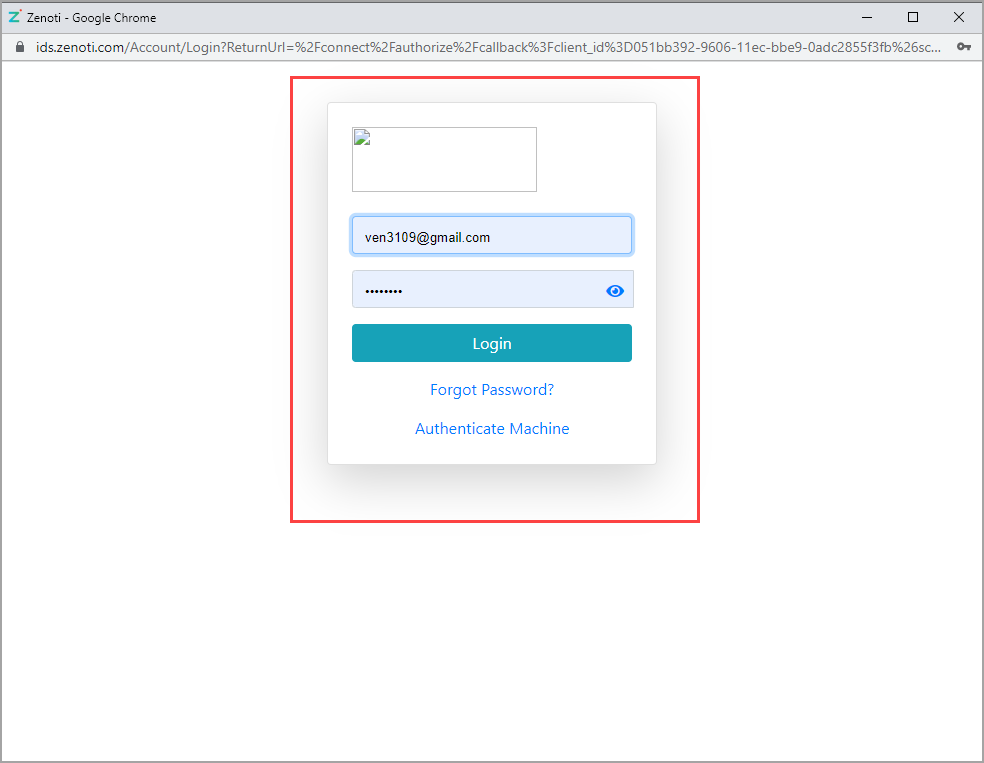
Click Login.
After a successful login, click Continue.
Note: Zapier sessions are permanent; this ensures that there are no interruptions to auto tasks.
The Test trigger section appears.
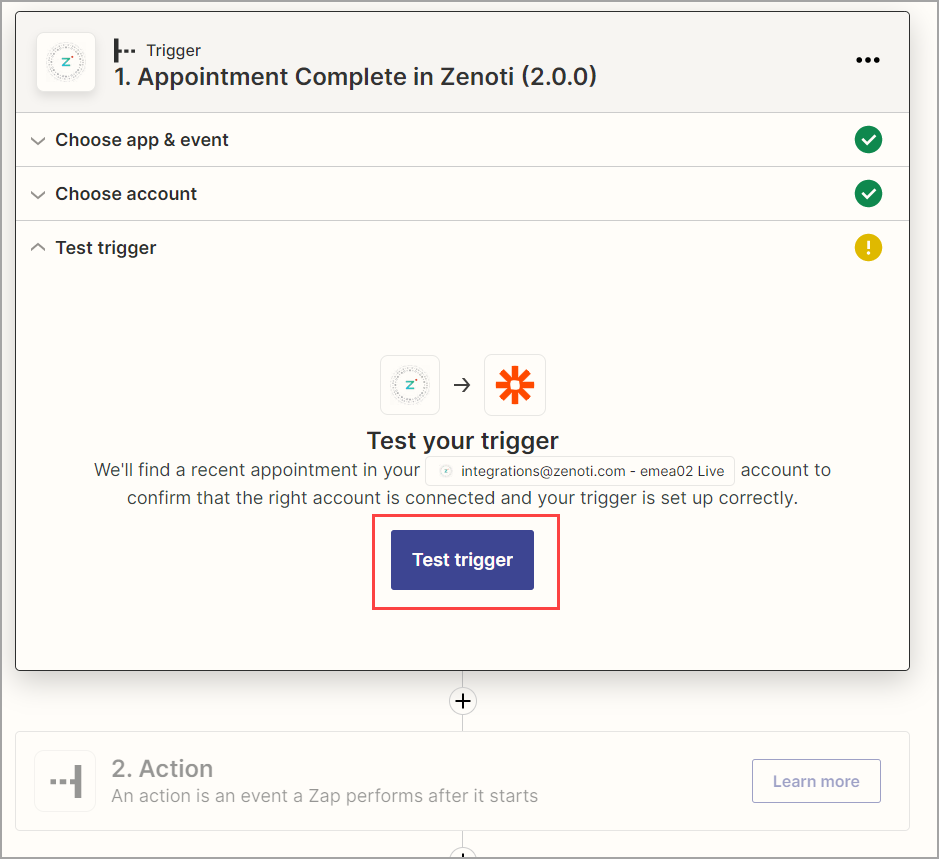
To test if the trigger is working, click Test trigger .
Zapier will search for a recent corresponding event and show the details of it. For example, if you choose the event as Guest Create, Zapier will search for this event and show the details accordingly.
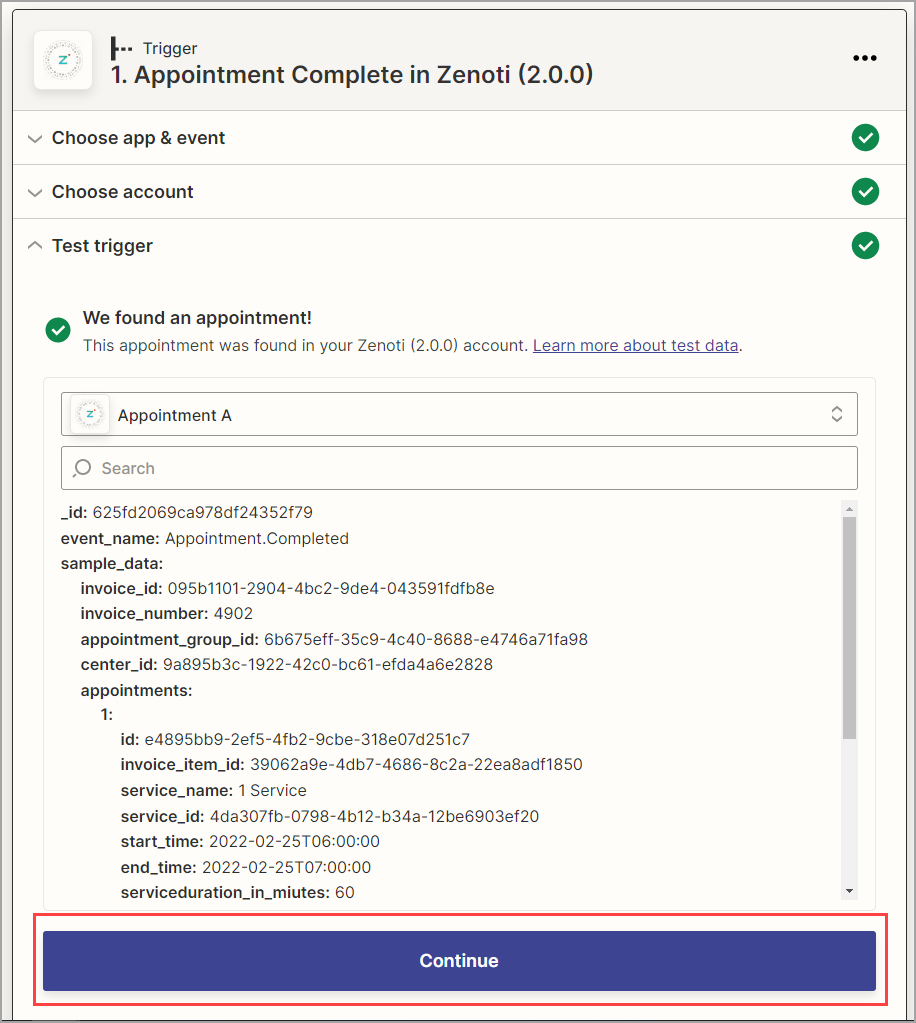
Click Continue.
The Action section appears.
Here you must add an automated action that occurs when an event is triggered.
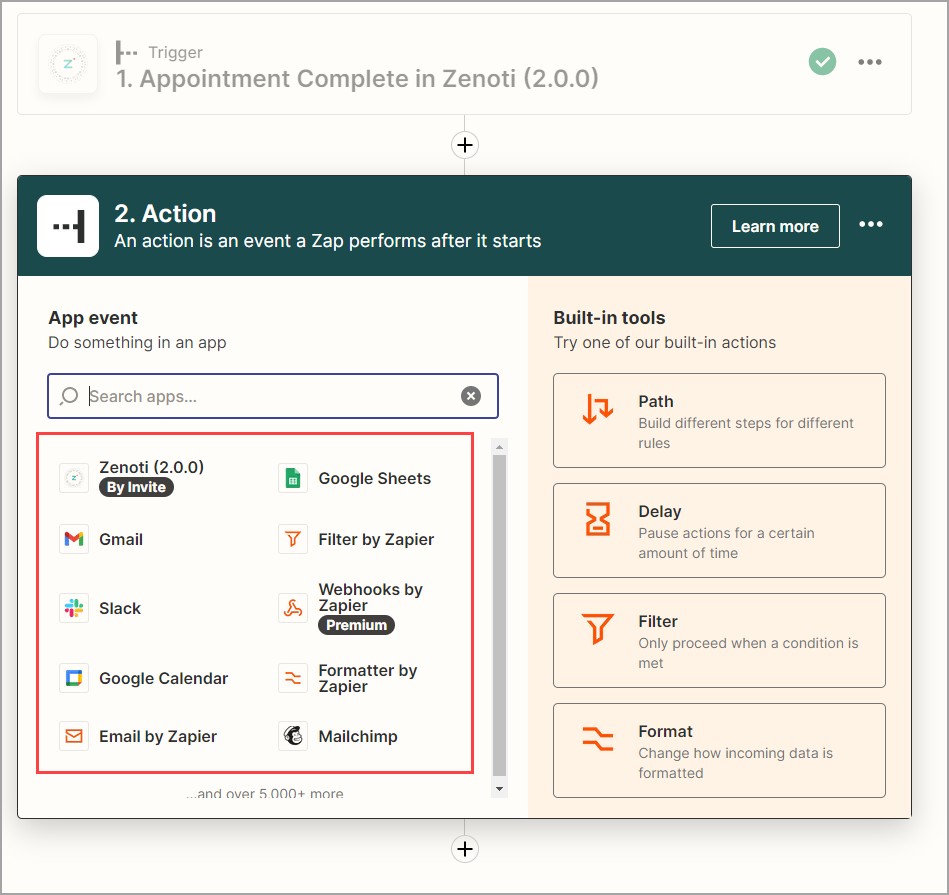
Select the actions that are automated by third-party apps. Some of them are:
Gmail
Slack
Google Calendar
Google Sheets
Mailchimp
Third-party apps will allow you to create a workflow, to complete an action. For example, if you select Guest Create as a trigger, and if you select Gmail as a third-party action, you must specify if Gmail must send a welcome email to the guest or create a draft email for you to verify.
Note
Third-party actions require you to log in to the respective services. For example, if you select Gmail, you must log in to the appropriate Gmail account.
After you create the action and test it, click Publish Zap.
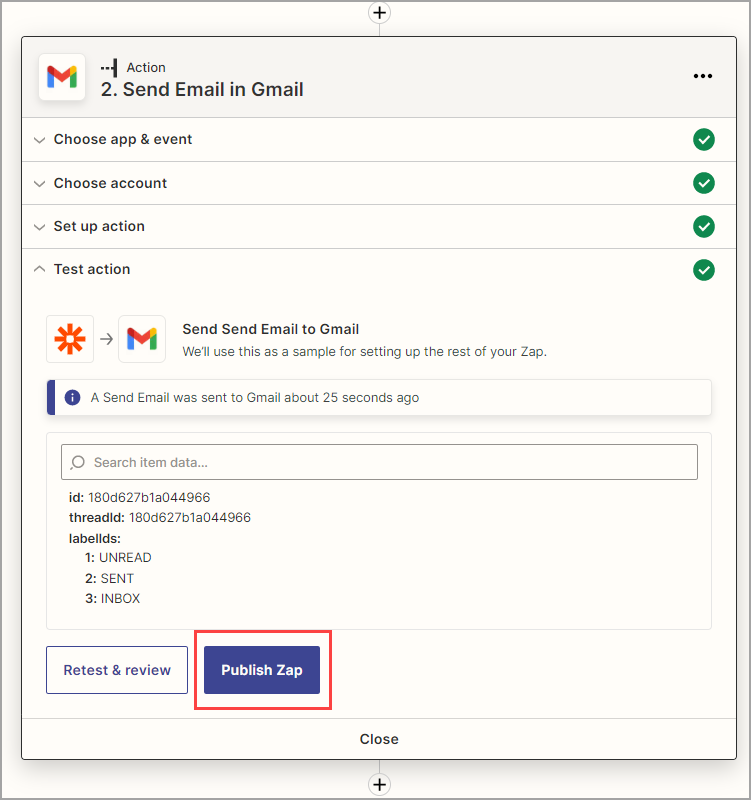
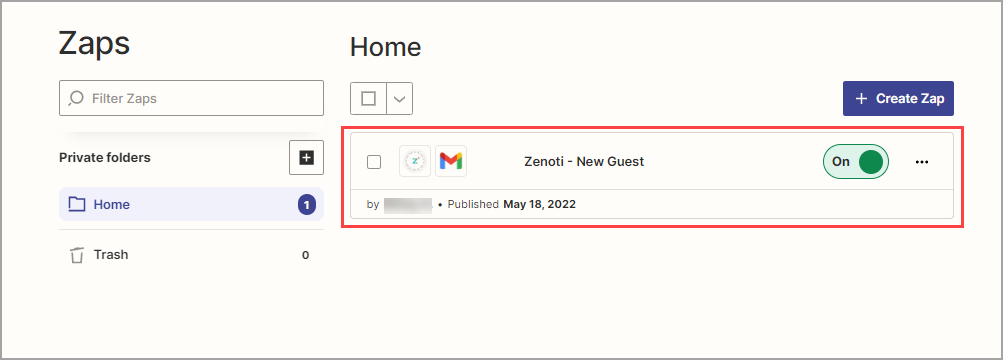
The workflow is created. You can see the created workflow on your homepage.
Center-level access
Zapier integrations can be created and managed at the center level without requiring brand-level permissions. This allows center owners to:
Build custom workflows specific to their operations
Automate tasks such as appointment follow-ups, membership renewals, staff notifications, or inventory updates
Connect Zenoti with apps like Gmail, Slack, Google Sheets, Mailchimp, and more
Maintain brand governance while giving centers the autonomy to run their own automation
Supported events and actions
Zaps are workflows that connect your apps to automate repetitive tasks. A trigger is an event that starts a Zap, and an action is an event a Zap performs.
Supported events
Event or Trigger | Description |
|---|---|
Appointment Complete | Triggers an event when an appointment is completed in Zenoti. |
Appointment Group Create | Triggers an event when an appointment is created in Zenoti. |
Appointment Group Status | Triggers an event when an appointment status is changed in Zenoti. |
Appointment Start | Triggers an event when an appointment is started in Zenoti. |
Class Booking Approve | Triggers an event when a class booking is approved in Zenoti. |
Class Booking Cancel | Triggers an event when a class booking is cancelled in Zenoti. |
Class Booking Create | Triggers an event when a class booking is created in Zenoti. |
Class Booking Delete | Triggers an event when a class booking is deleted in Zenoti. |
Class Booking No Show | Triggers an event when a class booking is marked as no-show in Zenoti. |
Class Booking Reject | Triggers an event when a class booking is rejected in Zenoti. |
Class Schedule Cancel | Triggers an event when a class schedule is cancelled in Zenoti. |
Class Schedule Create | Triggers an event when a class schedule is created in Zenoti. |
Class Schedule Update | Triggers an event when a class schedule is updated in Zenoti. |
Employee Create | Triggers an event when an employee is created in Zenoti. |
Employee Delete | Triggers an event when an employee is deleted in Zenoti. |
Employee Update | Triggers an event when employee details are updated in Zenoti. |
Guest Create | Triggers an event when a guest is created in Zenoti. |
Guest Delete | Triggers an event when a guest is deleted in Zenoti. |
Guest Membership Cancel | Triggers an event when a guest membership is cancelled in Zenoti. |
Guest Membership Create | Triggers an event when a guest membership is created in Zenoti. |
Guest Membership Freeze | Triggers an event when a guest membership is frozen in Zenoti. |
Guest Membership Reinstate | Triggers an event when a cancelled guest membership is reinstated in Zenoti. |
Guest Membership Unfreeze | Triggers an event when a frozen membership is unfrozen in Zenoti. |
Guest Merge | Triggers an event when a guest is merged in Zenoti. |
Guest Update | Triggers an event when guest information is updated in Zenoti. |
Invoice Closure | Triggers an event when an invoice is closed in Zenoti. |
Room Blockout Create | Triggers an event when a room blockout is created in Zenoti. |
Room Blockout Update | Triggers an event when a room blockout is updated in Zenoti. |
Room Blockout Delete | Triggers an event when a room blockout is deleted in Zenoti. |
Employee Blockout Create | Triggers an event when an employee blockout is created in Zenoti. |
Employee Blockout Update | Triggers an event when an employee blockout is updated in Zenoti. |
Employee Blockout Delete | Triggers an event when an employee blockout is deleted in Zenoti. |
Supported actions
Action | Description |
|---|---|
Create guest | Creates a guest in Zenoti via a Zap when a guest is created in your HR system. |
Create opportunity | Creates an opportunity in Zenoti via a Zap when an opportunity is created in your HR system. |
Search for a guest | Searches for the nearest guest in Zenoti via a Zap based on the search fields supplied as the query parameters. You should provide at least one search field and the value should contain at least 3 characters or 3 digits. |
Search guest by ID | Fetches the guests from Zenoti via a Zap using guest ID. If you use search with a Zenoti trigger, this is the preferred way to search for a guest over the standard guest search. |
Find or create guests | Searches for the nearest guest in Zenoti via a Zap based on the search fields supplied as the query parameters. You should provide at least one search field and the value should contain at least 3 characters or 3 digits. |
Find guest by ID or create guest | Fetches the guest from Zenoti via a Zap using the guest ID. If you use search with a Zenoti trigger, this is the preferred way to search for a guest over the standard guest search. |
Create employee | Creates an employee record or profile in Zenoti via a Zap when an employee record is created in your HR system. |
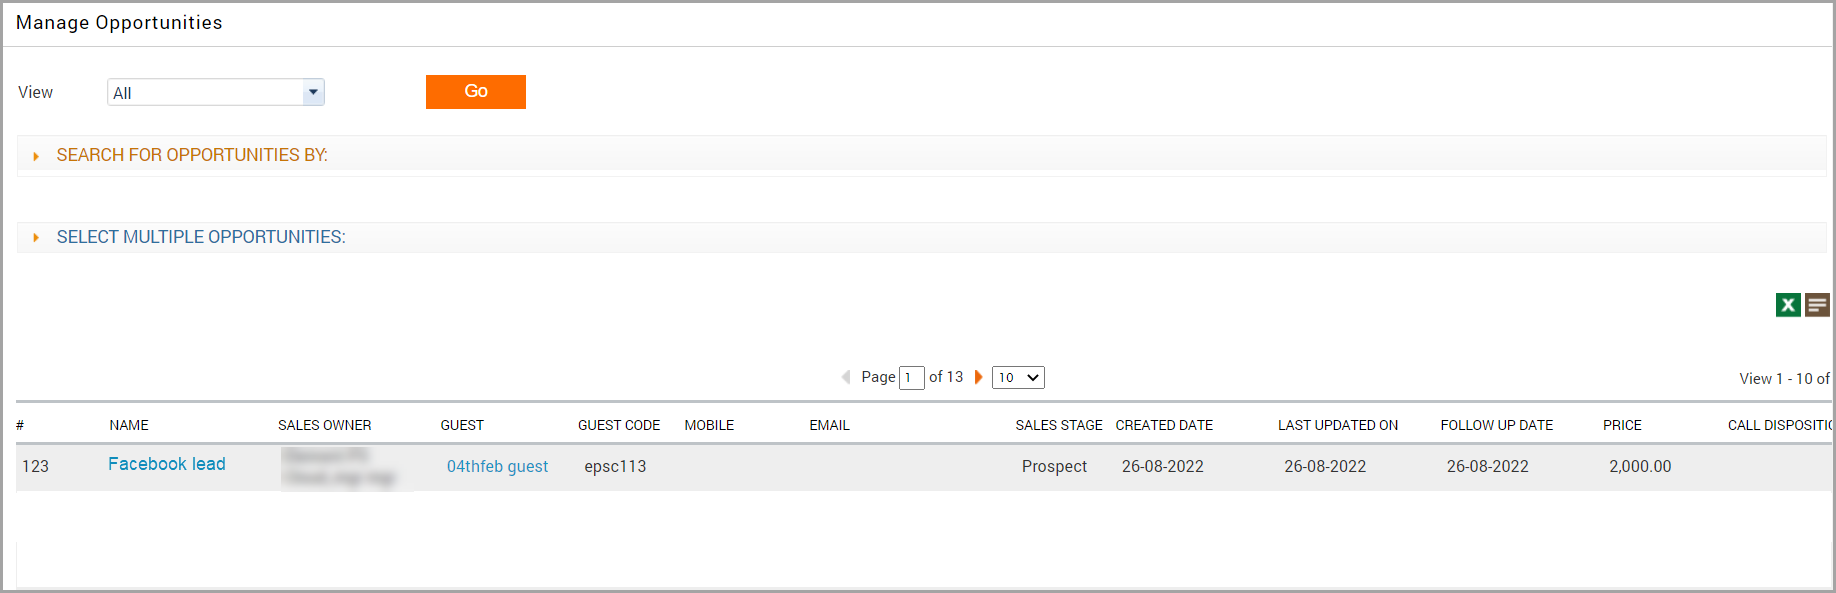
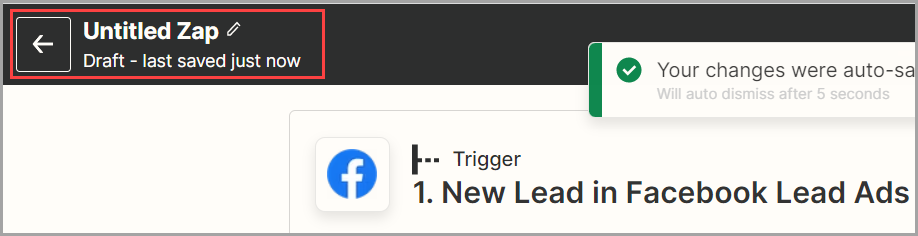
Convert Facebook leads to opportunities in Zenoti using Zapier
Facebook leads or leads from any social media form an integral part of the lead generation process. Such leads can be converted to opportunities in Zenoti, eventually improving your sales and growing your customer base. However, to convert each lead to an opportunity manually in Zenoti is a tedious process and may take time.
To overcome this issue, you can use the Zenoti - Zapier integration to automatically create an opportunity in Zenoti when a Facebook lead is generated; this cuts down the time to create an opportunity by automating the process and allowing the sales team to focus on generating more leads.
Prerequisites
To use this integration, you must subscribe to the Zenoti API package. Reach out to your CSM to enable the package.
Zapier is a paid subscription, and you must be on the premium plan to use this feature.
Log in to Zapier using your credentials.
On the Zapier Dashboard, click the search icon.
In the search box, enter Zenoti.
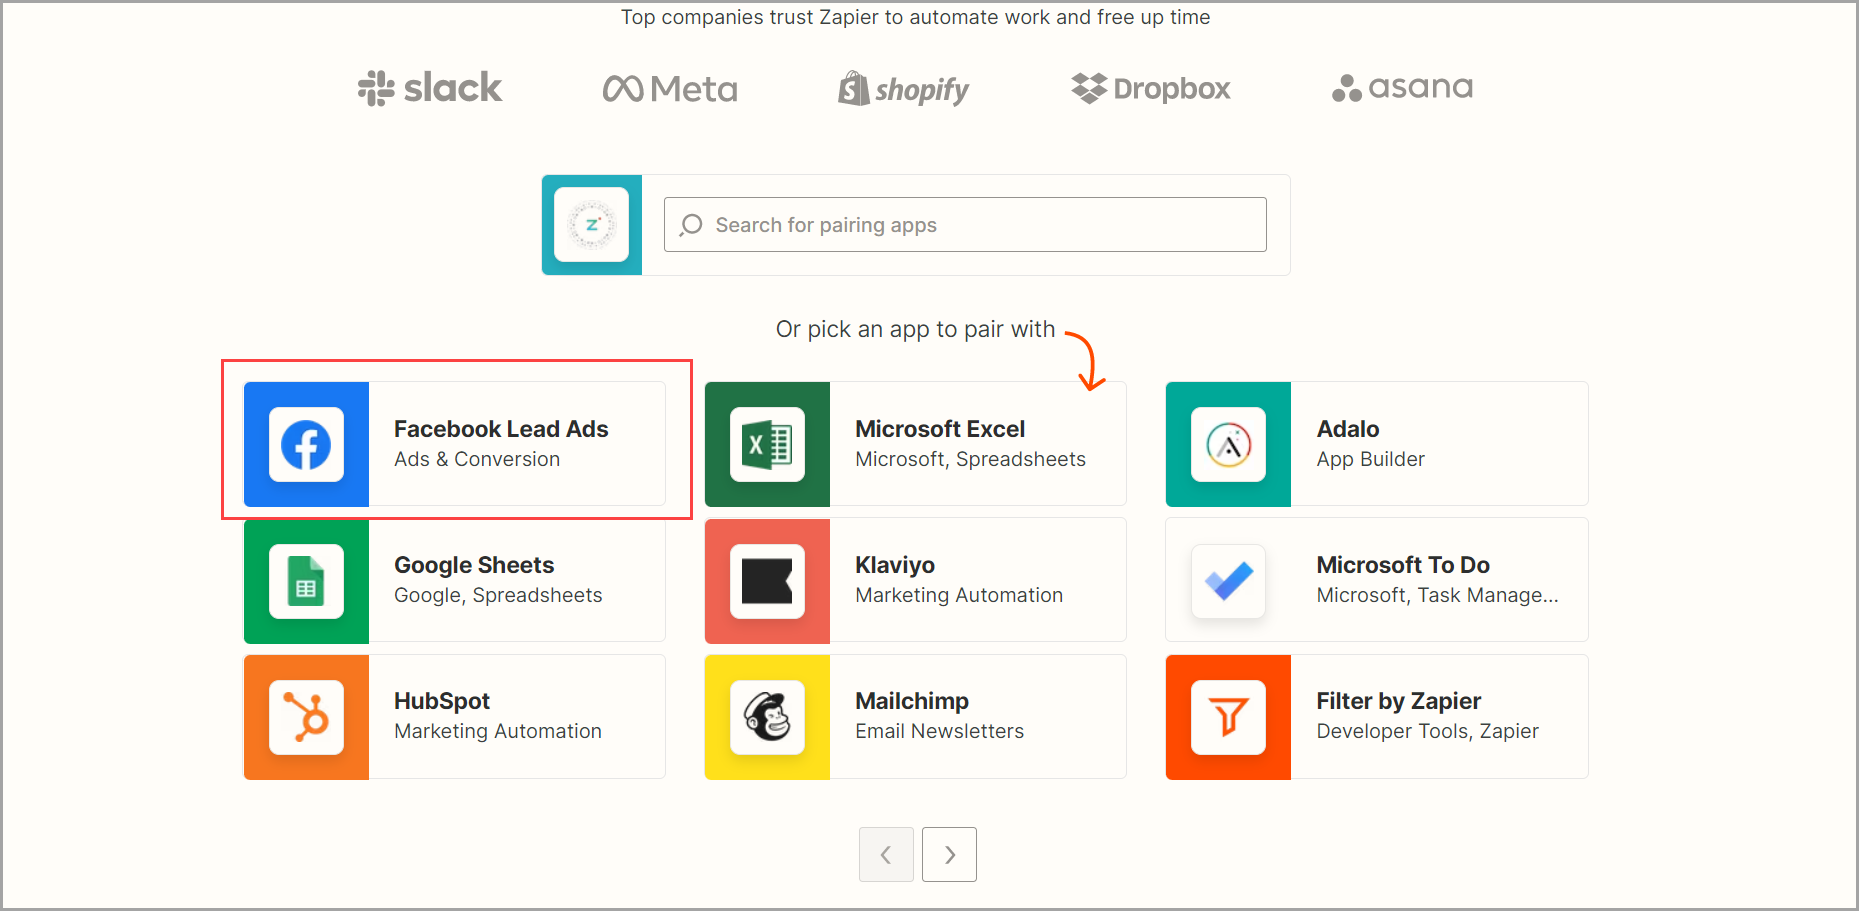
Select the Zenoti app

On the Zenoti Integrations page, select Facebook Lead Ads option. Note: This is a premium feature of Zapier.
Click the Connect Zenoti + Facebook Lead Ads button.
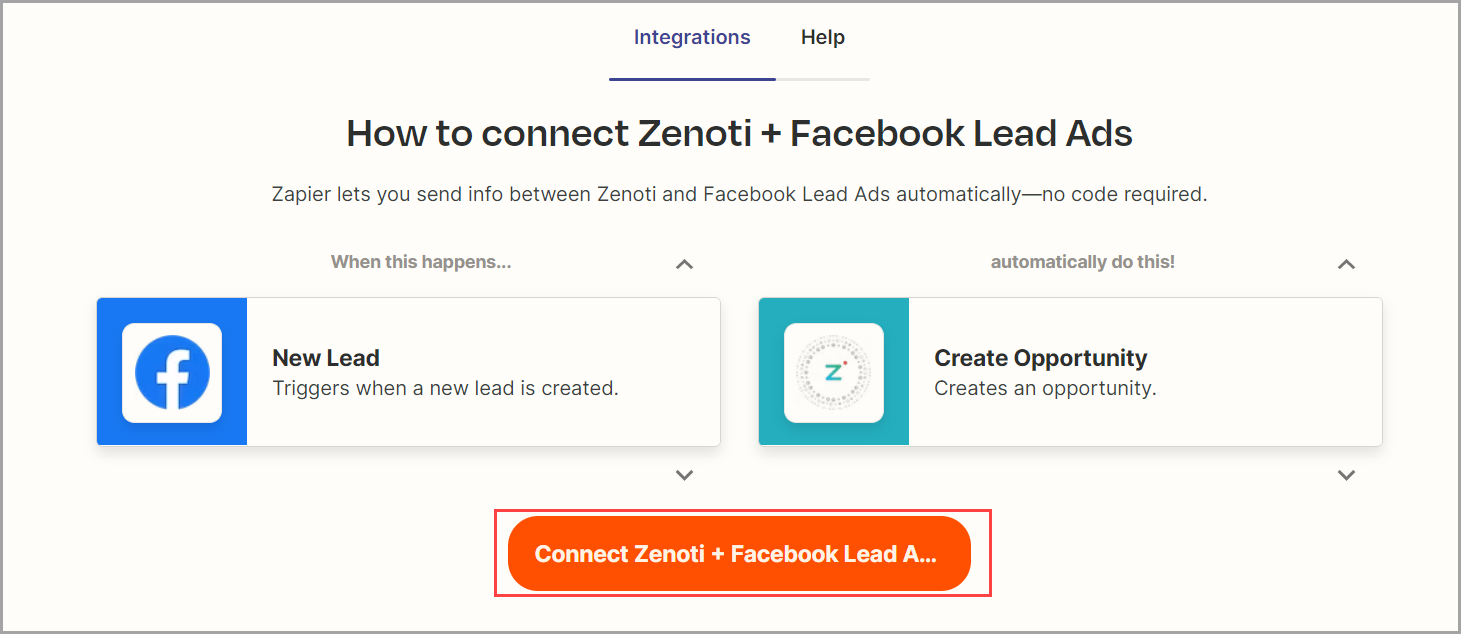
Give a name to the zap.
In the Trigger section for Connect Facebook Lead Ads, click Sign in.
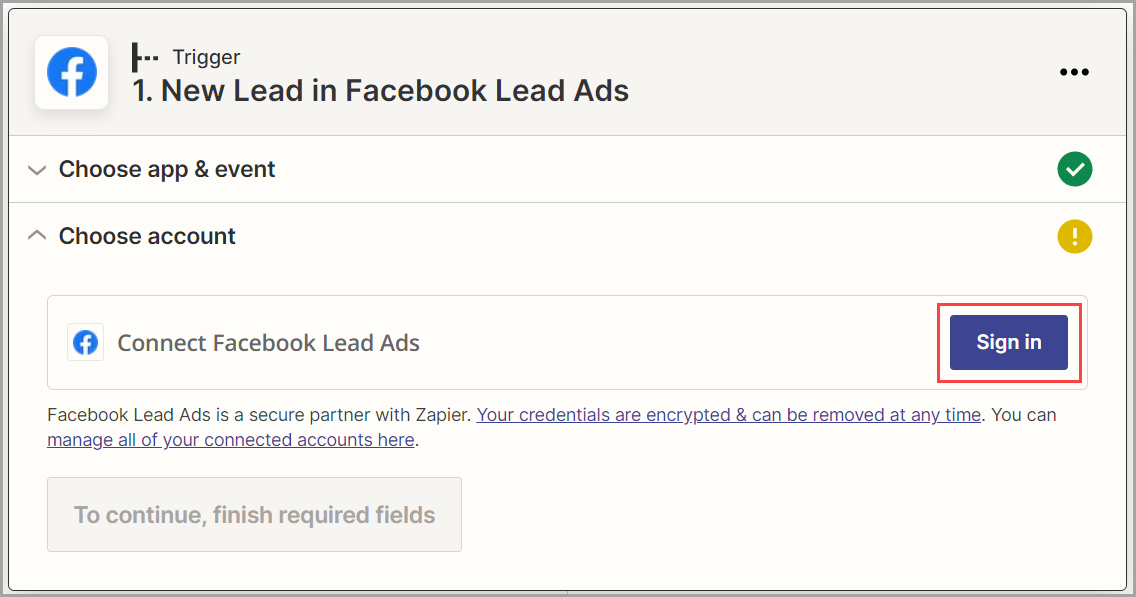
Connect Zapier to your Facebook business account.
Click Continue.
In the Set up trigger section, add the following details:
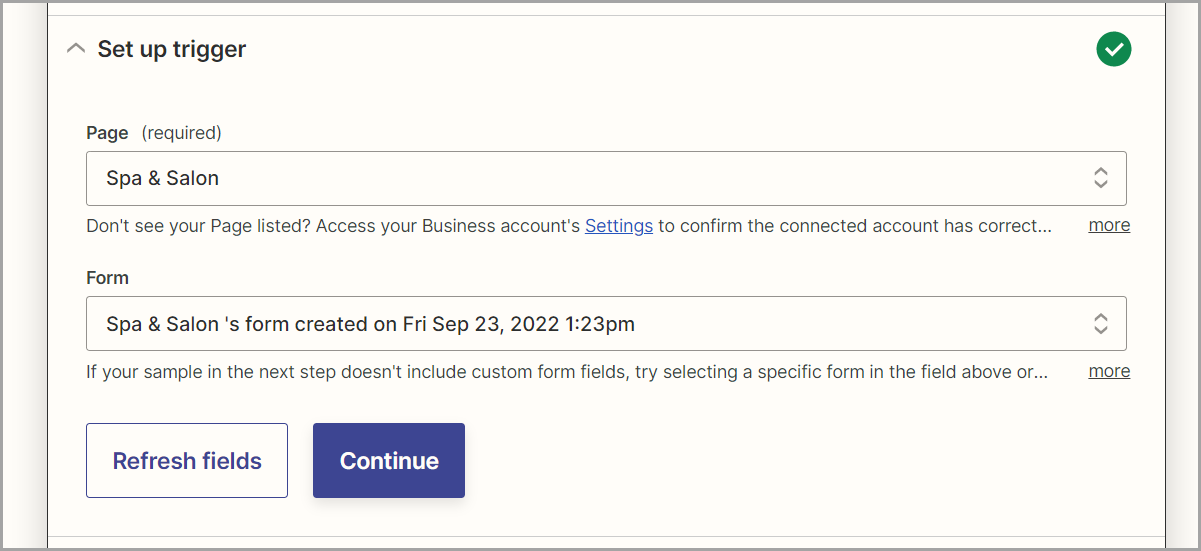
Page: From the drop-down list, choose your business’ Facebook page.
Form: From the drop-down list, select the form you’ve created to capture leads on Facebook.
Click Continue. Zapier will run a test and find the last registered lead on Facebook and display the same.
View the lead and click Continue.
In the Choose account section, choose your Zenoti account and click Continue.
Note: To log in, use your Zenoti credentials.
In the Set up action section, from the drop-down list, select the following:
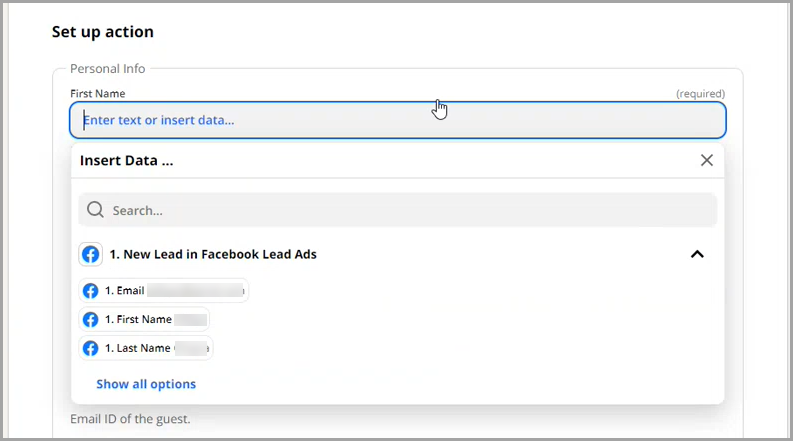
First Name
Last Name
Email addressThese are the details of the lead generated on Facebook.
For Center ID, from the drop-down list, select your center. This is the center where the opportunity gets created.
Select the Create Zenoti Guest if it doesn’t exist yet? checkbox.
For the number field, from the drop-down list, select the phone number of the guest.
Click Continue.
In the Test Action section, click Test & Continue. Zapier will now try to connect to Zenoti and find the guest with the name given above.
Note: In the next step, you must enter the details of the opportunity that must be created. You may be asked to provide your Zenoti credentials again.
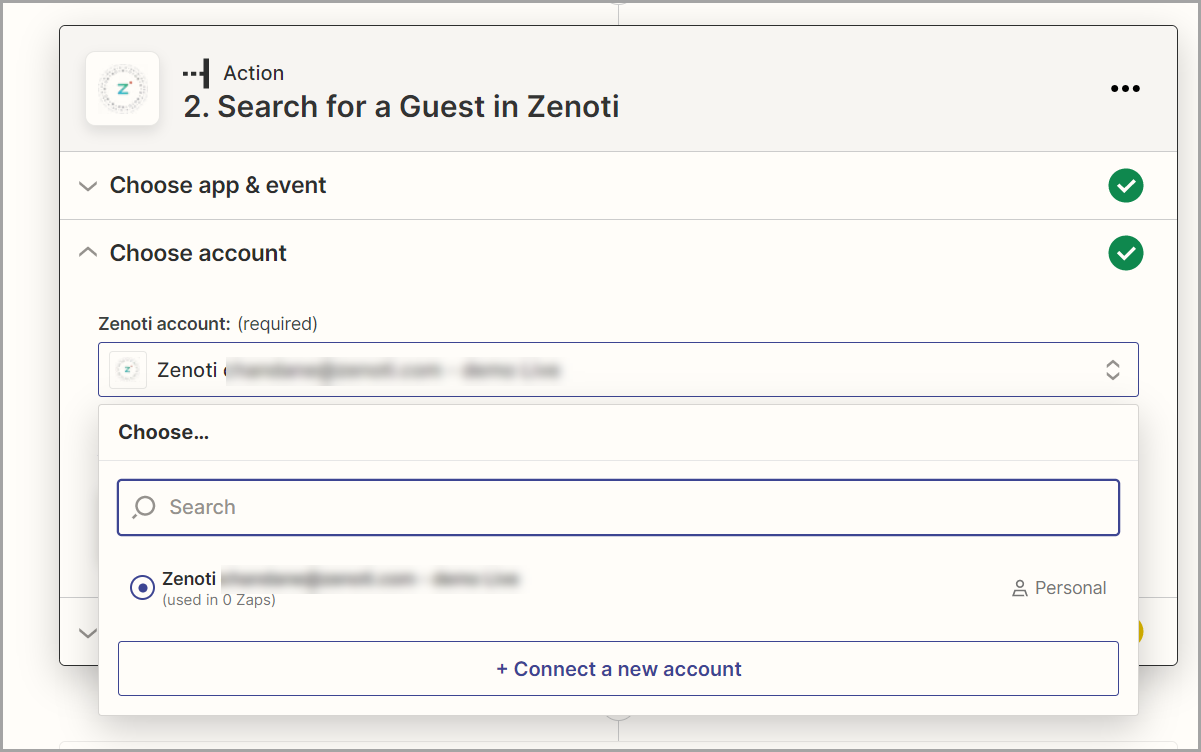
In the Choose Account section, select your Zenoti account.
In the Set up action section, select the Search for a guest in Zenoti option.
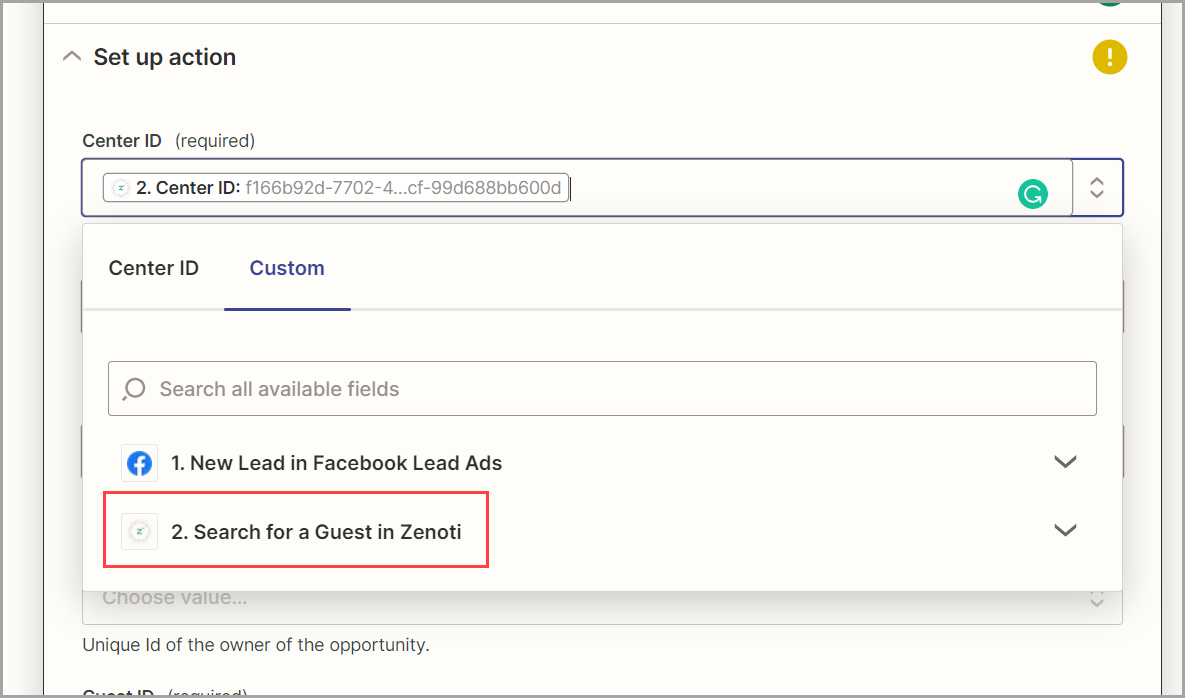
For the Employee field, from the drop-down list, select your employee. Zapier will assign this lead to the selected employee for follow ups.
Click Continue.
25. Click Test & Continue. Zapier will now send the lead info to Zenoti and create a new opportunity. If the test is successful, you will see a confirmation.
26. Click Publish Zap.

The Zap is published and is live. Every time a lead is generated in Facebook, an opportunity is created automatically in Zenoti.