Calling
Make a Call
HyperConnect allows users to initiate calls through multiple methods: the main dialer, search bar, and chat.
Note
Currently, HyperConnect does not support international calling.
To place a call from the main dialer:
Launch HyperConnect.
Click the Conversations icon.
On the Timeline, click the + icon and select Call.
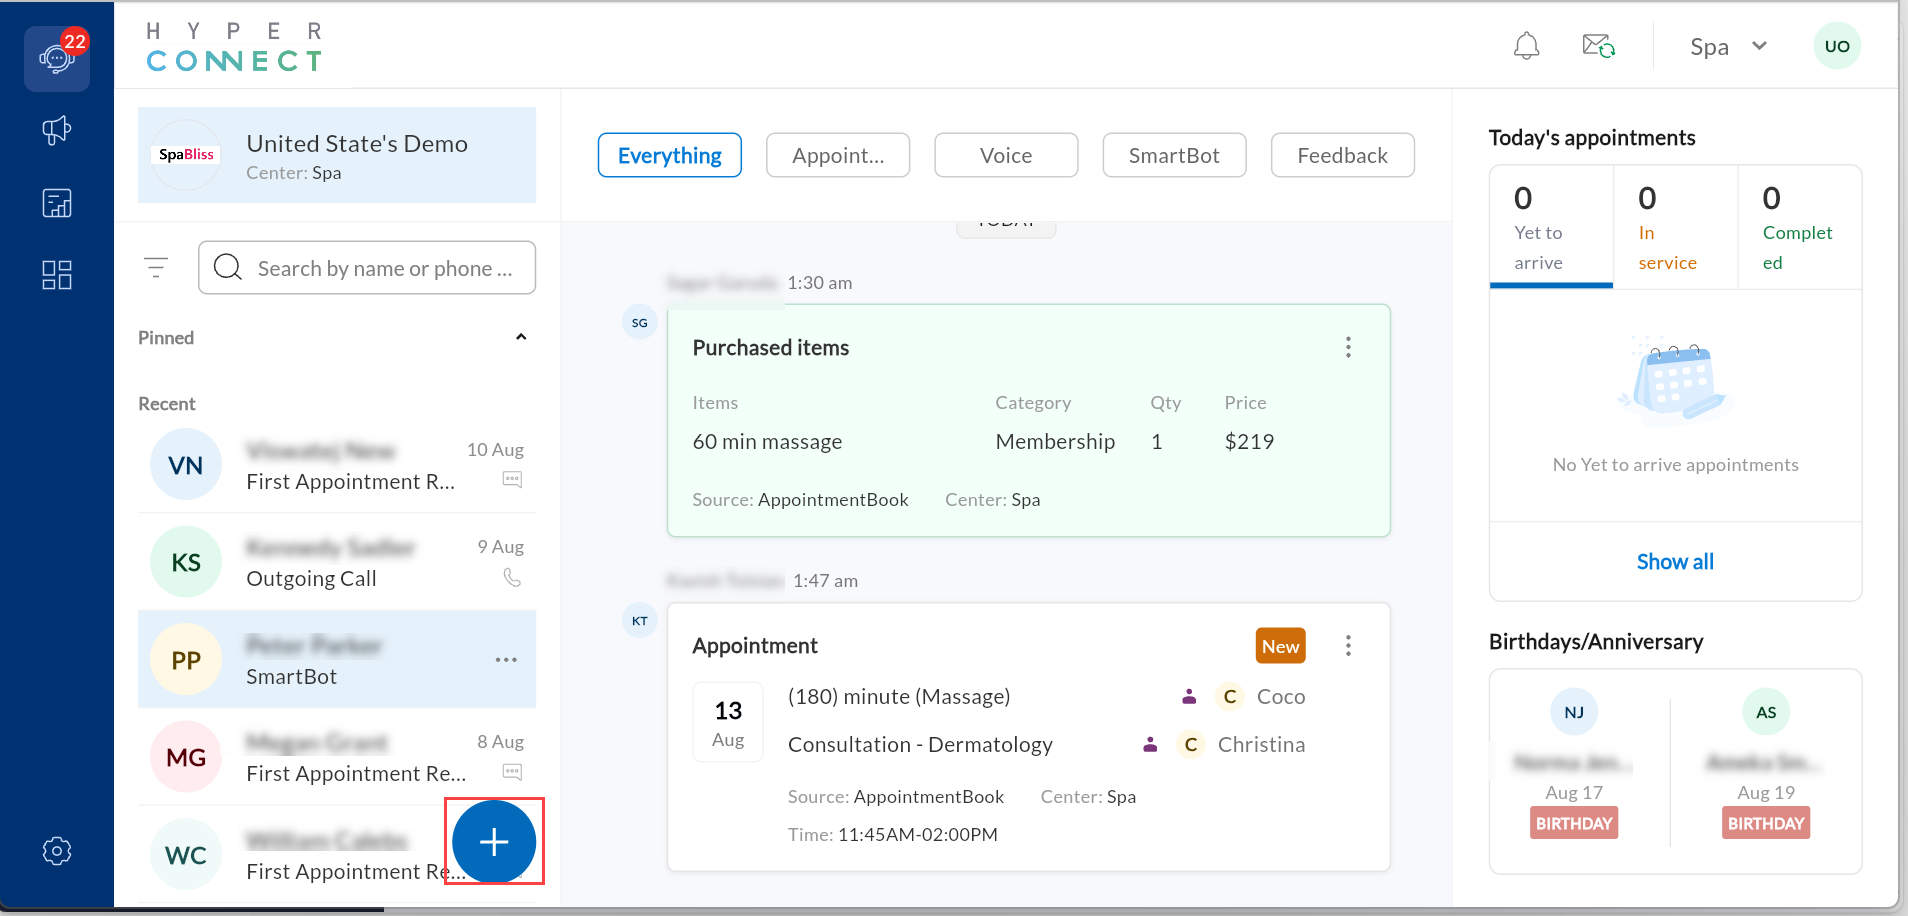
Select the country code and enter the guest's phone number.
Click Call.
To make a call from the chat:
Launch HyperConnect.
Click the Conversations icon.
Select the guest you wish to call.
Click the phone icon in the chat history.
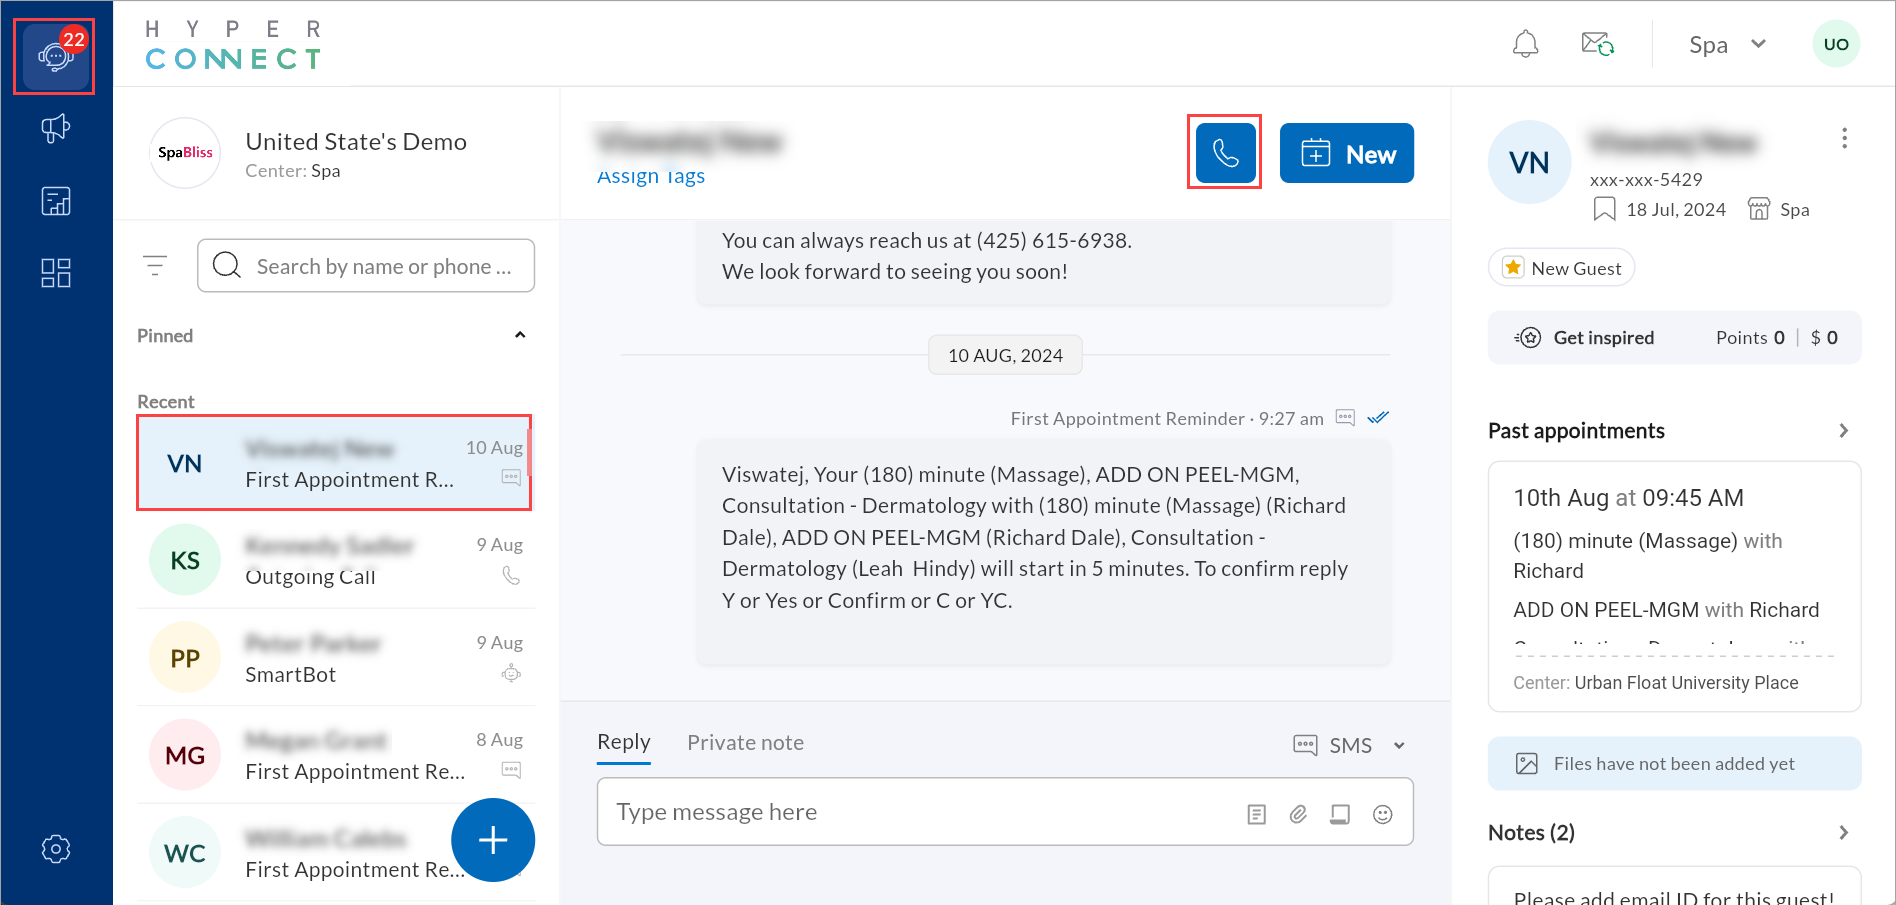
To make a call from the search bar:
Launch HyperConnect.
Click the Conversations icon.
In the left sidebar, search for the guest’s name or phone number.
Select the guest from the search results.
Click the phone icon in the chat history.
Note
During an active call, click the Mute icon to silence your microphone.
Answer or Decline a Call
When a call comes in, a notification appears on all selected devices.Accept the call with a tap or click, and you're connected.
Select Answer to pick up, or Decline to ignore the call.
Park a Call in HyperConnect
This article explains how front-desk staff and support teams can use the Call Parking feature in HyperConnect to manage incoming calls efficiently.
Overview
The Call Parking feature in HyperConnect provides a seamless way for spas, salons, and wellness centers to manage high call volumes. Instead of placing customers on a traditional hold, staff can "park" the call in a virtual slot, making it accessible to other authorized team members from any Zenoti Voice-enabled device including the Zenoti Mobile App.. This ensures a professional experience for clients and improves operational flow without missing critical calls.
Example: Your front-desk associate receives a call from a guest who wants to change an appointment but needs confirmation from a specific therapist. The associate parks the call in slot *202, notifies the therapist through Zenoti chat or an internal extension, and the therapist retrieves the call directly from their own device or the Zenoti Mobile App.
Key Benefits
Enhanced Guest Service Avoid sending callers to voicemail, park calls so any available team member can respond quickly.
Flexible Call Management: Parked calls can be retrieved from any location or device, including desktop phones and the Zenoti Mobile App, reducing wait time and physical movement across the premises.
Boosted Staff Productivity: Eliminate the need for cold transfers. Parked calls notify all agents in the group, allowing for better preparation and fewer interruptions.
Reduced Hold Times: Parked calls can be retrieved faster, shortening wait times and improving customer satisfaction. While on hold, businesses can play custom audio to inform guests of their queue status.
Prerequisites
Devices must be rebooted after enabling the call parking feature.
How it works
If call parking is enabled and an agent needs to pause or transfer an active call, they can place it into a temporary virtual extension. Once the call is parked:
The caller is placed on hold in a virtual slot(Example: *202)
The caller hears the business’s on-hold message or music.
A notification appears on all Zenoti Voice-enabled devices belonging to the designated call park group.
Any authorized user can dial the park number (Example: *202) from a Zenoti Voice-enabled device or the Zenoti Mobile App to retrieve the call.
Place a Call on hold in HyperConnect
The call hold functionality in HyperConnect provides efficient call management, helping your team stay in control of incoming calls without missing opportunities. With this feature, front-desk staff can handle multiple calls seamlessly, ensuring uninterrupted customer support.
Key features:
Receive notifications for up to 10 incoming calls through a call-waiting tone and a detailed caller ID display without interrupting the ongoing conversation.
Place and resume calls using the "Hold" and "Resume" buttons on the dialpad.
Automatic hold when switching between calls.
If a staff has one call on hold and one in progress, additional incoming calls will be routed to other available agents.
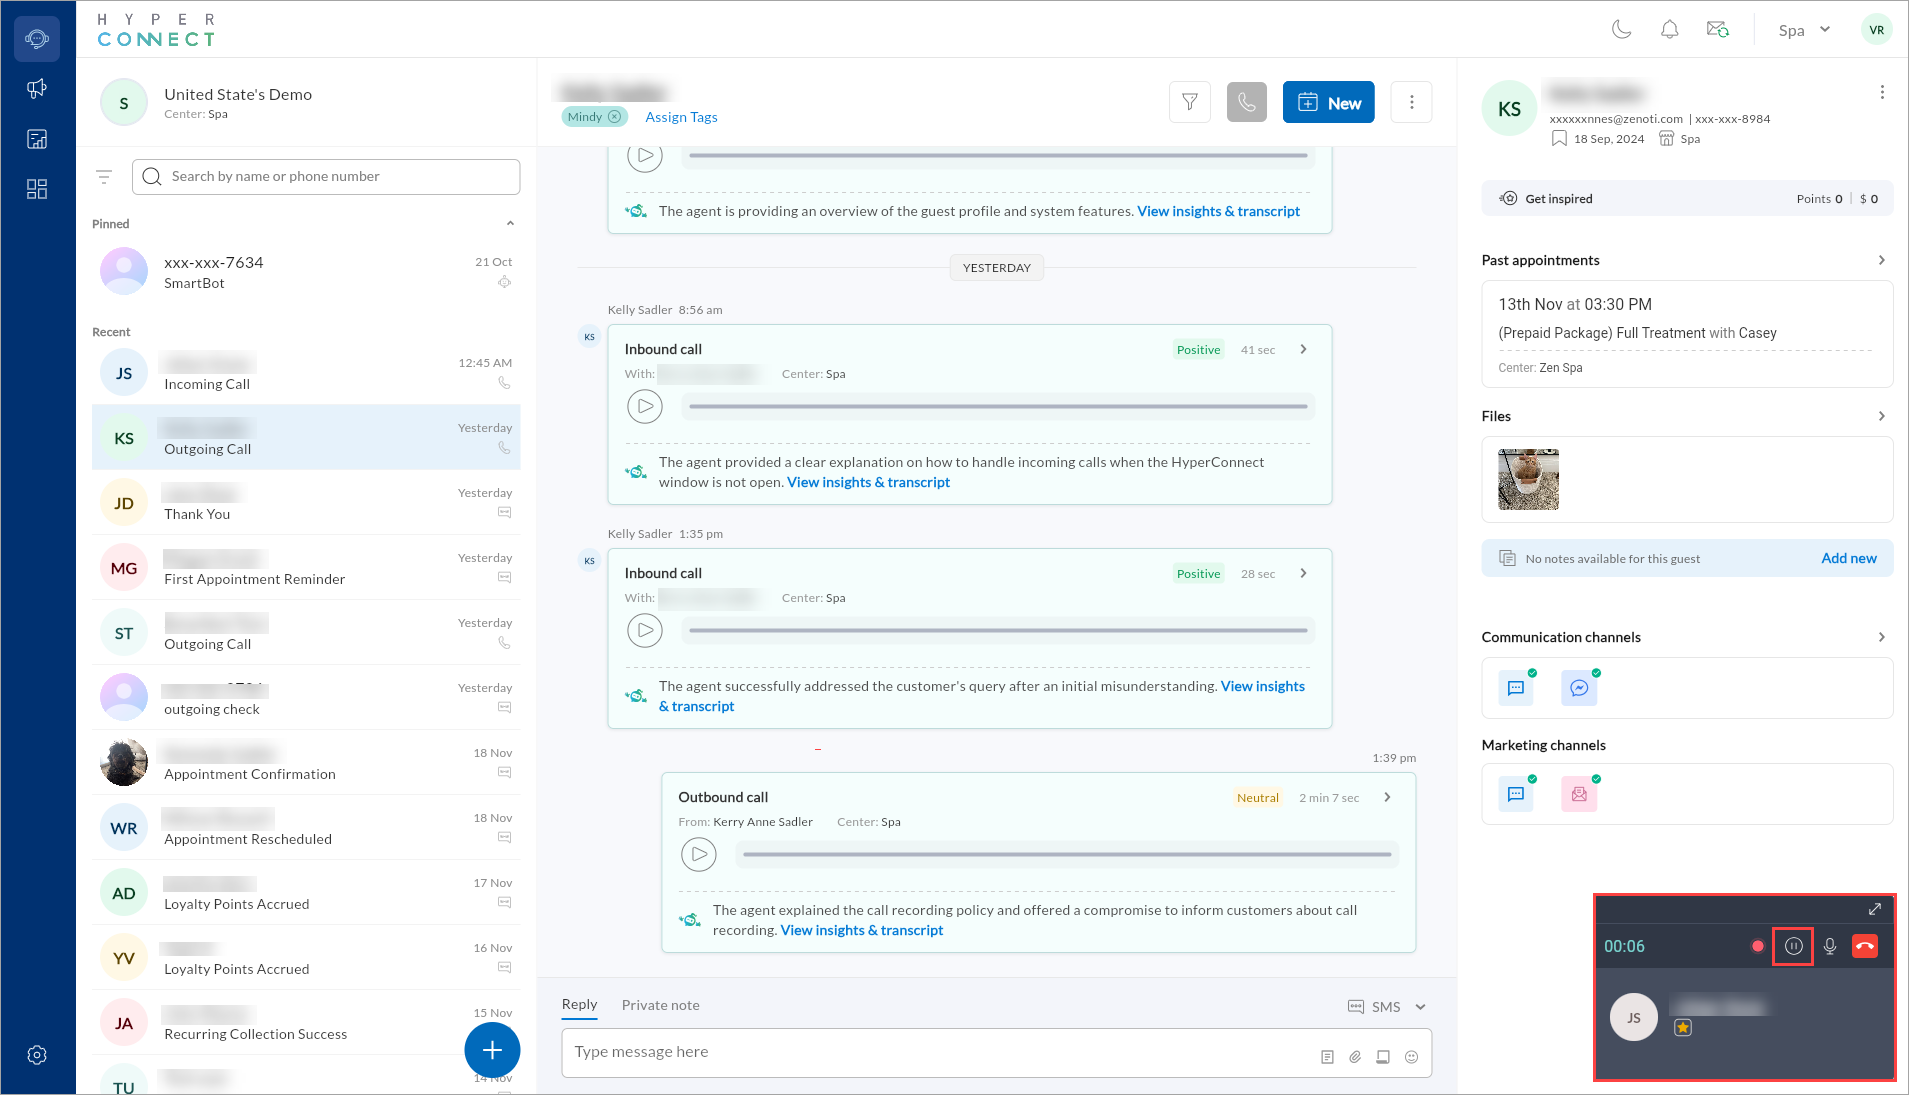
Using Call Hold
To place a call on hold:
While on a call, tap the "Hold" button on the screen.
To resume a call:
Tap the "Resume" button to return to the paused conversation.
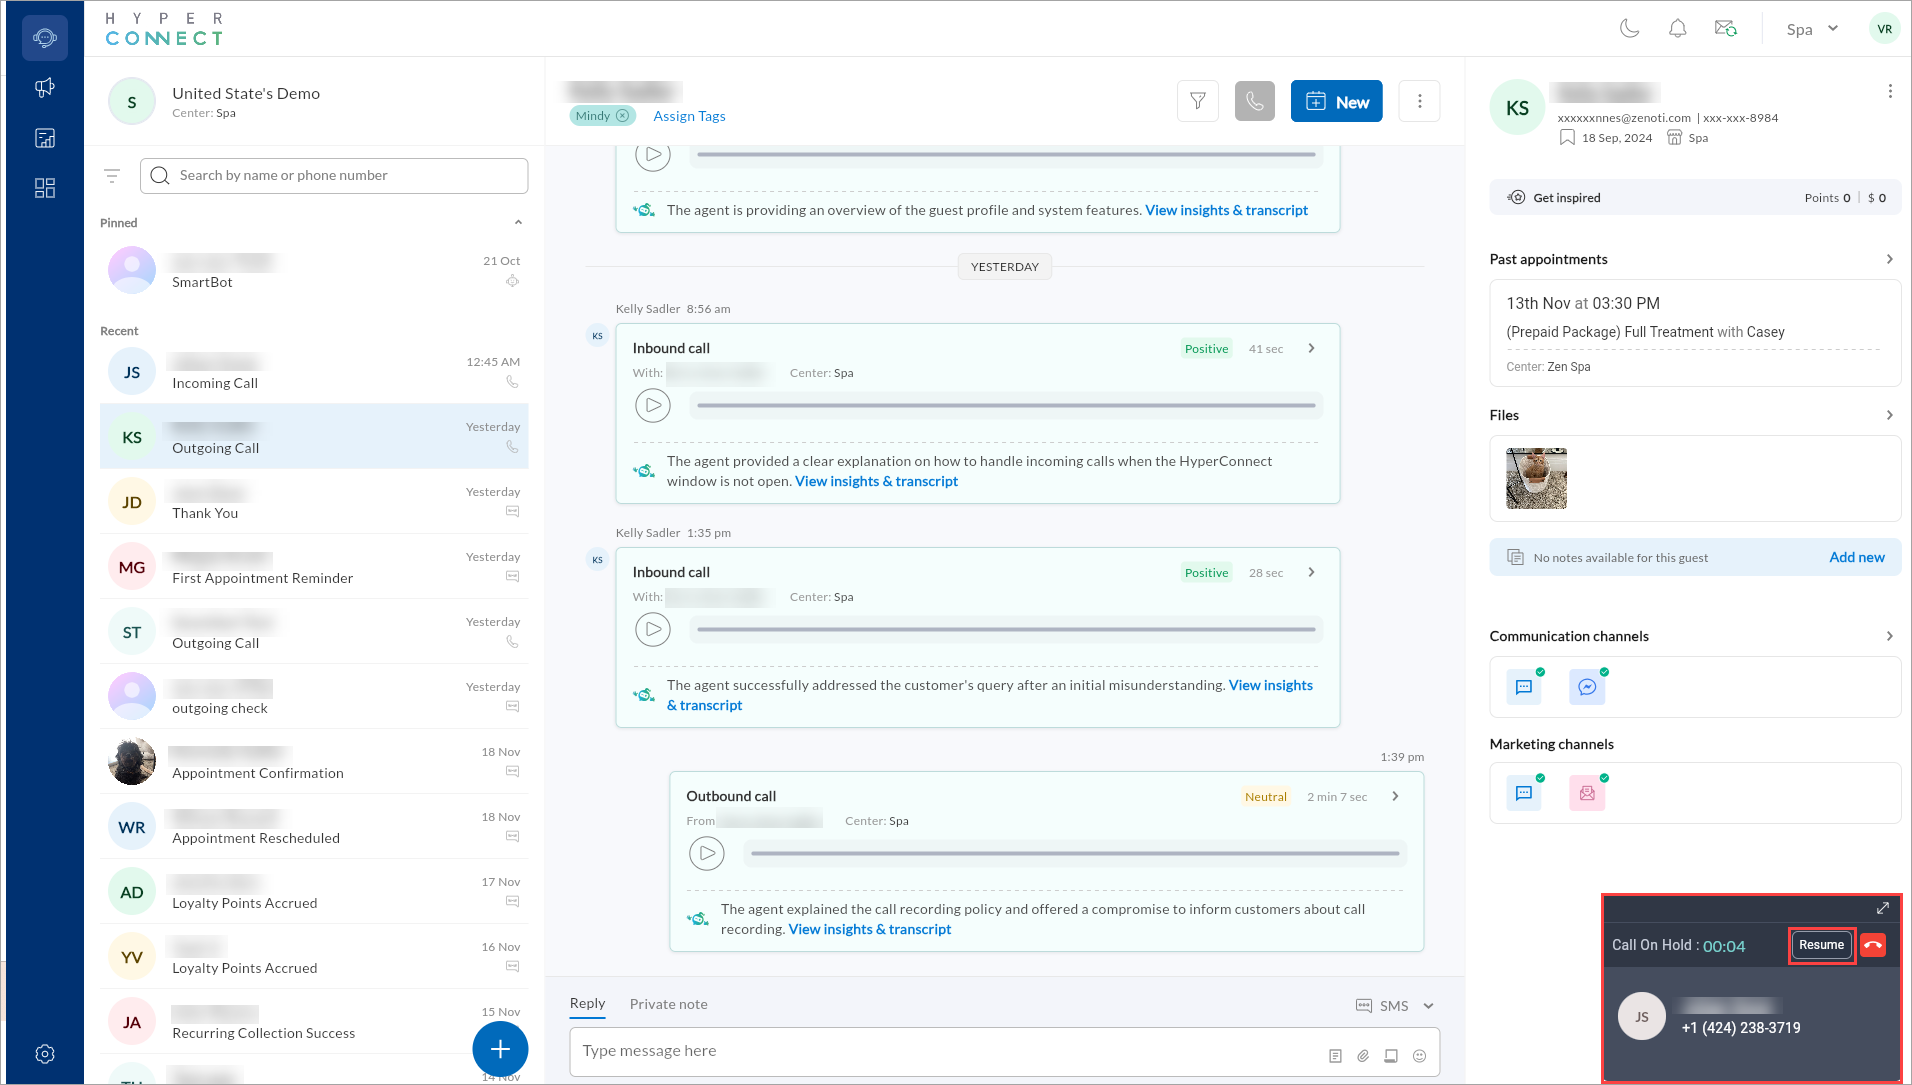
Manage multiple calls:
When resuming a held call, the current active call is automatically placed on hold.
Transfer or Forward Calls
Users can transfer a call to another team member for efficient call management and ensure that each caller is directed to the most appropriate person for their needs.
Launch HyperConnect.
During an active call, click the Transfer icon.
Search for and select the team member you want to transfer the call to.
The call will be redirected to the selected team member.
Access Call Transcript
Users can access the call transcript from either the Call Logs or the business flow.
Access call transcript from business flow:
Launch HyperConnect.
Click the Conversations icon.
In the left sidebar, search for the guest’s name or phone number for which you want to check the call transcript.
Click the > icon in the conversation or click the View insights and transcripts link.
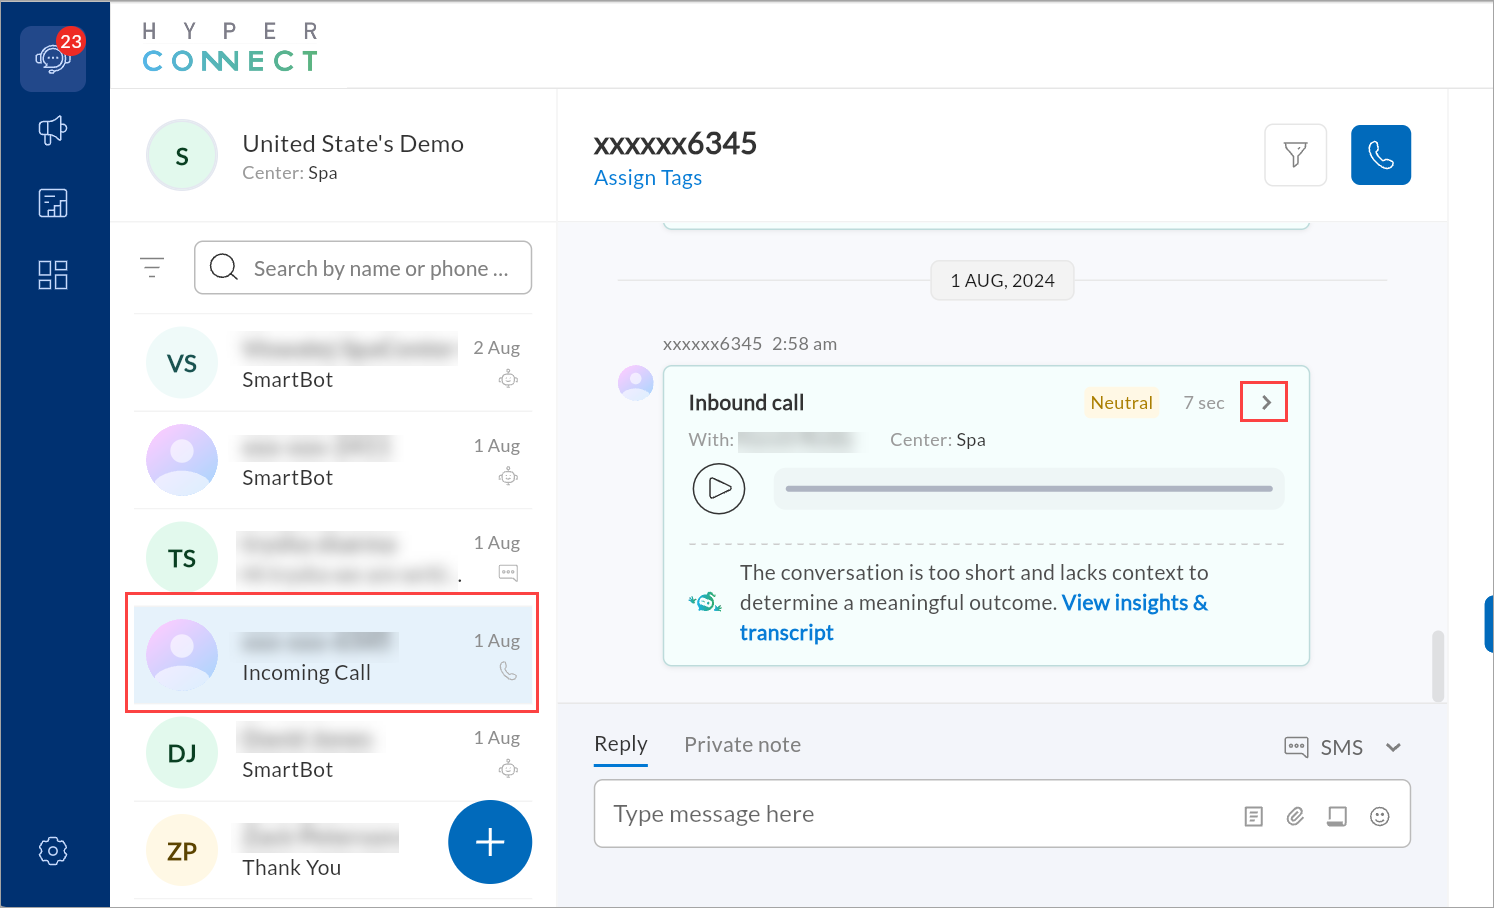
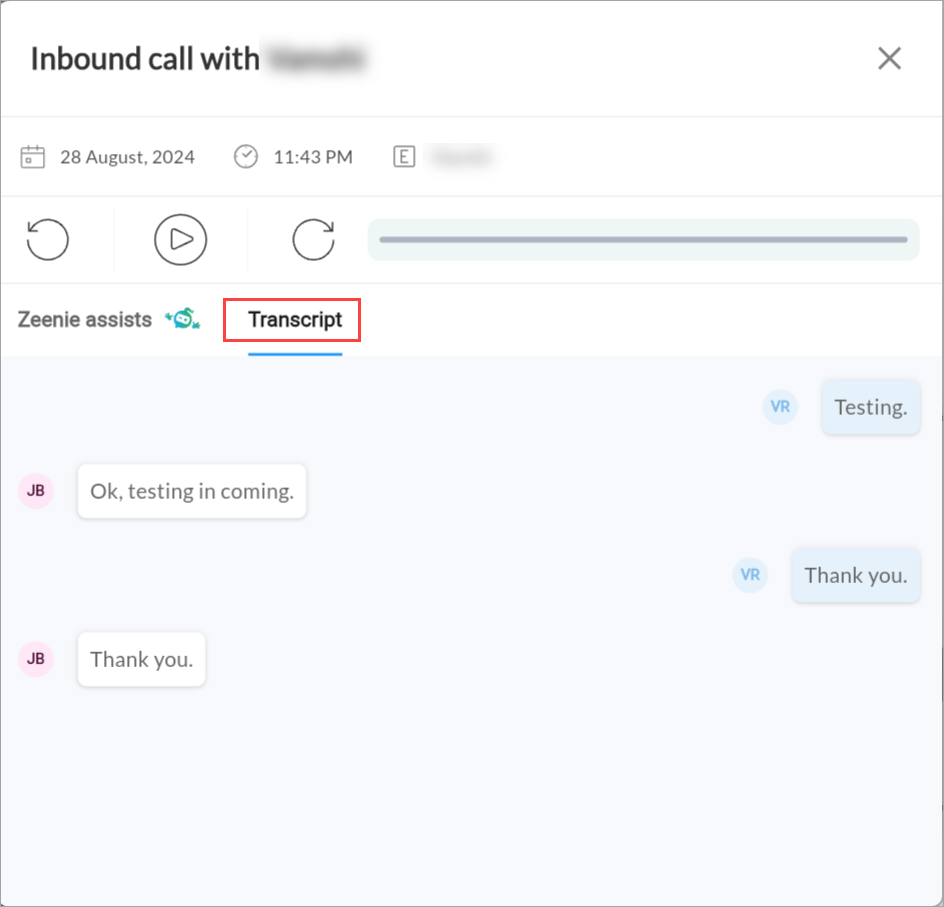
Select the Transcript tab.
Access call transcript from call logs
Launch HyperConnect.
Click the Call Logs icon.
From the available list, select the guest for which you want to check the call transcript.

Click View in the Transcript column and select the Transcript tab.
Note
To view call transcripts, ensure that the required permissions are enabled for you. Navigate to Organization > Security > Security Roles > Role Name > Zenoti HyperConnect.
Currently HyperConnect does not support downloading call transcripts.
Listen to Call Recordings
Call recordings are stored in call logs. Let's take a look at how to access your call recordings.
Launch HyperConnect.
Click the Conversations icon.
From the search bar, search for and select the guest.
Click the Play icon next to the call recording.
You can see details such as agent name, message length, and call sentiment.
Impacts and considerations:
To listen to a call recording ensure that the record incoming calls setting is enabled.
Note
International calling is disabled by default, and rates depend on the country you are calling. Reach out to expansionsales@zenoti.com for more information.
To manage spam calls, HyperConnect provides built-in spam filtering that automatically blocks unwanted calls and ensures that only genuine calls are received.
Currently, conference calling functionality is not supported by HyperConnect.
Mask Phone Number with Centralized Contact Number
This article explains how to use the Call Masking feature in HyperConnect to maintain brand consistency, protect staff privacy, and improve call tracking by displaying a unified phone number on all outgoing calls.
Overview
The Call Masking feature in HyperConnect allows your business to display a custom outgoing phone number instead of the actual number making the call.
This means that when a front-desk staff calls a guest, the guest sees the central business number (for example, your corporate contact center number) instead of the branch or user’s personal extension.
This helps maintain professionalism, brand consistency, and privacy, especially when calls originate from multiple Zenoti locations or users.
When call masking is enabled, guest contact information is also masked on call pop-ups and call-related screens within HyperConnect, ensuring sensitive details are not exposed to staff unnecessarily.
Key Benefits
Consistent Brand Identity : Display a single, recognizable phone number across all outbound calls to reinforce brand trust and avoid guest confusion, especially helpful for businesses with multiple locations.
Privacy Protection : Shield internal or personal phone numbers. Instead of a staff member’s direct line, guests see your selected business contact number.
Guest contact details are also masked on call pop-ups and screens when call masking is enabled, adding an extra layer of privacy protection.
Improved Guest Experience: Guests who miss a call and return it are routed to your main line, ensuring someone is always available to help, regardless of which location made the original call.
Simplified Call Management : A unified outbound number makes it easier to track and manage communication across your organization through centralized reporting and analytics.
How call masking works
When call masking is enabled, the actual outgoing number is replaced with a predefined display number, usually your contact center or main business line.
Here’s what happens during an outgoing call:
The front-desk staff initiates a call.
Zenoti checks your masking configuration and applies the selected display number.
The guest receives the call showing your masked number (e.g., +1 800 555 1234) instead of the caller’s direct number.
During the call, guest contact information appears masked on call pop-ups and related screens.
If the guest calls back, it routes to your central line, not the staff’s device.
This setup ensures guest-facing consistency and operational control over all communication.