Configure physical phone device
HyperConnect supports voice calling capability on multiple devices. It supports the following device configurations:
Soft phone - Calls will be accepted or made via the browser. Users will ideally require headphones to attend calls
Physical phones (VoIP) - Calls will be accepted or made via configured physical devices. Currently, we support the below devices
Businesses can also choose to operate a mixed model of Soft phones and Physical phones. Below are the different options available for customers:
Soft phones only - All users use soft phones and there are no physical phones at the location
Physical phone only - All users use physical phones only and use HyperConnect for Timeline, Messaging, and viewing guest information
Hybrid phone setup - Users choose a mix of soft phones and physical phones.
Key Features of the Physical Phones Section
Wired Devices
Displays detailed information such as the Friendly Name, Manufacturer, Model, MAC Address, and the assigned Agent.
Ideal for stationary setups like office desks.
Wireless Devices:
Includes details about the Manufacturer, Model, and MAC Address.
Lists the Number of Handsets and their associated Friendly Names.
Wireless handsets provide mobility for agents, making them suitable for dynamic environments.
Once all the steps are completed, a green icon shows up on the phone with the label HyperConnect beside it.
Link Devices to Users in HyperConnect
Linking devices to users in HyperConnect ensures that calls are directed to the appropriate agent or device. Follow these steps to link devices effectively:
Log in to HyperConnect using your Administrator credentials.
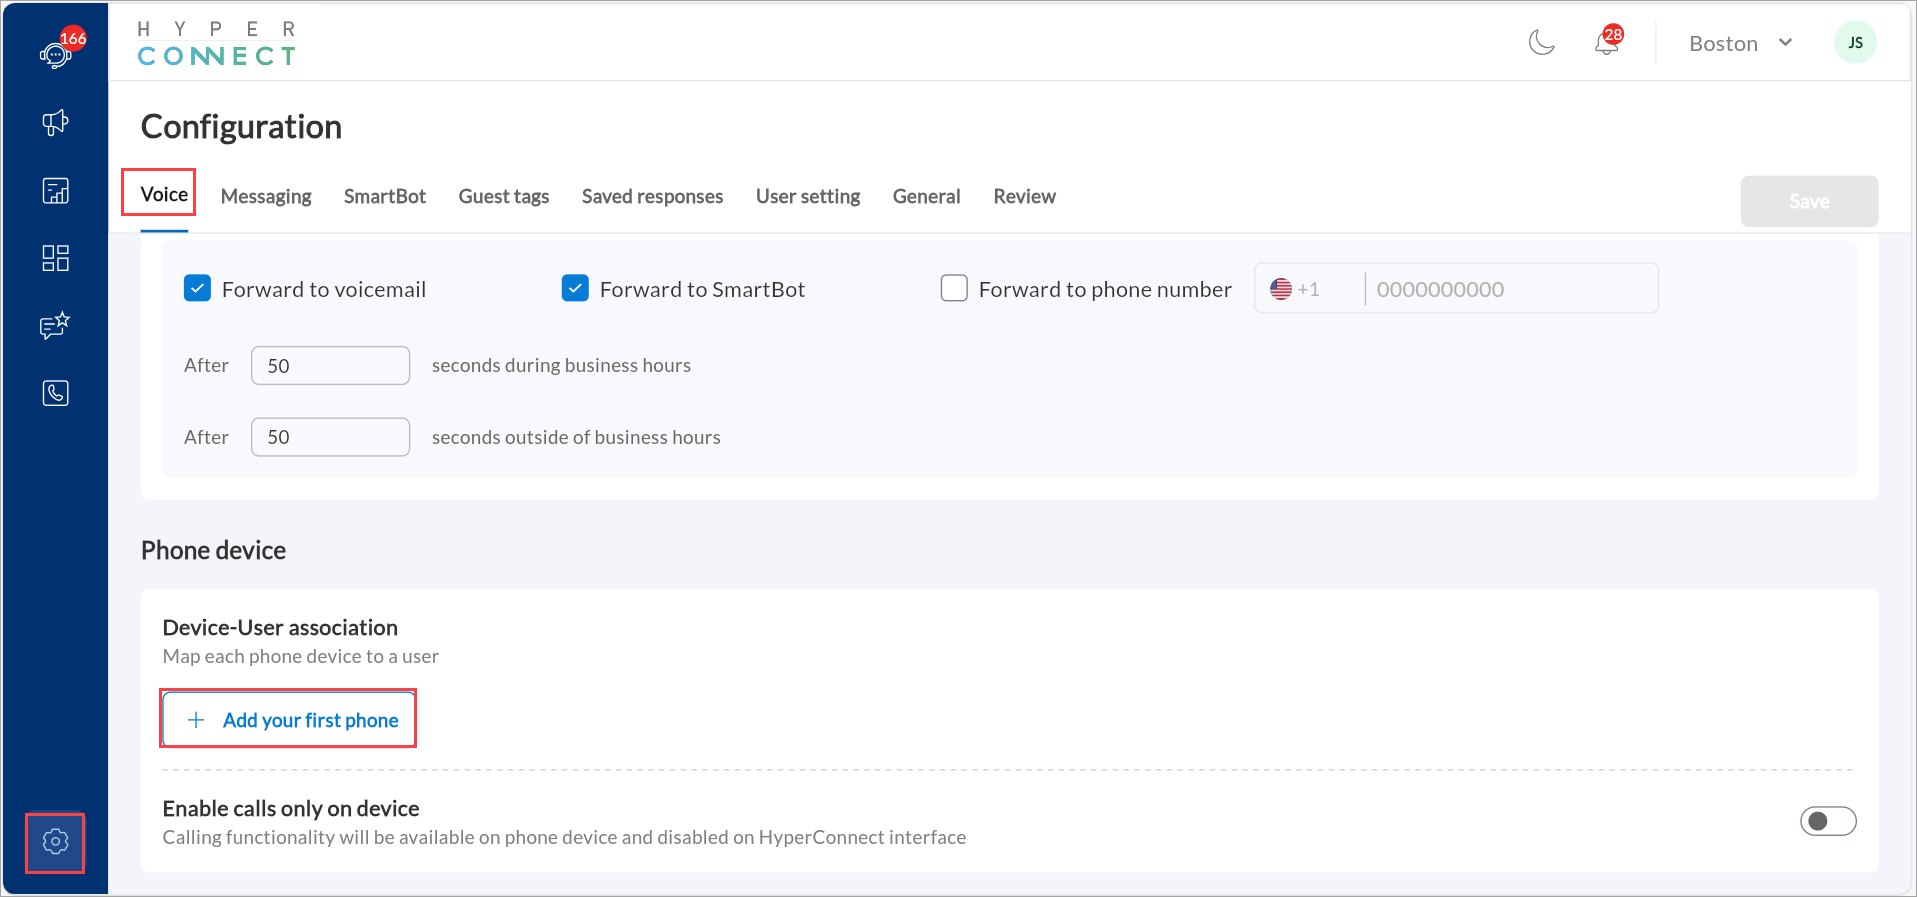
Navigate to the Configuration > Voice tab > Phone device section > Device-User association section.
Click Add your first phone.
Note
Physical Phones in HyperConnect
In HyperConnect, physical phones are categorized as either wired or wireless, and both types are managed in the Device-User association section. This page provides administrators with a clear overview of all physical devices linked to the system, allowing for efficient device management and assignment to agents.
In the Configuration wizard slide-out panel,
Select the phone Manufacturer from the dropdown menu (example, Yealink).
Choose the Model of the phone from the available options.
Enter the phone's Mac address to ensure proper recognition. To get the MAC address of the device, navigate to Menu > Status> Network > Mac Address.
Input the Machine ID to link the device to the setup.
Assign a Friendly Name for easy identification of the device.
From the Employee dropdown, choose either:
Specific Employee (Static): Assign the device permanently to one user.
Dynamic(Soft phone): Associates the phone with a specific browser session on a terminal. Any employee who logs into HyperConnect from that browser is automatically linked to the phone. Best for shared front desk computers.
Dynamic(Phone device): Associates the physical phone directly to an employee using their extension and PIN. The association is done from the device and remains active until another employee reassigns it. Ideal for restricted UI access environments.
Employees can now dynamically associate a phone directly from the device using:
Employee Extension
Association PIN
The PIN is used only for device association and is separate from the extension.
Click Add to finalize the device linkage. A confirmation message appears once the device is successfully linked to the extension.

Note
Ensure the Mac address and Machine ID are entered correctly to avoid configuration errors.
Use descriptive Friendly Names to easily differentiate between devices, especially in large setups.
Only administrators and managers can perform this task.
Note
Only users with Administrator or Manager roles can link devices to extensions.
Ensure the device is compatible with HyperConnect and has the latest firmware or software updates.
Regularly review linked devices to ensure proper configuration and avoid conflicts.
Dynamic Phone Association
Dynamic phone association allows businesses to link a physical phone to a terminal, rather than a specific employee. This means that any user who logs in from the same browser on that terminal will automatically be associated with the phone. When a call is answered, the correct guest profile is displayed for the logged-in user seamlessly and without manual reassignment.
Important
All employees must use the same browser on the terminal. For example: Chrome
The phone is tied to the browser session on a specific terminal.
Any user logging into HyperConnect from that browser will automatically be associated with the connected phone.
The correct guest profile pops up for the user who is logged in when a call is received.
To set up dynamic phone association, follow the steps mentioned in the Link Devices to Users in HyperConnect section.
To ensure smooth functioning:
Always use the same browser on the terminal (For example: Chrome).
Do not clear browser cache or use incognito or private browsing.
If the browser cache is cleared:
The phone will default to the last user who was logged in before the cache was cleared.
For example: If Adam Jones was the last user and clears the cache, the phone remains associated with Adam Jones.
In this case, the affected employee must: Go to Settings > Voice tab > Device-User Association. Re-mark the phone as dynamic.
Reset Physical Phone (Wireless Devices Only)
Perform a base reset to ensure the phone is ready for assignment:
On the phone, navigate to Menu > Settings > System Settings > Base Reset.
Enter PIN as 0000 and click OK.
Click OK when prompted to reset to factory settings.
After reset, update Date & Time Settings.
Number Porting
When transitioning to HyperConnect, businesses can retain their existing phone numbers through a process known as number porting. Number porting allows the transfer of phone numbers from one service provider to another. This ensures continuity in communication without changing well-established contact details.
Why Port a Number?
Businesses invest considerable time and resources in building a brand associated with their phone number. Changing that number can disrupt communications and affect customer recognition. Number porting allows businesses to retain their existing number while adopting the enhanced features of HyperConnect.
HyperConnect supports the porting of both local and toll-free numbers, ensuring that businesses can maintain their primary communication lines, regardless of the type of number they currently use.
Note
Porting a number is not compulsory to use HyperConnect. Businesses that choose not to port can forward calls from their existing number to the HyperConnect number. However, this approach means maintaining two providers and incurring additional costs. Alternatively, businesses can use a new number provided by HyperConnect, though this is not recommended as it would require changing their existing business number.
While the general process for number porting remains the same, the information required may vary slightly depending on the business’s location.
How to Port Your Number to HyperConnect
Number porting involves transferring your phone number from your current provider to HyperConnect. The process differs depending on whether your provider is Twilio or a non-Twilio carrier.
For businesses already using Twilio: Porting takes approximately 1 hour and businesses can choose the date and time (only on weekdays). Zenoti’s team will coordinate this process with minimal disruption.
For businesses using a non-Twilio provider: Once a business decides to port, Zenoti’s team will submit a request to Twilio. Twilio then assigns a date and time for the porting. The process takes 2-3 hours for calls, with an additional 30 minutes for SMS. Zenoti will keep customers informed throughout the process to ensure a smooth transition.
Important
Once Twilio assigns a porting date, it cannot be altered. The date is determined by the carriers involved, and businesses must be prepared for the scheduled downtime on the assigned date.
Some numbers may not be eligible for porting due to carrier restrictions. This will only be known after submitting a port request to Twilio. If this happens, businesses have the option to forward calls from their current provider to HyperConnect or acquire a new business number.
During the porting process, businesses may encounter challenges. Here are the most common reasons for delays or failures:
PIN/Passcode issues
Invalid authorization details
Invalid account number
Carrier freeze
Rate limit issues