Set Up and Manage AI Scribe
This article provides step-by-step instructions for using, and managing AI Scribe, including permissions, user licenses, AI charting summary layouts and making your existing forms AI-ready.
Note
This feature is not enabled by default. Reach out to your Zenoti representative to enable this feature for your organization.
Prerequisites
AI Scribe is available only on the Zenoti Mobile App (ZMA) for tablets and mobile devices. It supports Android devices with a minimum of 4 GB RAM and iOS devices with a minimum of 4 GB RAM. See the list of supported devices for ZMA.
To view generated insights or fill forms using AI on Zenoti Web, ensure you are using the latest guest profile (v2).
Only form builder forms can be made AI-ready.
Roles and permissions required to use AI Scribe
The following table outlines the default AI Scribe–related permissions enabled for standard user roles. These defaults help organizations understand baseline access and decide whether customization is required.
User Role | AI Scribe | AI Scribe Charting Layouts | AI Scribe User Management |
|---|---|---|---|
Manager | View | View | View |
Administrator | View, Consent | View, Create, Edit, Delete | View, Edit |
Owner | View, Consent | View, Create, Edit, Delete | View, Edit |
Therapist | View | View, Create, Edit, Delete | View |
This permission allows users to view recordings, transcripts, and insights.
At the organization level, click the Configuration icon.
Search for and select Security roles from under Security.
Select a role and click the Permissions tab.
Expand the Appointment Book section, and for AI Scribe, select the View checkbox.
Click Save.
This permission allows users to select and manage how guest consent will be collected for AI Scribe.
At the organization level, click the Configuration icon.
Search for and select Security roles from under Security.
Select a role and click the Permissions tab.
Expand the Appointment Book section, and for AI Scribe, select the Consent checkbox.
Click Save.
These permissions control who can manage AI charting layouts.
At the organization level, click the Configuration icon.
Search for and select Security roles from under Security.
Select a role and click the Permissions tab.
Expand the Appointment Book section, and for AI Scribe charting layouts, select the View, Edit, Create, or Delete checkboxes, as required:
View: Users with this permission can view the list of charting layouts and the services associated with them.
Edit: Users with this permission can edit the charting layouts.
Create: Users with this permission can create custom charting layouts.
Delete: Users with this permission can deactivate existing charting layouts.
Click Save.
These permissions control who can view or manage AI Scribe licenses for employees.
At the organization level, click the Configuration icon.
Search for and select Security roles from under Security.
Select a role and click the Permissions tab.
Expand the Administrator section, and for AI Scribe user management, select the View or Edit checkboxes, as required.

View: Users with this permission can view the list of employees and the status of their AI Scribe licenses.
Edit: Users with this permission can activate or deactivate AI Scribe licenses of employees
Click Save.
Set up AI Scribe for your organization
When you first access AI Scribe, a setup wizard guides you through the initial configuration. This process allows you to select which employees can use AI Scribe, define which roles can view AI charting notes, and configure your settings.
Note
Only users with the Owner and Administrator roles can start setting up AI Scribe.
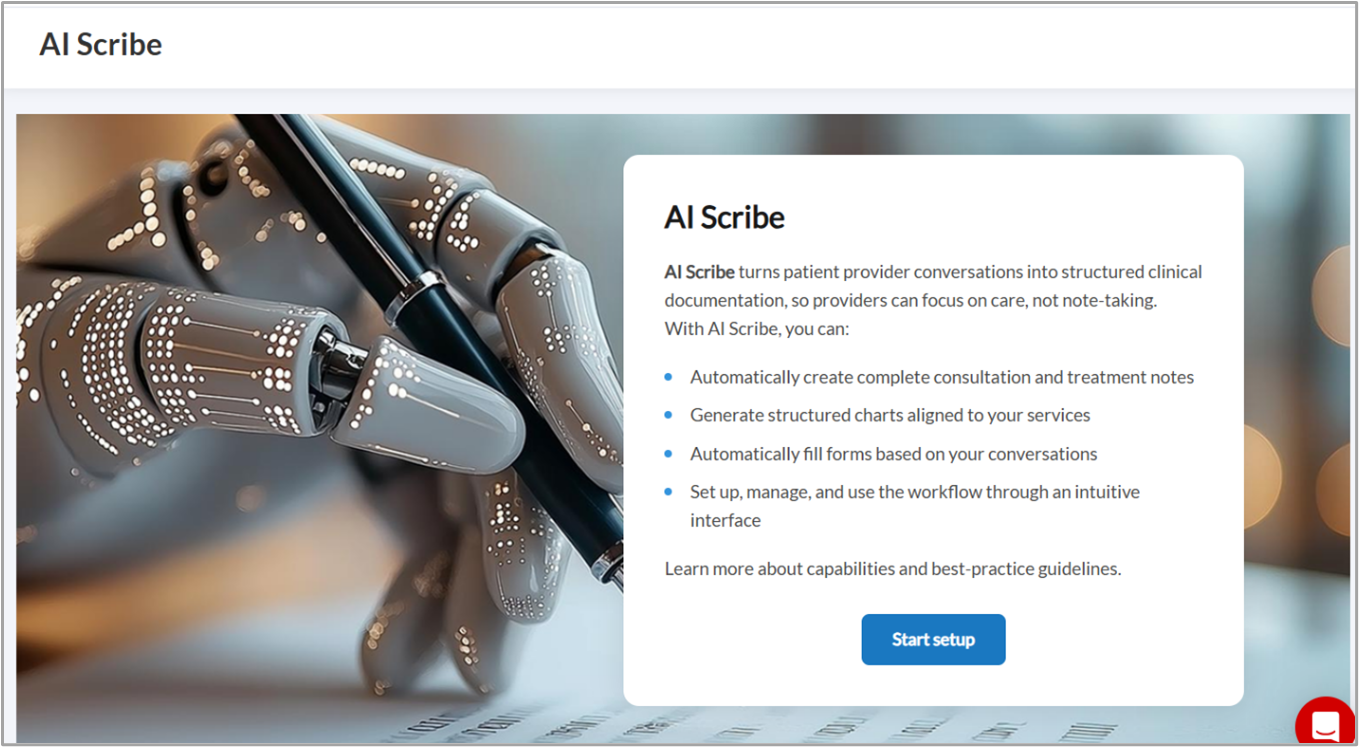
At the organization level, navigate to Configuration > AI Scribe.
On the AI Scribe landing page, click Start setup.
The setup wizard guides you through three main steps: setting up AI Scribe access, configuring view access for charting notes, and completing the configuration.
Note
To view and manage this screen, you must have the required AI Scribe user management permissions.
In this step, you select which employees can record with AI Scribe, edit AI charting notes, and fill forms with AI.
On the Select employees you want to grant AI Scribe access page, use the Job and Status (Active or Inactive) filters to find specific employees, or use the search field to search for employees by name.
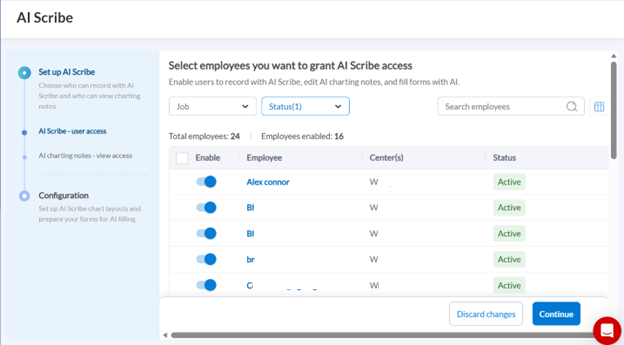
Turn on the Enable toggle for each employee you want to grant AI Scribe access.
To deactivate the AI Scribe license for an employee, turn off the toggle.
To enable access for multiple employees at once, select the checkbox next to Enable in the header row and turn on Enable AI Scribe.
Review your selections. The page displays the total number of employees and the number of employees enabled.
Click Continue to proceed to the next step.
Note: You can click Discard changes at any time to reset your selections. You can also skip this step by clicking Continue and return to it later.
Note: At the center level, you can manage AI Scribe licenses only for employees in centers where you have an assigned role.
Note
When you activate or deactivate AI Scribe for an employee, the change takes effect immediately.
If you activate AI Scribe for an employee associated with multiple centers, the license becomes active across all those centers. Similarly, if you deactivate AI Scribe for that employee, the license becomes inactive across all associated centers.
Note
Only users with the Owner role can enable or disable roles on this page. Users with other roles can view the settings but cannot make changes.
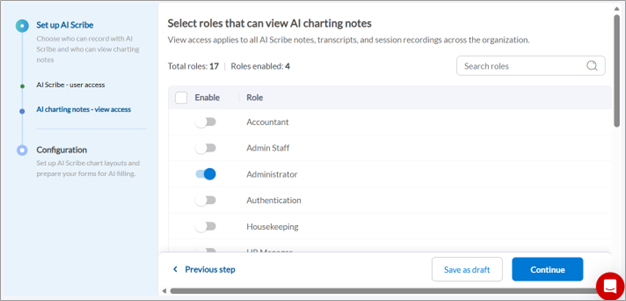
In this step, you define which roles can view AI Scribe notes, transcripts, and session recordings across the organization.
On the Select roles that can view AI charting notes page, review the list of available roles.
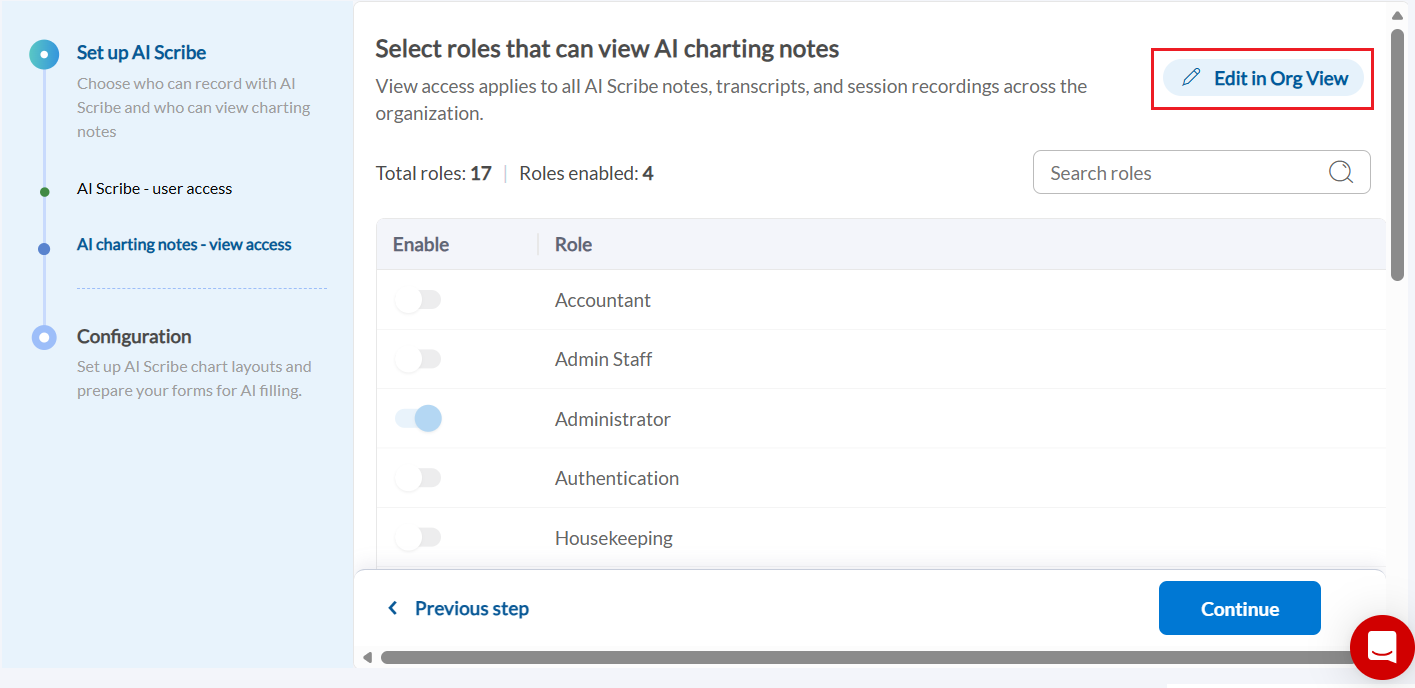
Note
If you are at the center level, click Edit in Org View to continue editing the roles with view permissions at the organization level.
Turn on the Enable toggle for each role that should have view access to AI charting notes.
Use the search field to find specific roles if needed.
Review your selections. The page displays the total number of roles and the number of roles enabled.
Click Continue to proceed to the configuration step, or click Save as draft to save your progress and continue later.
Note: Click Previous step to return to the employee selection step if you need to make changes.
Note
View access is separate from AI Scribe user access. The licenses granted in Step 1 allow employees to record and edit. The roles enabled here can only view AI Scribe notes, transcripts, and recordings—they cannot record or edit unless they also have an active AI Scribe license.
After you complete your selections, AI Scribe begins configuring your organization's settings.
On the Configuring AI Scribe page, a dialog appears explaining that the system is reviewing your services and assigning AI Scribe chart layouts.
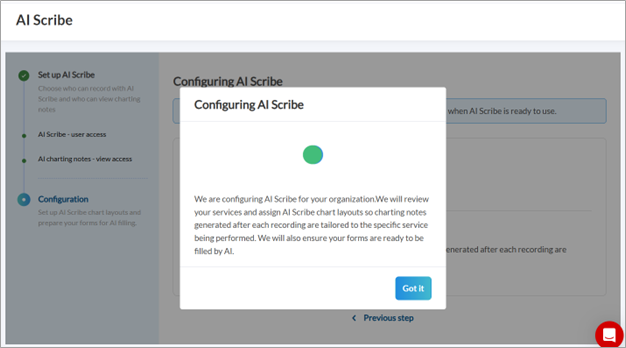
Click Got it to acknowledge the message.
The configuration process:
Assigns AI Scribe chart layouts to your services, so charting notes generated after each recording are tailored to the specific service being performed.
Ensures your forms are ready to be filled by AI.
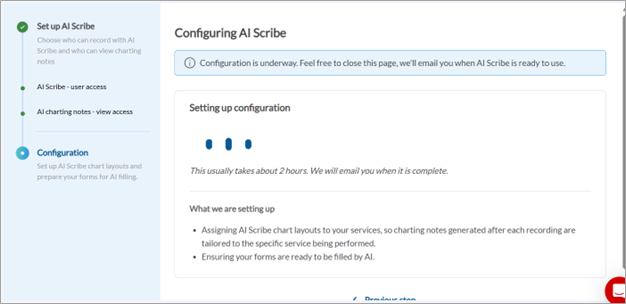
Note
This configuration process usually takes about 2 hours. You will receive an email notification when AI Scribe is ready to use. You can close the page and continue with other tasks while the configuration completes.
Navigate to Configuration > AI Scribe.
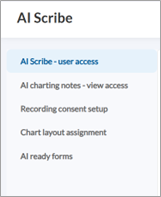
AI Scribe - user access: Add or remove employee access to AI Scribe features.
AI charting notes - view access: Update which roles can view AI Scribe notes, transcripts, and recordings.
Recording consent setup: Configure how you collect consent from guests while recording AI Scribe sessions.
Chart layout assignment: Manage AI Scribe chart layouts for insight presentation.
AI ready forms: Review and update forms that are ready for AI filling.
Note
To view and manage this screen, you must have the required AI Scribe consent permission.
After the initial setup, you can configure how consent is collected from guests during AI Scribe sessions.
Navigate to Configuration > AI Scribe.
Select Recording consent setup from the left menu.
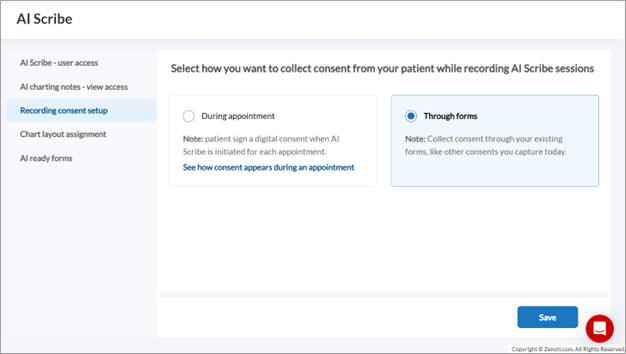
Choose how you want to collect consent:
During appointment: Guest signs a digital consent when AI Scribe is initiated for each appointment. Click See how consent appears during an appointment to preview the consent flow.
Through forms: Collect consent through your existing forms, like other consents you capture today. (Selected by default)
Click Save to apply your selection.
Note
To view and manage this screen, you must have the required AI charting layouts permissions.
After the initial configuration, AI Scribe automatically assigns chart layouts to your services. You can review these assignments and make changes if needed.
Navigate to Configuration > AI Scribe.
Select Chart layout assignment from the left menu.
On the Chart layout assignment to services page, review the list of services and their assigned chart layouts.

The page displays:
Service category: Expand categories and subcategories to view individual services.
Services: The name of each service.
Assigned chart layout: The chart layout assigned to generate insights for that service.
Actions: Click View layout to view or edit the assigned chart layout.
Note: If AI Scribe cannot find a relevant chart layout for certain services, it assigns a default Zenoti layout. An information banner at the top of the page indicates how many services are using the default layout.
Use the search field to find specific services.
To view or manage all available layouts, click View all layouts in the top-right corner.
View and edit chart layout
When you click View layout for a service, you can preview the layout structure and edit it if needed.
On the Chart layout assignment page, click View layout for the service you want to review.
On the layout preview panel, review the following:
Mapped services: Displays which services are using this layout.
Preview: Shows the layout structure, including sections (such as Patient Details) and subsections (such as Aesthetic Concerns, Treatment Goal, and Medical History).
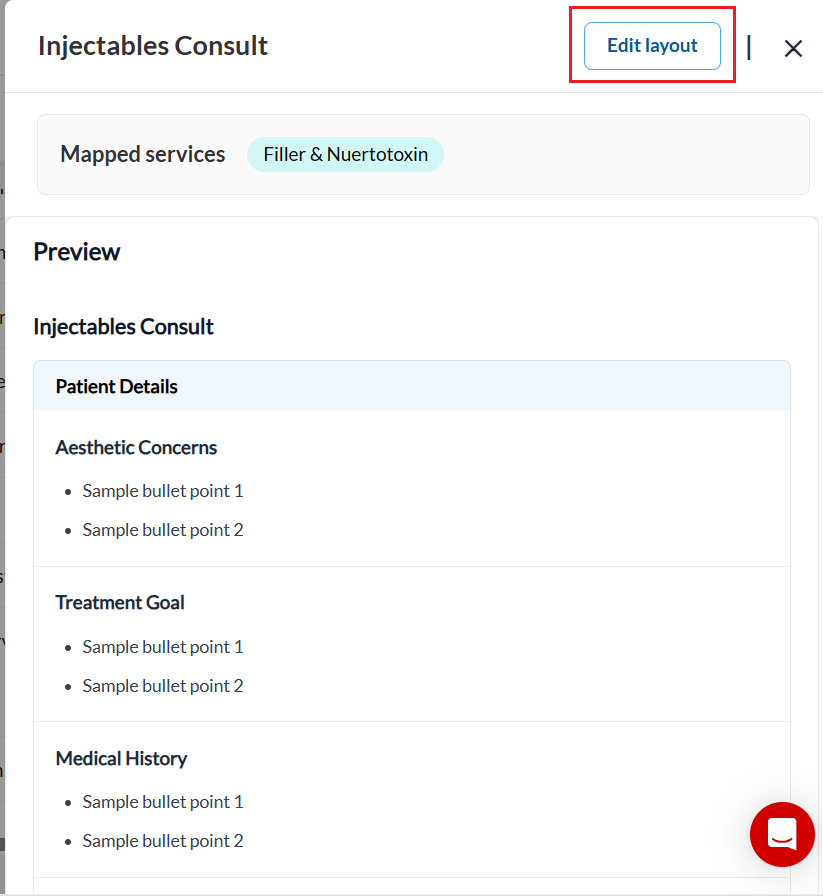
To make changes to the layout, click Edit layout.
In the Edit layout dialog, select the services you want to apply your changes to:
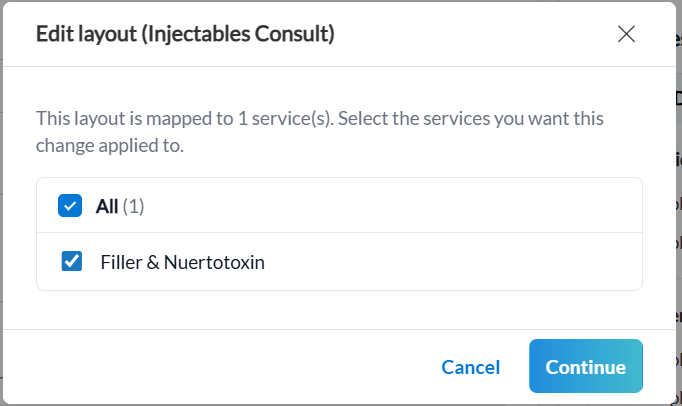
Select All to apply changes to all services mapped to this layout.
Or select individual services from the list.
Click Continue.
On the layout configuration page, you can edit the following:
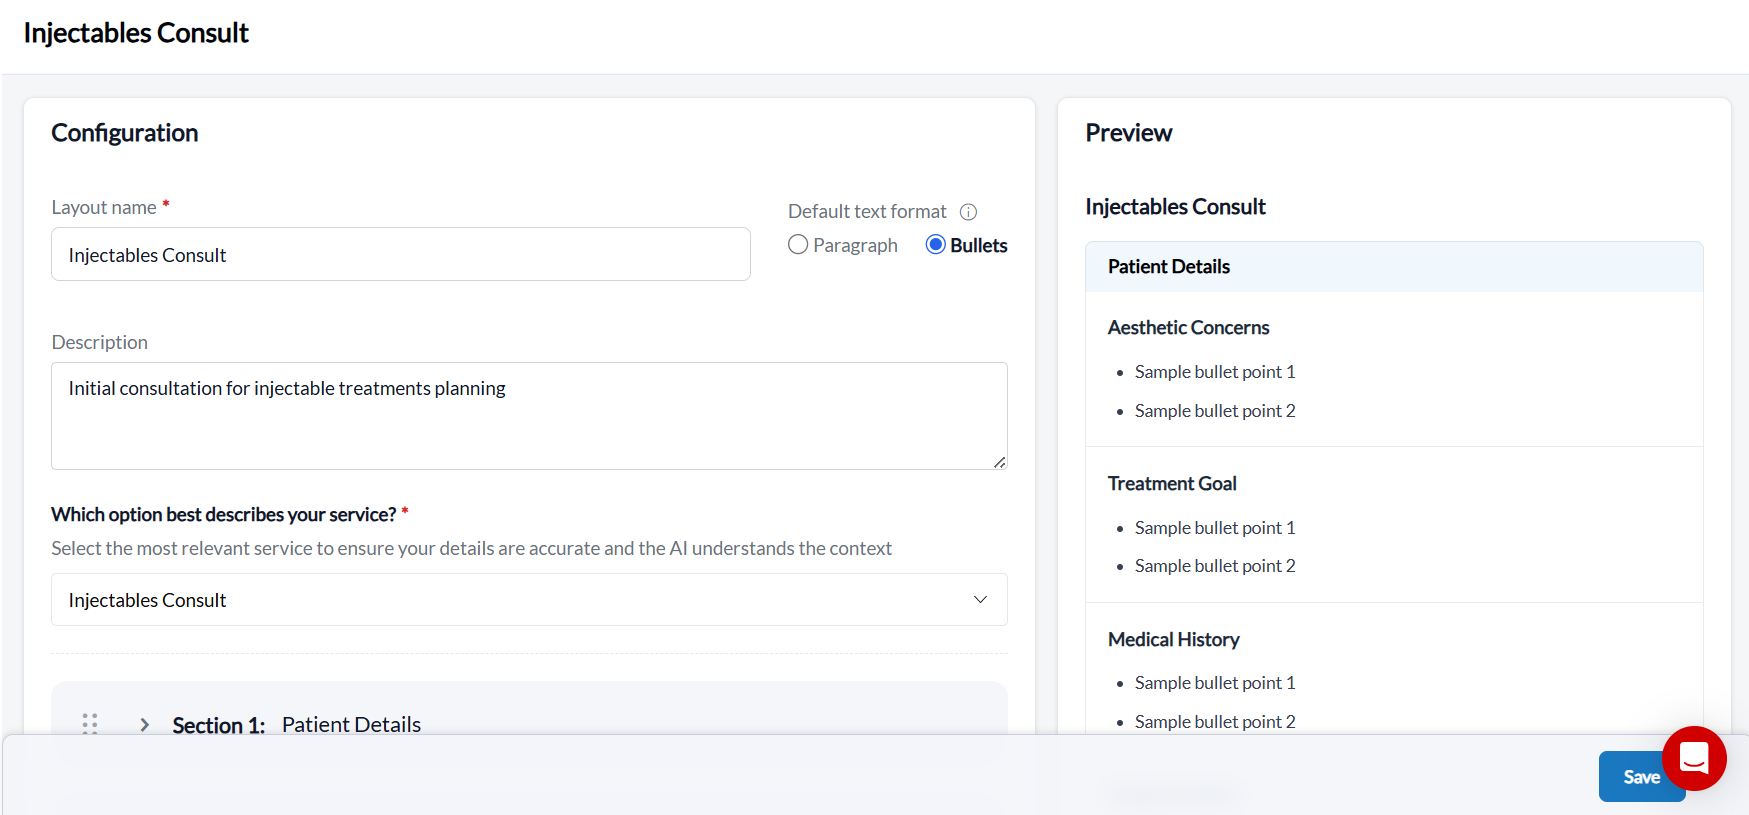
Layout name: Update the name of the layout.
Description: Add or modify the layout description.
Default text format: Choose whether the generated insights appear as Paragraph or Bullets.
Which option best describes your service?: Select the most relevant service type to help the AI understand the context and generate accurate insights.
Sections and subsections: Expand sections to view or modify the subsections within them.
Review your changes in the Preview panel on the right side of the page.
Click Save to apply your changes.
Note: Changes made to a layout will affect all services that are mapped to it, based on your selection in Step 4.
Note
To view this page, you need the Add permission under Custom Fields. To edit, you need the Edit permission.
Only form builder forms will appear in this page.
The AI ready forms section displays all forms that are configured to be filled using AI Scribe insights.
Navigate to Configuration > AI Scribe.
Select AI ready forms from the left menu.
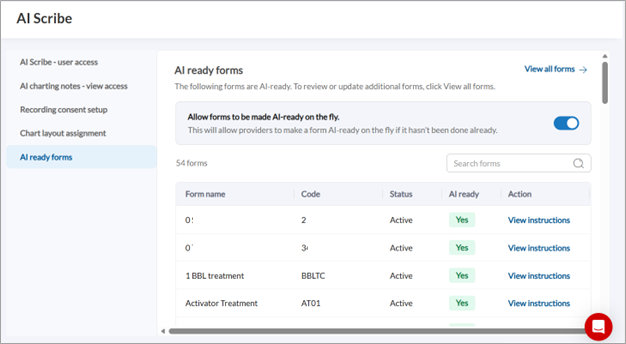
Review the list of forms, which displays:
Form name: The name of the form.
Code: The form code identifier.
Status: Whether the form is active or inactive.
AI ready: Indicates if the form is ready for AI filling.
Action: Click View instructions to see the AI instructions configured for the form.
To allow providers to make forms AI-ready during appointments, turn on the Allow forms to be made AI-ready on the fly toggle.
To review or update additional forms, click View all forms.
Create and manage AI Scribe charting layouts
Charting layouts define the format in which the AI-generated insights and clinical notes appear.
To access all AI Scribe charting layouts:
At the organization level, navigate to Configuration > AI Scribe and click Continue Setup.
Select Chart layout assignment from the left menu.
Click View all layouts.
When creating a layout, you can either use a predefined template or create one from scratch.
To create a layout from scratch:
Click Add layout.
On the Configure layout page, enter a Layout name and Description.
Select the Default text format that the notes should appear in.
Select a service from a list of predefined services to help the AI identify context.
Note
The following subsections are added by default to a new layout: Patient Details, Clinical Observations, Health and Lifestyle, Additional Conversations, and Commercial Summary
Click Add section and enter a section name to add a section to the layout.
Click Add subsection.
Choose from a set of predefined subsections, or
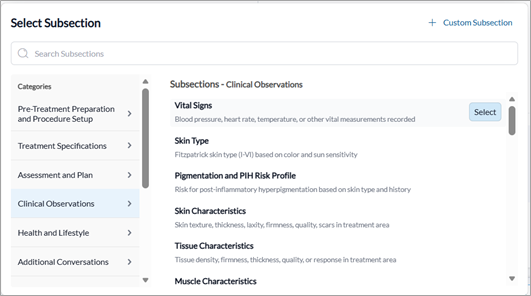
Note
Subsections that are already added to another section in the layout appear greyed out and cannot be added again.

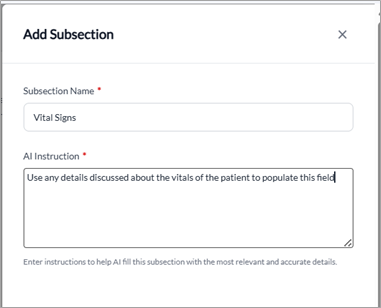
Add a custom subsection with clear AI instructions. You can edit these instructions at any time.
Click Save and continue to move to the next step, or Save as draft to save it as a draft and continue later.
On the Assign to services page, a list of service categories and subcategories are displayed. You can expand them to view individual services and turn on the toggle next to the services/subcategories/categories that you want to assign the layout to.
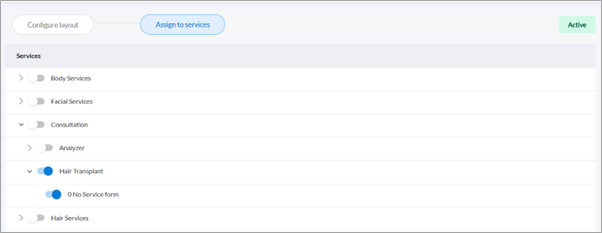
Note
If a service already has a layout associated with it, it will be greyed out and not be available for selection

Click Save and Activate to make the layout active. The layout will now be used to generate insights for the linked services.
To use a predefined template:
Identify the template you want to use from the list of available templates under the Predefined templates section.
Click Use on the required template.
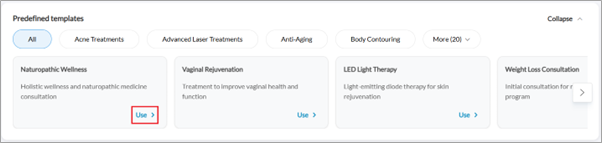
Follow the steps outlined in the create a layout section from step 4 onwards.
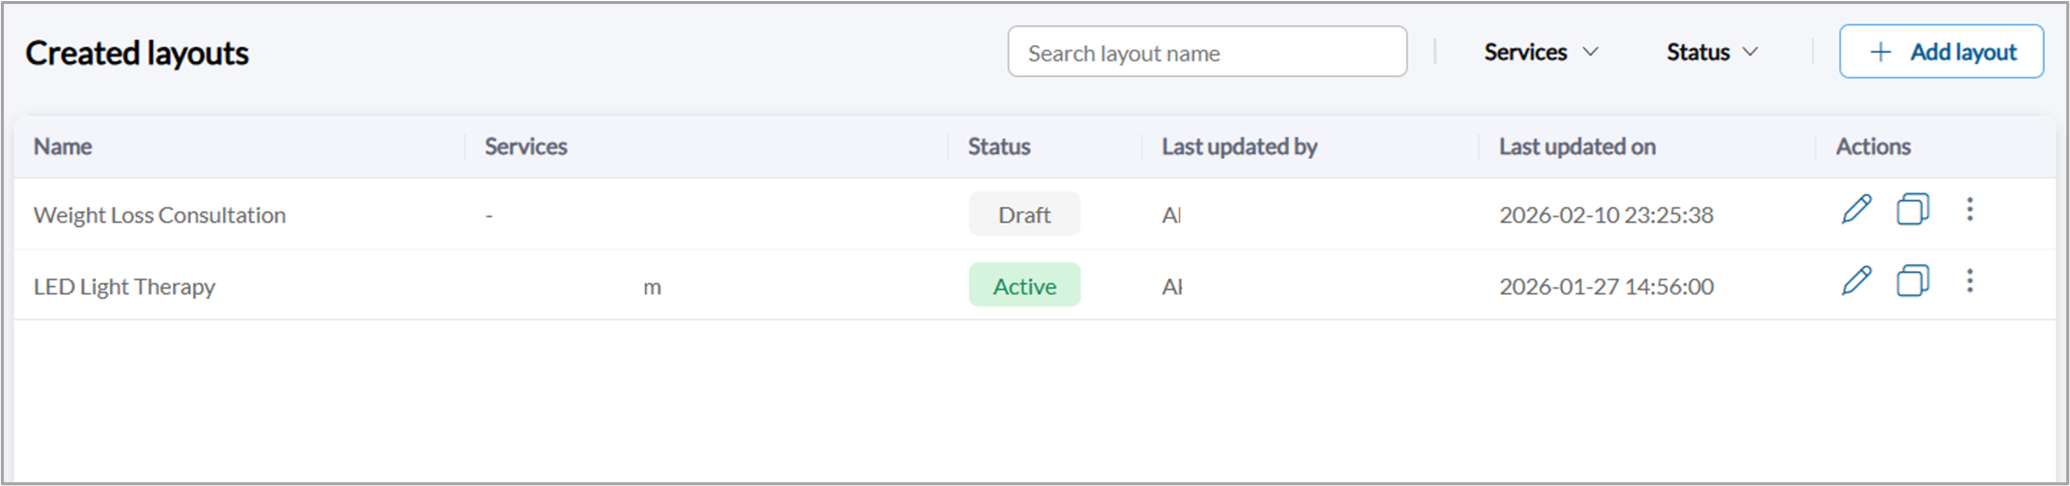
The layouts created by your organization appear under the Created layouts section on the AI Scribe charting template page.
Tip
It is recommended to use custom charting layouts when creating layouts to ensure they are tailored to your specific services and documentation needs.
Note
If a service-specific layout is not assigned to a service, Zenoti automatically assigns a default layout.
Under the Actions column:
Edit: Click the Edit icon and update details or services, as needed.
Duplicate: Click the Duplicate icon.
Activate/Deactivate: Click the More icon and select Activate or Deactivate.
Make forms AI ready (from the Custom forms page)
To make forms AI ready and fill forms using AI, you must have the necessary permissions to view and edit forms data.
Note
To make forms AI ready, you must be at the organization level.
To fill charting forms using the insights generated from AI Scribe recordings, you must set up instructions for the relevant fields in those forms. These instructions help the AI determine the details that need to be filled in the form based on the insights.
To make a form AI ready, follow these steps:
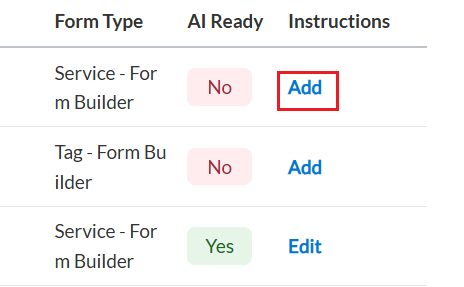
Navigate to Configuration > Forms > Custom forms.
Search for the form and click Add under the Instructions column, and click Confirm.
Add instructions, either manually or using AI by clicking Generate instructions, to guide the AI on the details to fill in the fields.
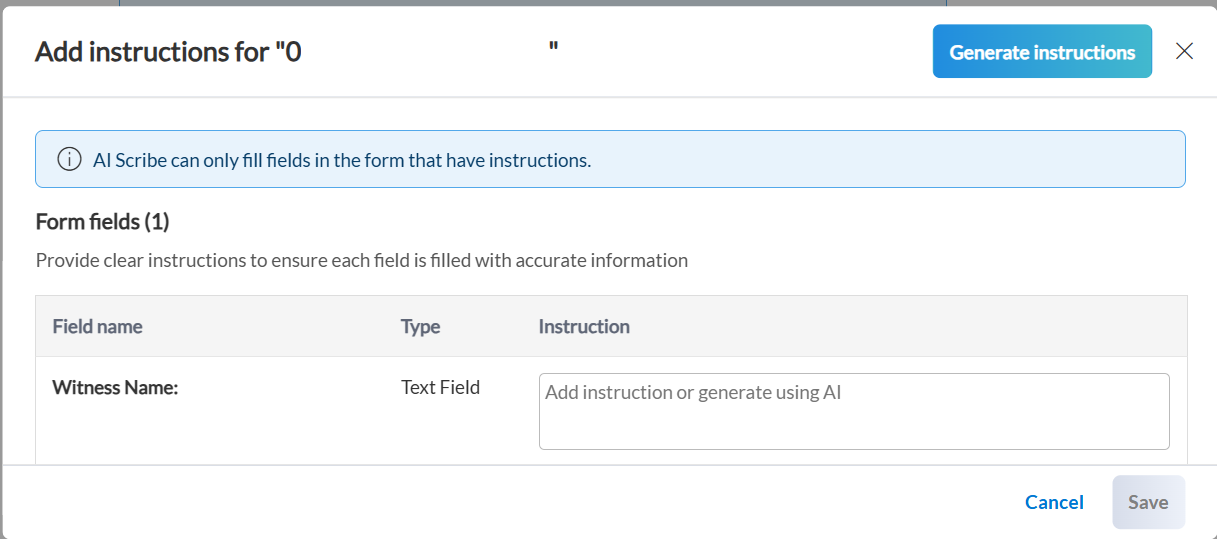
Click Save.
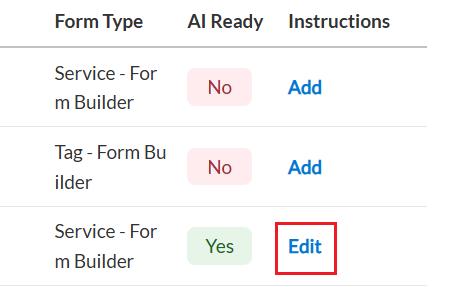
To edit or add additional instructions to an AI ready form, follow these steps:
Navigate to Configuration > Forms > Custom forms.
Search for the form and click Edit under the Instructions column.
Modify the instructions for the fields as required.
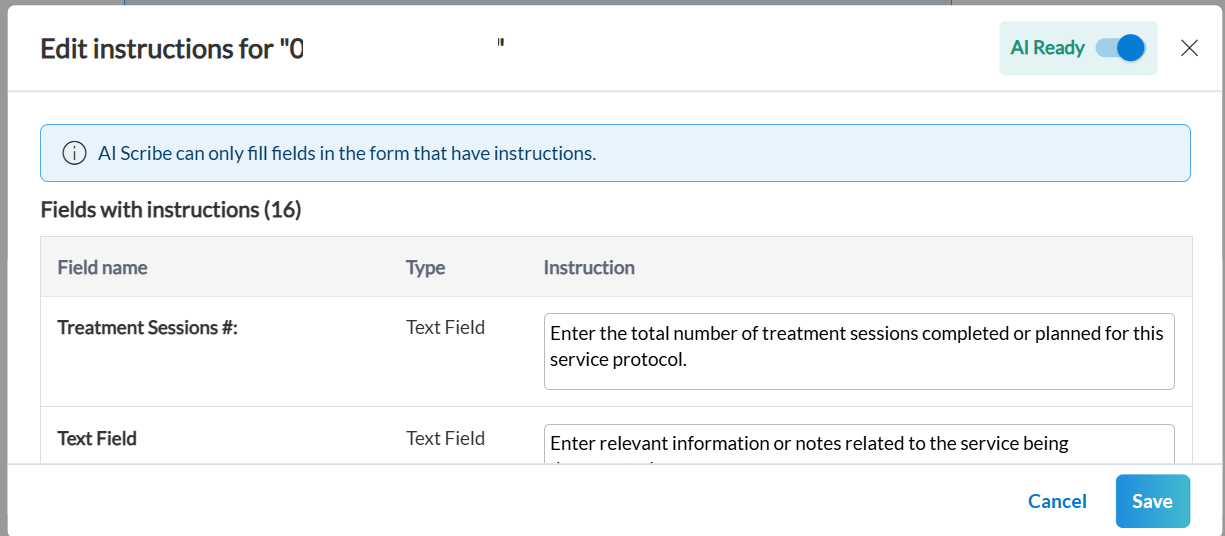
Click Save.
Turn off AI readiness for a form
Navigate to Configuration > Forms > Custom forms.
Search for the form and click Edit under the AI Instructions column.
Turn off the AI Ready toggle.
Click Save.
The form will now no longer be available for AI filling.
Add instructions to updated forms
When updating an AI ready form in the form builder, you will be prompted to add instructions for fields that were newly added. To do so:
Add the instructions for the applicable fields.
Click Save.
Alternatively, you can also add instructions later by clicking Add instructions later.