Other guest tasks
Enable Zenoti GO on your CMA
A guest can enable the Zenoti GO features such as Self Check-in, automated touchless payments using Auto-pay, and self-initiated payments using Self Pay.
Prerequisites
The business must first enable Zenoti Go for their organization.
After Zenoti Go is enabled for the organization, the admin can configure the images, text, and set up branding through the CMA template. Learn how
Guests must have the latest version of the app in their device. (The version number is available at the bottom of the menu. To access the menu, tap the hamburger icon.)
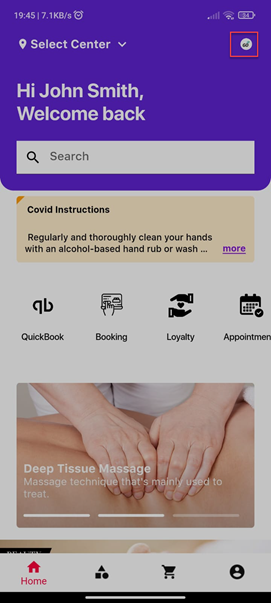
Log in to CMA.
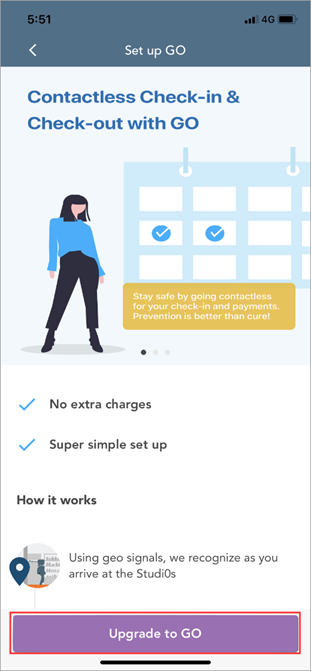
Tap the GO icon on the top right to open Set up GO.
Tap Upgrade to GO.
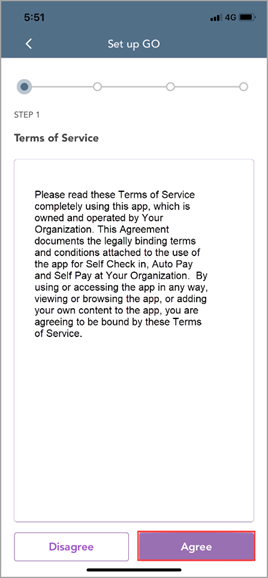
The terms and conditions open.
Tap Agree.
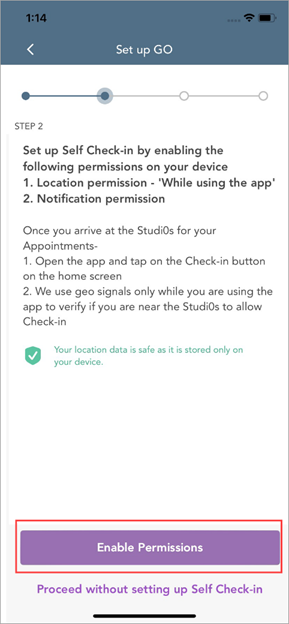
The page to set up self check-in opens.
Tap Enable Permissions, and then enable the following permissions:
Location: The Location setting allows the CMA to determine if the guest
is within 100 meters of the center’s coordinates and allows them to check-in. Guests must provide ‘While Using the App’ location permission.
Notification: Enable this setting to receive check-in push notifications.
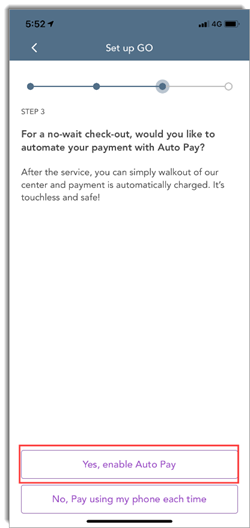
After the guest enables self check-in, proceed to set up check out options.
Choose from the following:
Yes, enable Auto Pay – select this option if you want a truly contactless and time-saving experience. As soon as you check in for an appointment, your saved card is authorized for the amount, which includes the default tip that you have selected. You can walk out of the center as soon as your service is complete as your payment is automatically charged.
No, Pay using my phone every time – select this option if you wish to initiate payments for the services online each time, without any assistance from the front desk or without the requirement of any physical terminal. You can pay for the appointment (services + tips) anytime after the beginning of the service. The payment is collected from your saved card.
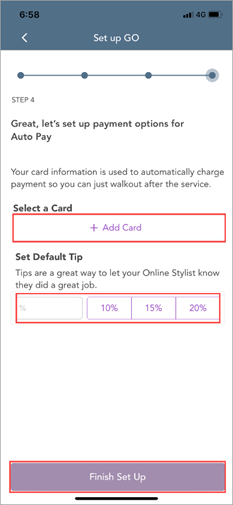
Payment options set up opens.
Add card details, set default tip, and then tap Finish Set up.
A confirmation screen appears, letting you know the Zenoti GO features that you can avail in the next appointment, such as Self Check-in and Auto-pay.
Tap Done.
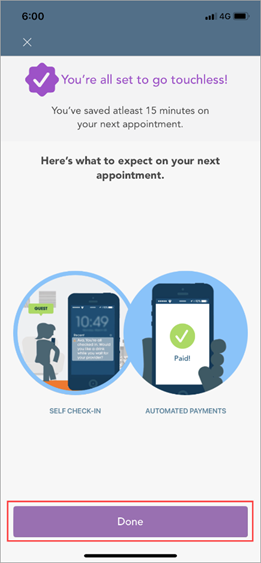
You are upgraded to Zenoti GO.
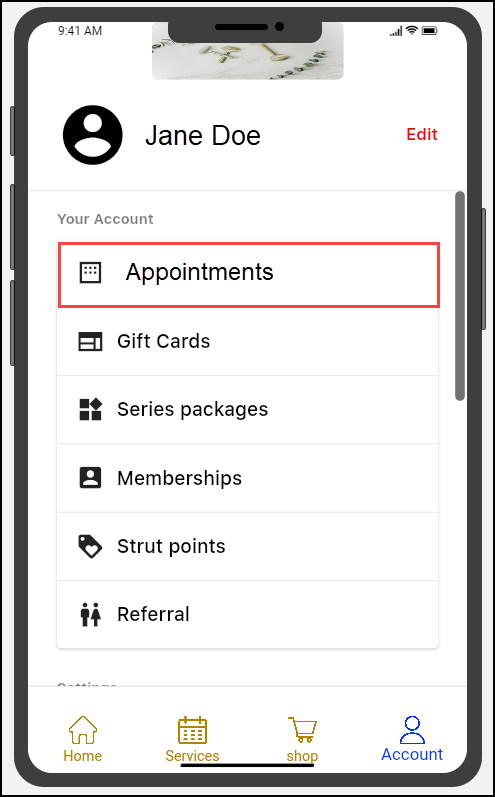
View the guest profile
Log in to the CMA application with your credentials.
Click the guest profile icon.
You can view and manage the following details on the guest profile:
Edit the account details
Manage notifications and specify the marketing and transactional communication preferences
Change the account password
View existing memberships
View the purchased gift cards and packages
View a list of purchased or booked products
View the loyalty points details
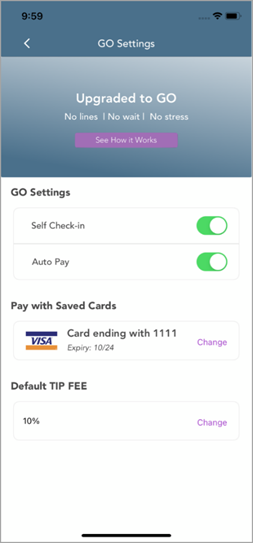
Manage card details
Enable self check-in and auto-pay
Note
To enable the self-check-in and auto-pay features of the CMA for your guests, you must contact your Zenoti representative.
Log in to webstore and CMA
Guests can log in to webstore and CMA either using a password or using a verification code.
When logging in with a password or verification code, guests can choose to stay signed in for up to 180 days. If they return within this period, they are automatically logged in. This ensures they can immediately view membership or package benefits applied to service prices during future visits, reducing the need to log in again before booking. For payment-related actions, such as booking with a deposit (if configured), or purchasing a package, membership, or gift card, as well as updating profile details, guests will be prompted to re-authenticate for security.
Log in using password
The guest clicks Sign In or Book now.
The guest enters mobile number or email address, depending on the configured option.
The guest enters the password and clicks Log in.
By default, the password is hidden. To verify the password they have entered before submission, the guest can click Show password.
Note
If the entered password is wrong, the guest can click Forgot password and enter their registered email address or mobile number to get a verification code. After successful verification, the system prompts them to create a new password.
Log in using verification code
To log in using a verification code, follow these steps as a guest:
The guest clicks Sign In or Book now.
The guest enters mobile number or email address into the provided field, depending on the configured option.
If the guest enters a mobile number, the country selector appears after they add the first three digits.
This information is used to identify the account linked with the email or mobile number.
To request a one-time password, the guest clicks Generate verification code after entering the mobile number or email.
The system checks if the provided mobile number or email exists in the record.
If the number or email is registered, the guest will receive the code on their mobile or email.
If not, the guest may be prompted to provide their personal identification information.
If the guest does not receive the code within a minute, they can click Resend code to request one again.
The guest enters the code.
The entered code is verified against the one sent to the guest's registered mobile number or email. If the verification code matches and is valid, the guest is granted access to their account or allowed to proceed with the booking process.
The guest can then proceed with the next step in the booking process.
If guests do not see the option to log in with a verification code, ensure that the Log in with verification code setting is enabled.
Impacts and considerations
If the entered email or mobile number has no profile associated with it: The guest will receive a verification code, submit it, provide the necessary details, and a new profile will be created.
If the entered email or mobile number has a single profile associated with it: The guest will receive a verification code, submit it, and get authenticated.
If the entered email or mobile number has multiple profiles associated with it: The guest will be prompted to enter their first name for validation.
If the first name matches exactly one profile, the guest will be authenticated.
If the first name does not match any profiles, an error message is displayed and the guest will be prompted to retry.
If there are multiple matches for the credentials: The guest will need to validate their first name to link the credential to the correct profile. A profile merge alert will be created for the front-desk staff.
Note
Guest can attempt to log in up to five times. After five unsuccessful attempts, their login with these credentials will be blocked for one hour.
Manage saved cards
The Consumer Mobile App allows your guests to save their card details for a quicker and easier checkout experience.
The card details saved by your guests are used by the CMA for online payments.
Log in to CMA.
Tap the hamburger icon on the top left to open the menu.
On the menu, tap Account.
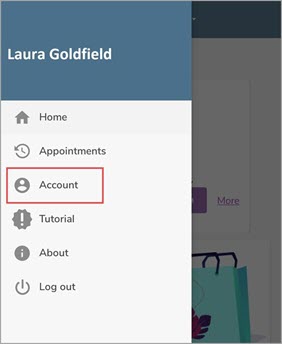
The Account screen opens.
Scroll down to locate the option Payments.
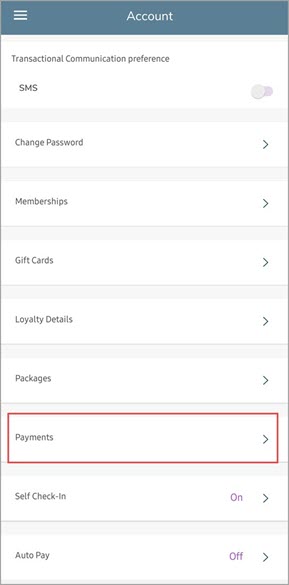
The Payments screen opens.
Tap Add New Card.
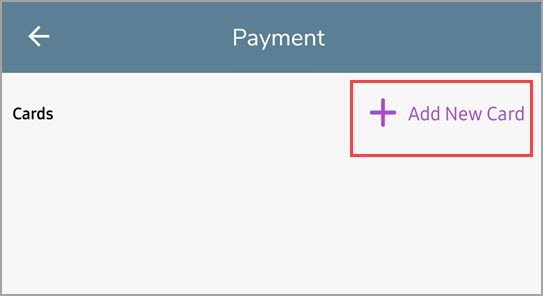
The card details screen opens.
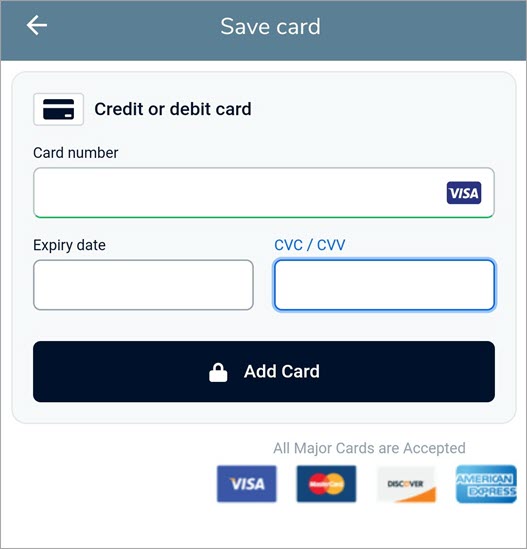
Enter the following information:
Card Number: Enter the number of the card.
Expiry Date: Enter the expiry date of the card.
CVC/CVV: Enter the code printed on the backside of the card.
Tap Add Card.
The details of the card are saved.
Note
Some of the payment processors and regions mandate for an Address Verification System (AVS) check which requires the guests to enter their physical address while saving the card. This is done only once at the time of saving the card online.
Pay with gift card for a self-pay appointment
Gift cards allow guests to book services and pay for appointments by redeeming the gift card balance. This is an easier and more convenient way for the guests to make payments for their appointments.
Extending this convenience, Zenoti allows your guests to use their existing gift cards in lieu of making payments for appointments booked on the CMA. This means, guests can redeem the gift card balance directly from their mobile devices on the appointments booked through the CMA.
Things to Remember
The appointments should be booked via the Consumer Mobile App (CMA).
Zenoti Go and Self-pay should be enabled and configured.
Guests can redeem the gift card balance only for self-pay appointments.
Your guest takes the following actions on the CMA.
The guest checks-in for her self-pay appointment.
The guest’s card is authorized as soon as she checks-in for her appointment.
After the appointment is completed, the guest receives a notification to make a payment for the appointment.
The guest taps the notification to open the self-pay screen.
On the gift card section of the self-pay screen, the guest enters the gift card code and taps Apply.
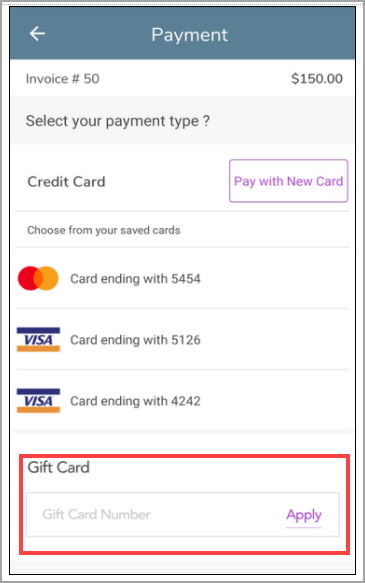
The gift card is applied and the gift card balance is deducted from the appointment invoice.
For example, if the invoice is for $150.00 and the gift card has a balance of $100.00, after tapping Apply, the gift card balance ($100.00) is deducted from the invoice amount ($150.00) and the rest of the amount ($50.00) is charged to the guest’s saved card via self-pay.
Purchase a gift card
Important
Your guests can only purchase Amount gift cards on the CMA.
Before You Begin
You must enable gift card sales for the CMA.
You must have configured and set up gift cards for your organization in Zenoti.
You must have also configured sales of gift cards at the center level.
Learn how you can sell and redeem gift cards at the center level.
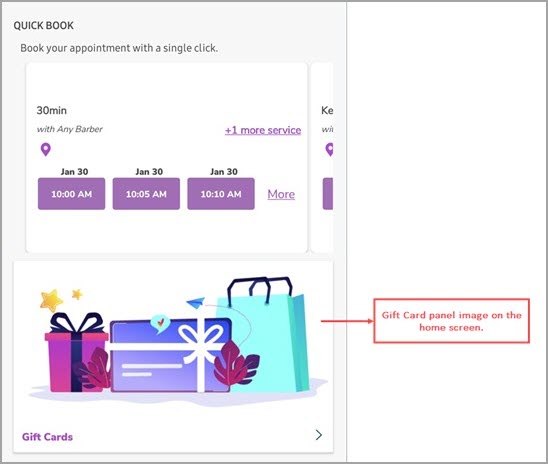
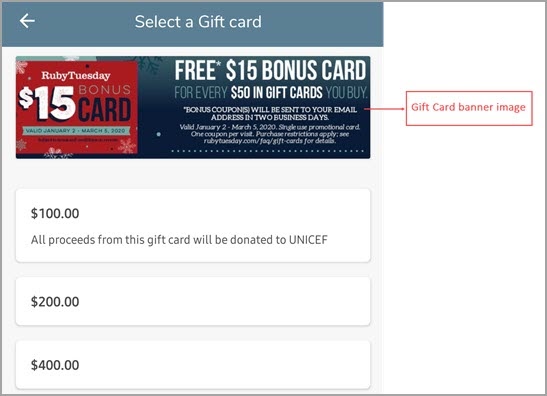
You must provide images for the following:
Gift Card panel on the home screen
Marketing banner in the Gift Cards screen
Refer to the following images:
Launch the Consumer Mobile App.
Tap the Gift Card option
The center selector appears.
Select the appropriate center.
The Select a Gift Card screen appears.
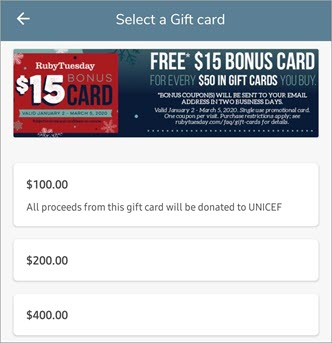
Select any of the listed amount gift cards or tap Custom to enter a custom amount.
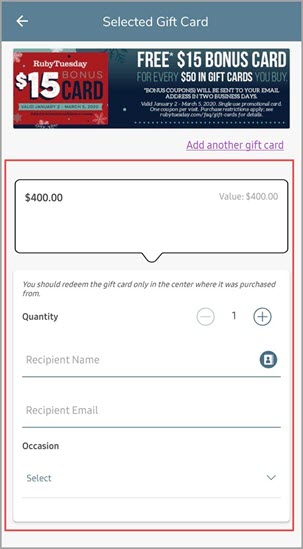
Enter the following information:
Quantity: Specify the number of gift cards you want to purchase.
Recipient Name: Enter the name of the recipient.
Recipient Email: Enter the email address of the recipient.
Occasion: Select an occasion for the gift card from the drop-down list.
Gift Card template: Select an appropriate template for the gift card.
Message: Enter the message that will appear on the gift card.
Delivery Date: Select any one of the following:
- Send Now: Select this option if you want to purchase the card and send it to
the recipient’s email immediately.
- Send Later: Select this option if you want to purchase the card now, but send
it later.
Tap Preview and Buy.
The Preview and Summary screen opens.
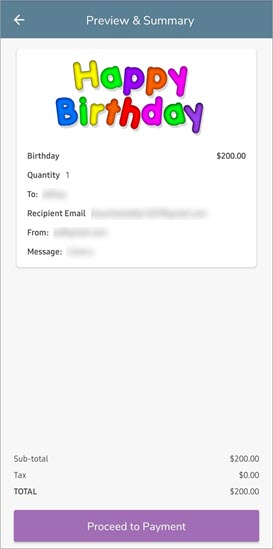
Check the preview and tap Proceed to Payment.
If you do not have a saved card, tap Pay with New Card. If you have a saved card, select the card and proceed to step 10.
Enter the card details.
Tap Pay.
The payment is made and you have successfully purchased an amount gift card.
Note
For custom service and day package gift cards, their availability as gift cards depends on the setting in the Service and Day package Master.
If the Do not sell as Gift card setting at the Service and Day package master is enabled, they will not be available as gift cards (service and day package gift cards
If the Do not sell as Gift card setting at the Service and Day package master is disabled, they can be sold as gift cards (service and day package gift cards).
This setting does not affect the pre-defined gift cards.
Join zoom appointments from CMA
From your mobile app, guests can access virtual appointments from two different places:
Home screen
Upcoming appointments screen
In the Upcoming Appointments section, tap Meeting Info.
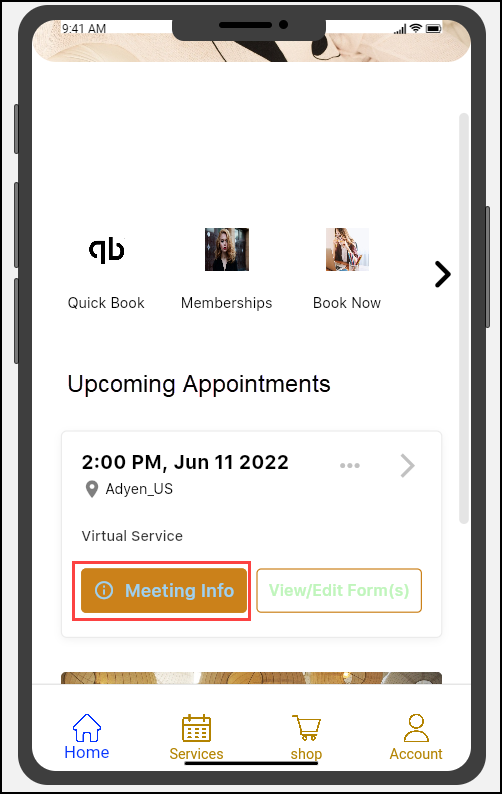
Tap Join Meeting.

Tap Account.
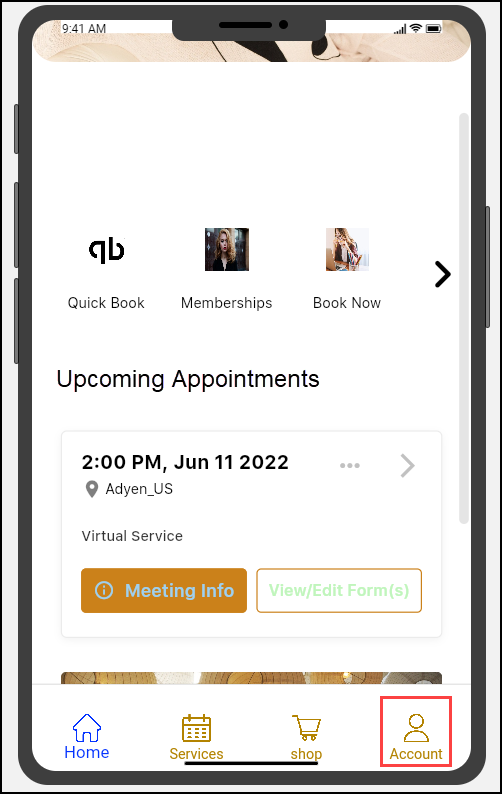
Tap Appointments.
From the Upcoming Appointments section, tap Meeting Info, and then tap the Join Meeting button.
Note
The Join Meeting button is activated five minutes before the meeting start time.
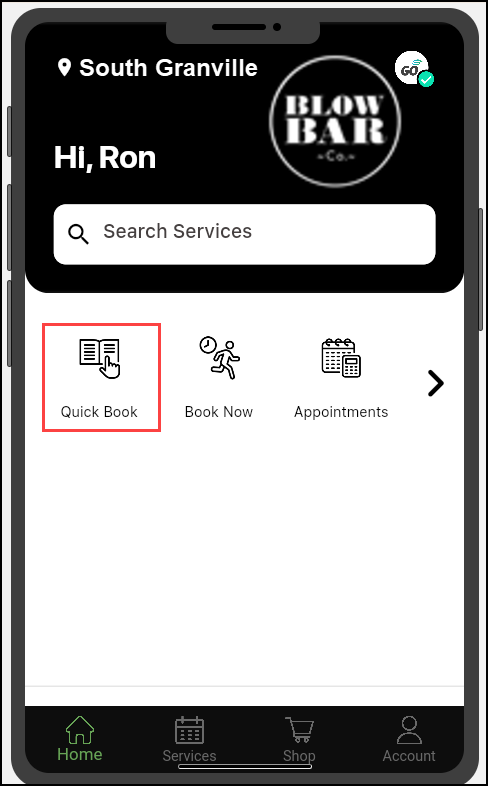
Quick book and rebook services with Consumer mobile app
Quick book
The Quick book panel on the Consumer Mobile App displays three unique appointments booked by the guest earlier; this allows your guests to quickly book any of the past three appointments without following the entire booking flow.
The guests just need to select slots for a therapist. That’s it. All services and add-ons (if any) are auto-selected based on the earlier preferences.
Note
You can book services and bundles from the Quickbook section.
All the services and bundles in the appointment, add-ons (if any), and providers are automatically added based on the earlier appointment.
The services included in the appointment cannot be changed.
For example, Sarah booked an appointment on August 1st for Manicure and Keratin treatment. She uses the Quick book panel to book an appointment on August 30th. Both the services (Manicure and Keratin treatment) will be added to the appointment.
Log into Consumer Mobile App and select the Quick book panel.
To select the therapists who have provided services in previous appointments, select the time slots for Therapists from previous appointments.
To select the first available therapist, select the time slots for Any therapist.
Note
The time slots displayed are the ones available for the current day.
To book an appointment on a different date and time, tap See more slots and select the date and time.
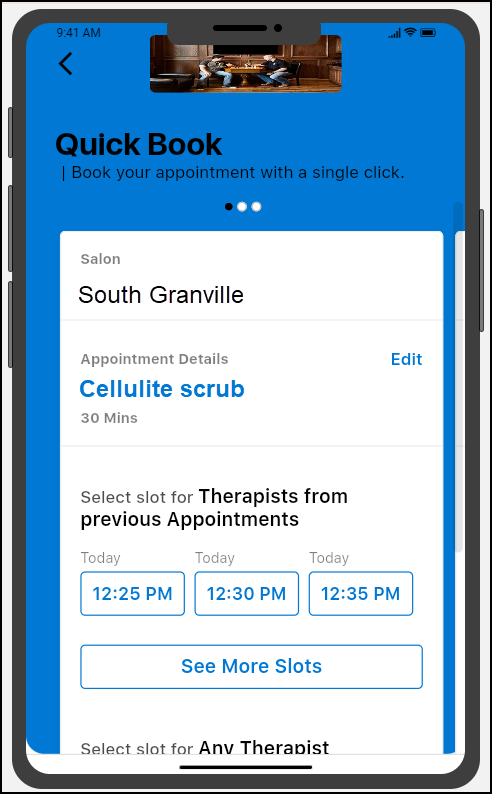
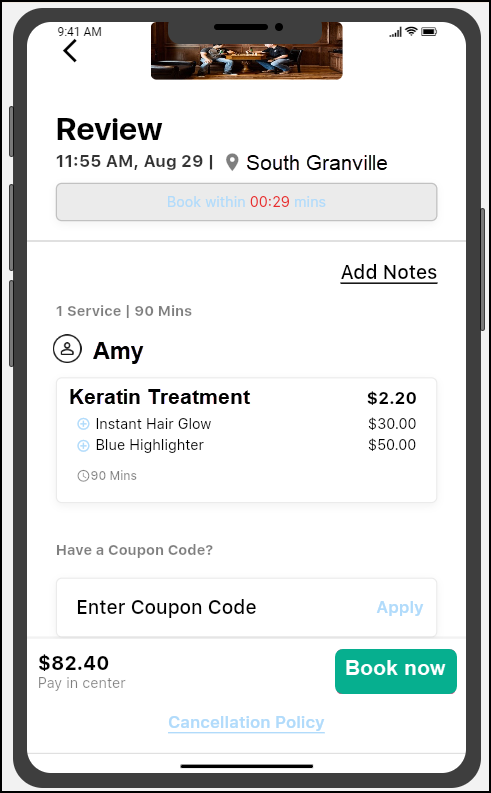
Review the details and tap Book now.
Rebook the Services
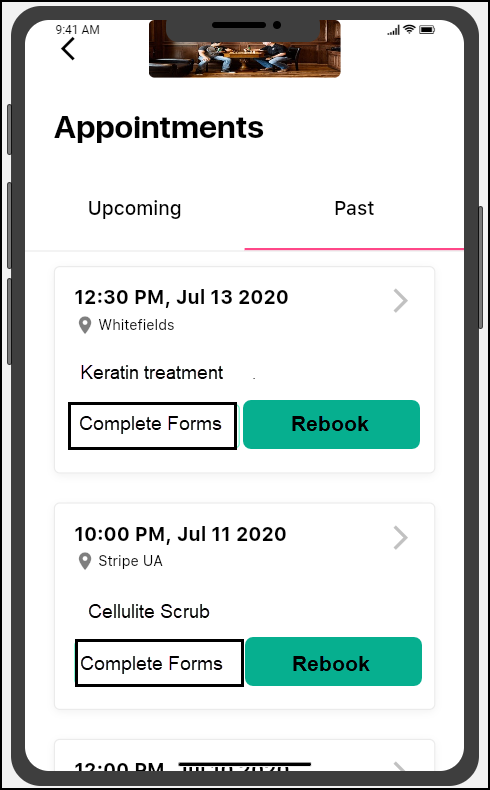
Guests usually tend to repeat the services they have taken in the past. Consumer mobile App allows your guests to book the services taken earlier, from the Past appointments tab.
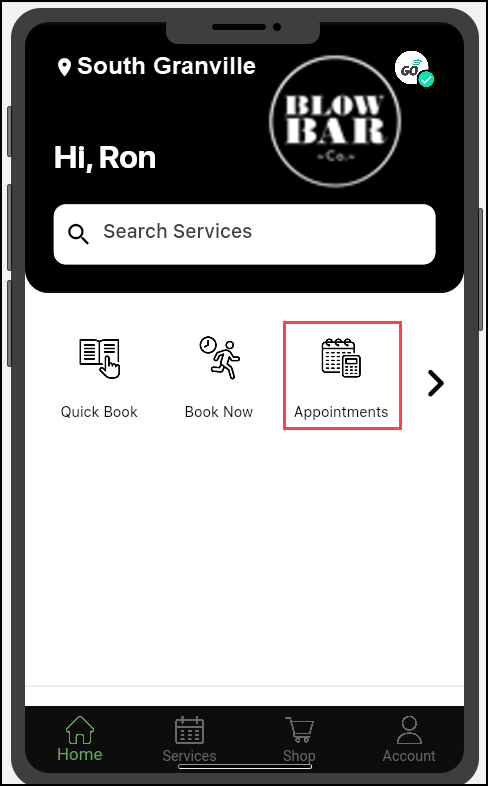
Log into Consumer Mobile App and select Appointments.
To rebook an appointment, from the Past appointments tab, tap Rebook for an appointment.
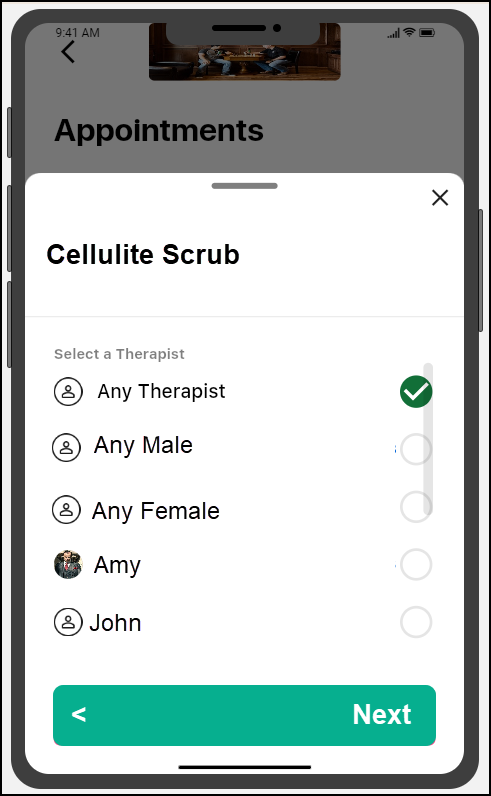
To select therapists for the services in the appointment, tap on one of the options for therapists and tap Next.
Note
The guest must select therapists for each of the services in the appointment. Here, they can also add other services to the booking.
To set a date and time for the appointment, select a date and a time slot for the appointment.
Review the details and tap Book now.
CMA: Book a fitness class with a signed waiver form
As a guest or student, you might be asked by some fitness studios to book a class only with a signed waiver form. A waiver form is a liability form students must sign before joining a fitness class. The waiver form states that students are healthy to undergo training at the studio. If any injury occurs to the student, the signed waiver form waives any legal liability of the trainer or gym.
There are two places where you can be asked to read and sign a waiver form:
While booking a class
While creating your account
As per the center settings, acknowledge and sign the waiver form.