Boost your reach
On the marketing dashboard, you can view the number of guests who are unreachable. To boost your reach, you can run a notes campaign for a target segment of such guests. You can add specific notes to be displayed to your front-desk staff when they are performing certain guest actions.
Create and publish notes campaign
A Notes campaign is essentially a campaign to add Guest Notes automatically to Guest Profiles that meet a particular target segment.
For example, you can add a Guest Note such as "Ask the guest for a valid phone number and email address" to a target segment of guests created on the current day and whose phone number or email address are not verified. You can further configure when such Note should appear - such as during check-in. This way, the Note acts like a handy reminder to the front desk to ask for valid contact details from the guest when they come in for an appointment.
You can set up such a campaign as an Always On Campaign so that every day Zenoti checks for guests will invalid phone numbers and email addresses and adds this Note to Guest Profiles who meet the target segment requirements.
Before You Begin
You must have the following permissions enabled for your role:
Create Notes Campaign permission to be able to create a notes campaign name of the role such as Owner > Permissions tab > Marketing Manager > Campaigns section).
Send/Schedule Notes Campaign to be able to publish notes campaign.
Note
If this permission is enabled for a role, but the Create Notes Campaign permission is disabled, the employee cannot view the Notes option in the left-hand side menu (Marketing > Campaigns) on the Marketing dashboard.
Click the Marketing icon and navigate to Campaigns > Notes.
Based on your requirement, Add one of the following campaigns:
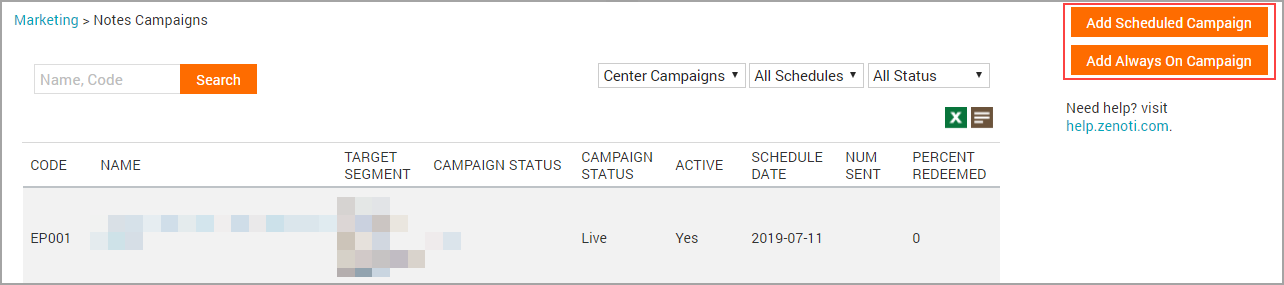
Add Scheduled Campaign: Scheduled campaigns let you send an email on a scheduled date and time.
Add Always on Campaign: Always on campaigns let you set up a series of emails and then let Zenoti send them out at the right time to the right customers.
Depending on your selection, either Create Scheduled Campaign or Create Always On Campaign page opens.
Enter campaign information.

Click Done.
Select the centers at which you want the Notes campaign to go live.
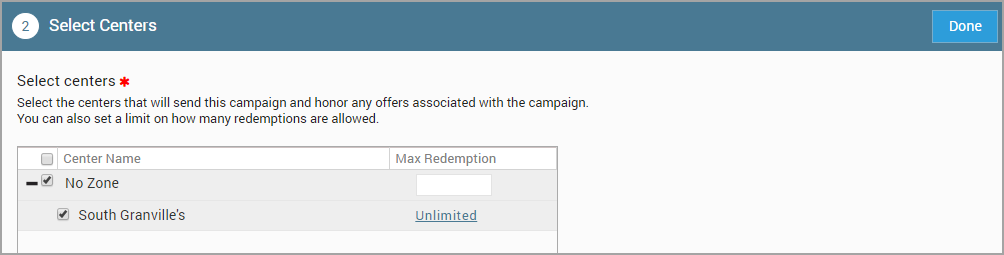
Click Done.
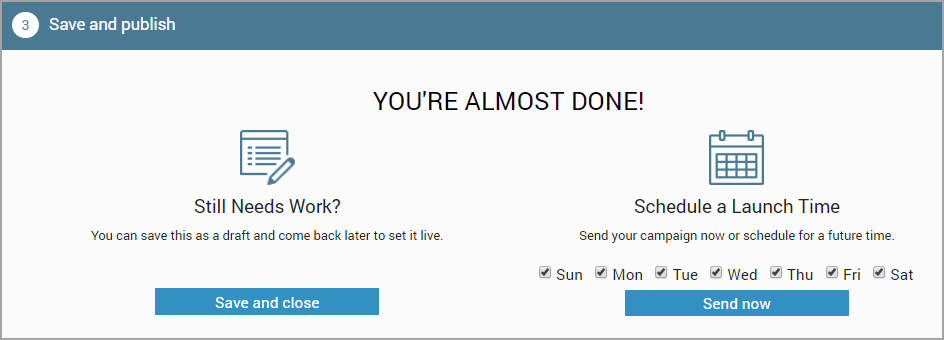
Save and publish.
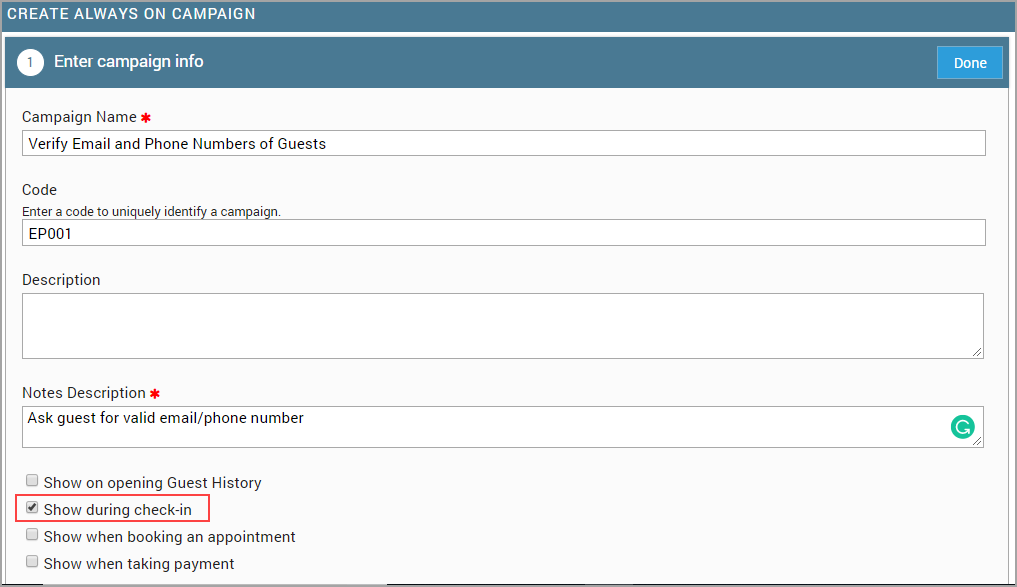
Enter campaign info
In this section, do the following:
Campaign Name | Enter a name for the campaign. For example: Verify the email and phone numbers of guests. |
Code | Enter a code to identify the campaign. |
Description | Enter an appropriate description. |
Notes Description | Enter the text that should appear in the Guest Note. For example: Ask guest for a valid email/phone number. |
Specify when the Note should appear | The options are:
For example, if you choose Show during check-in, then the note will appear the next time the guest checks in. |
Select the target segment | Select a target segment that you created earlier. NoteTo get the exact number of guests in the selected target segment, click Count. For example, you may have created a target segment with the rules (Demographic - Creation Date is equal to 0 Days, Guest Email is not Verified, and Guest Phone Number is not Verified). |
Save and Publish
Click Save and Close to save the campaign as draft.
Click Send Now to send out the campaign.
Note
If you selected Always On campaign earlier, all the days of the week are selected by default.