Create a class schedule
A class schedule is a plan of the days and times when a studio can conduct the class. In Zenoti, you can create a single schedule for a class or a recurring schedule that runs daily, weekly, or monthly.
Before you begin, ensure the class has already been created and assigned to your studio.
Create a single class schedule
At the center level, click the Fitness icon and navigate to Classes.
Search and select the class for which you want to create a schedule.
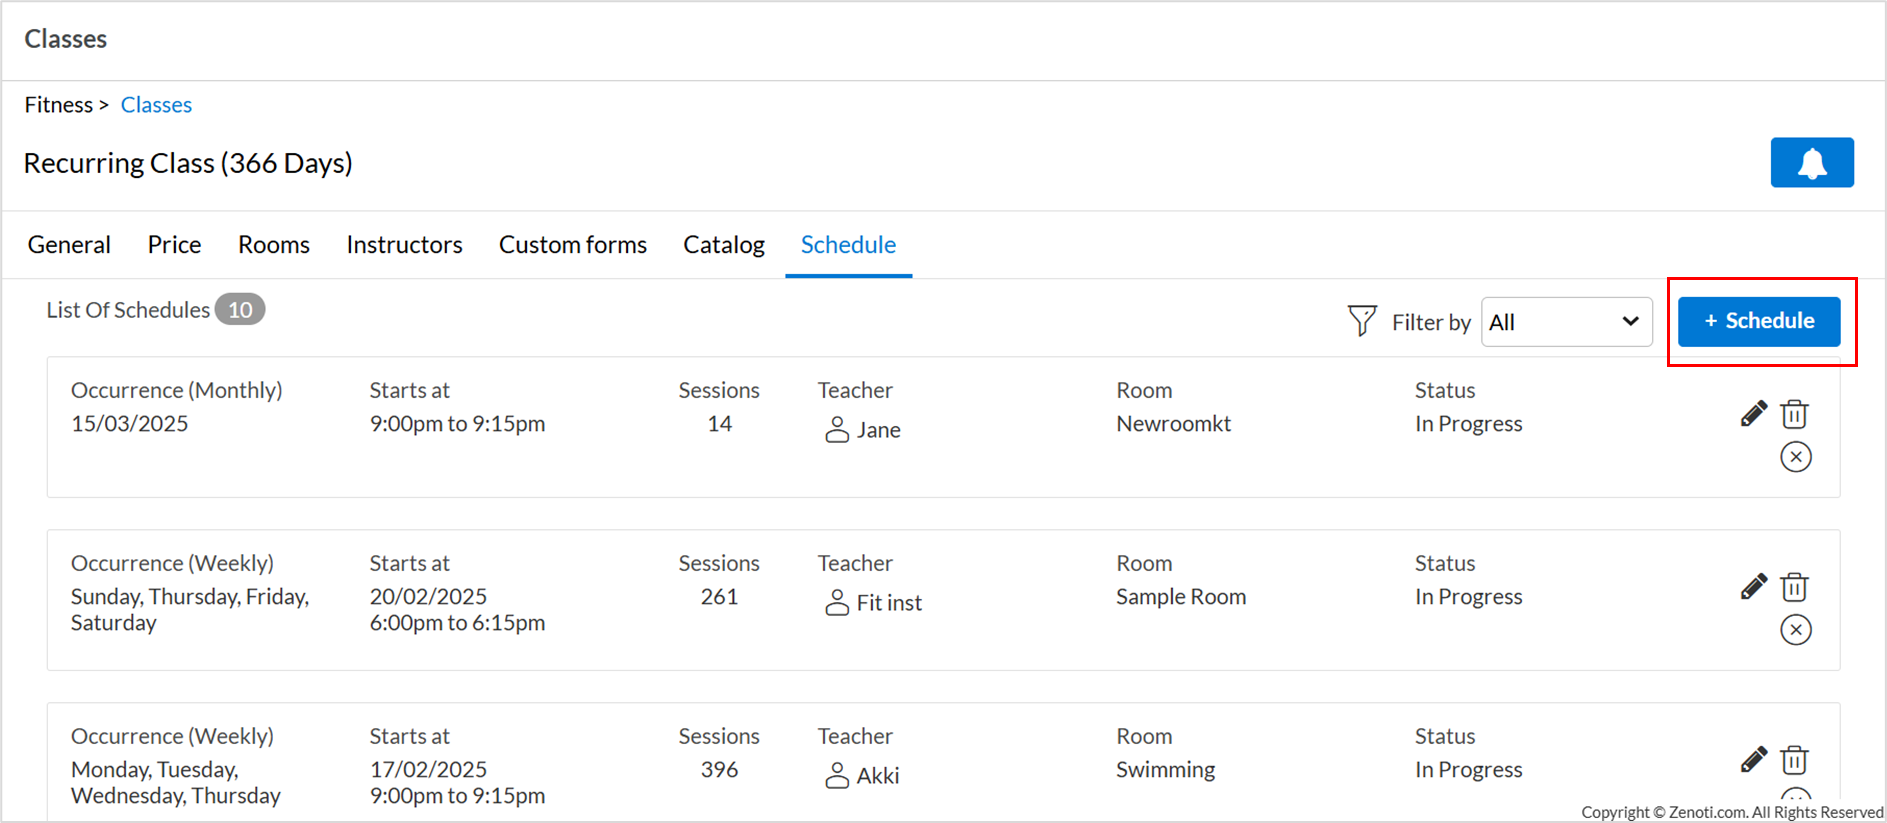
Select the Schedule tab.
Click +Schedule.
Select the Single schedule option.

Select the date, time, and instructor pay rate for the class. By default, you can see the pay rate that is defined while creating the class. Read: Apply pay rates for instructors
Enter other schedule details for the single class.
Field
Description
Instructor Virtual Link
Meeting link that the instructor can use to conduct the virtual class. E.g. Zoom meeting video call link.
This field is editable only if your business has enabled virtual classes. Read: Enable virtual classes for your studio
Student Virtual Link
Meeting link that the students can use to participate in the virtual class. This field is editable only if your business has enabled virtual classes.
Show In Catalog
Select this option to display this class schedule on Webstore or CMA. This is also defined while creating the class. You can modify this field at the schedule level if required. The HTML Description: displays a brief description of the class schedule on Webstore or CMA. You can add images and other text formats in this description.
Free Session
Select this option if you do not want to charge students for this class. This is also defined while creating the class. You can modify this field at the schedule level if required.
Add Teacher
Click the Add Teacher icon to assign additional instructors to a class during the current schedule. Adding more instructors or teachers is useful for longer classes or sessions with high attendance.
To remove an instructor, click the Delete Teacher icon, which appears only if more than one instructor is assigned to the schedule.
Note
Every class schedule must always have at least one instructor assigned.
Click Create Schedule.
Create a recurring class schedule
At the center level, click the Fitness icon and navigate to Classes.
Search and select the class for which you want to create a schedule.
Select the Schedule tab.
Click +Schedule.
Select the Recurring schedule option.
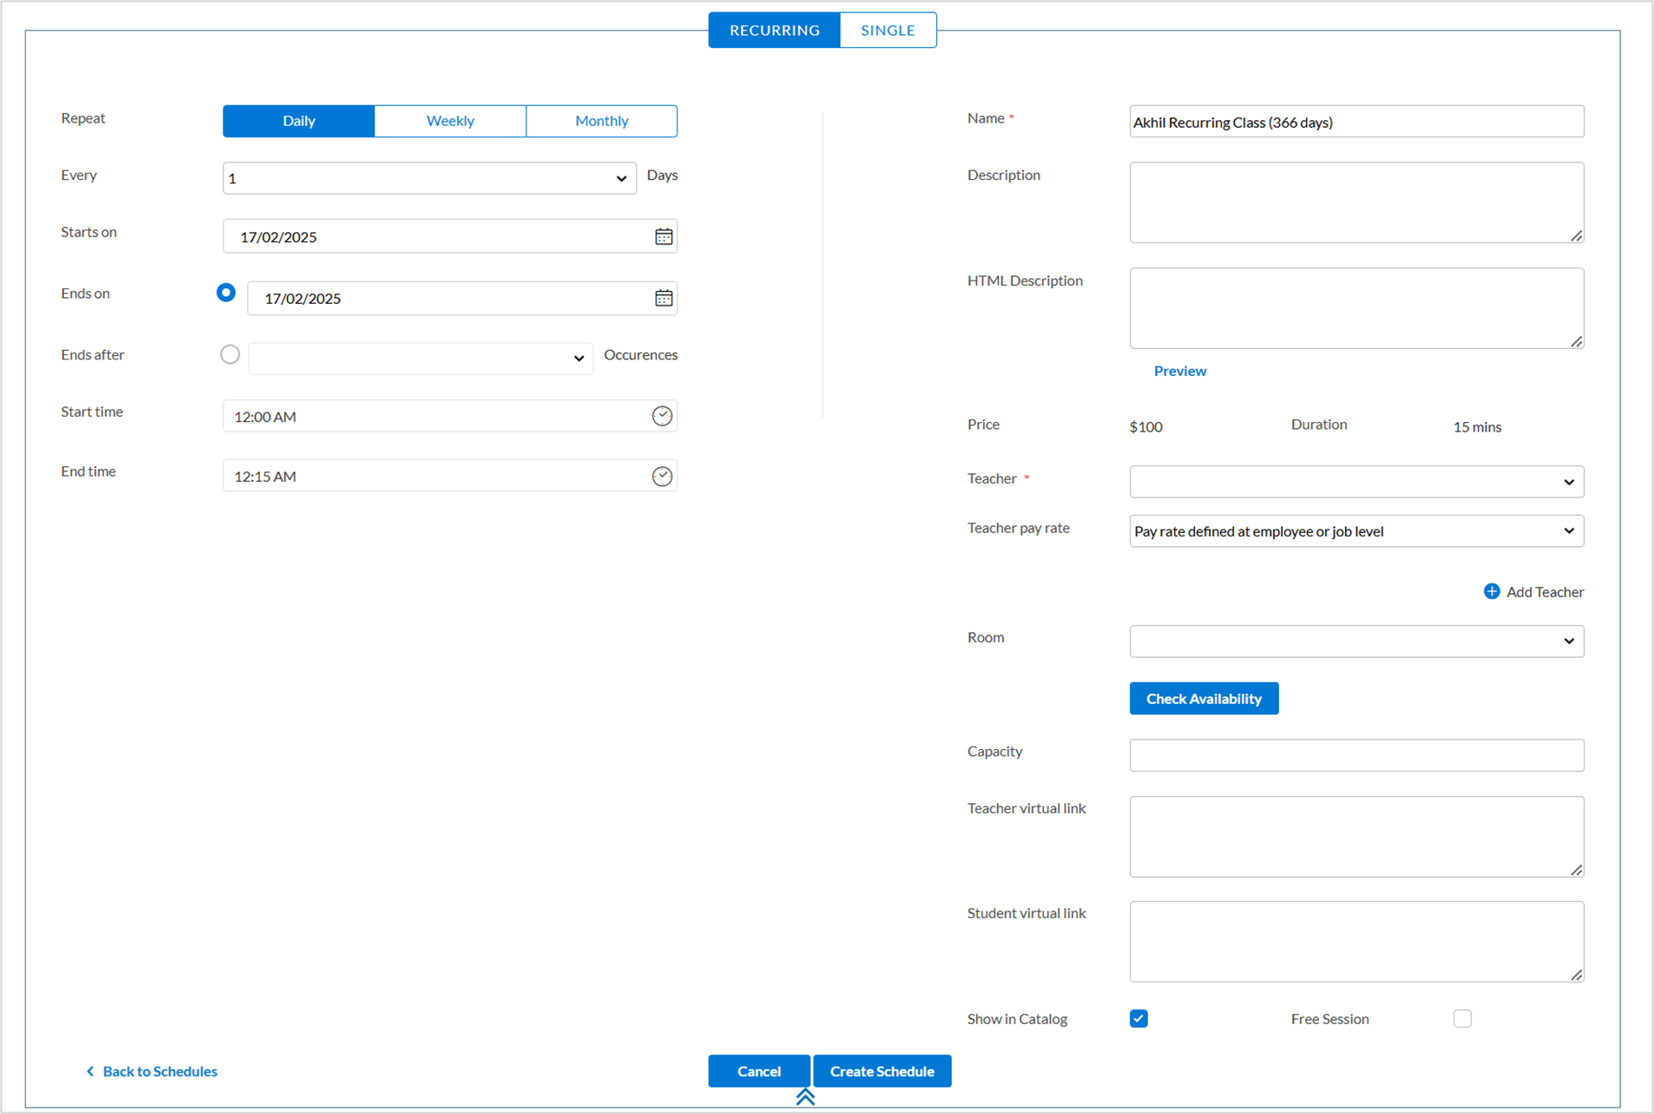
Select the frequency at which you want this class and how many days, weeks, or months this schedule will repeat. This can be Daily, Weekly, or Monthly.
If you select Weekly, along with the number of weeks, select the days of the week on which the class can be conducted.
Choose the Start date and End date. The default maximum difference allowed is 90 days, but you can extend this to 366 days. To make this change, reach out to a person at Zenoti.
Select the pay rate that you want to pay to the instructor for this schedule. By default, you can see the pay rate that is defined while creating the class. Read: Apply pay rates for instructors
Enter other schedule details for the recurring class.
Field
Description
Instructor Virtual Link
Meeting link that the instructor can use to conduct the virtual class. For example, Zoom meeting video call link.
This field is editable only if your business has enabled virtual classes. Read: Enable virtual classes for your studio
Student Virtual Link
Meeting link that the students can use to participate in the virtual class. This field is editable only if your business has enabled virtual classes.
Show In Catalog
Select this option to display this class schedule on Webstore or CMA. This is also defined while creating the class. You can modify this field at the schedule level if required. The HTML Description: displays a brief description of the class schedule on Webstore or CMA. You can add images and other text formats in this description.
Free Session
Select this option if you do not want to charge students for this class. This is also defined while creating the class. You can modify this field at the schedule level if required.
Add Teacher
Click the Add Teacher icon to assign additional instructors to a class during the current schedule. Adding more instructors or teachers is useful for longer classes or sessions with high attendance.
To remove an instructor, click the Delete Teacher icon, which appears only if there is more than one instructor assigned to the schedule.
Note
Every class schedule must always have at least one instructor assigned.
Click Create Schedule.
Also watch: How to edit a schedule in the roster view?