Accounting Integration v2
Integrate Zenoti with an accounting platform
Notice
This article is for accounting integration v2.
In Zenoti, you can integrate with an accounting platform that can help you track accounting activities and help you prepare the following book of accounts:
Profit and loss accounts
Cash-flow statements
Balance sheets
Expenses
Zenoti supports integration for Xero and QuickBooks Online (QBO).
At the organization level, click the Configuration icon.
Search for and select Accounting from the Integrations section.
Set up and authorize the accounting platform.
Expand the Provider section and select the accounting platform.
Click Continue.
Note
The fields in the Configuration section are different for each accounting platform.
Enter the details of the account that you have on the accounting platform:
For Xero, follow these steps.
For QBO, follow these steps.
Choose whether you want to send location details to the accounting platform.
With locations
To enable the integration with locations, switch on the Multi-Location toggle and configure Xero or QBO.
Without locations
Select the sync type.
To sync data based on the invoice closed date, select the Closed Date option to sync data based on the invoice closed date.
Select the sync type: Invoice-wise, Invoice-wise as Journal entries, Day-wise, Day-wise as Journal entries.
Configuration
Sync
Invoice-wise
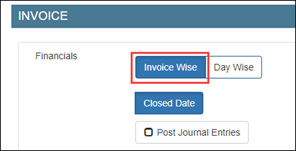
For each invoice in Zenoti, an invoice is created in the accounting platform.
Invoice-wise as Journal entries

For each invoice in Zenoti, an invoice is posted as a journal entry to the accounting platform.
Day-wise
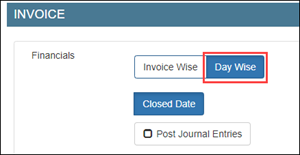
For all the invoices in Zenoti on a day, a summarized invoice is created in the accounting platform.
Day-wise as Journal entries
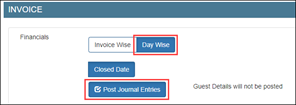
For all the invoices in Zenoti on a day, a summarized invoice is posted as a journal entry to the accounting platform.
Configure the sync.
Based on the sync type that you’ve selected in Step-4, select the way you want to post data from Zenoti to the accounting platform: by invoice or by journal entries.
Map data.
After you’ve completed configuring how you want to push data in Zenoti to the accounting platform, you are ready to map data in Zenoti to data in the accounting platform.
Configured data by
Required mapping
Invoice
Payment Mapping
Tax-rates Mapping
Journal entries
Payment Mapping
Item Mapping
Sync data.
After you’ve mapped the data, you can manually sync data or schedule a sync job to auto sync data on a timely basis.
Important
For scheduled sync, reach out to Zenoti Support.
Set up and authorize Xero
Notice
This article is for accounting integration v2.
Set up
Important
Before you begin, ensure that you have a Xero account.
At the organization level, click the Configuration icon.
Search for and select Accounting from the Integrations section.
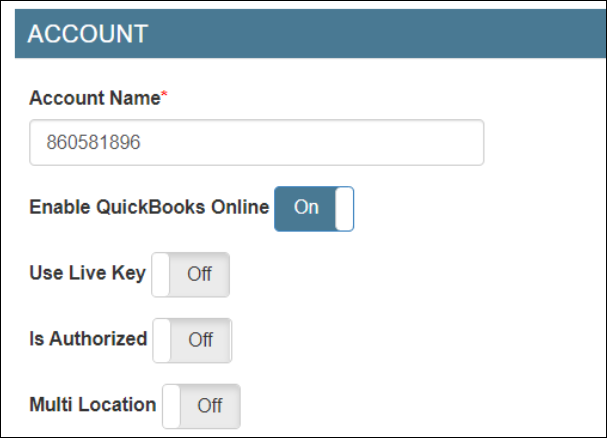
Under the Configuration tab, expand the Account section.
You can see the account name and company name of your business. The account name is a unique identifier for your business. This is a random combination of numbers. Zenoti will use this id while creating a company for your business. For example, 3456782
Switch on the following toggles:
Enable Xero: Select this switch to enable integration. If you want to pause the sync, you can turn off this switch.
Use Live Key: If you want to test the integration, turn off this switch. After you are ready to integrate data, you must turn on this switch.
Authorize
Important
The Authorize button is visible if you've configured the invoice and sync settings in the Configuration tab.
At the organization level, click the Configuration icon.
Search for and select Accounting from the Integrations section.
Click Authorize - this button is visible only after you configure the invoice and sync settings in the Configuration tab.
A new tab opens that will ask you for access to your Xero account to Zenoti. If the new tab does not open, you can see the authorization link in the Authorize section. Open a new tab on the browser, copy-paste the authorization link, and press Enter.
Click Allow access and close the tab.
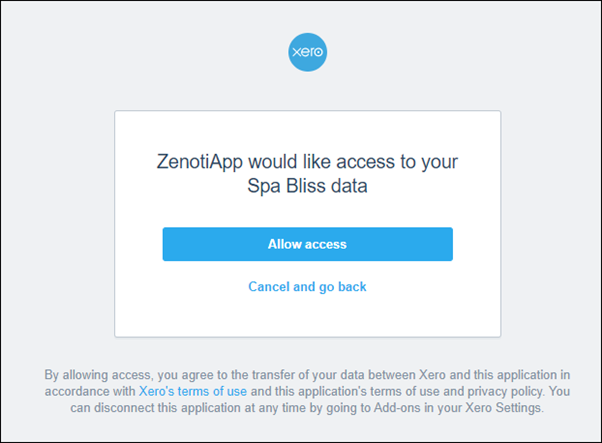
If you have multiple organizations created for your business on Xero, select the organizations and click Allow access.
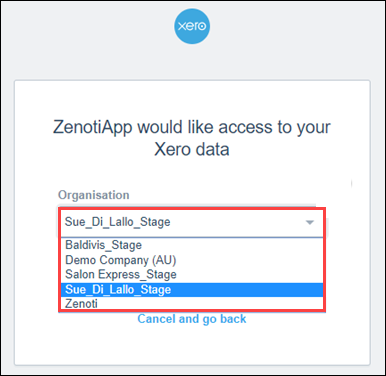
Close the window.
In Zenoti, click Save.
Set up and authorize QuickBooks Online
Notice
This article is for accounting integration v2.
Set up
Important
Ensure that you have an account created on QuickBooks Online (QBO).
At the organization level, click the Configuration icon.
Search for and select Accounting from the Integrations section.
Under the Configuration tab, expand the Provider section.
Select QuickBooks Onlineas the accounting platform.
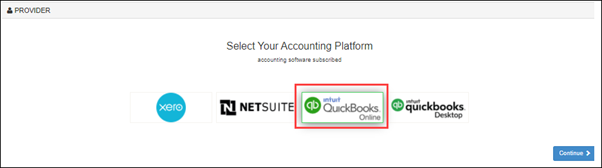
Click Continue.
Click Advanced.
Switch on the Use Live Key toggle.
Authorize
Important
This tab is visible only after you configure the invoice and sync settings in the Configuration tab.
Expand the Authorize tab.
Click the Authorize button. A new tab opens in the browser asking for access to your QBO account.
Note
If you have a single organization created for your business on QBO, you will see the following window:
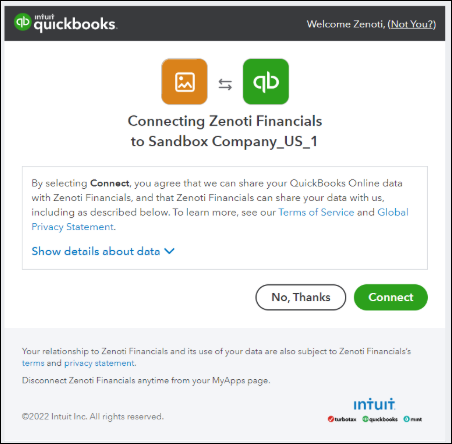
To allow Zenoti to access your QBO account, click Connect.
Click Next twice.

Click Finish.
Important
After the authorization is successful, note that the Is Authorized toggle gets switched on automatically.
Expand the Company section and verify the connection.
Important
Sometimes, the connection may not be established immediately.
Configure to post accounting data to Xero with location details
Notice
This article is for accounting integration v2.
Step 1: Create locations or tracking categories in Xero
Login to your Xero account.
Click your company name.
For example, Spa Bliss.
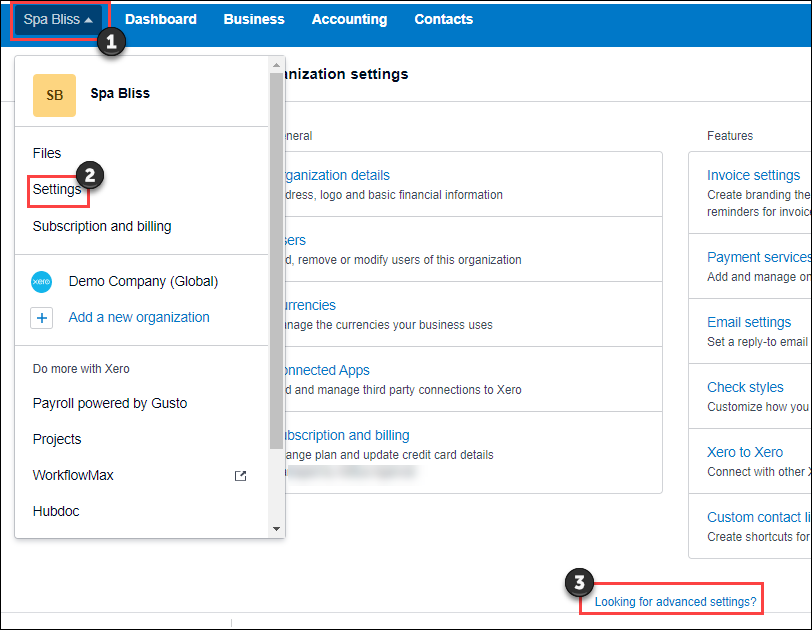
Click Settings and then click Looking for advanced settings?
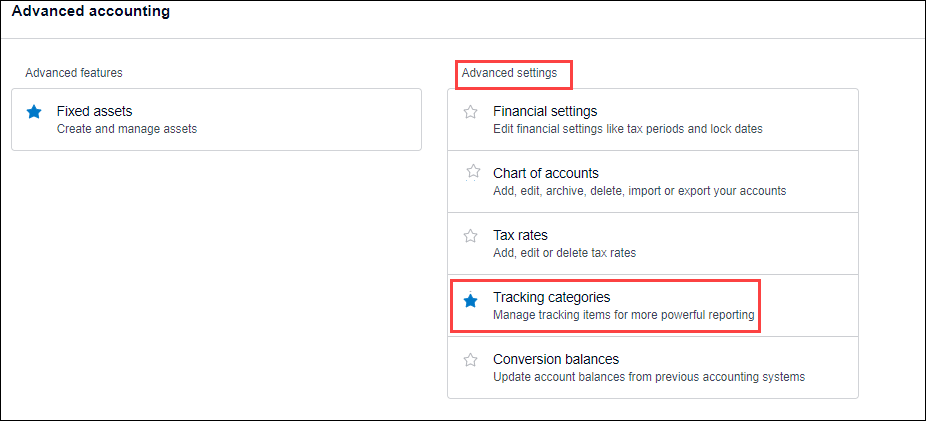
Click Tracking categories.
Click Add Tracking Category.
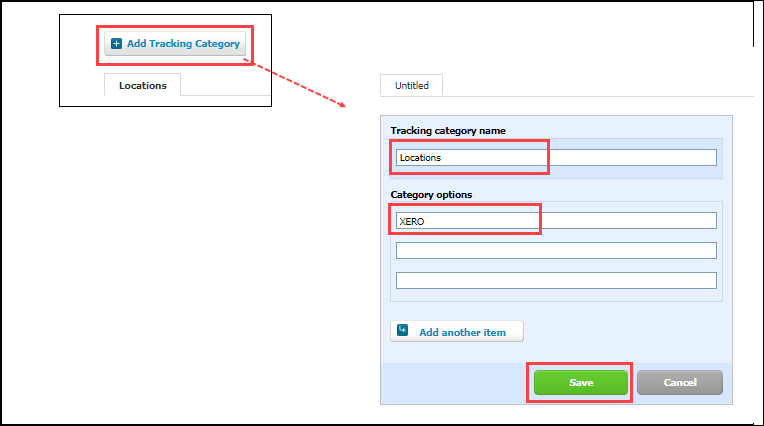
In the Tracking category name box, enter Locations.
In the Category options box, enter the center names.
Keep this information handy to map the category options as location names in Zenoti.
Click Save.
Step 2: Configure location details in Zenoti
At the organization level, click the Configuration icon.
Search for and select Accounting from the Integrations section.
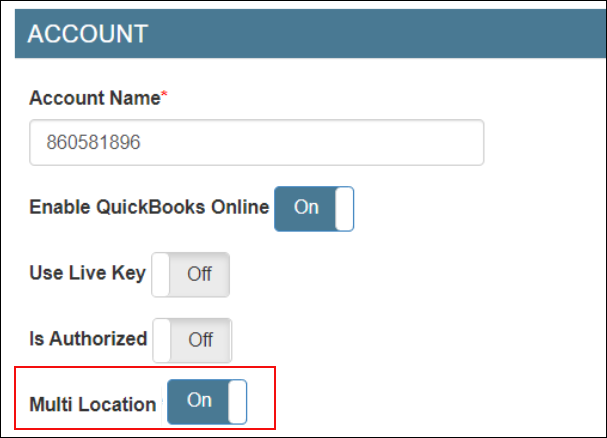
Expand the Configuration tab and navigate to the Account section.
Switch on the Multi-Location toggle.
Navigate to the Sync section and click Save.
Expand the Locations tab.
In the Mapped Location box, enter the category name that you’ve entered in QBO.

Click Save.
Expand the Manual Sync tab.
Click Get to sync the locations.
Expand the Locations tab and verify that the QBO Location is updated, and the Active toggle is switched on.

Configure to post accounting data to QuickBooks Online with location details
Notice
This article is for accounting integration v2.
Step 1: Create locations or tracking categories in QuickBooks Online(QBO)
Caution
Businesses operating in the USA must configure locations for automated tax calculation.
Login to your QBO account.
Click the settings icon.
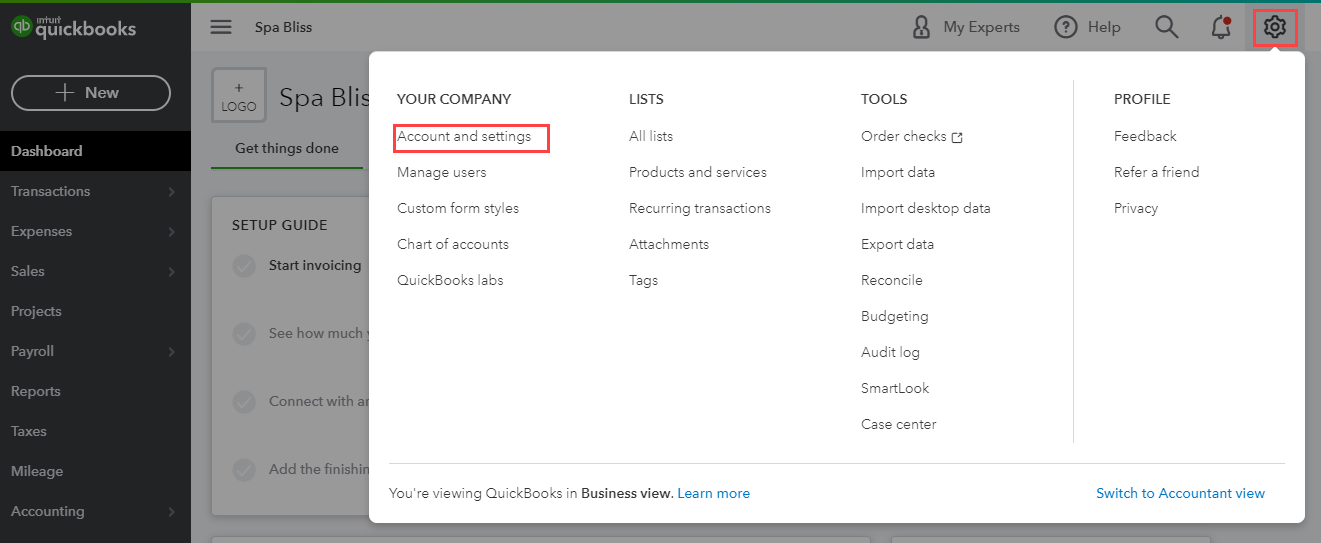
Click Account and settings.
Click Advanced.
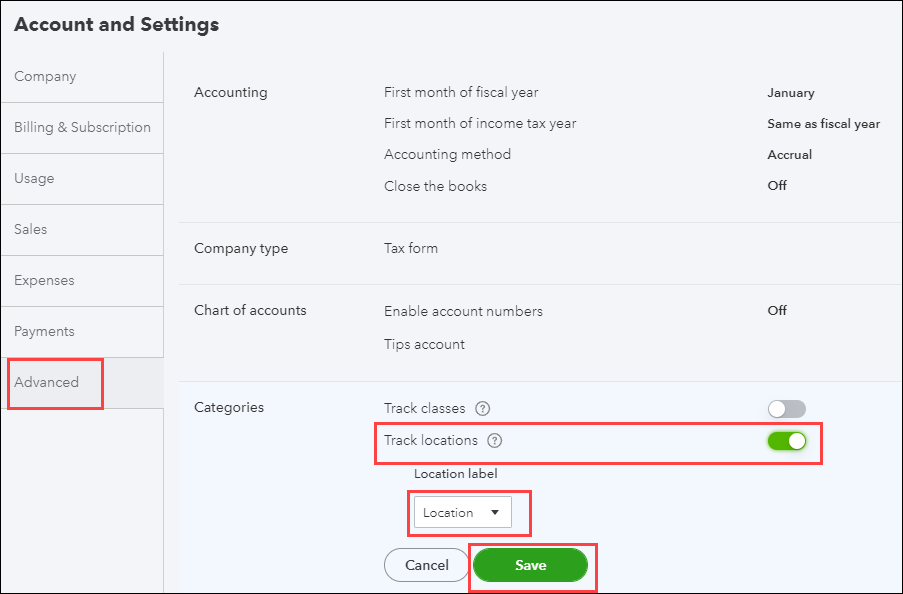
Switch on the Track locations toggle.
From the Location label list, select Location.
Click Save.
In the upper-right corner of the screen, click the settings button.
Click All Lists.
You can see that the Locations section is enabled.
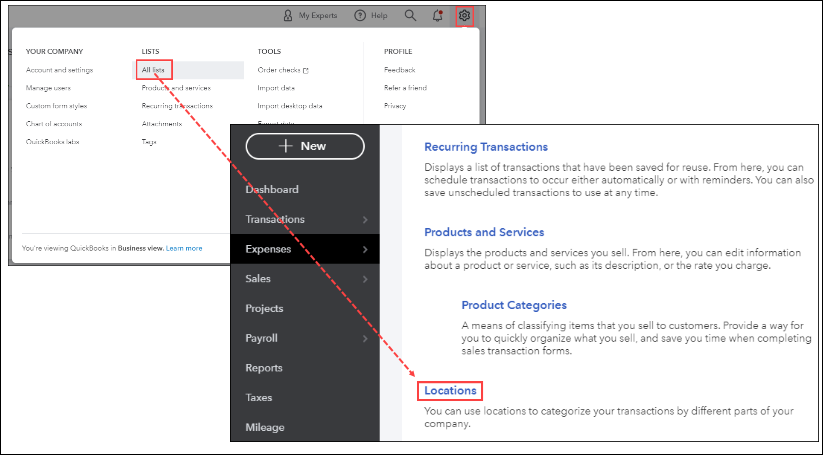
Click Locations.
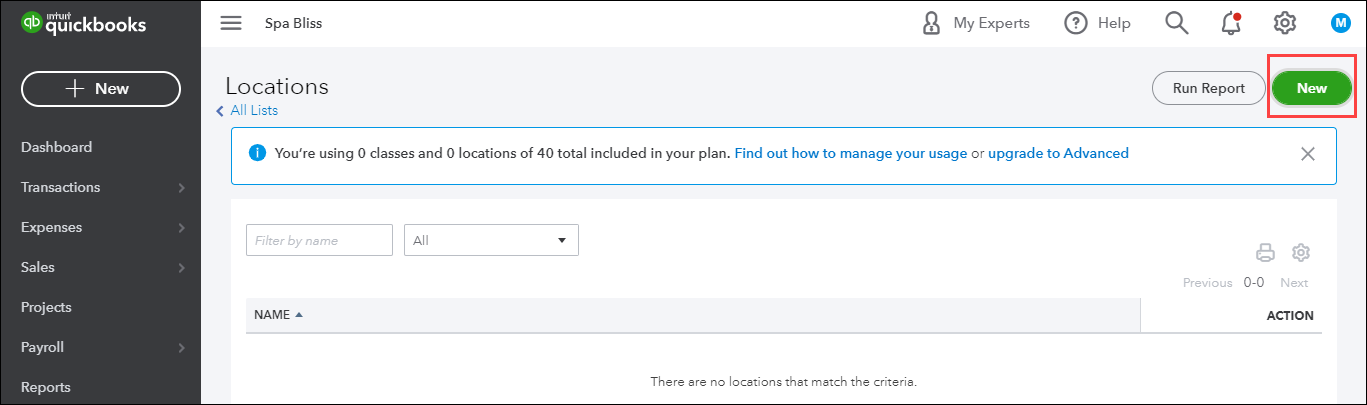
Click New.
Enter the location name.
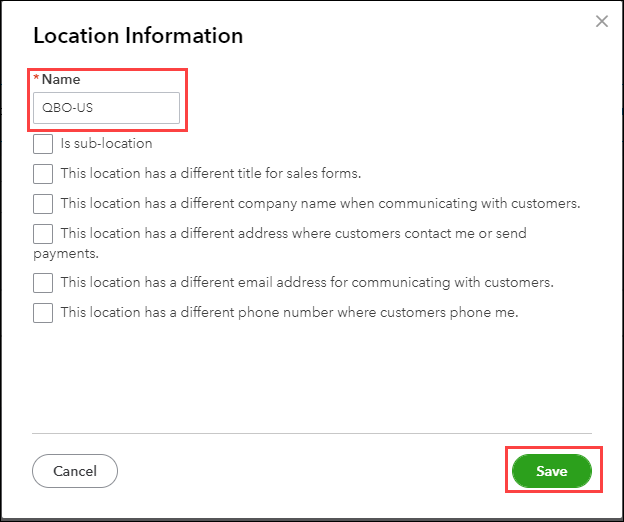
Click Save.
Step 2: Configure location details in Zenoti
At the organization level, click the Configuration icon.
Search for and select Accounting from the Integrations section.
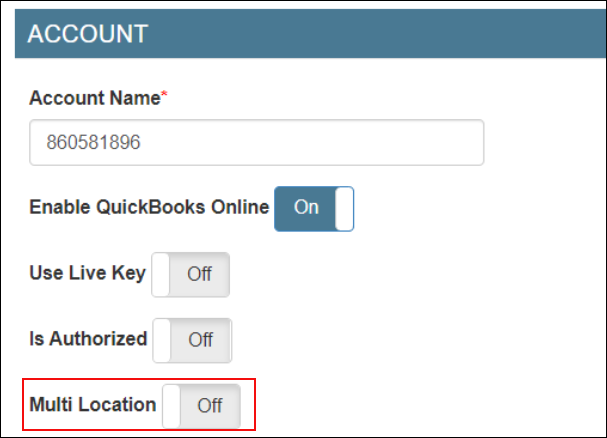
Expand the Configuration tab and navigate to the Account section.
Switch on the Multi-Location toggle.
Navigate to the Sync section and click Save.
Expand the Locations tab.
In the Mapped Location box, enter the category name that you’ve entered in QBO.
Click Save.
Expand the Manual Sync tab.
Click Get to sync the locations.
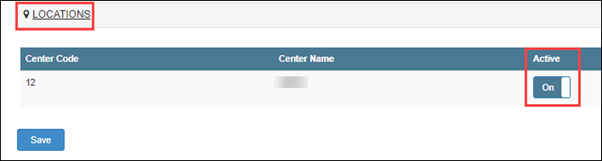
Expand the Locations tab and verify that the QBO Location is updated, and the Active toggle is switched on.
Configure the accounting platform without location details
Notice
This article is for accounting integration v2.
Caution
Businesses operating in the USA cannot integrate to an accounting platform without location details.
At the organization level, click the Configuration icon.
Search for and select Accounting from the Integrations section.
Expand the Configuration tab and navigate to the Accountsection.
Switch off the Multi-Location toggle.
Navigate to the Sync section and click Save.
Expand the Locations tab and verify if the Active toggle is switched on.
Important
The data will be synced ONLY for the centers that have the Active toggle switched on.
Notice
This article is for accounting integration v2.
At the organization level, click the Configuration icon.
Search for and select Accounting from the Integrations section.
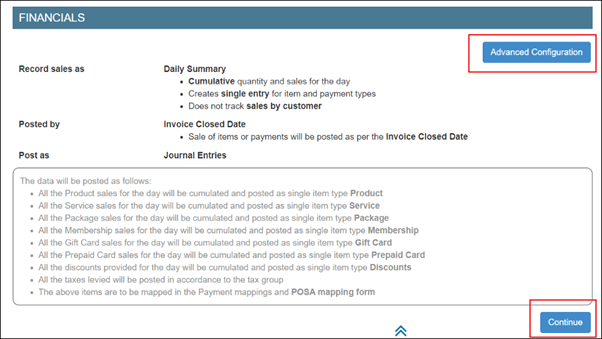
Expand the Configuration tab and navigate to the Invoice section.
Configure the way you want to post data: financials, customer details, item grouping, payment, tax, and miscellaneous journal entries.
Under the Configuration tab, navigate to the Sync section and enter the following details:
Start Date: Select the date from when you want to start posting your data to the accounting platform.
Delay: Specify the duration between each data posting.
Click Save.
Map journal entry items for accounting integration
Notice
This article is for accounting integration v2.
After you configure data to be posted by journal entries, you must map each item in Zenoti to the corresponding chart of accounts in the accounting platform.
Item is posted by | Map |
|---|---|
Category | Each category to the corresponding chart of accounts in the accounting platform |
Subcategory | Each subcategory to the corresponding chart of accounts in the accounting platform |
Default item | Default item to the corresponding chart of accounts in the accounting platform |
Code | Each item to the corresponding chart of the accounts in the accounting platform |
Important
Before you start mapping the items, you must sync the accounts in the Manual Sync tab.
At the organization level, click the Configuration icon.
Search for and select Accounting from the Integrations section.
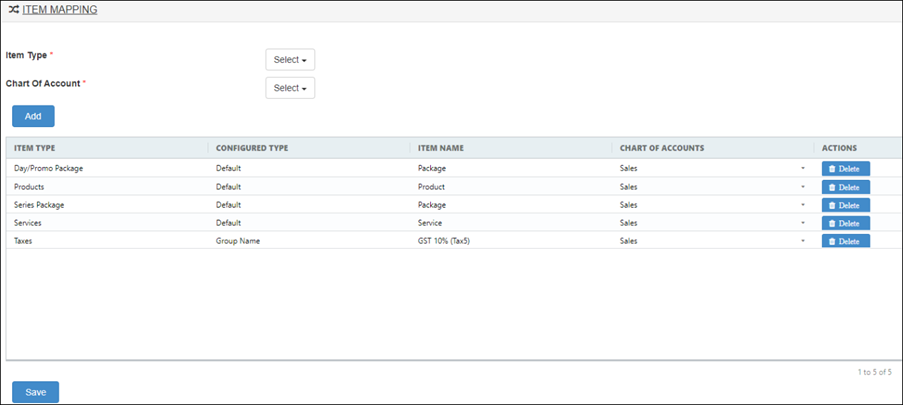
Expand the Item Mapping tab.
For each item in Zenoti, do the following:
From the Item Type list, select the item in Zenoti.
Important
If you’ve configured to post data by item code, item category, or item subcategory, you must also select the respective item from the Item Name list.
From the Chart Of Account list, select the corresponding item account in the accounting platform.
Click Add.
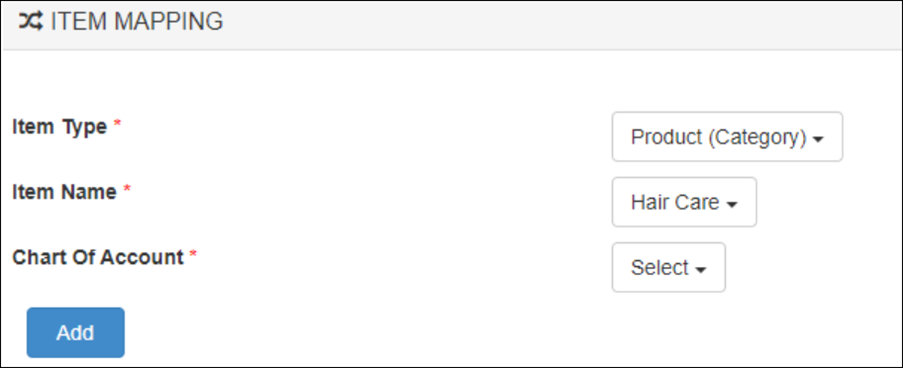
Click Save.
Map miscellaneous journal entries for accounting integration
Notice
This article is for accounting integration v2.
At the organization level, click the Configuration icon.
Search for and select Accounting from the Integrations section.
Expand the Miscellaneous Journal Type Mapping tab.
Select the journal entry: Cash Deposit, Cash Pay-In, Cash PayOut, or Digital Payment Fees.
Select the locations (centers).
Select the subsidiary for each location.
Select the chart of accounts in the accounting platform for credit entry.
Select the chart of accounts in the accounting platform for debit entry.
Click Add.
Note
If the journal entry has a negative amount, the mapped debit account will be credited, while the mapped credit account will be debited.
For each journal entry, repeat steps 4 - 9.
Map payment types for accounting integration
Notice
This article is for accounting integration v2.
After you complete configuring how you want to push data from Zenoti to the accounting platform: by journal entries or by invoices, you must map each payment type in Zenoti to the corresponding payment bank account in the accounting platform.
Important
Before you start mapping the payment types, you must sync the accounts in the Manual Sync tab.
At the organization level, click the Configuration icon.
Search for and select Accounting from the Integrations section.
Expand the Payments Mapping section.
For each payment type in Zenoti, do the following:
From the Payment Header list, select the payment type in Zenoti.
From the Mapped Account list, select the corresponding payment bank account or payment method in the accounting platform.
Note
If you've configured an account on the accounting platform as a bank account, and you've enabled payments on that bank account, only then you will see the account in the Mapped Accounts list.
Click Add.
Click Save.
Map tax rates for accounting integration by invoices
Notice
This article is for accounting integration v2.
After you configure to post accounting data to the accounting platform by invoices, you must map the tax rates as groups or as components to the corresponding chart of accounts in the accounting platform.
Important
Businesses operating in the USA must map all tax rates to the tax name: TAX.
At the organization level, click the Configuration icon.
Search for and select Accounting from the Integrations section.
Locate and expand the Tax Rates Mapping tab.
For each tax group or tax component in Zenoti, do the following:
From the Tax Group (Zenoti) list, select the tax group in Zenoti.
From the Tax Rates (accounting platform) list, select the corresponding tax rate name in the accounting platform.
Click Add.
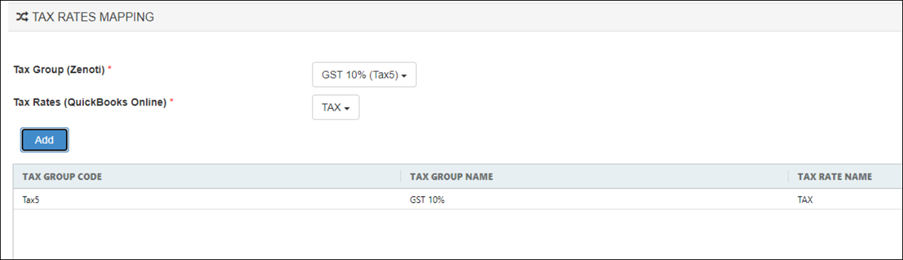
Click Save.
Notice
This article is for accounting integration v2.
At the organization level, click the Configuration icon.
Search for and select Accounting from the Integrations section.
Expand the Configuration tab and navigate to the Invoice section.
Configure the way you want to post data: financials, customer details, item grouping, payment, tax, and miscellaneous journal entries.
Under the Configuration tab, navigate to the Sync section and enter the following details:
Start Date: Select the date from when you want to start posting your data to the accounting platform.
Delay: Specify the duration between each data posting.
Click Save.