Configure the CMA v2 template
CMA v2 General
After you enable Consumer Mobile App (CMA) for your organization, you must configure the settings for the CMA from the CMA template. This template allows you to configure important settings such as enabling Zenoti Go, enabling Referral Program, and adding text labels for buttons and messages. This template also allows you to customize the branding by adding relevant text, images and titles.
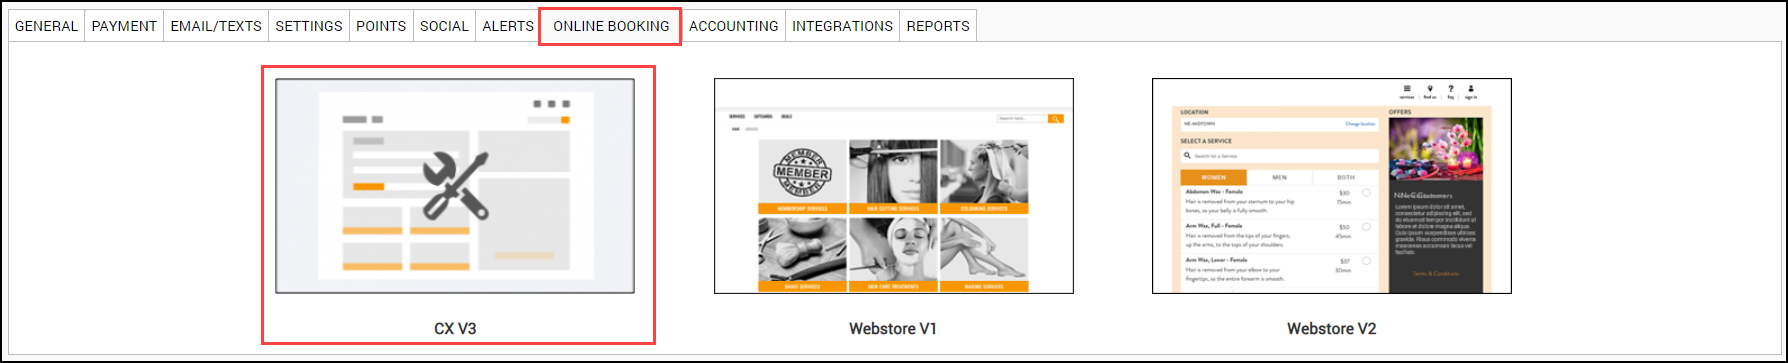
At the organization level, click the Configuration icon. Search for and select the Online booking setting from the Online booking settings section. Click CX V3.
In the General settings, you can configure the following:
Service selection
Therapist selection
Appointments
Centers
Onboarding
Gift Cards
Loyalty
User Profile
Service Selection
Configure the following settings:
Enable Service Category Images: Switch ON the setting to display service category images.
Display service price: Switch ON the setting to display the service price on the CMA.
Display service duration: Switch ON the setting for displaying the service duration on the CMA.
Display specific therapist price: Switch ON the setting if you want to enable price scaling for therapists.
Note
You must configure Price Scaling for your organization.
Enable Pre-Requisites: Switch ON the setting if you want to enable prerequisite services while booking in CMA
Enable Finishing services: Switch ON the setting to enforce your guests to mandatorily select the finishing services when they book an appointment for a service that requires one.
Enable Deposits: Switch ON the setting to enable collection of a portion of the service amount as deposit.
Therapist Selection
Configure the following settings:
Enable Therapist gender selection - Switch ON the setting to allow your guests to select the therapist on the basis of their gender. If your guests are particular about a specific gender of therapists, this setting will help them to select appropriately.
Enable Therapist gender color - Switch ON the setting to assign predefined gender colors to the therapists.
Example: A male therapist is denoted in blue, whereas a female therapist is denoted in pink.
Enable multiple therapist selection - Switch ON this setting to allow your guests to select multiple therapists for multiple services. If this setting is disabled, your guests can select a single therapist for all of their services.
Enable preferred therapist selection - Switch ON this setting to allow guests to select a “Specific” therapist. If this is not enabled, your guests will not be able to select a “Specific” therapist; they will be able to select only “Any”, “Any Male” or “Any Female” therapist options.
Appointments
Configure the following settings:
Enable appointment cancellation: Switch ON this setting to enable the cancellation of appointments on the CMA.
Note
You must also configure the appointment cancellation reasons.
Display appointment cancellation alert: Switch ON this setting to display an appointment cancellation alert when a guest cancels an appointment.
Enable appointment rescheduling: Switch ON this setting to enable the rescheduling of appointments on the CMA. This setting is subject to your cancelation policy. If your organization’s cancelation policy states that you cannot reschedule an appointment 1 hour before the beginning of the appointment, then your guests can only cancel the appointment, but not reschedule the appointment.
Enable Imperial System: Switch ON this slider to display the distance to the center in miles. If this setting is turned OFF, the distance to the center is shown in kilometers.
Enable force apply memberships for appointments: Switch ON this setting to automatically apply the memberships to an appointment. (If the guest is an existing member).
Enable guest custom form: Switch ON this setting to enable guest custom forms on the CMA. This will allow guests to fill forms on the CMA.
Enable PromoCode: Switch ON this setting to display Promo Code on the CMA.
Display cancellation policy on app: If your business allows cancellation of appointments on the CMA, you can display a disclaimer text to your guests stating the terms and conditions for the appointment cancellation. Switch ON the setting to enable display of cancellation policy on app.
Date format - Choose from the following date formats:
MMMDDYYYY
DDMMMYYYY
Onboarding
Configure the following settings:
Skip OTP during new guest sign-up: Usually, when a guest signs-up on the CMA, the guest’s mobile number or the email address is verified by sending an OTP. If your organization does not want to verify the mobile number or the email address of the guest through an OTP, you can enable this option. This setting will not prompt the guest to enter the OTP during sign-up.
Note
In cases where you enable Social Login for your CMA and if the guests choose to use their social credentials to log in, they will not be prompted to enter an OTP. The verification is taken care of by the respective social logins (Google and Facebook).
Enable guest gender selection: Switch ON this setting if you want new guests to specify their gender during the sign-up process.
Enable Login via Mobile or Email: Switch ON this setting to let your guests log in to your CMA with an email id or a mobile phone number.
Gift Cards
Enable Gift Card Sale: Switch ON this setting to enable sales of gift cards on the CMA.
Enable Gift Card Amounts: Turn this setting ON to enable the sale of Amount gift cards on your CMA.
Note
You can add a custom description for the Amount Gift Cards. You can describe the services included in the gift card and mention other offer information. This will help your guests in selecting the best gift card as per their requirements.
Enable Custom Amounts for Gift Cards: You can allow your guests to decide the price of the gift card and allow them to purchase such custom gift cards by turning this setting ON.
CMA Gift Card Promo Banner URL: Enter the URL of the image that should appear on the Gift Card screen of the Customer Mobile App (CMA). If you run any gift card campaigns or promotions, you can let your guests know about such offers by displaying the image as a banner on the CMA. When your guests open the app and navigate to the Gift Card screen, they can see the banner and decide whether to purchase the gift cards.
Note
Image size should be 1242 px X 360 px
CMA Giftcard Image URL: Paste the image URL to update the Gift Card image.
Loyalty
Rewards Label: Enter the name of your Rewards program.
Example: Bliss Rewards
Text for points to next reward: Switch ON this setting to enable a text to inform guests of the points they need to earn for the next reward.
Enter the text for the number of points the guest needs to earn the next reward.
Note
Use the macro [PointsForNextReward] for the Number of points the guest needs to earn next reward.
Example: You are [PointsForNextReward] Bliss Bucks away to earn your next Bliss Rewards!
User Profile
Configure the following settings to control the items that are displayed in the guest profile.
Display gift cards in profile: Switch ON this setting to enable the display of gift cards on the guest profile. All the purchased gift cards are displayed in this section.
Display purchased packages in profile: Switch ON this setting to enable the display of packages on the guest profile. Only the packages purchased by the guest will be visible in the guest profile.
Display purchased memberships in profile: Switch ON this setting to enable the display of purchased memberships in the guest profile. Only the memberships purchased by the guest will be visible in the guest profile.
Display loyalty points in profile : Switch ON this setting to enable the display of loyalty points on the guest profile. The guests check out the balance of the loyalty points and their status
Display Payment Details: Turn ON this setting to enable the display of payment details on the guest profile.
Click Save.
You have successfully configured the Consumer Mobile App using the template.
CMA v2 Labels
This section allows your organization to customize the labels that appear across the CMA to suit the business and marketing needs of your business.
At the organization level, click the Configuration icon.
Search for and select the Labels setting from the Online booking settings section.
Click CX V3 > Labels.
For Labels , you can configure the following settings::
Review Price Disclaimer Text: Enter the text for the review price disclaimer. This text appears during the booking of an appointment on the CMA. Enter a disclaimer text for service prices or service bookings.
Example: Prices are subject to change based on the therapist you select.
Post Tip Thank you Message: Enter a thank you message that must after guests specify a tip.
Example: Wow! Thank you for your tip!
Tip Message: Enter the text for a message that will prompt guests to add a tip for the services.
Example: Would you like to add a tip?
Quickbook Tagline: The QuickBook panel on the CMA home screen displays the past five appointments and allows the geust to book anyone of the previous appointments in a single touch. Enter the text for a tagline that will appear above the Quickbook panel.
Example: Book your regular services in a single click.
Appointment Cancellation Message: Enter the text for the appointment cancellation message.
Example: Are you sure you want to cancel the appointment?
Logo Tagline: If your logo has a caption or a tagline, enter the text here. This text appears below the business logo.
Example: Elevate your Everyday.
Finishing Services Label: Enter the label for finishing services.
Example: Finishing touches
Cancellation Policy Label: Enter the label for your cancellation policy.
Example: Cancellation
Appointments Label: Enter the label for your appointments.
Loyalty Details Label: Enter the name of the loyalty points.
Example: Bliss Bucks
Center Label: Enter the label for your center.
Example: Center, Studio, Retreat, Store
Add-on Label: Enter the label for add-ons.
Example: Enhancement
Note
Ensure that the label is in the singular form
Series Package Sales Label: Enter the label that will appear on the series package page.
Example: Series Pack
Booking Button Label Enter the name of the booking button with this label setting.
Example: Book Now, Book Here.
Mobile Number Sub-text: Enter a disclaimer text that you will display to your guests when they enter their mobile number while creating a guest profile on the Webstore.
Example: “By providing your mobile number you agree to receive transactional messages when you book a service with us.”
Marketing Opt-in Consent: Enter the text for the consent text message.
Example: I would like to sign up to receive text updates and promotions from Spa Bliss.
Cancellation Policy: If your business allows cancellation of appointments on the CMA, you can display a disclaimer text to your guests stating the terms and conditions for the appointment cancellation. Enter the cancellation policy text in this field.
About Us: Enter a description about the values, culture, and vision of your business.
Terms of Use: Enter the terms of use that the guest must abide by to avail your service.
Privacy Policy: Enter the text for the Privacy Policy of your business.
Set up Referral Program
Referrals occur when existing guests refer your services to their friends and family. This positive word of mouth plays an important role in increasing your business’s customer base, as well as garnering overall positive reviews for your services. It is also a well-known fact that more than 92% of guests trust the recommendations of their friends and family.
Bearing this in mind, Zenoti allows you to enable the Referral Program for your business, which allows your existing guests to refer new and potential guests.
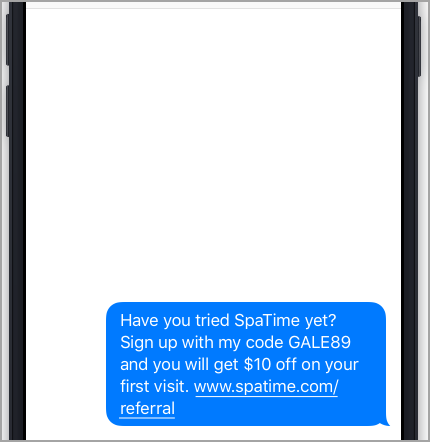
After you configure the referral program for your organization, you must also configure it to be available for your guests who book online. This allows your guests to directly refer their friends and family by sharing a Promo Code and an Invitation Link. In return, your existing guests get discounts and offers on products and services.
In this article, you will see the steps required to set up the referral program for the Consumer Mobile App (CMA).
At the organization level, click the Configuration icon and navigate to Organization > Organizations.
Search for and select the Labels setting from the Online booking settings section.
Click CX V3 > Online Booking
From Categories, select Referral Program.
Configure the following settings:
Referral Page
Menu Title: Enter the text for the title of the Referral screen. This title will appear as an item in the main menu and on the referral program screen.
Promotion Header: Enter the text that will appear on the header of the Referral Program screen. This will be used as a headline to your referral program to highlight the benefits or effectiveness of the program to your guests.
Promotional Description: Enter a brief description of the Referral Program. This description allows the businesses to describe what this program is and its benefits to the guests and will appear below the Promotion Header text.
Promotional Image: Upload an image that will appear on the Referral Program page of the guest profile. The resolution of the image should be 1440 x 900 px and should be less than 3 MB in size.
How It Works
Step Title: Enter three simple steps explaining how your guests can send a promo code and how they receive the rewards for successful referrals. Explain the process of this referral program and how your guests can benefit from it.
Description: Enter a description for each of the steps.
Link to Terms and Conditions - This is important as the guests might want to read through the terms and conditions for the referral program. If you have an existing Terms and Conditions URL, enter the URL here. If you do not have an existing URL, enter your terms and conditions here.


Promotion Banner
Promotional Banner: Upload a banner image that will appear on the home page, on the Appointment Confirmation screen, and on the Feedback Confirmation screen of the CMA.
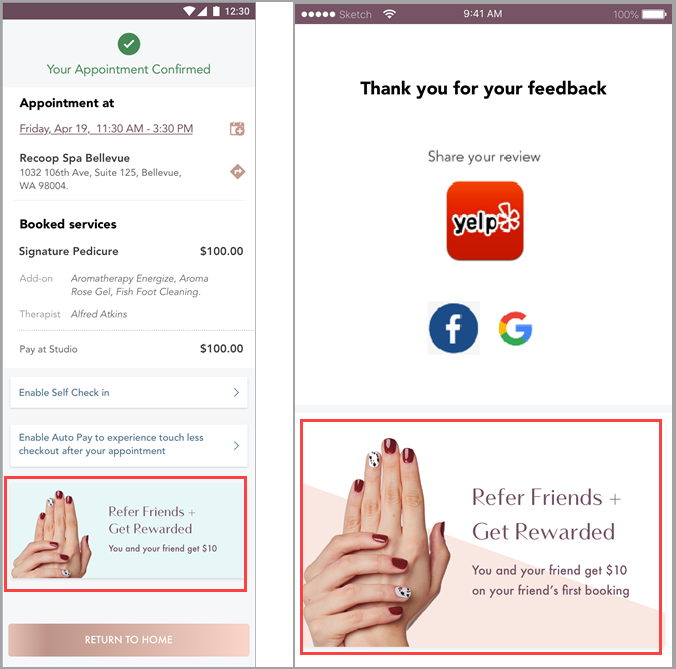
Note
As the screen space of certain mobile devices are small, the user might not be able to see the Promotional Banner. In such instances, they must tap Show More to view the Promotional Banner.
Sharing Options
Text to be Sent While Sharing: Enter the text that will appear after sharing the promo code and the invitation link.
Upload Image: Upload an image that will appear on the message that is shared by your guests with their friends and family.
Click Save.