Onboard and Manage ePrescribe
Important
ePrescribe is available only in the US.
The ePrescribe feature in Zenoti enables prescribers to create, manage, and send prescriptions electronically, streamlining the prescription process for both practitioners and patients. Integrated directly into the Zenoti platform, this feature ensures secure, compliant, and efficient handling of medical prescriptions, reducing paperwork and minimizing errors.
With ePrescribe, practitioners or prescribers can:
Write and send prescriptions digitally.
Access patient records and prescription history instantly.
Comply with legal and regulatory requirements for controlled substances, including Electronically Prescribing for Controlled Substances (EPCS).
Ensure secure identity verification through services like ID.me to authorize prescribers.
This solution enhances the overall workflow for healthcare providers, offering convenience, compliance, and improved accuracy for patient care.
Role permissions for ePrescribe
ePrescribe roles and permissions govern user capabilities. Roles assigned during onboarding determine the ability to prescribe, add permissions to the queue, and make modifications.
By default, the Owner of the organization is granted all the permissions associated with ePrescribe.
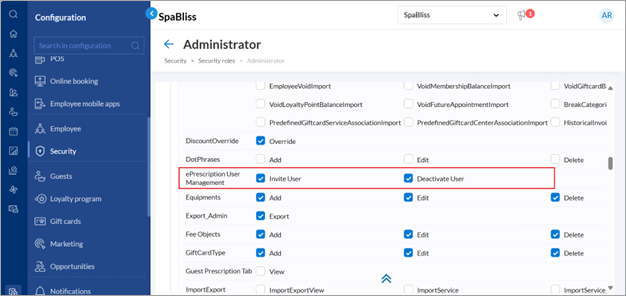
Role permissions to invite users to ePrescribe
Users with invite permissions can use the ePrescribe configuration page to select and invite employees as Prescribers or Support Agents.
At the organization level, click Configuration.
Navigate to Security > Security roles.
Select a role and click the Permissions tab.
Expand Administrator and in the ePrescription User Management section, select the Invite User checkbox.

Click Save.
Role permissions to deactivate users in ePrescribe
Users with deactivate permissions can remove a profile from the listing page.
At the organization level, click Configuration.
Navigate to Security > Security roles.
Select a role and click the Permissions tab.
Expand Administrator and in the ePrescription User Management section, select the Deactivate User checkbox.
Click Save.
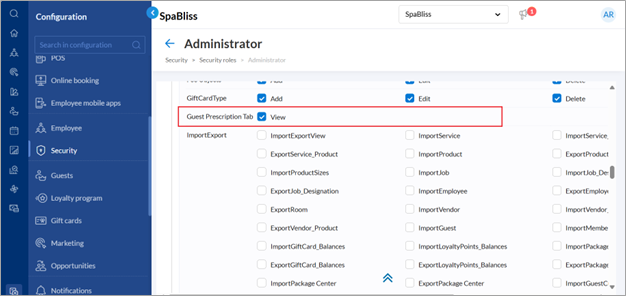
Role permissions to access the Prescription tab in the guest profile
Users with these permissions can access the prescription tab within a guest’s profile.
At the organization level, click Configuration.
Navigate to Security > Security roles.
Select a role and click the Permissions tab.
Expand Administrator and in the Guest Prescription Tab section, select the View checkbox.
Click Save.
Prerequisites for onboarding centers
Ensure that center details including the center phone number, fax number, address, and PIN number, are updated in the Business details section.
Ensure that employee details including email, phone number, date of birth, gender, address, and ZIP number are updated in the employee profile.
During onboarding, these details are validated. If it shows any errors, fix them and refresh the onboarding page.
Considerations for onboarding centers and prescribers
The initial center onboarding process includes onboarding the organization, center, and a prescriber together. This initial onboarding designates the center as the organization's base center.
A prescriber must be included in the first center onboarding. Since this prescriber will serve as the base employee, it’s recommended to start with someone who also holds an admin role within the organization.
Activate the first center and invite a prescriber to onboard
Go to Configuration.
Select ePrescribe settings.
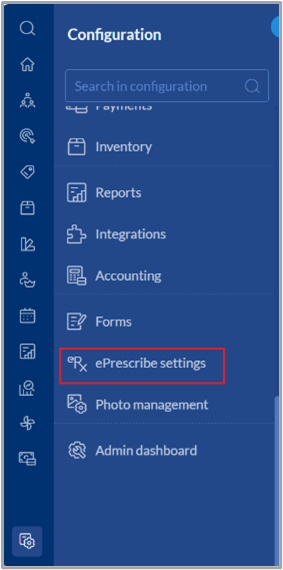
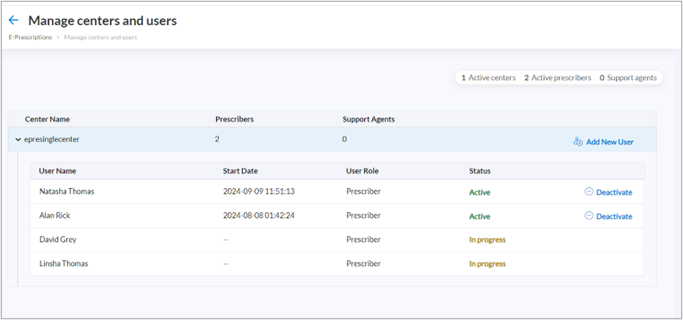
On the ePrescribe settings page, click Manage centers and users.
All centers with ePrescribe enabled will appear on the Manage Centers and Users page. If you are at the center level, only that center will appear on the Manage Centers and Users page.
Click Activate Center.
Note
Only a user with the Invite User role permission enabled under ePrescription User Management can activate a center.

If any center details are missing, an error message appears.
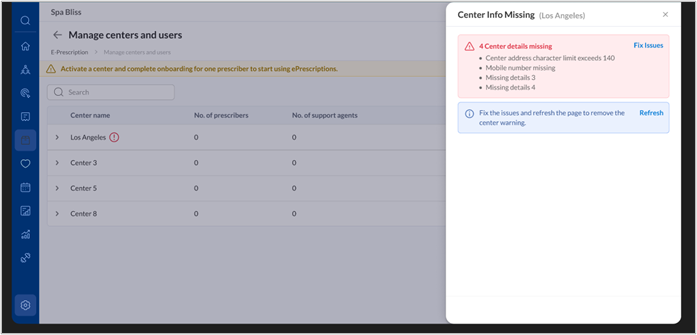
Complete any missing center details by navigating to the business details page. After updating, refresh the onboarding page to continue. Add employee details if any required fields are missing and refresh the onboarding page.
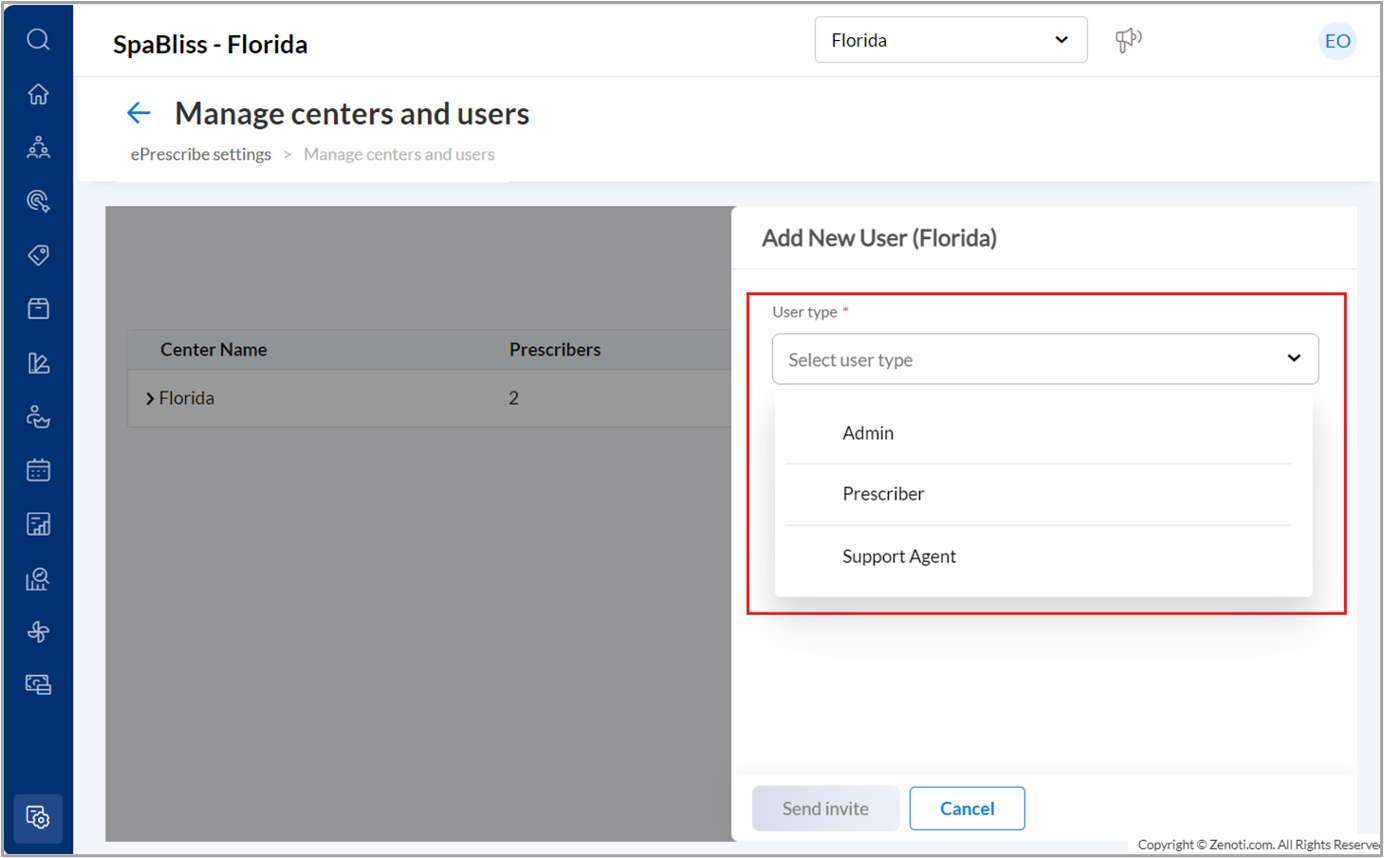
Select User type.
Note
If the logged-in user adding the prescriber is not onboarding themselves, they will automatically be added as an admin. They don’t need to be added manually, and their status will appear as Pending Activation until they complete their own onboarding.
For example, if the logged-in user is an admin, they will receive an email to complete admin onboarding once the prescriber onboarding is complete.
There should be at least one Prescriber in the center to activate a center.
During the initial onboarding, only the "Prescriber" role will be available in the role selection drop-down list.
When onboarding a center, only a Prescriber can be invited, not an Admin or Support Agent.
After the initial onboarding, users with invite permissions can select any employee from an onboarded center to invite them for onboarding. User status can be tracked on the same page.
Select Prescriber from the User type drop-down list.
Select a name from the Select prescriber drop-down list you wish to onboard.
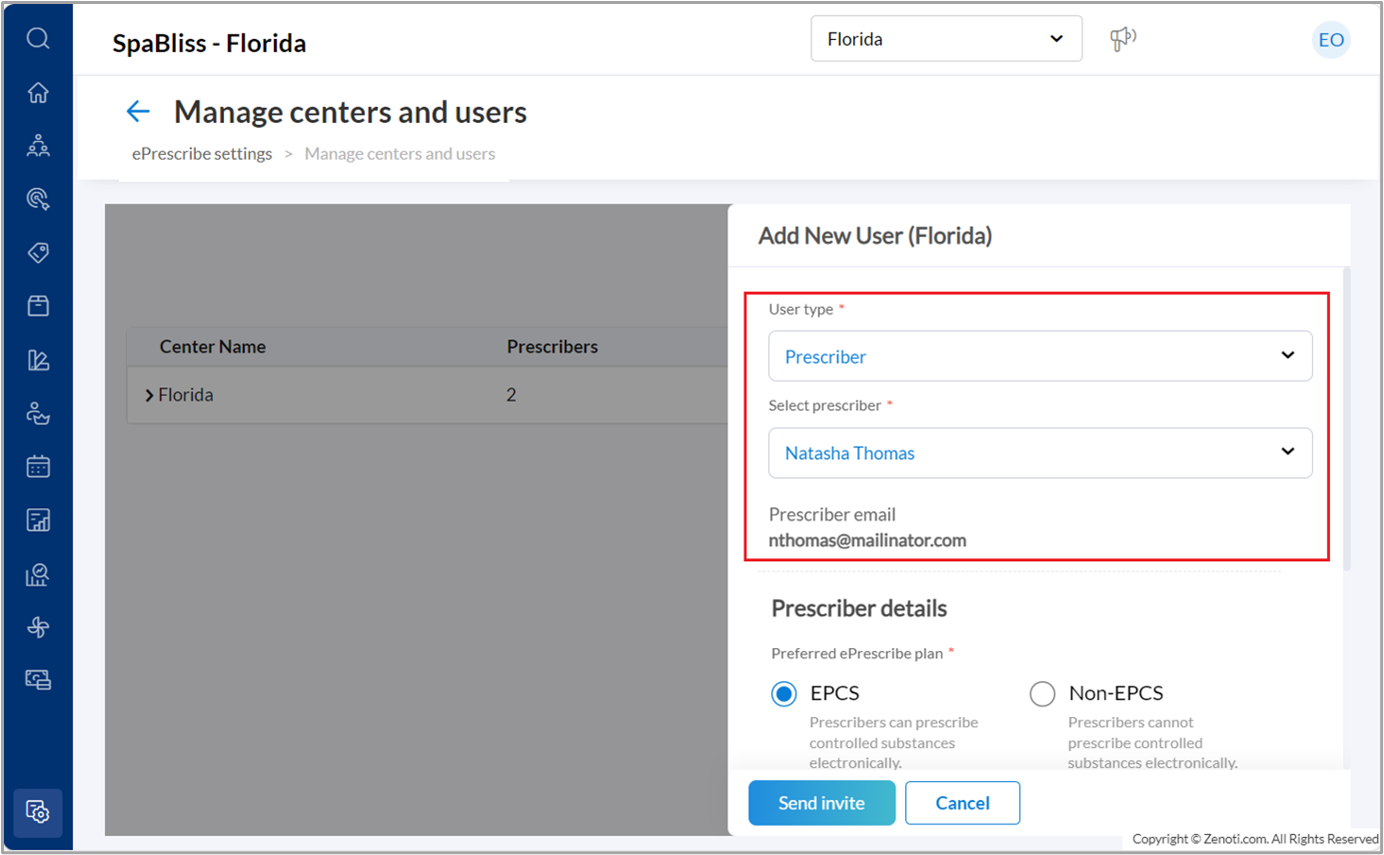
The email ID auto populates.
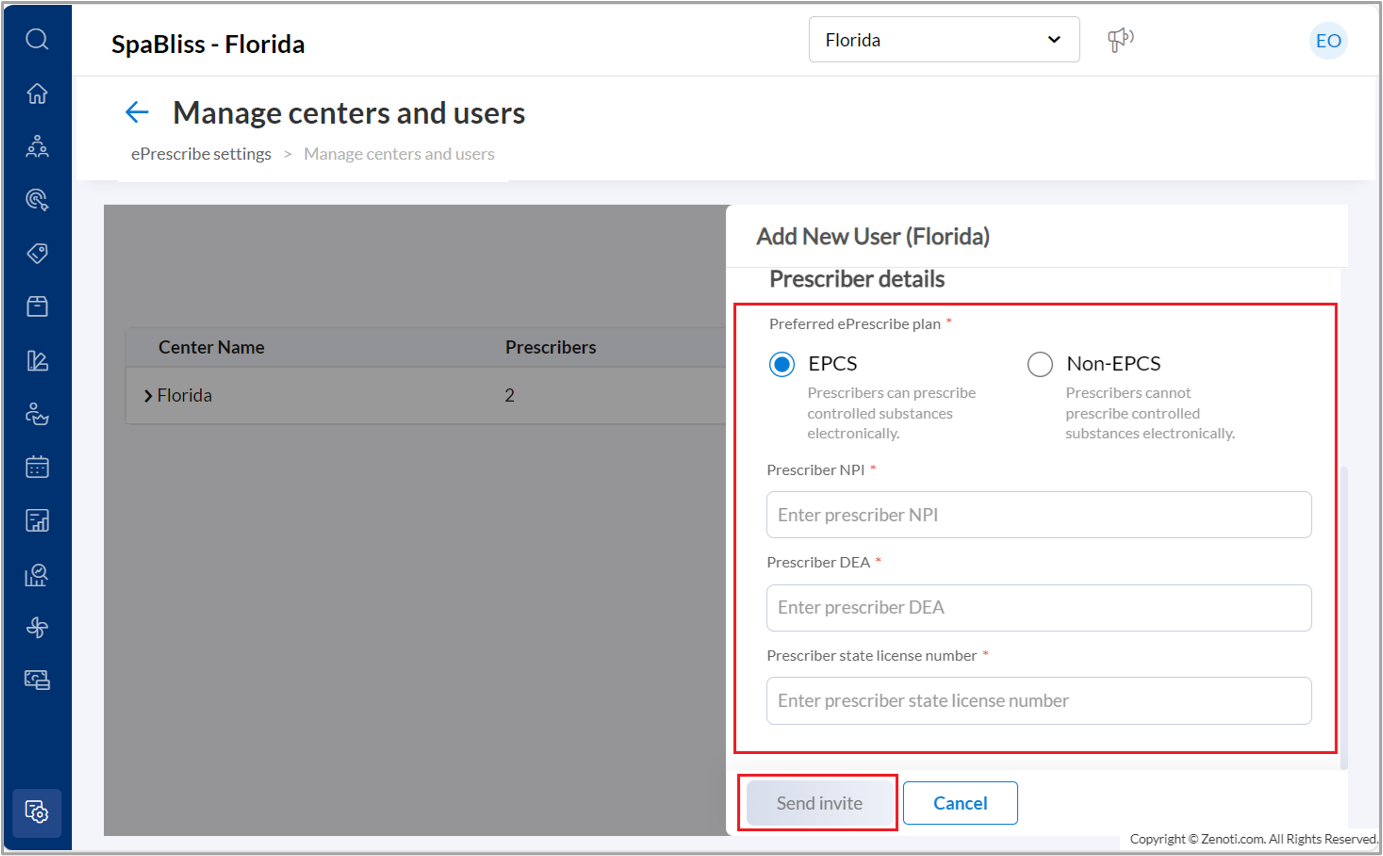
Specify the eprescriber type as EPCS or Non-EPCS.
EPCS: Prescribers can prescribe controlled substances electronically.
Non-EPCS: Prescribers cannot prescribe controlled substances electronically.
Provide Prescriber details such as NPI (National Provider Identifier) and State License.
Note
Ensure the prescriber’s first and last names matches the NPI registry. If it does not, an error message will appear when entering the NPI number. Update the name or the NPI number accurately in Zenoti to proceed with onboarding.
If your ePrescriber type is EPCS, add the DEA (Drug Enforcement Administration) number.
Click Send invite.
Note
To update a prescriber’s details—such as their preferred ePrescribe plan (EPCS or Non-EPCS), NPI, DEA number, state license, or email—after onboarding, contact ePrescribe Support.
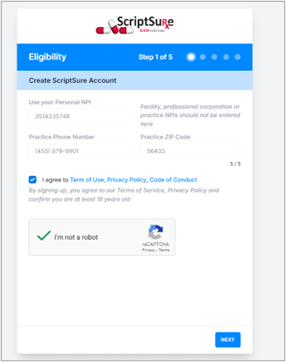
Onboarding steps for the prescriber
Register on the ePrescribe portal
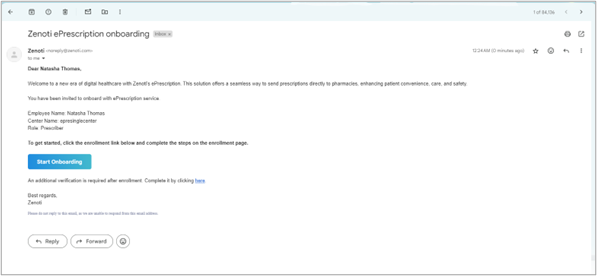
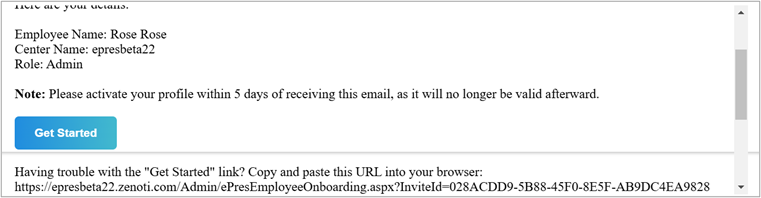
Email Notification: The prescriber receives an email with an onboarding link that remains valid for five days. If they don't complete the onboarding within that time, the link expires. After onboarding is complete, the link becomes inactive.
Note
The first prescriber onboarded to any center will be able to approve EPCS requests across all centers in the organization.
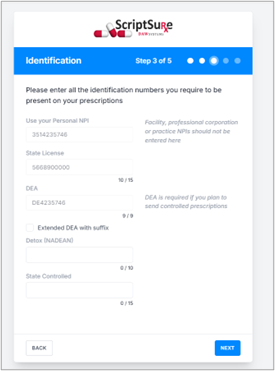
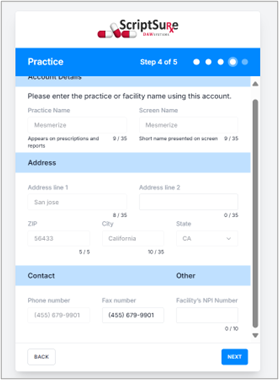
Additional center verification on the ePrescribe portal:
For the first prescriber, there’s an extra step to verify center details.
The center fax number is mandatory. If the center lacks a fax, use the center phone number in the fax field.
Information entered in Zenoti, such as Name, NPI, DEA, State License, and email, will auto-fill in this step.
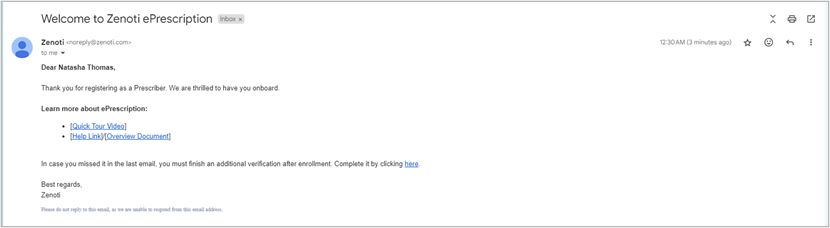
Onboarding Activation: After verification, the prescriber’s status in Zenoti updates to “Active,” the prescriber receives a welcome email. Also, the user, center, and organization are registered on the ePrescribe portal.
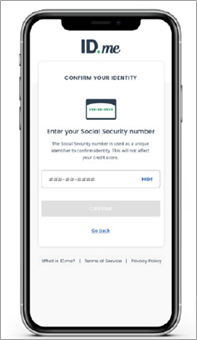
ID.me verification
Note
ID.me verification is mandatory to enable eprescribing. If the prescriber skips ID.me verification and later attempts to prescribe, they will be prompted to complete the ID verification before proceeding.
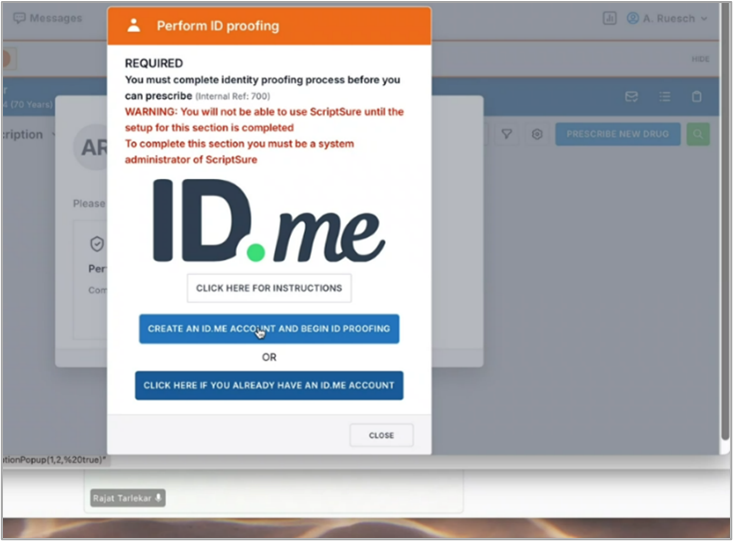
After the prescriber is onboarded the screen redirects to the ID.me verification process.
If the prescriber already has an ID.me account, they should sign in using their existing login details.
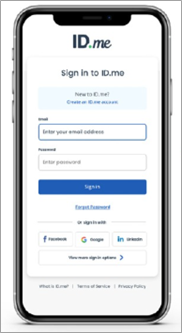

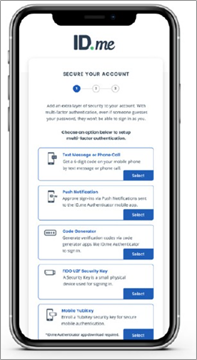
If the prescriber does not have an ID.me account, they can sign up using one of the available options, confirm their email ID, set up multi-factor authentication, and proceed with ID.me verification by following these steps:
Choose the document you prefer to submit to verify your identity, from the available options.
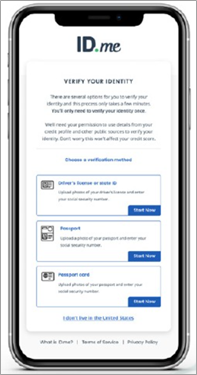
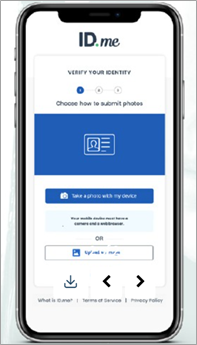
Upload photos of your government ID.
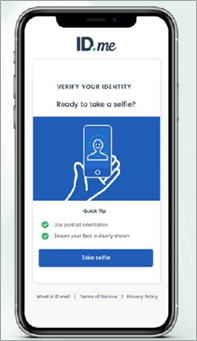
Capture a selfie so that ID.me can match it with your government ID.
Enter your Social Security Number (SSN).
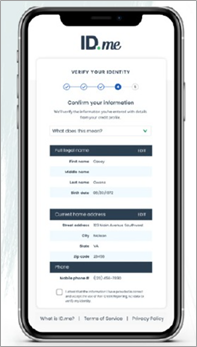
Confirm that all your information is accurate and complete.
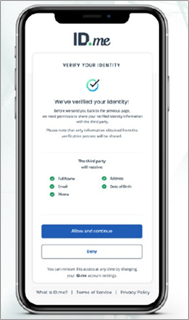
Click Allow and Continue to authorize ID.me to share your verified identity.
Note
For any issues during ID.me verification, contact ID.me Support directly.
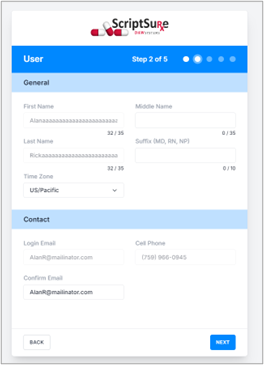
Onboard Admin and Support Agent users to the ePrescribe portal
The onboarding process for Admins and Support Agents is straightforward and does not include ID.me verification.
Fill in your personal details, including first name, last name, middle name (optional), suffix (optional), and time zone.
Enter your login email and phone number.
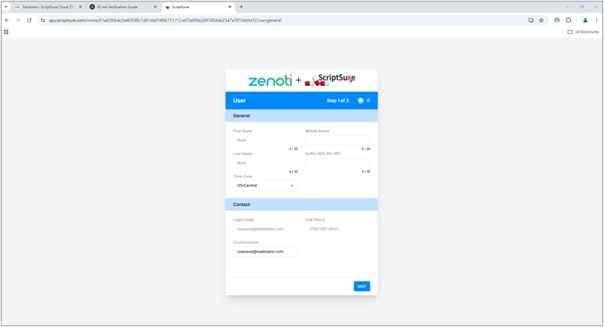
Click Next.
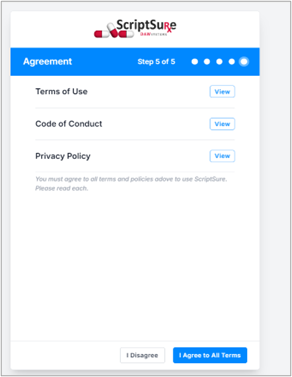
Click View to review the Terms of Use, Code of Conduct, and Privacy Policy.
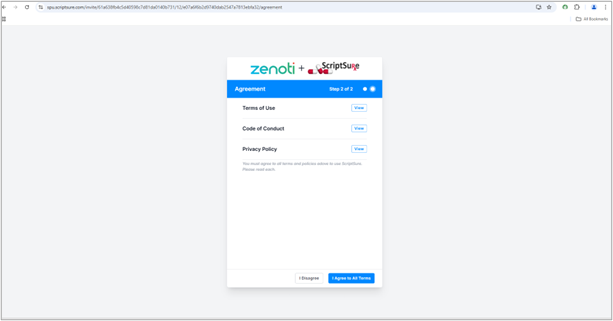
Click I Agree to All Terms to confirm your acceptance and proceed.
This process captures user information and ensures agreement to all required policies before granting access to the platform.
Invite additional users to ePrescribe
After initial onboarding is complete, new users can be invited to onboard as Admin, Support Agent, or Prescriber.
Go to Configuration > ePrescribe settings > Manage Centers and Users > Add New Users.
Select the User Type (Admin, Support Agent, or Prescriber).
Fields will vary based on the selected user type.
Fill in the required fields and send the invite.
The invited users will receive an onboarding email similar to the first user.
To complete onboarding, they should follow the instructions provided by clicking the link in the email.
Note
If a user is onboarded as an EPCS prescriber, they must reach out to the Admin for approval before prescribing controlled substances.
The Admin receives a notification in the ePrescribe portal to review and approve EPCS requests. For detailed steps, see Approve EPCS prescribers.
If the admin denies the request, the user is automatically onboarded as a Non-EPCS prescriber.
Activate/Deactivate ePrescribe users
Existing ePrescribe users can be activated or deactivated.
Go to Configuration > ePrescribe settings > Manage Centers and Users.
Click Activate or Deactivate next to the status of the user.
A message will be displayed confirming the activation/deactivation of the user.
Note
Terminating an employee automatically deactivates their ePrescribe account, if they were an active user.
Edit the Prescriber type of users
Go to Configuration > ePrescribe settings > Manage Centers and Users.
Click Edit.
Select the Prescriber type you want to switch the user to from the Prescriber Type dropdown.
Click Update.
Resend invites to ePrescribe users whose onboarding is in progress
You can resend invites to ePrescribe users whose status is “In progress”.
Go to Configuration > ePrescribe settings > Manage Centers and Users.
Click the Resend invite button next to the status of the user.
A panel appears on the right-side displaying all the details entered during the initial onboarding.
Click Send invite.
Activate multiple centers
Important
To onboard the first center, any user with the required security role permissions at the center level can activate the center.
To onboard additional centers, only an employee who has already completed onboarding and holds the necessary role permissions can activate other centers.
Note
If the logged-in user adding the prescriber is not onboarding themselves, they will be automatically added to the new center with the same user type as the base center, once the prescriber successfully completes onboarding.
Add prescribers to multiple centers
Points to consider
A prescriber can register at multiple centers:
Non-EPCS prescribers are automatically registered on both Zenoti and the ePrescribe portal.
EPCS prescribers are registered only on Zenoti—not on the ePrescribe Portal. Zenoti will activate these users within 24 hours. After activation, an Admin from the organization must approve the EPCS requests.
Any admin within the organization can approve EPCS requests across all associated centers.
Log in as Admin and activate the center where the prescriber needs access.
From the employee list, select the prescriber.
If the selected prescriber is already registered, Zenoti automatically populates their details. Verify and update the following fields as needed:
NPI (National Provider Identifier)
DEA (Drug Enforcement Administration) number
State License
Prescriber type
Click Add to Center.
Note
To enable prescribing in subsequent centers on Zenoti, users must be assigned the employee role with the necessary permissions for those centers. To do so:
At the organization level, navigate to Employee and select the employee.
On the employee profile, go to the Employee Roles tab.
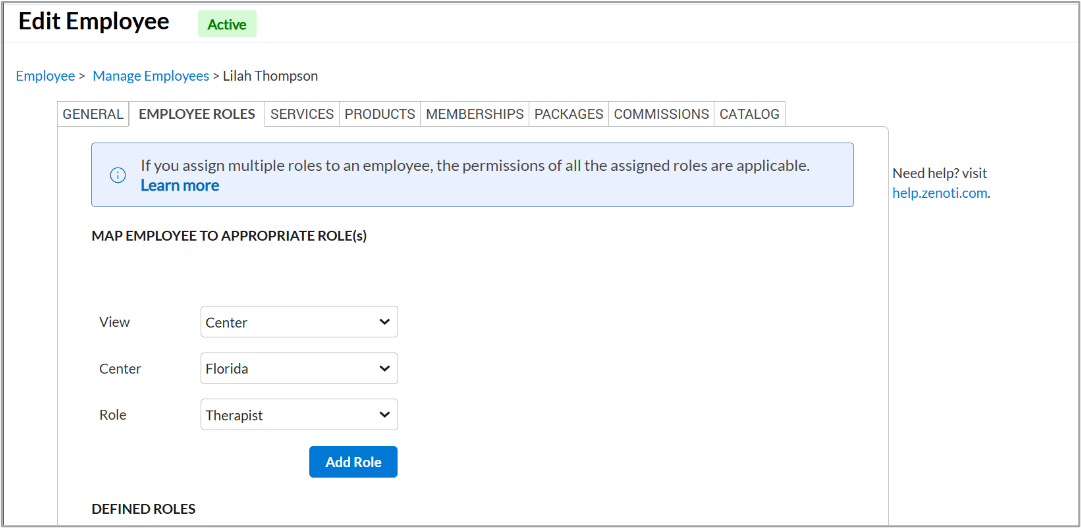
Select Center from the View drop-down list.
Select the center that the prescriber was recently onboarded to, from the Center drop-down list.
Select the required role from the Role drop-down list.
Click Add Role.
Note
When onboarding a new center, ensure it has a unique phone number and ZIP code.
Note: If an employee is already onboarded as a Support Agent, Admin, or Prescriber and later requires a role change, they must contact Zenoti for assistance. You cannot change the role by deactivating the existing user and re-adding the same employee with a different role.