Verifone E355 setup and administration
Set Up Verifone e355 to Process Payments
Learn about the steps involved in connecting your Verifone e355 to your WiFi network before you can accept card payments
Note
Using Zenoti Payments and a Verifone e355 card reader (that you purchased from the online store), you can initiate and accept card payments in Mirror mode and from Mobile POS and Desktop POS. Verifone e355 card reader also accepts NFC payments (Apple Pay and Android Pay).
To accept payments in Mirror mode or from Mobile POS Set up your Verifone e355 card reader using one of the following methods:
Connect your Verifone e355 using a Static IP (this method is best, but requires advanced IT support and access to your networking configuration to complete).
After you connect your card reader, do the following:
After you complete the above steps, you can:
To accept payments from Desktop POS
Connect your Verifone e355 via DHCP
Learn about the steps involved in setting up and connecting a Verifone e355 reader to your WiFi network via DHCP
In this article, you will learn about the steps involved in setting up and connecting a Verifone e355 reader to your WiFi network via DHCP.
Make a note of the Verifone e355's Serial Number. The Serial Number starts with S/N and is printed on a label affixed to the underside of the Verifone e355. You will need this to configure your Zenoti account to accept Zenoti Payments.
Note
Ensure that your Verifone e355 is fully charged and you have the charging cable handy. When the device is charging, a yellow light blinks on the right side of the device.
To set up your Verifone e355 device, you must be aware of the following keys.
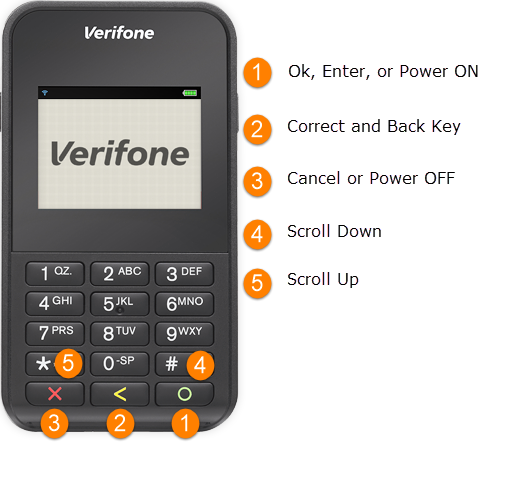
Turn on Verifone e355 by holding down the green key for a few seconds.
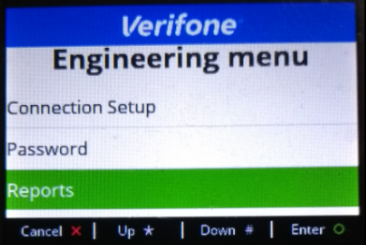
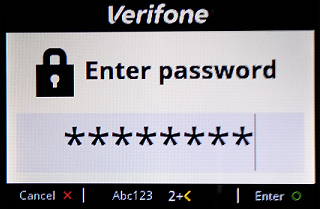
Press Y ellow keyand number 1 key at the same time. The Engineering Menu appears on the device. : If you are prompted for a password, enter 12345678.
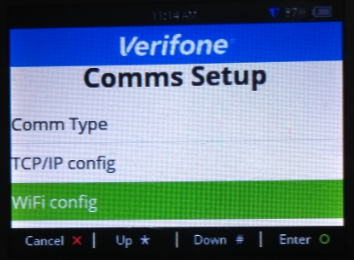
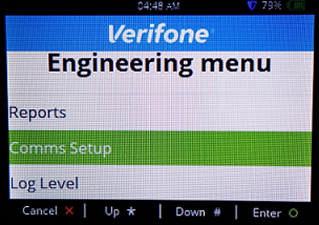
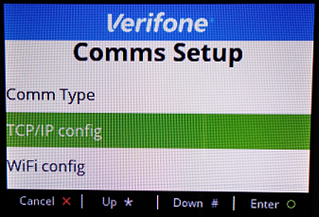
Scroll down (using the # key) until Comms Setup is selected, and enter the Comms Setup menu (using the green key).
Select Comm Type and press Enter.
Select the WIFI option and confirm by pressing Enter.
You are returned to the Comms Setup menu. If you do not return to the Comms Setup menu, press the yellow key until you go back to the Comms Setup menu.
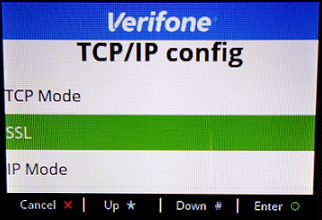
In the Comms Setup menu, scroll to and select the TCP/IP config.
Enter TCP Mode and select the TCP Server option and press Enter.
Press the Cancel key (red key) until you go back to the Engineering Menu.
In the Engineering Menu, Enter Connection Setup.
Enter Listen Port.
Enter (or verify) 16107 as the Listen Port and confirm by pressing the Enter key.
Press the Cancel key (red key) until you go back to the Engineering Menu.
In the Engineering Menu, enter the Comms Setup menu.
Select TCP/IP config.
Select IP Mode.
Select DHCP. You are returned to the TCP/IP config menu.
Press the Cancel key (red key) to go back to the Comms Setup menu.
Enter the Comms Setup menu.
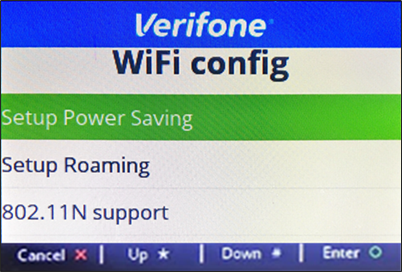
Select WiFi config.
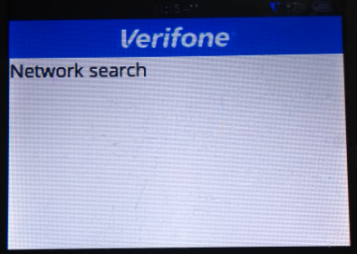
Select Add WiFi profile. The Verifone e355 searches for available WiFi networks.
Select the WiFi network you want to join (using the * or # keys) and press Enter.
Enter the correct WiFi password. Press Enter when done. You are returned to the WiFi config menu. If you need to enter special characters for the password, press and hold the # key until you find your required character.
In the WiFi config menu, select Setup Roaming.
Select Enabled.
For the Wifi Roaming Threshold%, enter 10.
You are returned to the WiFi config menu.
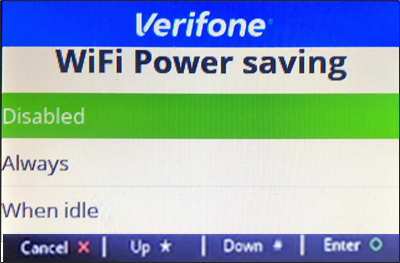
In the WiFi config menu, select Setup Power Saving.
Select Disabled.
Select Enter. 4. Press the Cancel key (red key) until you go back to the Engineering Menu.
In the WiFi config menu, select Set WiFi profile.
Select the profile you have just created (it will be named like the network point you have just joined). Press Enter when done. If you do not see a profile listed, repeat the Add Wifi profile steps again (listed in the previous section).
Press the Cancel key until you exit the Engineering menu.
The card reader will update and try to connect to your WiFi.
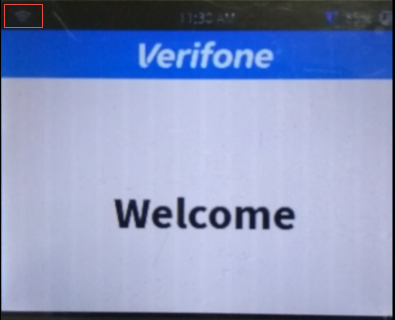
When the Verifone e355 is successfully connected to the WiFi, a Welcome Screen displays and a WiFi icon appears in the upper left corner of the device.
Restart the device.
For Zenoti to process payments using your Verifone e355 card reader, you must update the IP address of your Verifone e355 in Zenoti.
Press yellow and 1 keys at the same time.The Engineering Menu appears on the device. : If you are prompted for a password, enter 12345678.
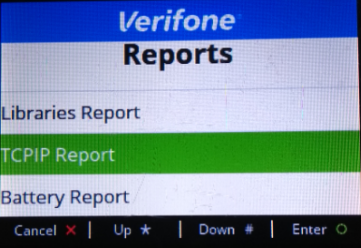
Scroll to and enter Reports.
Select and enter TCPIP Report.
You will see the IP address. Make a note of it.
Next Steps
If you are configuring Zenoti Payments for the first time
Proceed with configuring your Zenoti account to accept Zenoti Payments.
If you have already configured Zenoti Payments
If you have already configured Zenoti Payments and are only adding or replacing your existing card reader with Verifone e355, you must add Verifone e355 as a terminal in Zenoti.
See Also
Connect your Verifone e355 using a Static IP
Before you begin
Reserve a Static IP for your Verifone e355 card reader in your WiFi network. You can involve your network administrator to help reserve the Static IP. Make a note of the Static IP address, Subnet Mask, and Gateway. : If you do not have access to your router to reserve an IP address, you can do the following: 1. Connect your Verifone e355 card reader via DHCP method and make a note of the IP address, Subnet Mask, and Gateway (see the reports section). 2. Connect your Verifone e355 card reader via Static IP by following the steps prescribed in this article. For IP address, Subnet Mask, and Gateway, use the details you made a note of in Step 1.
Make a note of the Verifone e355's Serial Number. The Serial Number starts with S/N and is printed on a label affixed to the underside of the Verifone e355.
Note
Ensure that your Verifone e355 is fully charged and you have the charging cable handy. When the device is charging, a yellow light blinks on the right side of the device.
To set up your Verifone e355 device, you must be aware of the following keys.
Turn on Verifone e355 by holding down the green key for a few seconds.
Press Y ellow keyand number 1 key at the same time. The Engineering Menu appears on the device. : If you are prompted for a password, enter 12345678.
Scroll down (using the # key) until Comms Setup is selected, and enter the Comms Setup menu (using the green key).
Select Comm Type and press Enter.
Select the WIFI option and confirm by pressing Enter.
You are returned to the Comms Setup menu. If you do not return to the Comms Setup menu, press the yellow key until you go back to the Comms Setup menu.
In the Comms Setup menu, scroll to and enter TCP/IP config.
Enter TCP Mode and select the TCP Server option and press Enter.
Press the Cancel key (red key) until you go back to the Engineering Menu.
In the Engineering Menu, Enter Connection Setup.
Enter Listen Port.
Enter (or verify) 16107 as the Listen Port and confirm by pressing the Enter key.
In the Engineering Menu, enter the Comms Setup menu.
Select TCP/IP config.
Select IP Mode.
Select Static IP.
Enter the static IP you reserved for the Verifone e355. To enter the "." character, double-press the "1" key. Press Enter when done.
Enter the Subnet Mask of your WiFi setup. Press Enter when done.
Enter the Gateway of your WiFi setup. Press Enter when done.
Enter 0.0.0.0 for the DNS Pri setting. Press Enter when done.
Enter 0.0.0.0 for the DNS Sec setting. Press Enter when done.
Enter the Comms Setup menu.
Select WiFi config.
Select Add WiFi profile. The Verifone e355 searches for available WiFi networks.
Select the WiFi network you want to join (using the * or # keys) and press Enter.
Enter the correct WiFi password. Press Enter when done. You are returned to the WiFi config menu. If you need to enter special characters for the password, press and hold the # key until you find your required character.
In the WiFi config menu, select Setup Roaming.
Select Enabled.
For the Wifi Roaming Threshold%, enter 10.
You are returned to the WiFi config menu.
In the WiFi config menu, select Setup Power Saving.
Select Disabled.
Select Enter. 4. Press the Cancel key (red key) until you go back to the Engineering Menu.
In the WiFi config menu, select Set WiFi profile.
Select the profile you have just created (it will be named like the network point you have just joined). Press Enter when done. If you do not see a profile listed, repeat the Add Wifi profile steps again (listed in the previous section).
Press the Cancel key until you exit the Engineering menu.
The card reader will update and try to connect to your WiFi.
When the Verifone e355 is successfully connected to the WiFi, a Welcome Screen displays and a WiFi icon appears in the upper left corner of the device.
Restart the device.
Next Steps
If you are configuring Zenoti Payments for the first time
Proceed with configuring your Zenoti account to accept Zenoti Payments.
If you have already configured Zenoti Payments
If you have already configured Zenoti Payments and are only adding or replacing your existing card reader with Verifone e355, you must add Verifone e355 as a terminal in Zenoti.
See Also
Connect Verifone e355 card reader via USB
Note
You can connect the Verifone e355 card reader via USB only to a Windows PC (Mac is not supported).
Install the PayServer service
Install the PayServer bundle.
Note
The software is downloaded as a zip file.
On your computer, go to the Program Files directory (for example, Z:\Program Files (x86)).
Create a new folder and name it Zenoti Payments.
Extract the downloaded zip file to the Zenoti Payments folder.
After the file is extracted, go to the Server folder.

Locate and rename config-example.yaml to config.yaml.

Come out of the Server folder by clicking the back button and run the Install Pay Server Service as administrator.

Download and install the Verifone Windows Unified driver
Download and extract the Verifone Windows Unified driver.
Open the extracted zip file, and depending on your operating system (32 or 64-bit), access the appropriate folder.

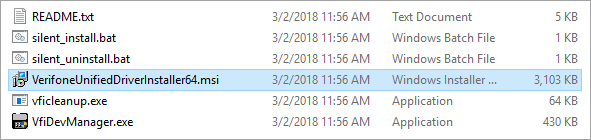
Locate and run VerifoneUnifiedDriverInstaller64.msi.
Click Next.

Do the following:
Port Number base: Make a note of the value in this field. You will need to update this value in the port number field of the config file.
Single device system: Ensure that this checkbox is selected.
Click Next.

Click Install.
After the installation completes, click Finish .
Set Verifone e355 in USB mode and connect to a Windows PC
Switch on Verifone e355 by holding down the green key for a few seconds.
Press the yellow and 1 keys at the same time.
If you are prompted for a password, enter 12345678.
Use the# key to scroll down and select Comms Setup.


To enter the Comms Setup menu, use the green key.
Select Comm Type and press Enter.
Select the USB option and confirm by pressing Enter.

Press the Cancel key (red key) until you go back to the Home screen.
Connect the Verifone e355 card reader to your windows PC via USB.
Open Device Manager. In Device Manager, Verifone e355 should appear under Ports (COM & LPT) named VX GEN 3 Terminal.

Make a note of the COM Port. This is the same port number you made a note of when installing the device drivers. You will need to update this value in the port number field of the config file.
Edit the Config file for Verifone e355 terminals
The steps in this article are applicable only if you wish to collect payments using a Verifone e355 card reader (via USB).
Important
To edit the config file, you must have Administrator privileges on the computer.
After you download the PayServer bundle, install the PayServer service, set Verifone e355 in USB mode, and connect to a Windows PC, you must edit the config file (which is part of the extracted PayServer bundle) with the Port information of your connected card reader.
Open the Zenoti Payments folder where you extracted the PayServer bundle.
Open the server folder.
Download this config.yaml file and replace the one in the server folder.
Open the config.yaml file in Notepad.
Ensure that the port for WEBSOCKET is set to 8087. You must enter the same port number in the Processor Settings when configuring Zenoti Payments.

Verify that you have the following entries in the config file.
                     # sample configuration for a Verifone reader connected via USB
-
name: USB Verifone              # human readable device name
identifier: usbVerifone         # unique identifier
type: VERIFONE                  # device type
comlink: USB                    # connection type
port: COM9                      # virtual port name
keep_alive: true                # the device will be kept connected
(Optional) Change the name of the identifier. Make a note of the identifier. You will need the identifier when adding Verifone e355 as a terminal in Zenoti.
(Optional) Change the port number with the port number you noted when you connected the card reader to the PC.

Save your changes.
Come out of the Server folder by clicking the back button and run Restart Pay Server Service.

Add Verifone e355 as a terminal
The steps in this article are applicable only if you are adding or replacing your existing card reader or terminal. If you are configuring Zenoti Payments for the first time, refer to Set up Zenoti Payments.
At the organization or the center level, click the Configuration icon.
Search for and select Payment processor onboarding.
Click the drop-down arrow to view more options.

Under the Terminals section:
Terminal Name: Enter the name of your choice for the terminal.
Identifier: Enter the identifier you entered in the config file.
Serial Number: (Only for USB) Enter the serial number on the back of your Verifone e355 card reader.
Reader IP: (Only for WiFi) Enter the IP address assigned to your device.
Click Add.
Click Save.
Download and install the Verifone Windows Unified driver
Download and extract the Verifone Windows Unified driver.
Open the extracted zip file, and depending on your operating system (32 or 64-bit), access the appropriate folder.
Locate and run VerifoneUnifiedDriverInstaller64.msi.
Click Next.
Do the following:
Port Number base: Make a note of the value in this field. You will need to update this value in the port number field of the config file.
Single device system: Ensure that this checkbox is selected.
Click Next.
Click Install.
After the installation completes, click Finish .
Set Verifone e355 in USB mode and connect to a Windows PC
Switch on Verifone e355 by holding down the green key for a few seconds.
Press the yellow and 1 keys at the same time.
If you are prompted for a password, enter 12345678.
Use the# key to scroll down and select Comms Setup.
To enter the Comms Setup menu, use the green key.
Select Comm Type and press Enter.
Select the USB option and confirm by pressing Enter.
Press the Cancel key (red key) until you go back to the Home screen.
Connect the Verifone e355 card reader to your windows PC via USB.
Open Device Manager. In Device Manager, Verifone e355 should appear under Ports (COM & LPT) named VX GEN 3 Terminal.
Make a note of the COM Port. This is the same port number you made a note of when installing the device drivers. You will need to update this value in the port number field of the config file.
Unable to Process Payments using E355
Troubleshooting steps to follow when you are unable to process payments using a Verifone E355 payment terminal
This article lists the common errors and troubleshooting steps that you must follow when you are unable to complete the setup or the card reader fails to process payments (in Mirror mode or from Mobile POS) when your Verifone e355 card reader is connected via DHCP or a Static IP.
This article covers:
e355 displays a connection error
Frequent connectivity issues with the card reader
Is your e355 connected to the WiFi network?
Verifone e355 is connected to the WiFi, but you are unable to process payments
e355 displays a communication error
e355 displays a Connection Error
If your e355 card reader displays a connection error, try the following:
Reboot the device
To reboot the device:
Hold the Cancel key (red key) down until you hear a series of beeps and the device powers down.
Press and hold the Enter key (green key) for a few seconds until the device powers on.
If the device displays the Welcome screen and the WiFI icon, proceed with the payment. If the device still does not connect to the WiFi, proceed with the next step.
Remove and Add WiFi Profile
1. Press yellow and 1 keys at the same time. The Engineering Menu appears on the device. : If you are prompted for a password, enter 12345678.
2. Scroll down (using the # key) until Comms Setup is selected, and enter the Comms Setup menu (using the green key).
3. Select WiFi config.
4. Select Remove WiFi profile. The existing WiFi profile displays.
5. Select the desired WiFi profile and press Enter to remove it. You are returned to the WiFi config menu.
6. Select Add WiFi profile.
The Verifone e355 searches for available WiFi networks.
7. Select the WiFi network you want to join (using the * or # keys) and press Enter.
8. Enter the correct WiFi password. Press Enter when done. The profile is added and you are returned to the WiFi config menu. If you need to enter special characters for the password, press and hold the # key until you find your required character. 9. Press Cancel key until the device starts searching for the WiFi network. The device connects to the WiFi. You can now proceed to taking the payments.
Frequent connectivity issues with the card reader
If you were unable to process payment and you lose connectivity with the e355 device, it's most likely that the device has power saving enabled.
To fix this problem, you must do the following:
1. In the WiFi config menu, select Setup Power Saving.
2. Select Disabled.
3. Select Enter. 4. Press the Cancel key (red key) until you go back to the Engineering Menu.
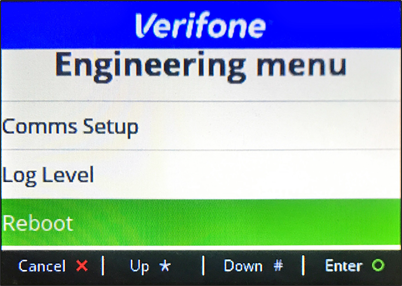
5. In the Engineering Menu, scroll down (using the # key) until Reboot is selected and press Reboot (using the green key). The Verifone e355 is rebooted and the Welcome screen appears.

If the device displays the Welcome screen and the WiFi icon, proceed with taking the payment.
Is your e355 connected to the WiFi network?
Verify if your e355 is connected to the WiFi network. If your e355 is connected to the WiFi, a Welcome Screen displays on the device and a WiFi icon appears in the upper left corner.
If the device is connected to the WiFi, skip to the next section.
If the device is not connected to the WiFi, do the following:
Reboot the device
To reboot the device:
Hold the Cancel key (red key) down until you hear a series of beeps and the device powers down.
Press and hold the Enter key (green key) for a few seconds until the device powers on.
If the device displays the Welcome screen and the WiFI icon, proceed with taking the payment. If the device still does not connect to the WiFi, proceed with the next step.
Remove and Add WiFi Profile
1. Press yellow and 1 keys at the same time. The Engineering Menu appears on the device. : If you are prompted for a password, enter 12345678.
2. Scroll down (using the # key) until Comms Setup is selected, and enter the Comms Setup menu (using the green key).
3. Select WiFi config.
4. Select Remove WiFi profile. The existing WiFi profile displays.
5. Select the desired WiFi profile and press Enter to remove it. You are returned to the WiFi config menu.
6. Select Add WiFi profile.
The Verifone e355 searches for available WiFi networks.
7. Select the WiFi network you want to join (using the * or # keys) and press Enter.
8. Enter the correct WiFi password. Press Enter when done. The profile is added and you are returned to the WiFi config menu. If you need to enter special characters for the password, press and hold the # key until you find your required character. 9. Press Cancel key until the device starts searching for the WiFi network. The device connects to the WiFi. You can now proceed to the payments.
Verifone e355 is connected to the WiFi, but you are unable to process payments
If your device is connected to the WiFi, but you are unable to process payments, you must verify if the IP address of your e355 and the IP address you entered for your e355 in Zenoti is the same.
To view the IP address of your Verifone e355 card reader
1. Press yellow and 1 key at the same time. The Engineering Menu appears on the device.
Note
: If you are prompted for a password, enter 12345678.
2. Scroll to and enter Reports.
3. Select and enter TCPIP Report.
4. You will see the IP address. Make a note of it.
Verify the IP address in Zenoti
1. At the center level, click the Configuration icon.
2. Search for and select Payment processor onboarding.
Expand the configured payment processor.
3. Scroll to the Terminal section, and click the edit icon against your e355 terminal.
4. Verify if the IP address in the Reader IP field is the same as your e355.

5. If the IP address is the same as your e355, talk to a person from Zenoti Support.
6. If the IP address is different, make the required changes and, click Save Terminal and proceed with taking payments.
e355 displays a Communication Error
A communication error indicates that your device is not correctly configured. If your e355 card reader displays a communication error, try the following:
Disable SSL
1. Press yellow and 1 keys at the same time. : If you are prompted for a password, enter 12345678.
The Engineering Menu appears on the device.
2. In the Engineering menu screen, scroll down to Comms Setup using the # key and press the green key to select.
Comms Setup screen appears.
3. In the Comms Setup screen, scroll down to TCP/IP config option and press the green key to select.
TCP/IP config menu appears on the device. 4. In the TCP/IP config menu, scroll down to SSL and press the green key to select.
5. In the SSL screen, press the green key to select Disabled.
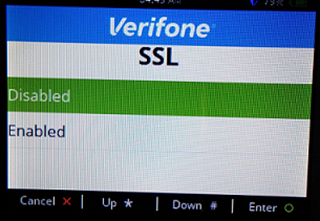
Now, try processing the payments.
See Also
Set Up Your POSzle Pack
Step-by-step instructions for connecting your POSzle devices
After you place an order for a POSzle pack and you receive your POSzle devices, you will need to connect the individual devices. Read on for step-by-step instructions.
Note
After you receive your POSzle pack, you must send an email to deviceactivation@zenoti.com with the serial number of the Miura card reader and request for activation.
Connecting Your POSzle Devices
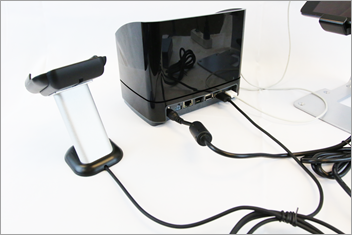
1. Remove all devices from their packaging. Your POSzle package should contain the following items:
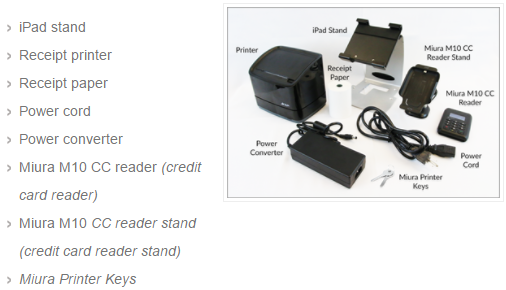
2. Connect the power cord to the convertor.
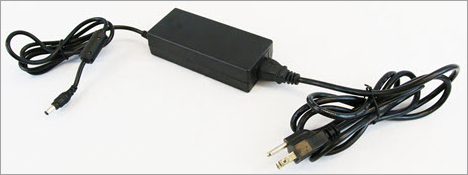
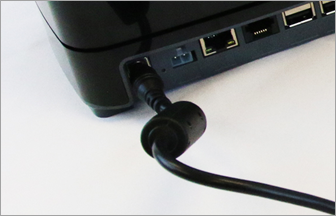
3. Plug the end of the power convertor into the printer.
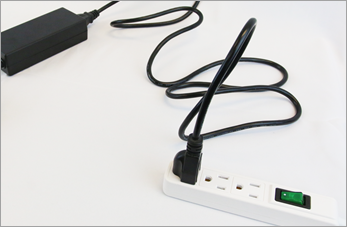
4. Plug the power plug into a power outlet.
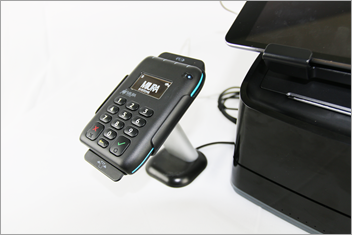
5. Insert the iPad into the iPad cradle.
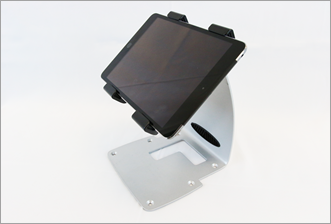
6. Connect the iPad and the CC reader stand to the back of the printer.
7. Slide the CC reader into the cradle.
8. The Zenoti Payments hardware setup is complete.
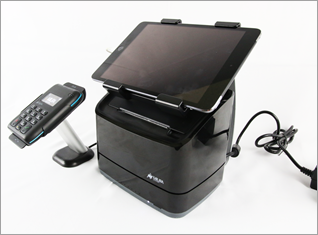
You can now proceed with the following next steps:
Configure your Zenoti account to accept Zenoti Payments
Install the Zenoti Mobile POS app on an iPad
Pair the credit card reader to the iPad
Pair the printer to the iPad