Manage social logins admin Tasks for online booking
Monitor and understand the online booking performance
Businesses need to analyze online booking performance to understand guest behavior and identify areas for improvement.
Important
The Online Booking Dashboard shows a summation of the appointments booked during the selected time period. If the guest does not show up for the appointment, or if the appointment is canceled, such information is not captured. This data will not match with the Online Collections Report or other Sales Reports.
To view the online booking dashboard
Precondition: Enable the Online Reporting Details report from the organization level. Navigate to Configuration icon > Reports > List of reports > select Online Reporting Details checkbox.
At the organization level, click the Reports icon.
Search for and click Online Reporting Details.
The Online Booking Dashboard appears.
Select the following filters:
Metrics: Select Online Appointment Data to see the Online Booking performance:
Date: Select the date range for which you want to check the performance metrics.
The Online Booking Dashboard shows the booking performance of Webstore, CMA, and Kiosk (if enabled).
Online appointment data
Online Appointment Data shows the following details in a graphical representation:
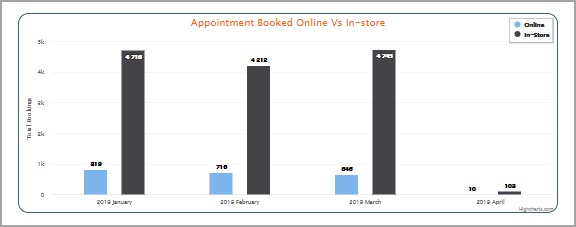
Appointments Booked Online VS In-store: This chart compares the number of appointments booked online with the appointments booked in-store.
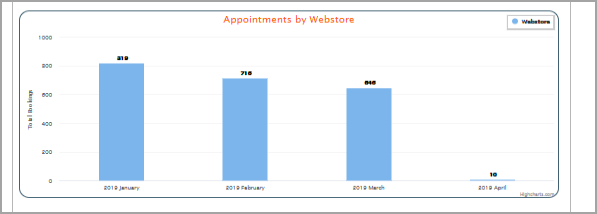
Appointments By Webstore: This chart displays the appointments that are booked on the Webstore for the selected time period.
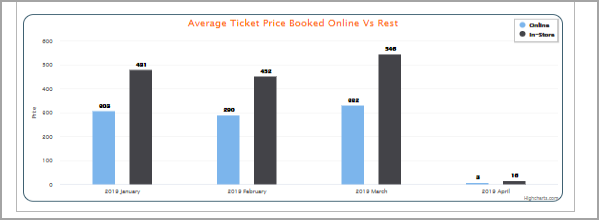
Average Ticket Price Booked Online VS Rest: This chart displays the average cost of the appointment that was booked on the Webstore and compares it with the in-store average price of the booking.
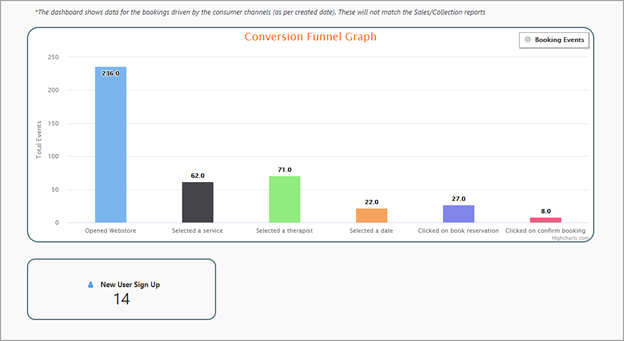
Conversion Funnel: The Conversion Funnel tracks all user behavior on the Webstore. You can get info as to how many new users signed up on the Webstore, and how many have opened the Webstore and completed the booking flow.
Configure social logins
Online businesses want their customers to create new user accounts, as this allows them to know more about the customers and builds rapport. It is more so relevant for a salon or a medspa with an online booking facility as this helps them know their guests better, thus paving the way for better service.
However, it is difficult for guests to remember all their credentials. Zenoti understands this and allows you to let your guests use their Facebook or Google credentials to log in to the Webstore. Such social logins allow for a rapid guest sign-up and increased user adoption.
Important
Zenoti checks for the uniqueness of the email ID and not the mobile number. A unique and valid email address is mandatory for using social logins.
Preconditions
Facebook Authentication - Create a Facebook Login account.
Google Authentication - Generate Google Client IDs.
To enable social logins
At the organization level, click the Configuration icon.
Search for and click Online booking settings from the Online Booking section.
Click the CX v3 template.
Click Online Booking on the left panel and select the Enable social login checkbox.
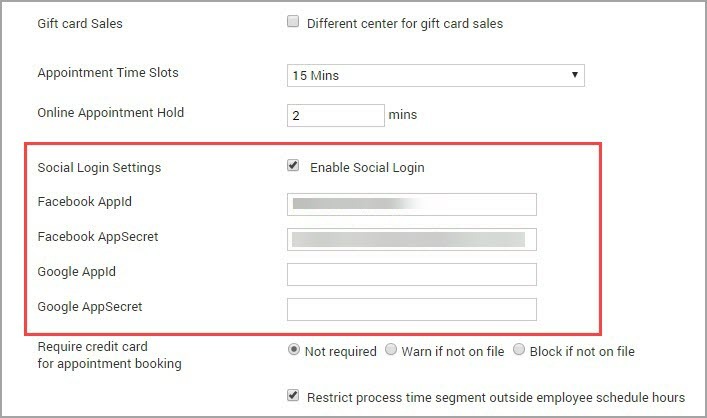
Enter the following information:
Facebook App Id: Enter the Facebook app id.
Facebook App Secret: Enter the Facebook app secret id.
Google App Id: Enter the app id or Google Client Id in this field.
Google App Secret: Enter the Google Client secret code in this field.
Click Save.
Now, when your guests navigate to your Webstore and click Sign In, they will see two new options with which they can sign in:
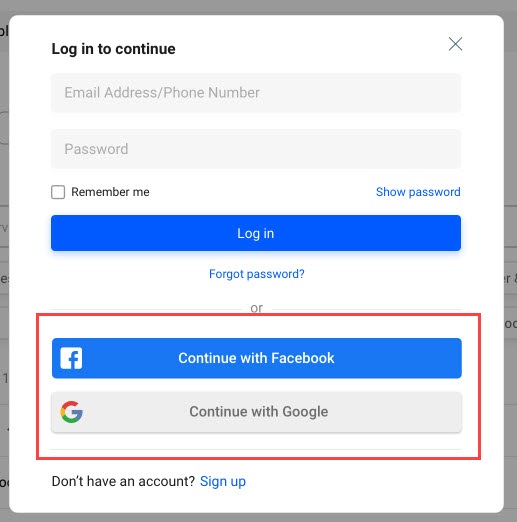
Note
Guests can both sign-up and login using their social credentials.
Use Facebook for signing in or signing up
If your guests decide to use Facebook to sign in or sign up, they will be required to take the following steps:
The Facebook login screen appears and the guests should enter their credentials.
Facebook displays the guest’s profile and prompts them to proceed.
Guests click Continue as <Guest Name>
Guests are redirected to Zenoti Webstore. They will see the following screen:
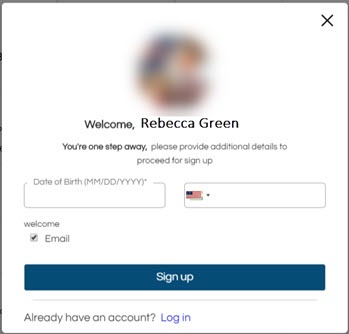
Enter the Date of Birth and optionally provide a Phone Number.
Click Sign Up.
The sign-up process is completed and the Webstore homepage appears.
Use Google for signing in or signing up
If your guests decide to use Google for signing in or signing up, they will be required to take the following steps:
A pop-up from Google appears and prompts the guests to sign in with their Google credentials.
The guests enter their Google credentials. The guests are redirected to Zenoti Webstore.
Guests enter the following details: Date of Birth - Mandatory Phone Number - Optional
The sign-up process is completed and the Webstore homepage appears.
Set up Facebook login
Important
The steps in this article are pertaining to the configuration on a third-party (Facebook) site. Zenoti is not responsible if there are any changes to these steps or processes. The information is provided for your convenience.
Configure the Facebook login to allow your guests to log in to the Webstore using their Facebook credentials.
Step 1: Create a Facebook developer account
Navigate to the URL https://developers.facebook.com.
Log in using your Facebook credentials or create an account.
Step 2: Add an app to your developer account
On the Facebook for developers homepage, click My apps.
Click Create app and from the Select an app type list, select the type of app you want to create, and click Next.
Enter the following details of the app and click Create app.
Add an app name: Enter the name of the app. For example, Social login.
Note
The Add an app name field should not contain the word “Facebook” (to adhere to Facebook policy).
App contact email: Your email ID will be auto-populated in this field.
Business account: Select a business manager account to be associated with this app.
To proceed with the creation of the app, enter your Facebook password and click Submit.
To set Facebook login for your webstore, on the Add products to your app page, under Facebook login for business, click Set up.
In the Valid OAuth redirect URIs field, enter your redirect URI. This is your Zenoti URL.
Example: https://abc.zenoti.com, where 'abc' is the name of your business.
Note
In the Allowed domains for the JavaScript SDK field, you can give the same URL as that in the Valid OAuth redirect URIs field.

Click Save changes.
Navigate to Facebook login for business > Quickstart.
To set up Facebook login for your Webstore, select Web.
Under the Tell us about your Website section, enter the URL of your Webstore.
The URL of your Webstore will be in the format www.<orgname>.zenoti.com.
For example, if your organization name is Spa Bliss, the URL will be www.spabliss.zenoti.com.
Click Save and then click Continue.
Under the Set up the Facebook SDK for Javascript, Check login status, Add the Facebook login button and Next steps sections, click Next.
Navigate to Settings > Basic and make a note of the App ID and the App Secret ID
You must paste the App ID and the App Secret ID in the Enable social login settings of the CX v3 template.
Fill up the following information (Mandatory):
App domains: Enter the URL of your Webstore.
Privacy policy URL: Enter the URL of your privacy policy page.
Terms of service URL: Enter the URL of your terms of service page.
Scroll down to the end of the page and in the Site URL field, enter the URL of your Webstore.
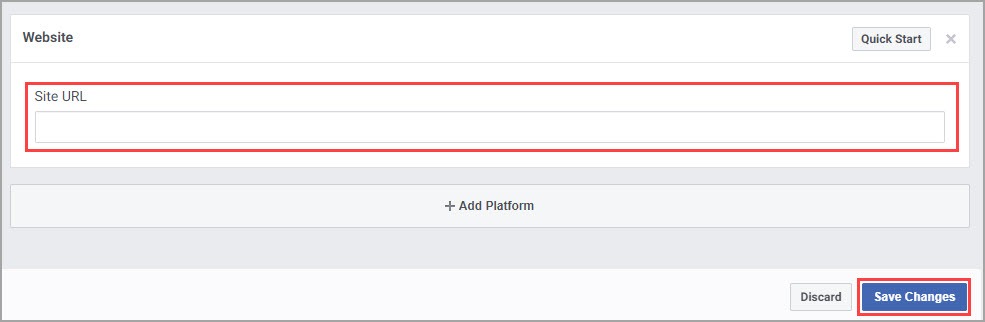
Click Save changes.
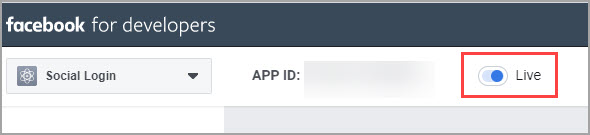
To set the app live, from the top menu, click the slider to make the app live.
Tip
If you are testing the Facebook login on the Webstore, ensure you log out of your developer account and close the tab.
Note
When you are in live mode, your app can do the following:
Access user data from anyone who visits your Webstore and grant the requisite permissions.
Your app is granted login permissions.
Generate Google Client IDs
Disclaimer: The steps in this article are pertaining to the configuration on a third party (Google) site. Zenoti is not responsible if there are any changes to these steps or processes. The information is provided for your convenience.
You can allow your guests to log in to your Webstore with their Google credentials. This allows for a quick and seamless login experience.
But before you enable this feature on your Webstore, you must generate a Google OAuth Client ID and Client Secret ID.
To generate both these IDs:
Navigate to https://console.developers.google.com/apis.
You will be prompted to log in with your Google account.
Sign in with your Google credentials.
The Google API Console page opens.
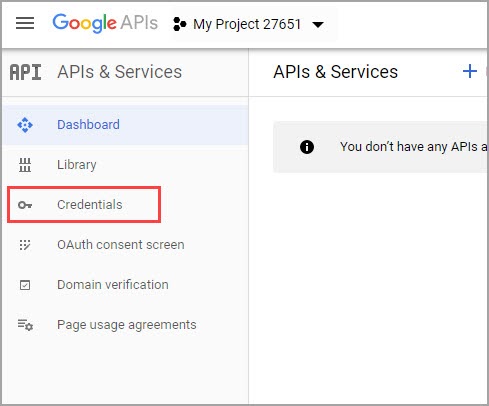
From the side menu, select the Credentials option.
The page will prompt you to Create a New Project.
Click New Project.
The New Project page appears.
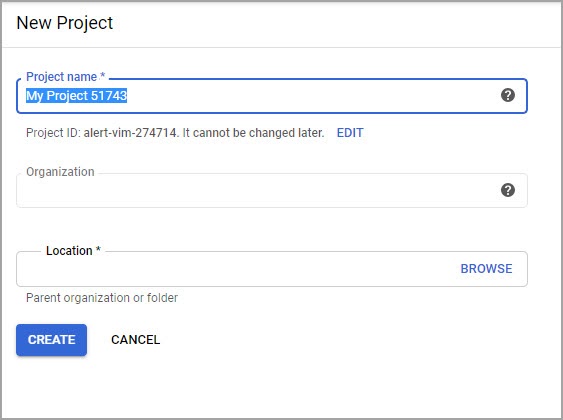
Enter the following information:
Project Name: Enter the name of your project. For example, Social Login.
Organization: This field is auto-populated.
Location: This field is auto-populated.
Click Create.
The new project is created and the project home page appears.
From the side menu, click OAuth Consent Screen. The consent screen appears.
Note
If you already have the OAuth Consent Screen setup, you can skip this step and proceed to Step 11.
Select User Type as External.
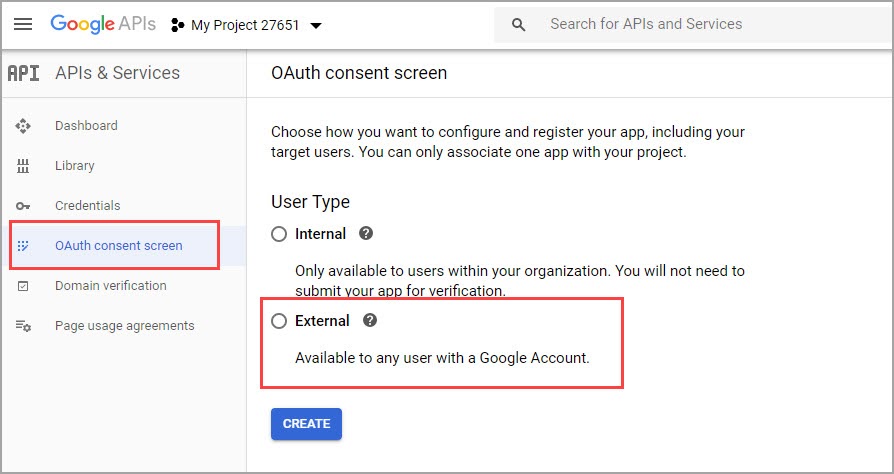
Click Create.
You will be prompted to enter the Application Name.
Enter the Application Name and click Save.
From the side menu, click Credentials again.

Click Create Credentials.
Select OAuth Client ID from the drop-down list.
The OAuth Client ID page opens.
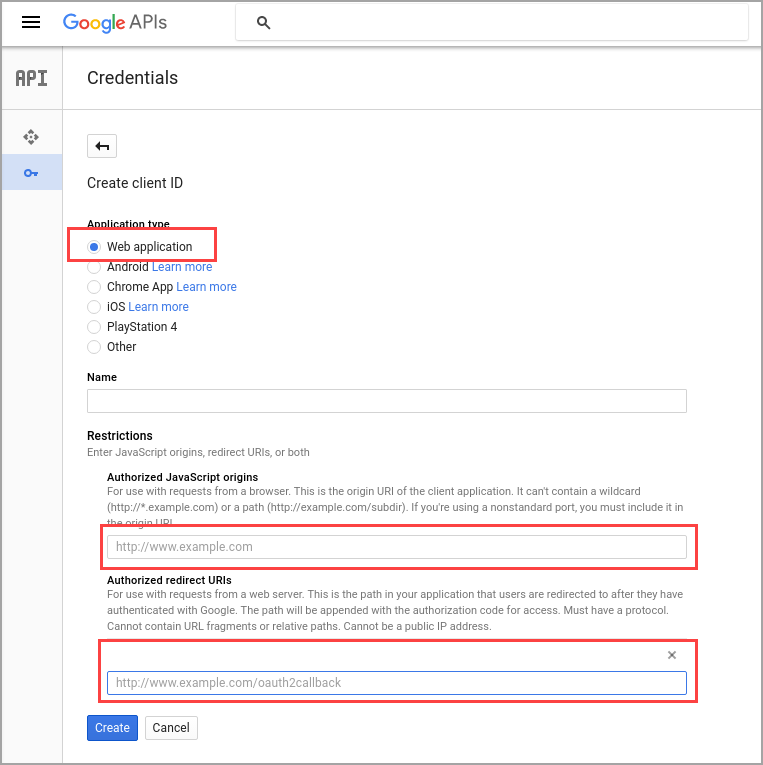
Select the Application Type as Web Application.
Enter the Authorized Javascript Origins URL. To simplify, enter your Zenoti URL. For example, if your business name is Spa Bliss, your Zenoti URL will be spabliss.zenoti.com. Enter the same in the Authoized Javascript Origins and Authorized Redirect URIs field.
Note
The URLs you enter should be authorized by Google. To authorize the URLs, go to the OAuth Consent Screen, click Edit App, scroll down and enter the URL in the Authorized Domains field.
Click Create.
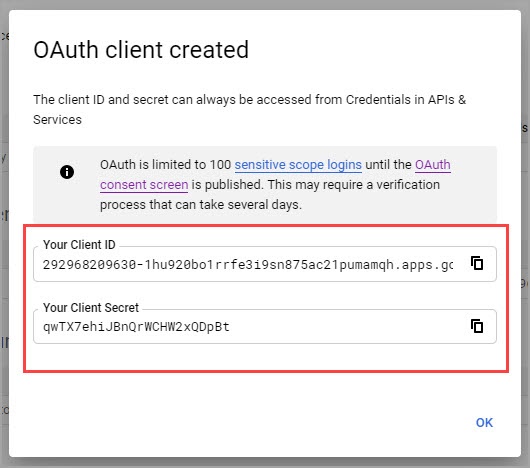
Your client IDs are generated and are displayed in a pop-up window.
In the Enable Social Login settings of the CX V3 template, copy and paste the Client ID and the Client Secret.