Set up basic configurations
Set up basic configurations for CMA
After you have enabled the CMA for your business, you must configure the basic settings such as Employee Catalog, Services Catalog among others in Zenoti. These settings and configurations allow you to display services, providers, and allow you to accept bookings on the CMA.
Employee Schedule: You must set up employee schedules for your service providers as Zenoti uses this information to show their availability in Appointment Book and in CMA.
Employee Catalog: Employee catalog allows you to display the available providers in CMA.
Service Catalog: You must set up the service catalog as this displays the services on your CMA.
Learn how you can configure the Service Catalog.
Center Hours: Configure the settings Online Booking Start Time and End Time.
Learn how you can configure the Center Hours - Online Booking Start Time and End Time.
Block Out Time: You must set up the Block Out times for the providers to allow them to take personal or other breaks.
Note
Apart from configuring these basic settings, you must also configure the CMA template that allows you to enable/disable services or features of the CMA.
Customize the look and feel
After you have enabled CMA for your organization, you can customize its look and feel to match your branding requirements.
Branding customization allows you to add your own brand language to CMA’s look and feel. You can change the icons, personalize some important text elements, and add background images that resonate with your branding.
Note
Please contact your Zenoti Customer Success Manager to customize the look and feel of your CMA.
Branding logos and icons
App Icon: You can use your existing business logo or a trademarked image. This will appear as the main icon for the app on a mobile device and on the app stores.
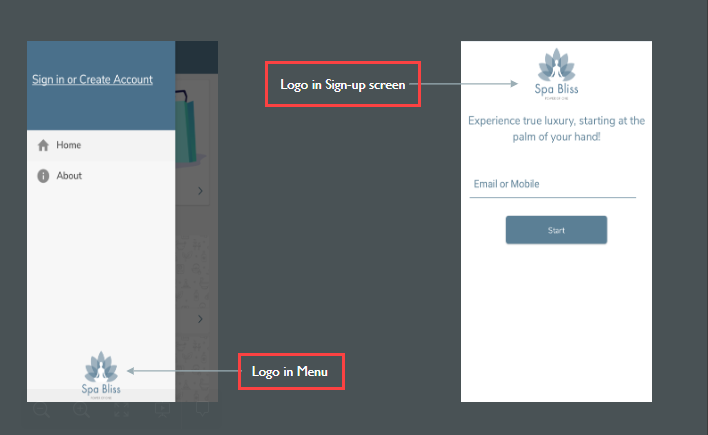
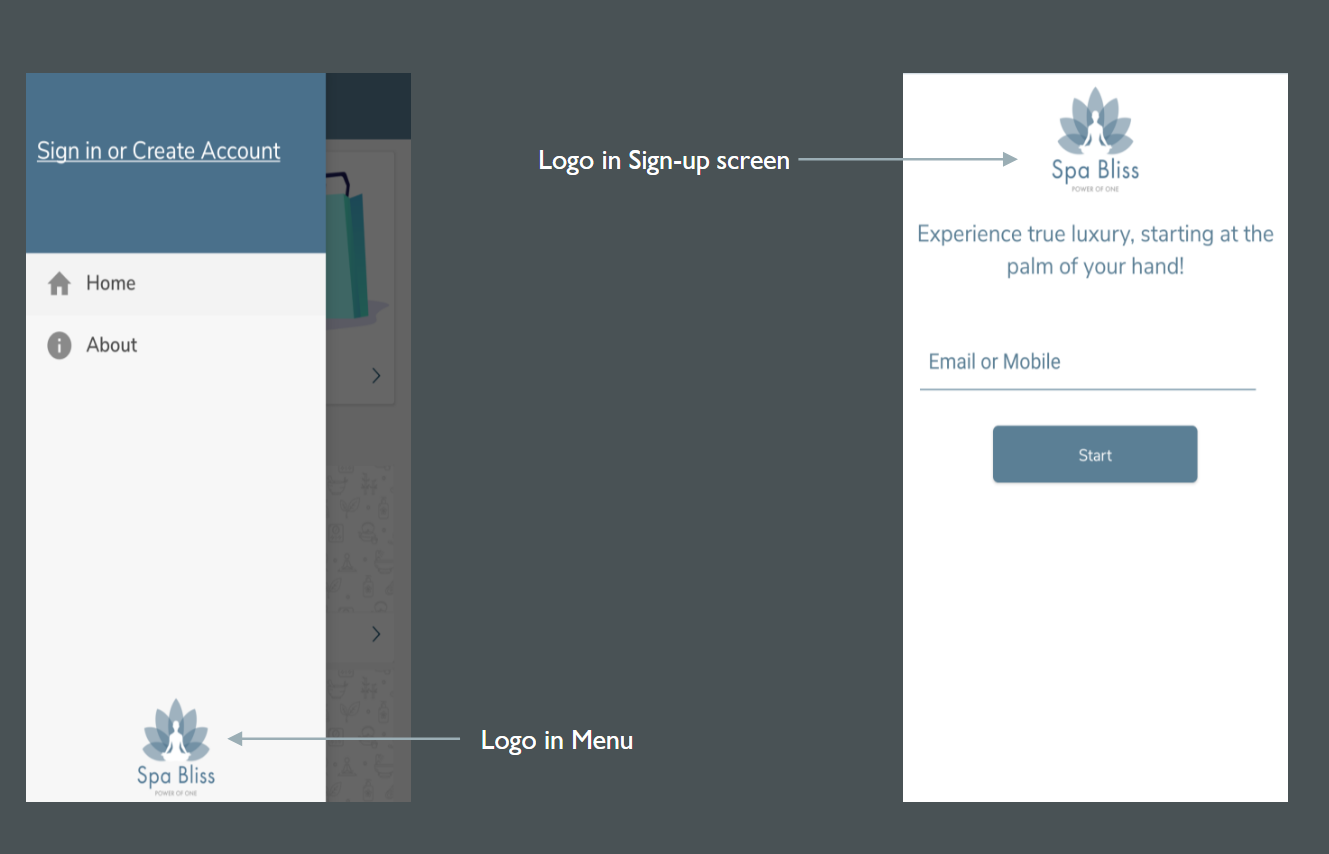
Logo: You can use your existing business logo or a trademarked image on the menu, during sign-up and sign-in of the guest.
Splash Screen: The splash screen appears when the app is launched. You can use your existing business logo or a trademarked image for this screen. You can also use a GIF image as the splash screen.
Custom Home Screen: The custom home screen appears after the app has launched. You can customize the look and feel of the screen and add your branding. You can customize the following elements:
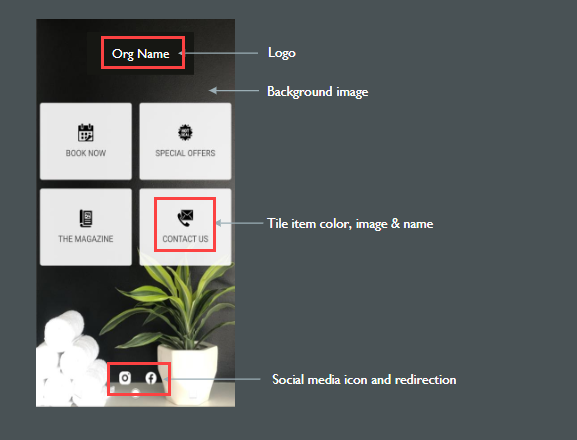
Business Logo: You can add a logo or a text that represents your business.
Background Image: You can add a background image for the home screen.
This image is only visible on the home screen.
Tiles: Tiles allow you to showcase the important features of the app in an organized manner. Zenoti allows you to showcase a maximum of 4 tiles on the home screen. The text, logos, and colors are customizable.
Social Media Icons: Redirect your guests to your social media pages through social media icons on the home screen. Zenoti allows you to showcase a maximum of 4 social media icons.
Colors: You can change the colors of the following elements:
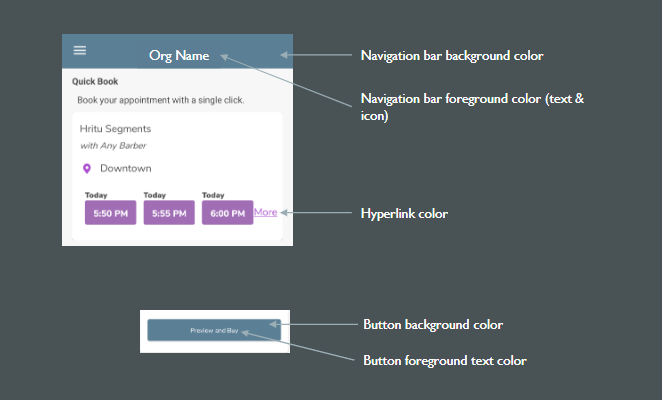
Navigation bar (background and text color)
Hyperlinks
Action buttons (background and text color)
Text labels
You can change the text labels for the following elements:
Center label
Employee label
Booking button label
Add-ons label
Marketing opt-in consent text during sign-up
Images
Service Categories: You can customize the images that appear for the service categories.
Gift Cards Section: You can customize the image for the gift card section on the home screen.
Streamline review process with app reviewers
The Apple Appstore and Google Playstore guidelines require Zenoti to share a demo account with their internal reviewers while uploading apps on their platforms. Read detailed guidelines here.
Important
Zenoti has no control over the app review processes by Apple or Google.
Reviewers may create appointments in your live environment as part of testing. Ideally, these appointments must be deleted by the reviewers. However, this is not always the case. Many times, reviewers from Appstore and Playstore may forget to delete such appointments from your live environment. This results in confusion for your front-desk staff – as some of the appointments are not genuine.
To try and reduce this confusion and to make the process smooth and simple for both, the internal reviewers and you, Zenoti will create demo accounts in your database with the following details:
Email: cmademo@zenoti.com
First Name: Demo
Last Name: CMA
These accounts will only be used by the Appstore or Playstore reviewers. Moreover, we will share the following guidelines with the Appstore and Playstore:
To create appointments at least a week in future.
To delete the appointments once their testing is completed
Note
The reviewer is not bound to follow these guidelines.
The use of the demo accounts will ensure that:
Your front-desk staff can see that an appointment is booked by the Apple/ Google reviewers. It will appear on the Appointment Book with the user details as mentioned above.
If the appointment is not deleted by the reviewers, the front-desk staff must delete it to avoid any confusion around appointments booked.
Image requirements and specifications
The Consumer Mobile App (CMA) is a customized booking solution aimed towards your guests and allows them to book an appointment, make a payment, and view memberships and packages directly from their mobile devices.
Businesses can personalize and customize the CMA according to their branding and marketing requirements.
During the initial set up of the CMA, businesses are required to share multiple assets in specific formats and resolutions. These assets will be used across multiple screens on the CMA and convey crucial information such as service offerings.
This article lists down all the image requirements and their specifications necessary to build a quality guest-facing application for a business.
Businesses should share these images with their Customer Success Managers either via Dropbox or via email.
Branding images
Branding images allow you to create a unique and distinctive look for the CMA, albeit being in-line with your marketing requirements.
You must provide the following images in the following specifications:
Logos
Asset
Resolutions
Format
Sign-up Screen Logo
327 X 231 Pixels
JPG or PNG
Menu Screen Logo
327 X 231 Pixels
JPG or PNG
These logos will appear when a guest first signs up for your CMA application (or signs in again after logging out); It also appears at the bottom of the menu navigation screen.
Splash Screen
Asset
Resolutions
Format
Splash Screen
504 X 375 Pixels
JPG, PNG, or a GIF
This screen appears as soon as the app is launched. The splash screen image will appear on the screen approximately for 1-2 seconds with a white background.
You must share the image that will appear on this screen. Preferably it will be the business logo or an emblem.
App Icon
Asset
Resolutions
Format
App Icon
1024 X 1024 Pixel
JPG or PNG
App icons are the images you tap to open or launch an application.
You must provide a logo or an image that will appear on the home screen of the guest’s mobile device and also on the respective app stores.
Homepage tile images
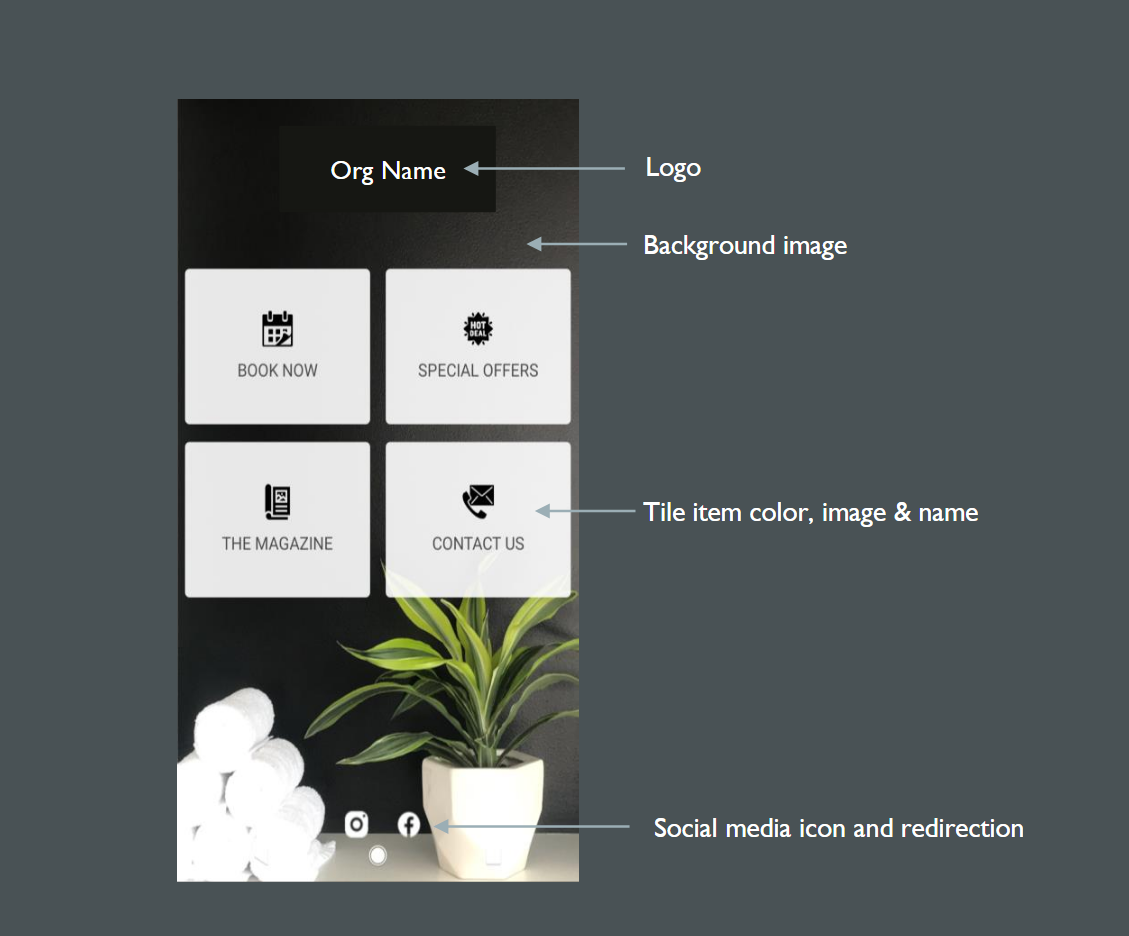
You must provide the following images that appear on the home screen:
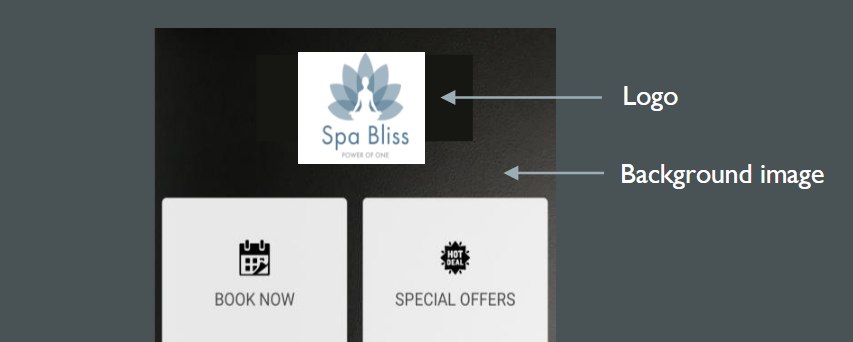
Background Image: The image appears on the background of the home screen behind all the visible elements. A good background image elevates the look and feel of the app without hindering the text and other elements in the screen.
Please take into account the spacing of the tiles in the center of the image, and the social media icons at the bottom. The icons will be either white or grey, depending on the primary tone of your background image.
Asset
Resolutions
Format
Background Image
1000 X 1778 Pixel
JPG or PNG
Home screen Customer Logo: The logo will appear on the top of the home screen.
Asset
Resolutions
Format
Home screen Logo
530 X 170 Pixels
JPG or PNG
Home screen Tile Images: The CMA home screen will contain four tiles or two tiles ( as per your needs) which redirect the guests to various features or sections of the app. For example, you will have tiles for appointment booking, for viewing special offers, and contacting the business.
You must provide images or icons that appear on the tiles of the home screen.
Note
Of the four tiles, the first tile will always be the Book Now tile. You must provide the icon for the Book Now tile. The Book Now tile will redirect guests within the app. The other three could be as per your options such as Gift Cards, Offers, Magazine, Shop etc.
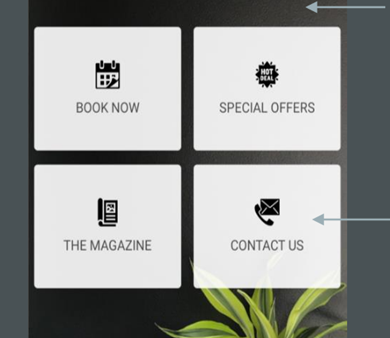
The color of the tiles and the opacity can be determined by the businesses.
Asset
Resolutions
Format
Home screen Tile Icons
128 X 128 Pixels
JPG or PNG
Social Media Icons: These images can be arranged based on the preference and link to your social profiles. Please ensure a transparent background, they will overlay your background image.

Asset
Resolutions
Format
Social Media Icons
72 X 72 Pixels
JPG or PNG
Category and Gift Card Images
Service category images and the gift card category images are the only ones that can be updated by you and can be changed frequently without Zenoti re-publishing the app.
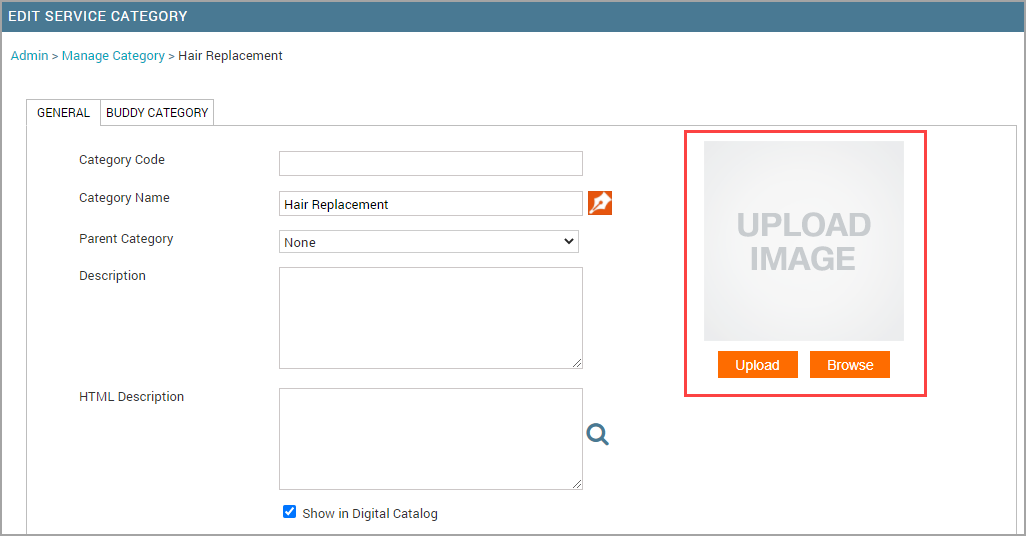
To update the Service category images, at the organization level, click the Configuration icon and navigate to Services > Service categories.
To upload the category image select the service from the available list and click Upload.
To update the gift card images, at the organization level, click the Configuration icon. Search for and select the Gift Cards setting from the Online booking settings section. Click Webstore V2 > Gift Cards. Paste the image URL in the Giftcard Default Preview Image field.
In case you need an Image URL, you can upload the image into the Zenoti Image Gallery. At the organization level, click the Configuration icon. Navigate to Marketing > Image Gallery.
The rest of the images require an app update that needs to be pushed from the respective app stores - This can be coordinated with your Zenoti Customer Success Manager after your app is launched.
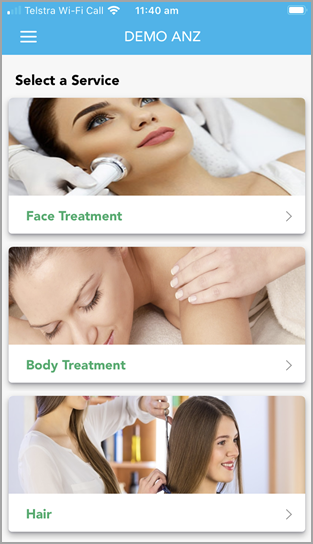
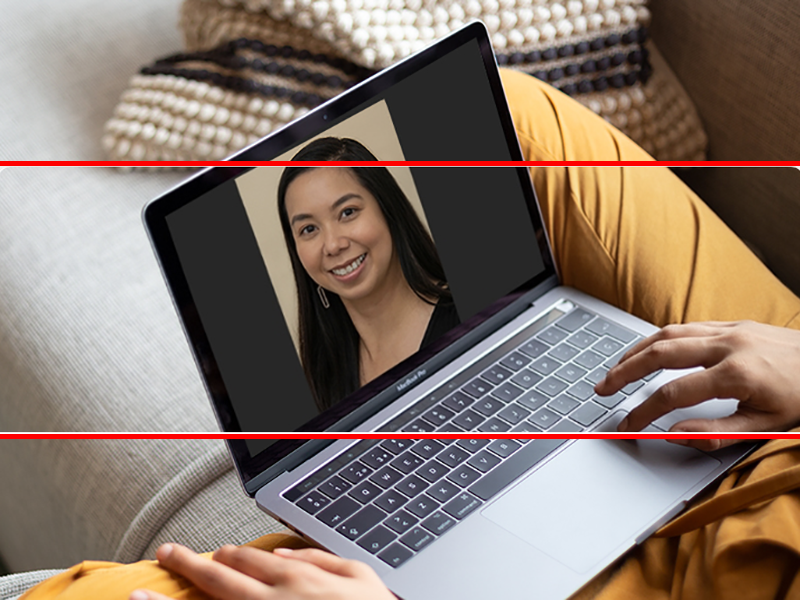
These images appear on the service category indicating the type of category. For example, for a massage category, you could use an image that is similar to the example below:

Asset | Resolutions | Format |
Category Images | 1400 × 490 px | JPG or PNG |
Gift Card Category | 1242 X 360 Pixels | JPG or PNG |
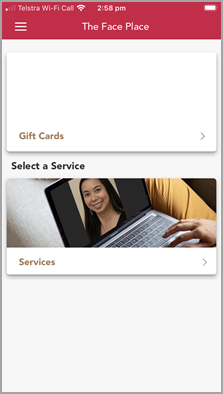
This is how your category images would display within the app.
Original image (800x600)
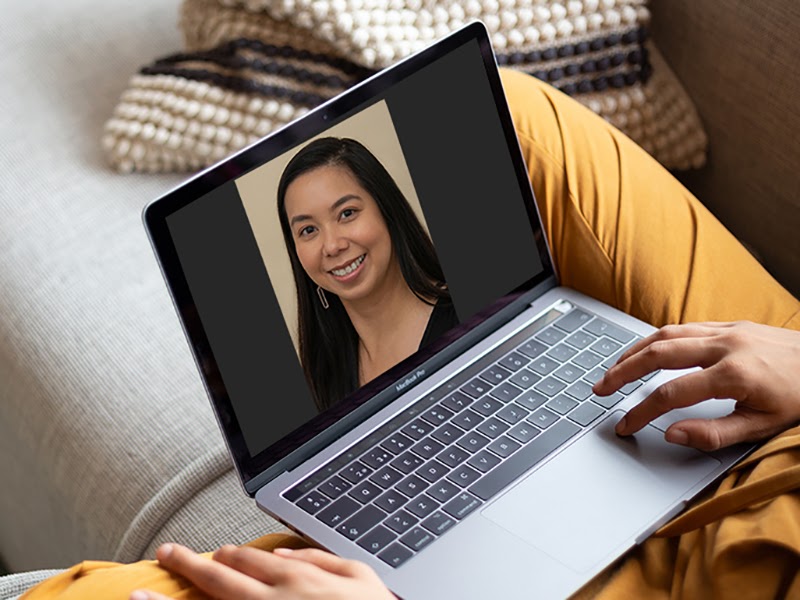
Section of image that is displayed, approx (800 x 280) or ~160px either side of image horizontal midpoint.
Alternatively, you can add transparent padding to your category image instead of aligning it for cropping:
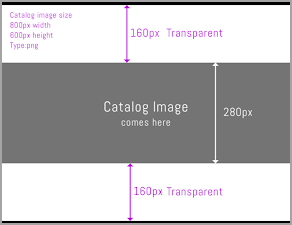
Final display in app
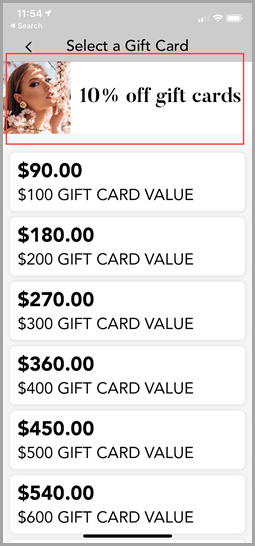
Optional: gift card promotion banner
You can utilize the highlighted section below for displaying marketing banners and offer banners currently being offered at your center.
To update the Gift Card Banner images, at the organization level, click the Configuration icon. Navigate to Webstore V2 > Gift Cards . Paste the banner image URL in the CMA Gift Card Promo Banner URL field.
In case you need an Image URL, you can upload the image into the Zenoti Image Gallery. At the organization level, click the Configuration icon. Navigate to Marketing > Image Gallery.
Configure guest account deletion policy
Businesses using the CMA (Consumer Mobile App) can add custom warning messages to inform guests about the consequences of deleting their accounts. Doing so ensures that the business stays compliant with privacy regulations.
Note
Guests can delete their accounts from CMA only when there are no pending items, such as no pending payments, active memberships, loyalty points, active gift cards, or packages linked to their profile. If any of these conditions remain unsettled, the request will be denied.
With this feature, businesses can define custom warning messages for guests who want to delete their accounts.
At the organization level, click Configuration.
Navigate to Online Booking > Online booking settings > CX V3.
Click Guest Privacy.
Enter the desired custom warning text in the Guest Account Deletion Policy text box.
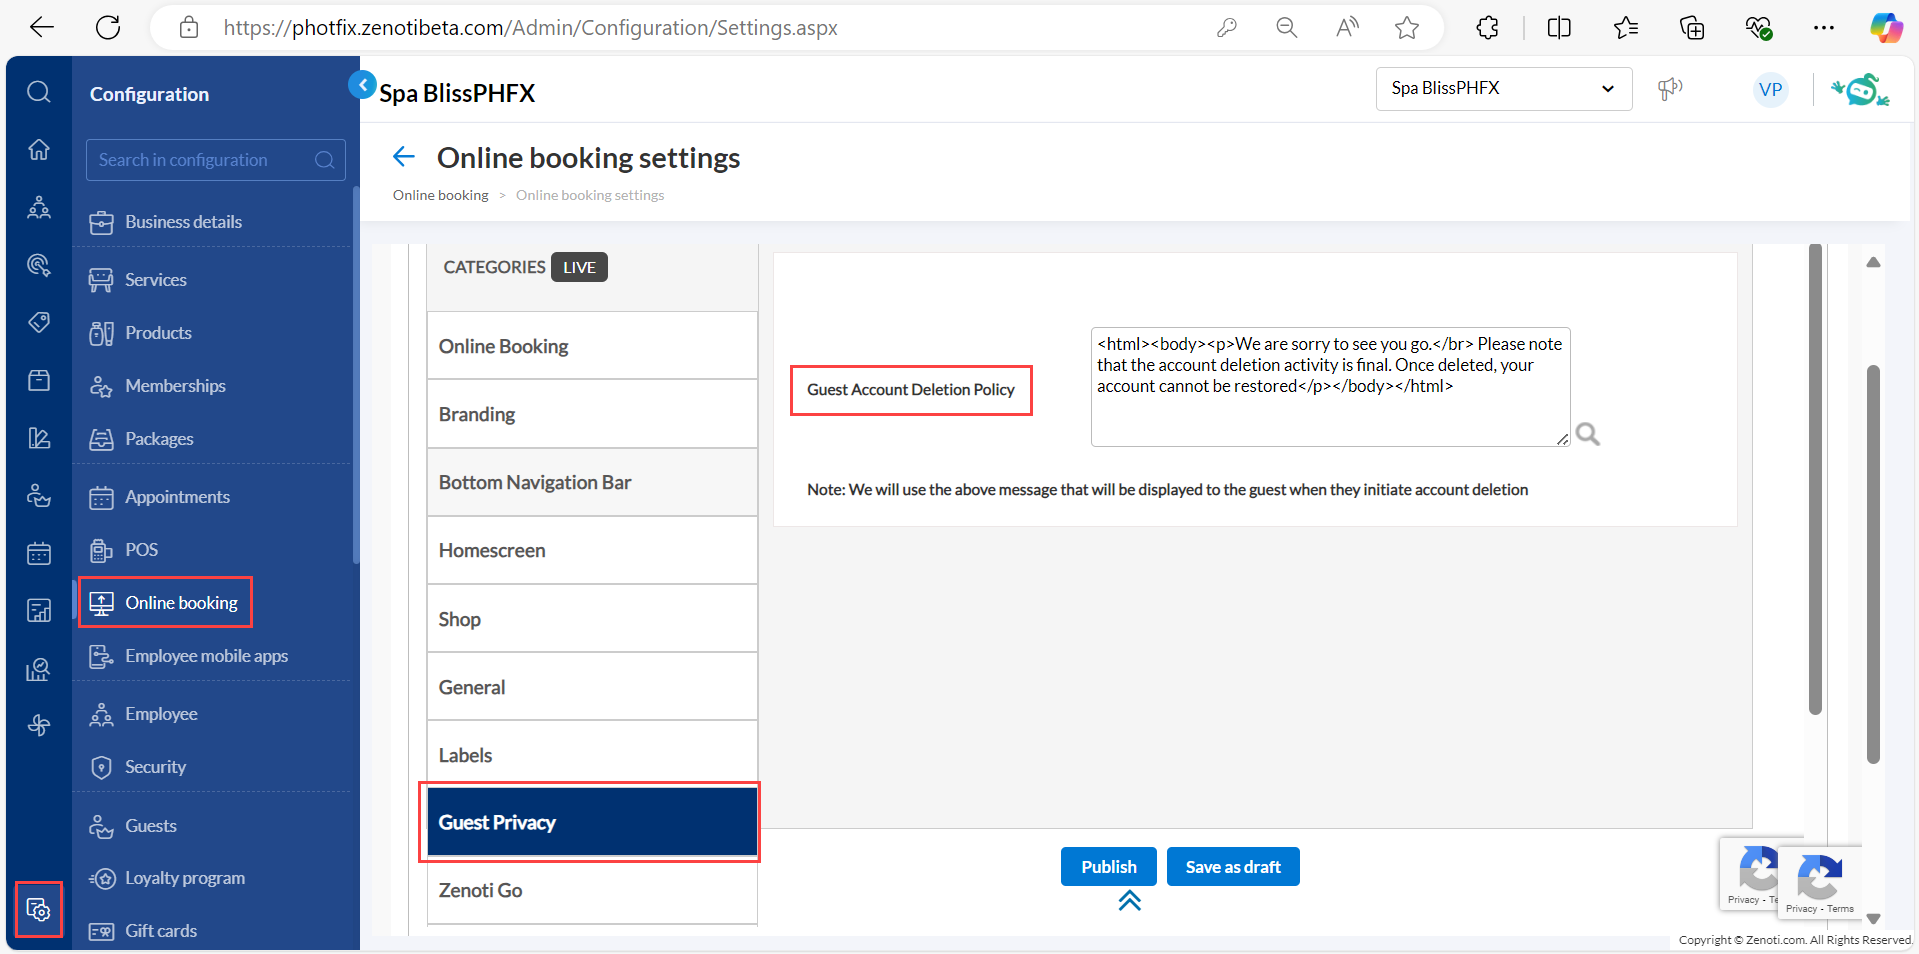
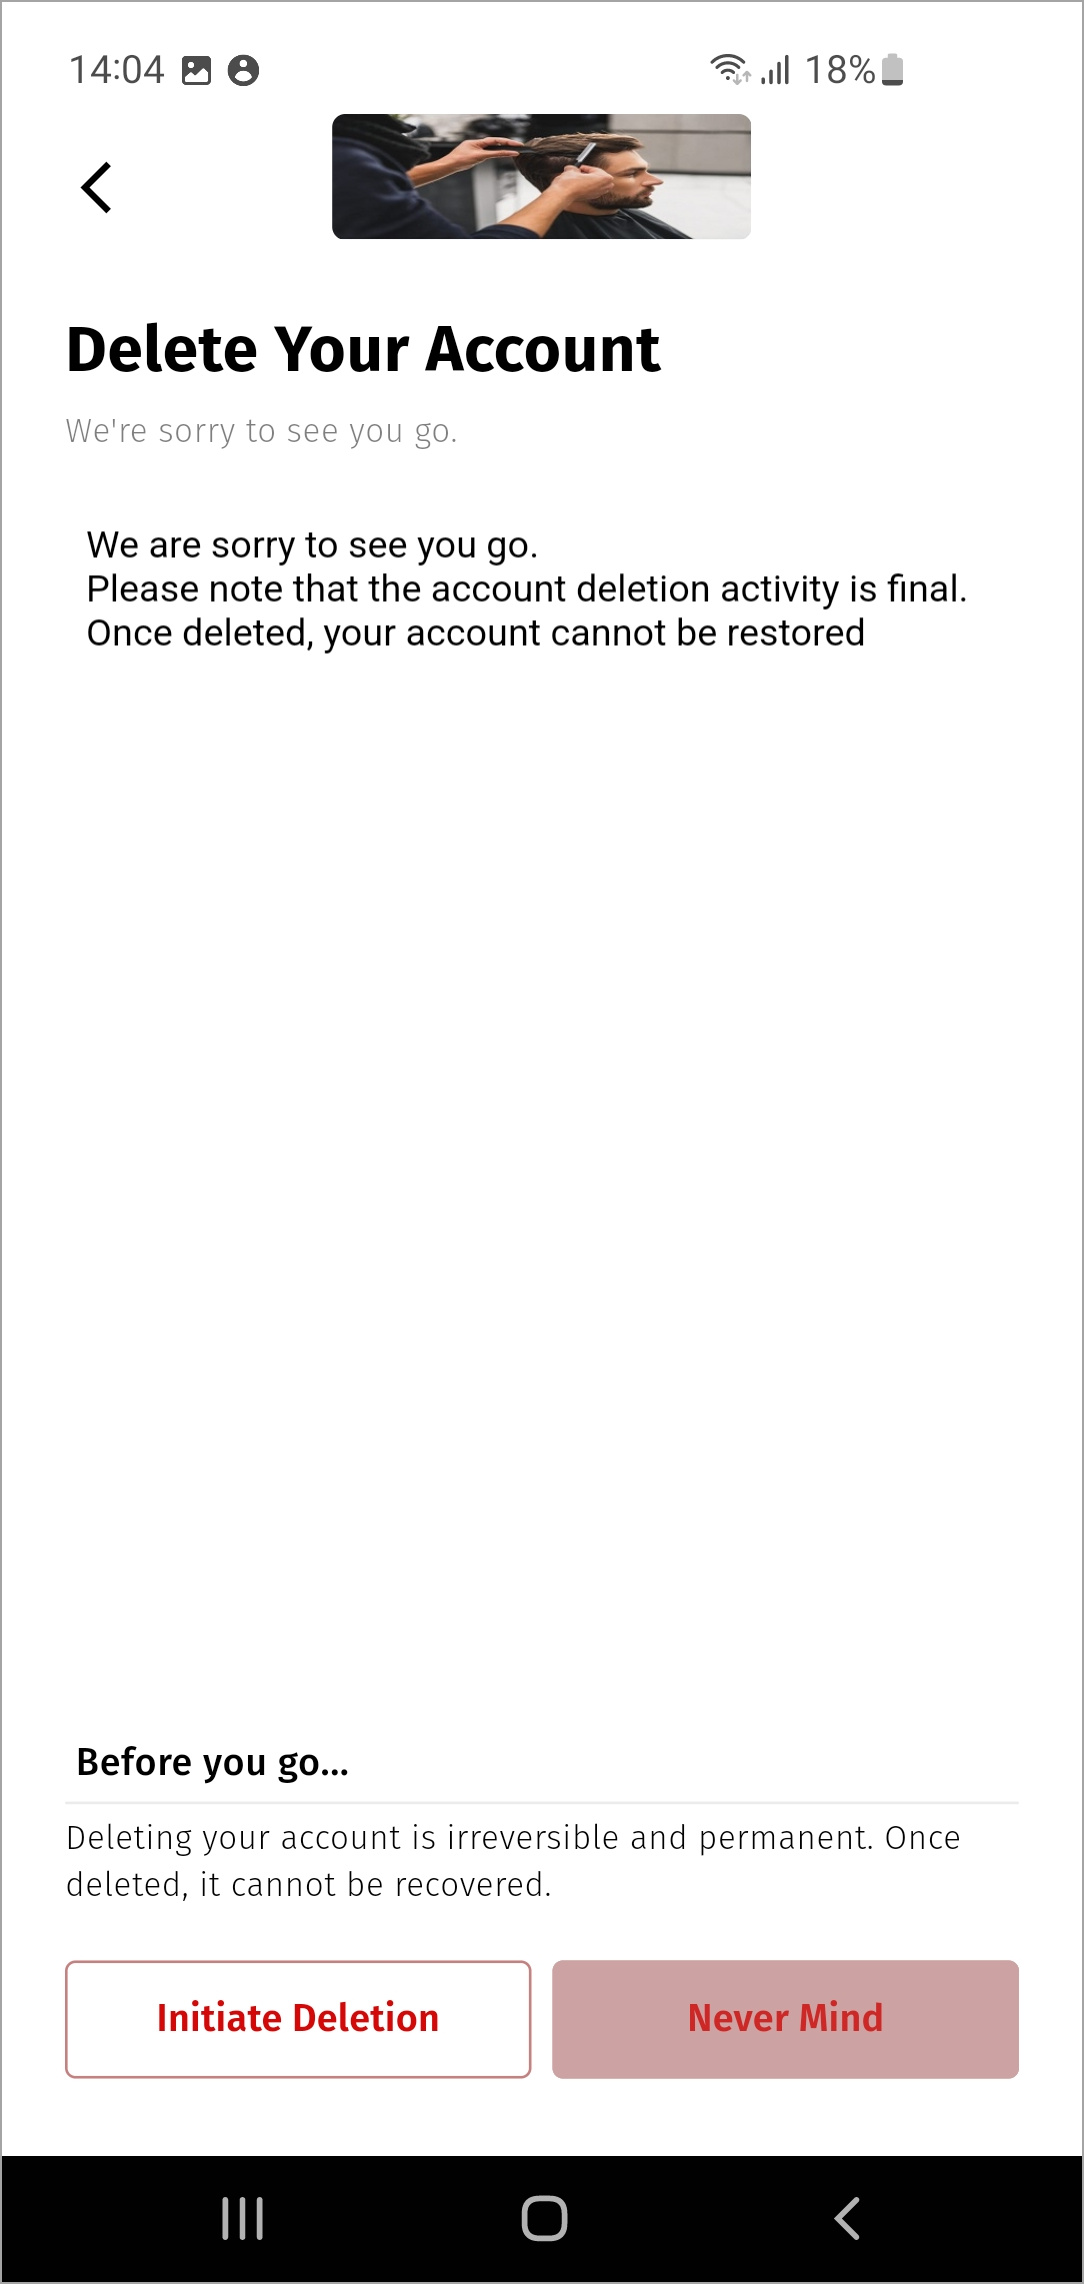
This message will appear to guests when they log in to the CMA application and click Initiate Deletion to request account deletion. This ensures guests are fully informed about the policy before they delete their account.
Impacts and considerations
Only guests can initiate the deletion of their profile.
Profile linked to an employee id cannot be deleted.
Preview branding changes in CMA
You can use the advanced branding and customization options in CMA v3 to match the app to your brand. The Preview function lets you see the results of your customizations before you set them live.
Using the Preview option, you can:
Select the type of device (Phone, Tablet, or Desktop) to preview the layout of the Consumer Mobile Application.
View the saved draft.
Note
You will be able to save changes as a draft only after you fill in all the required fields.
View the published changes in real time.
Publish the changes directly from the preview.
Note
To publish the changes directly from the Preview page, first save the changes as a draft.
Caution
Any bookings or purchases you make in the preview get reflected on Zenoti Web, CMA, and Webstore.
At the organization level, click the Configuration icon.
Search for and select Online booking settings from the Online Booking section.
Click CX V3.
Customize the settings under relevant categories, as required.
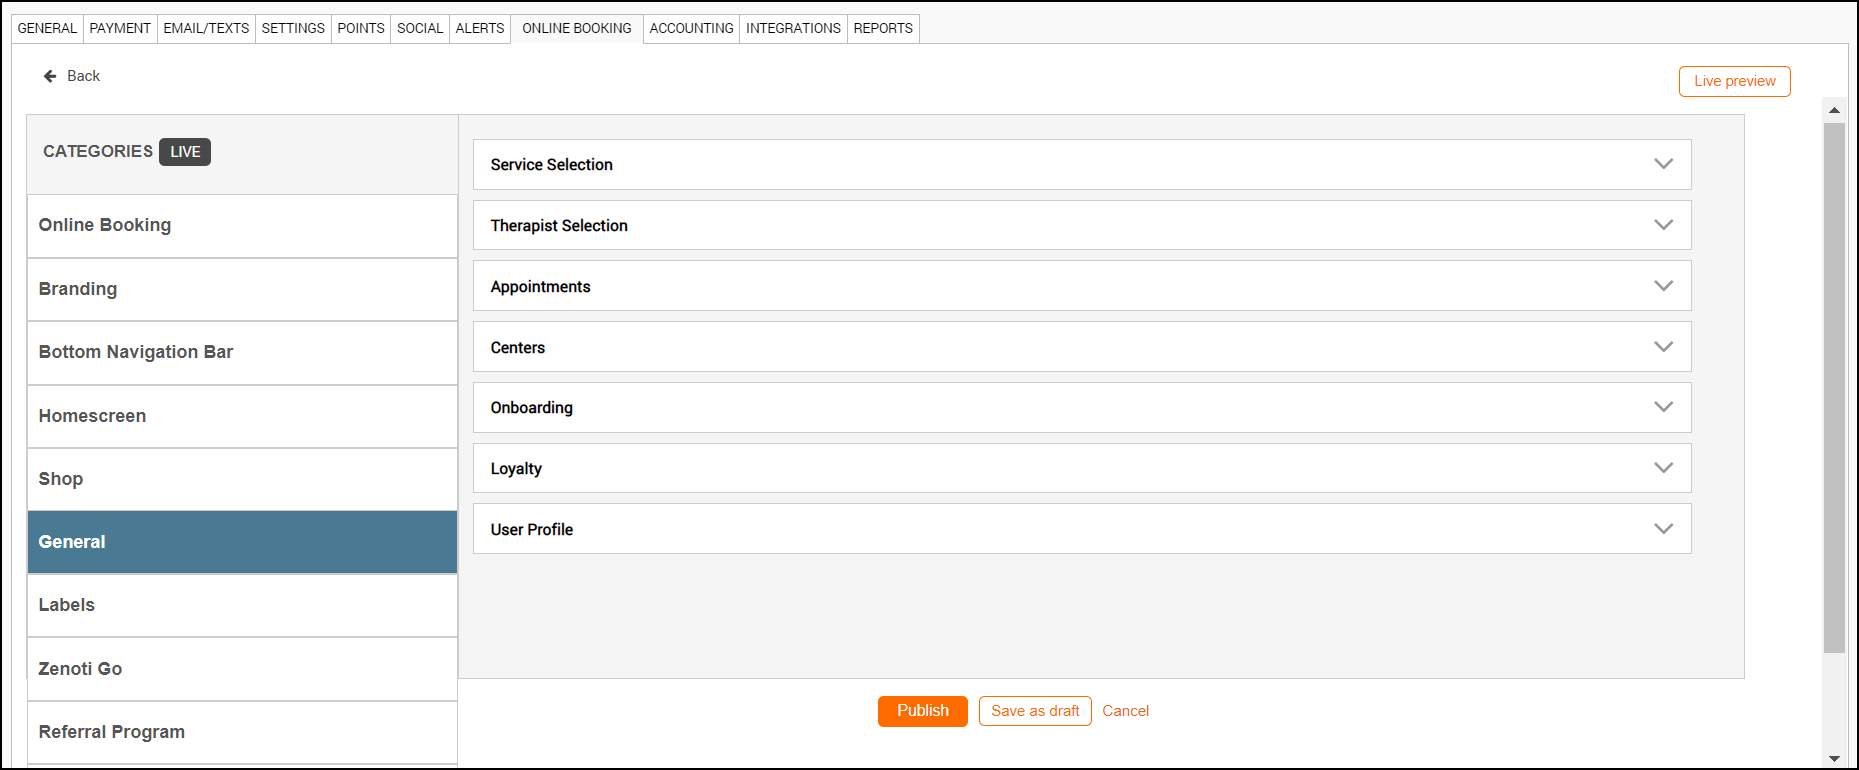
Do one of the following:
Publish
Publish the changes made to the live application.
Save as Draft
Save changes as a draft. You can preview the draft and then publish changes from the preview.
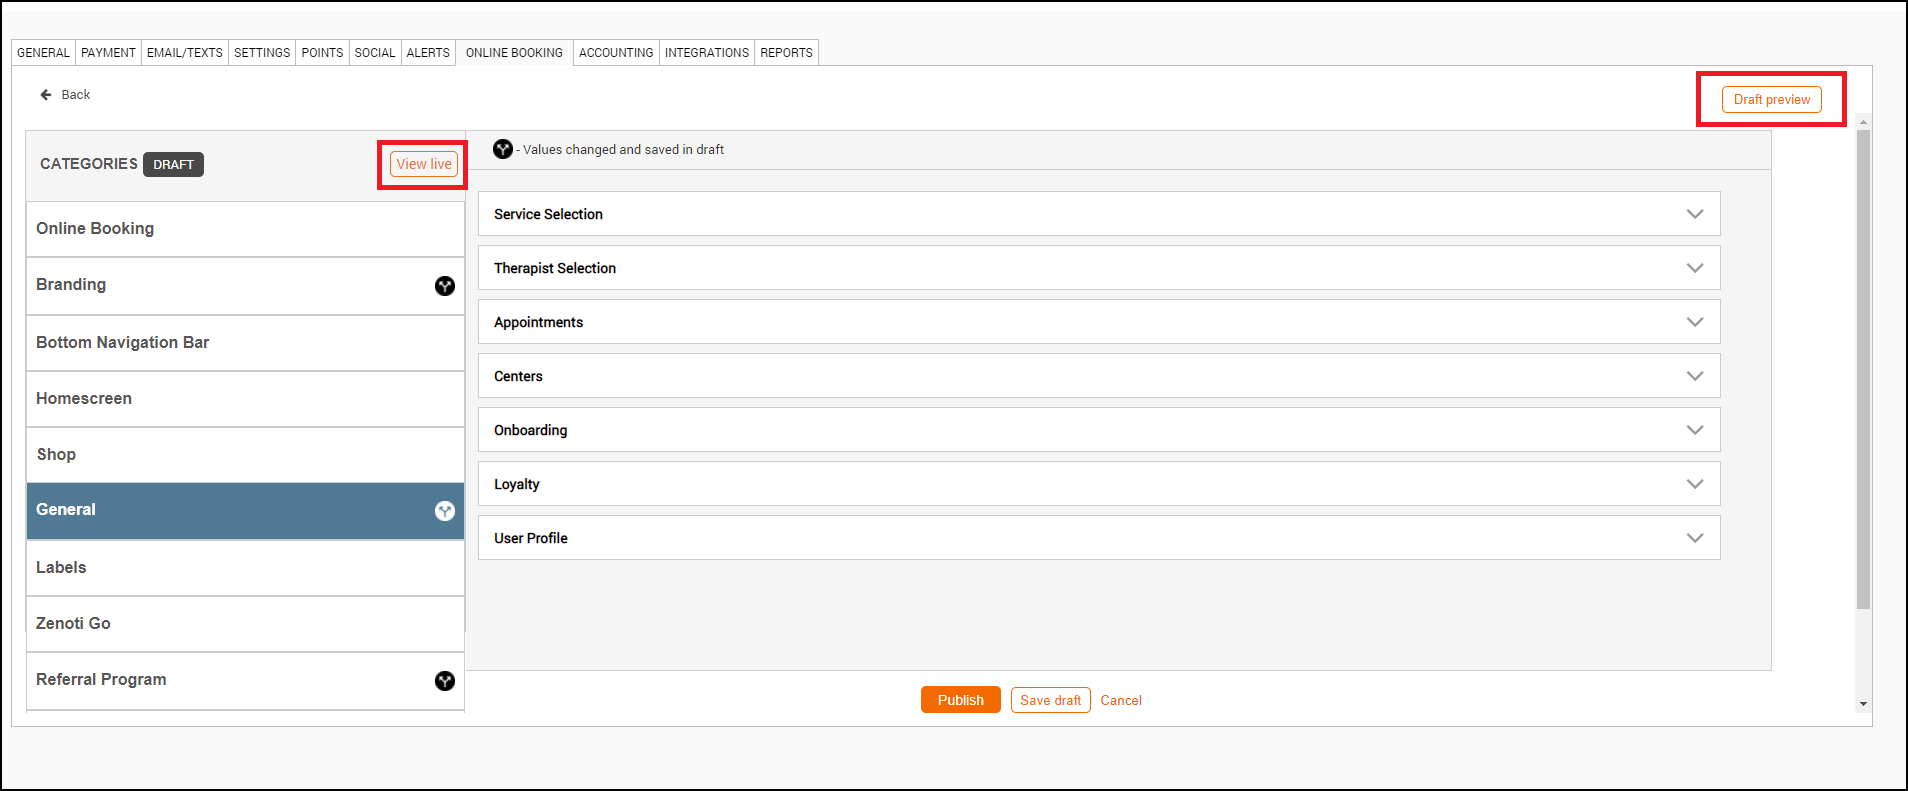
Click Live Preview or Draft Preview as required.
Note
To view Draft Preview, you must save changes as a draft and click View draft on the left panel. The preview button will then change to Draft Preview.
To come back to Live Preview, click View Live. The preview button will then change to Live Preview.
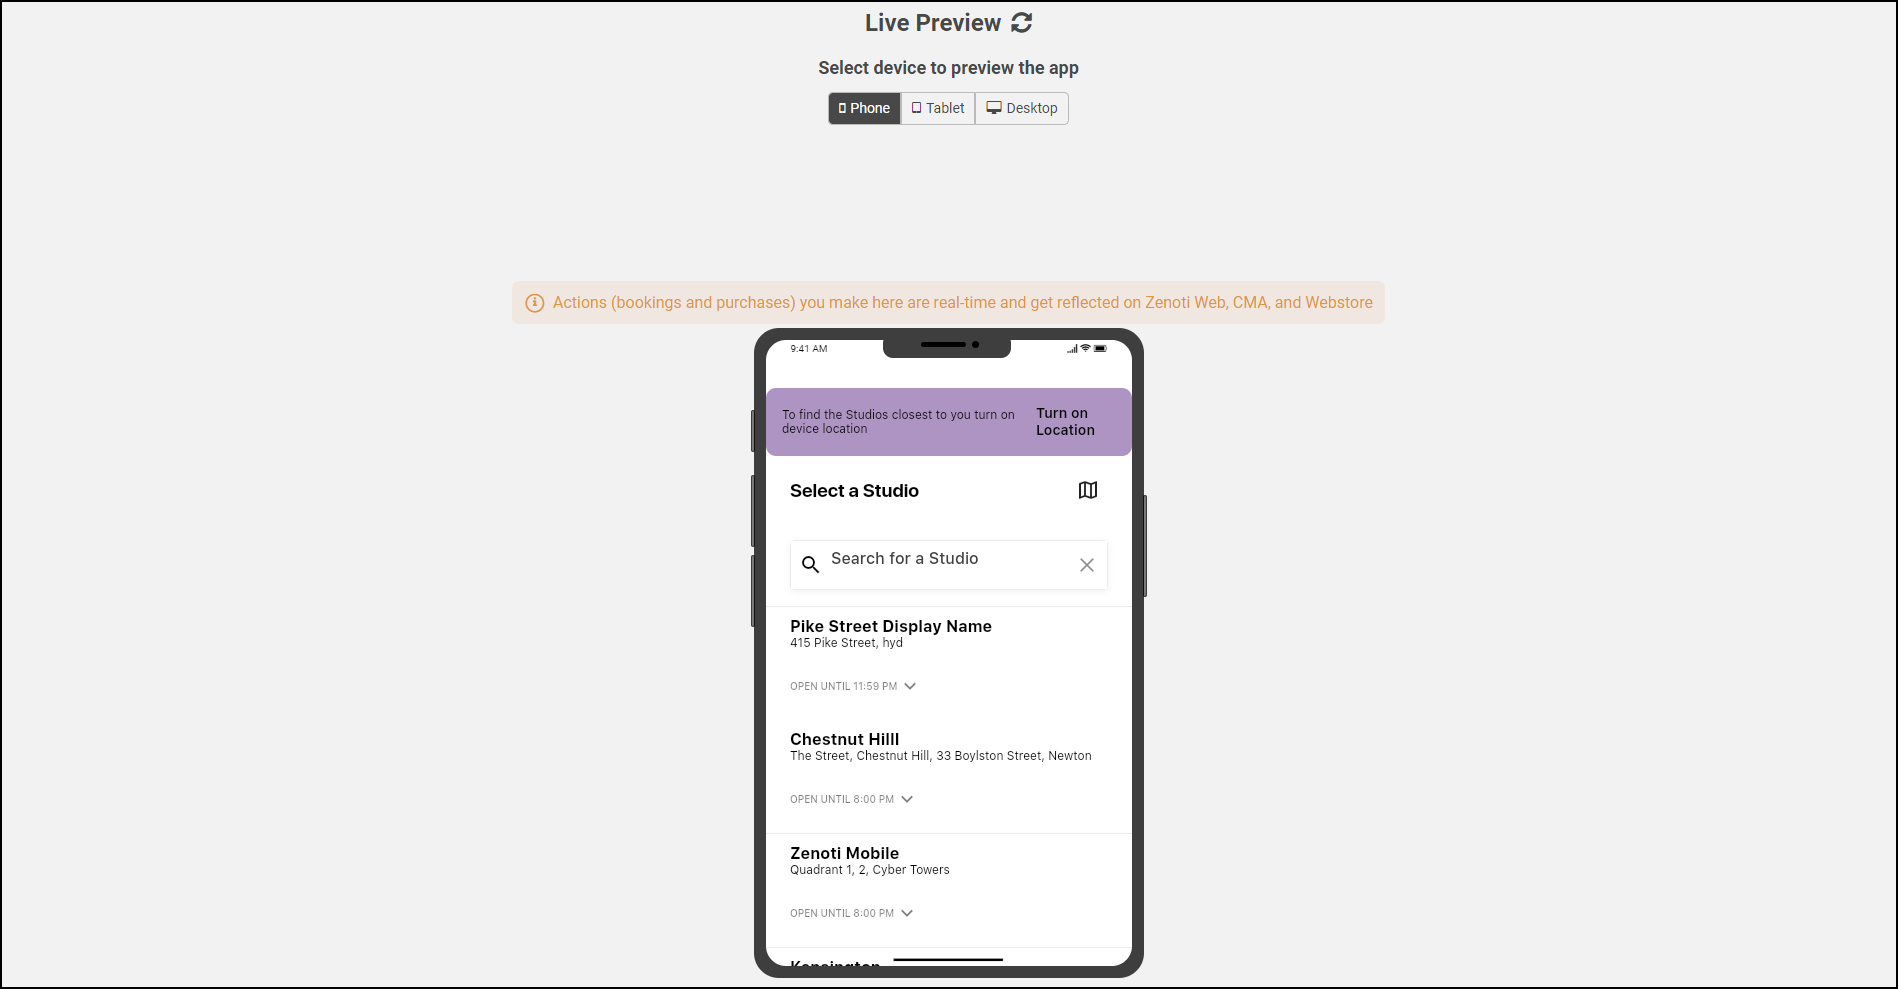
Live Preview button
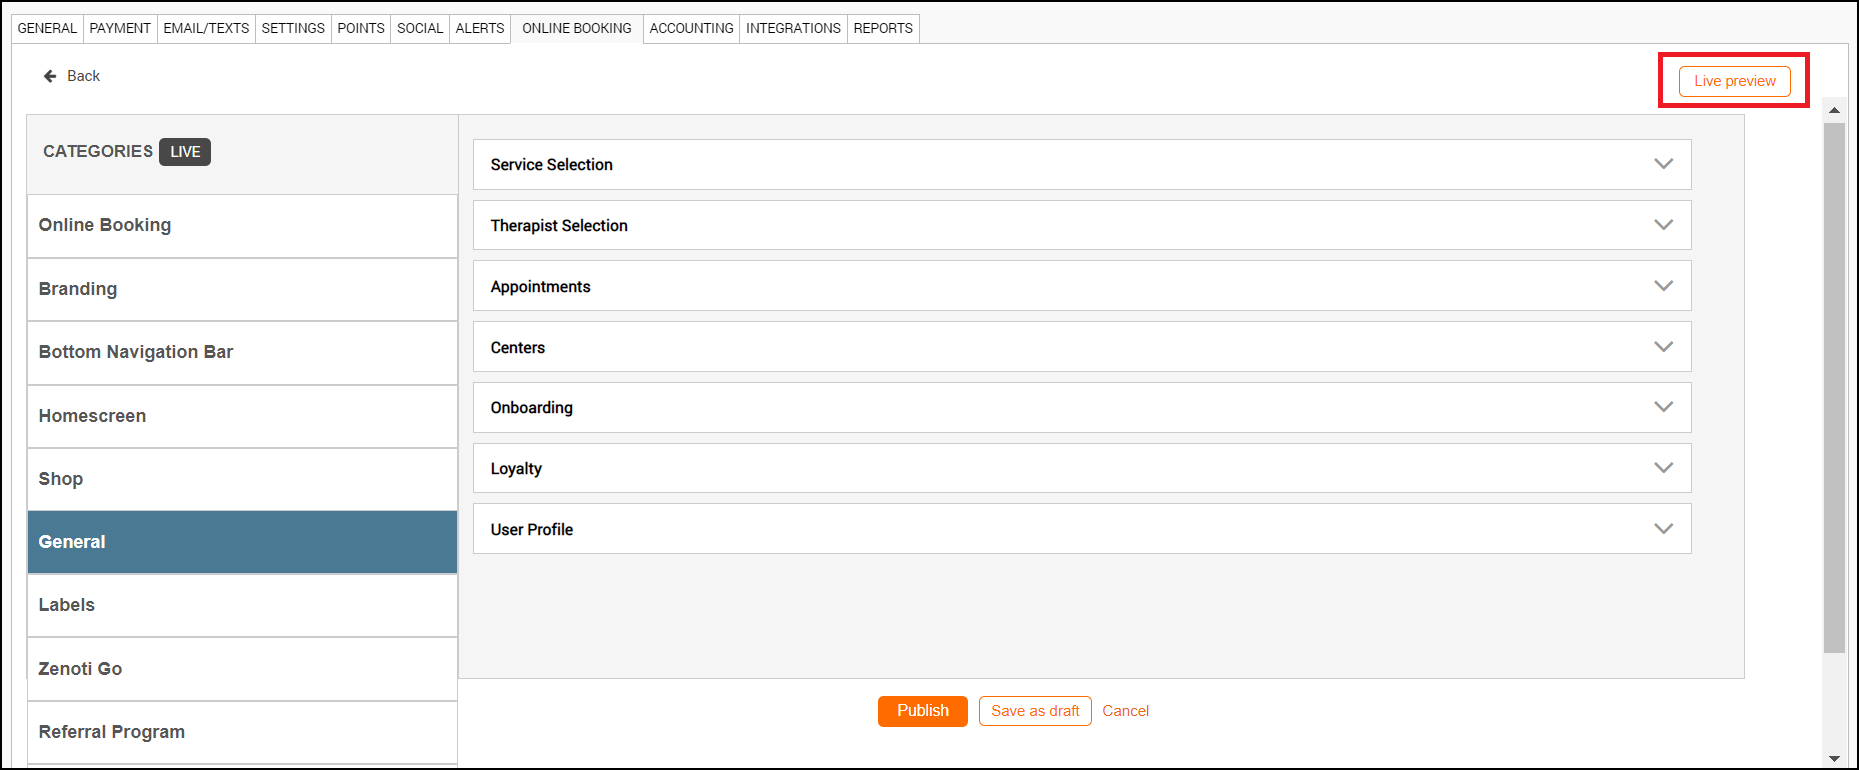
Live Preview
Draft Preview button
Draft Preview
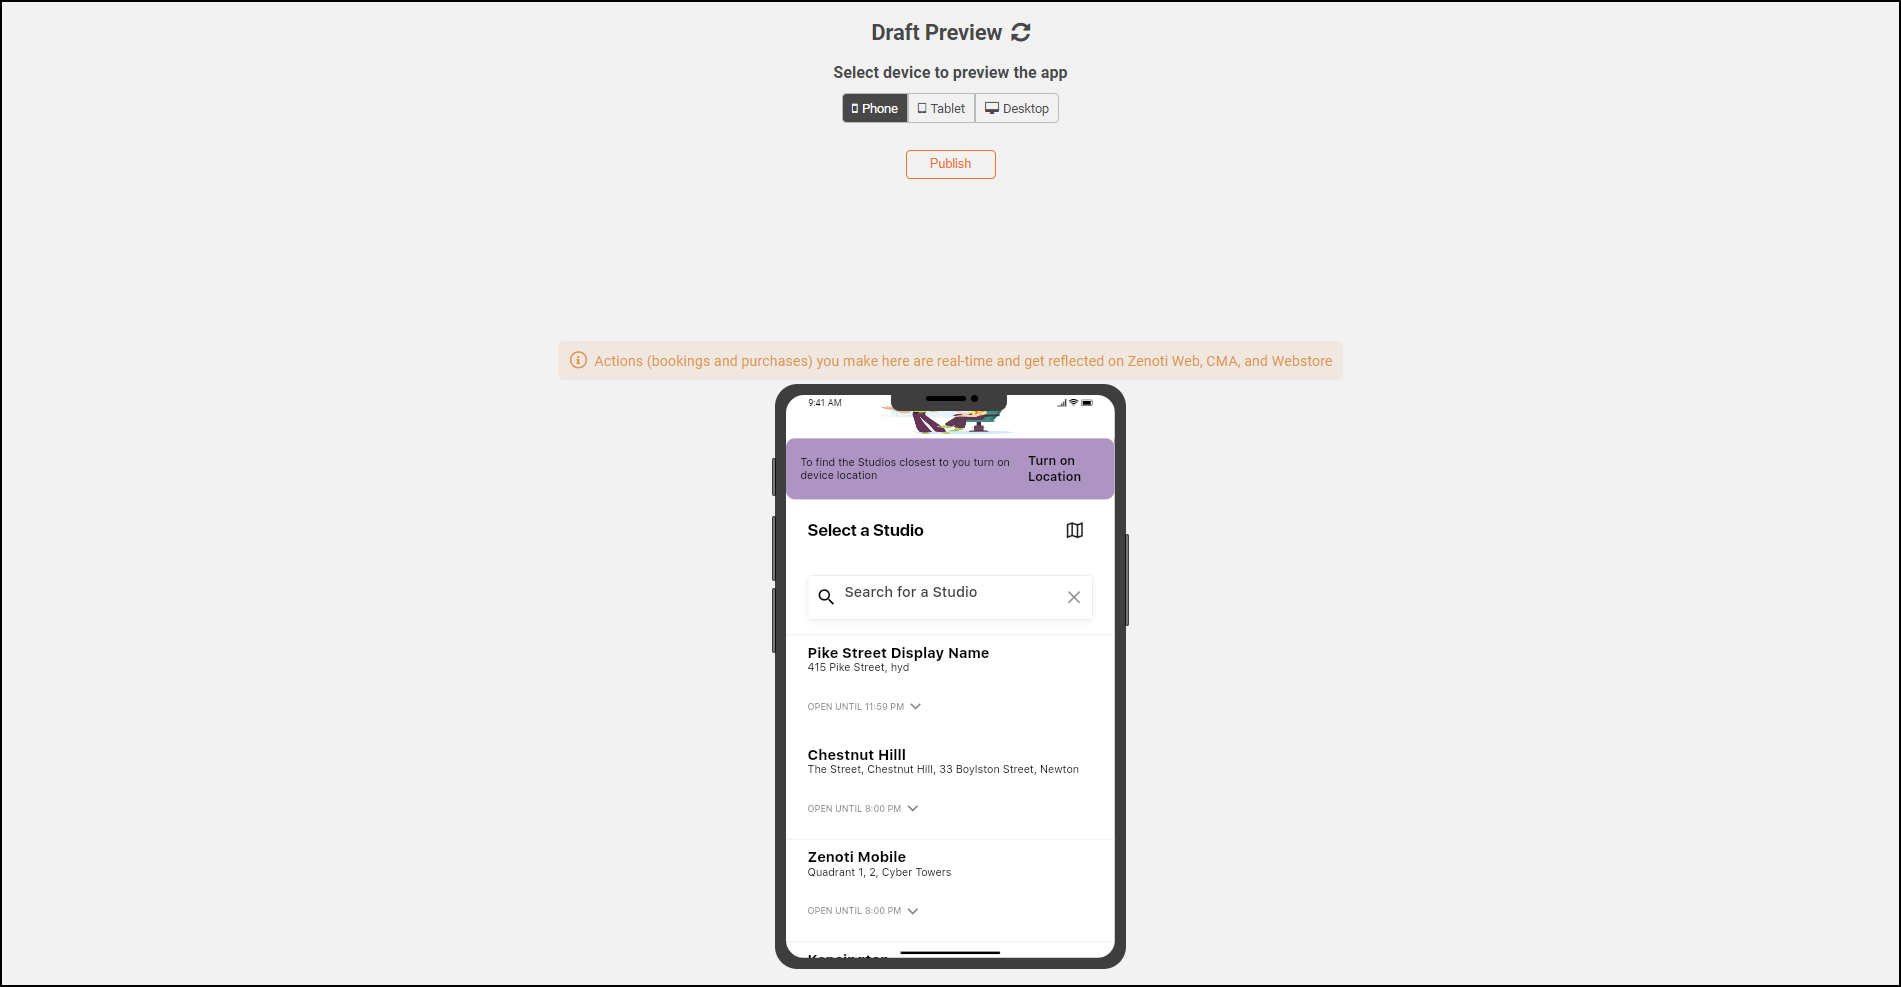
The latest version preview appears. You can publish or make further changes.