Guest Tasks for purchasing and using gift cards online
Purchase a gift card
This article explains how gift cards are configured and how guests can purchase and personalize gift cards on Webstore V2. It covers eligibility rules, validation behavior, promotional offers, and the complete end-to-end guest purchase flow.
Overview
Webstore V2 allows guests to purchase gift cards directly online. Gift cards can be:
Amount-based gift cards
Service gift cards
Package (Day package) gift cards
Pre-defined gift cards
Guests can personalize gift cards by selecting:
Delivery method (Email, SMS, Physical)
Occasion
Design style
Custom message
Delivery date
Prerequisites
For custom service and day package gift cards, their availability as gift cards depends on the setting in the Service and Day package Master.
If the Do not sell as Gift card setting at the Service and Day package master is enabled, they will not be available as gift cards
If the Do not sell as Gift card setting at the Service and Day package master is disabled, they can be sold as gift cards (service and day package gift cards).
This setting does not affect the pre-defined gift cards. On the Webstore, assigning an occasion is mandatory when purchasing a gift card.
A payment processor must be configured for the center. Without a payment processor, gift cards cannot be sold on the Webstore.
Your guest can gift an amount, service, or package gift card for various events such as birthdays, marriages, Valentine’s Day, or Mother’s Day.
Guest logs in to the Webstore with their username and password or selects the Continue as Guest option to buy the gift card.
Click Gift cards available on the top banner of the page.
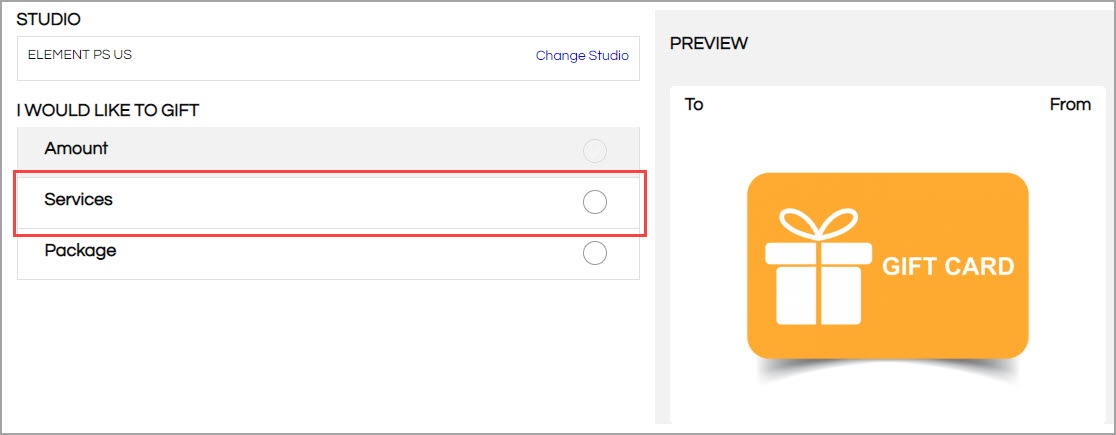
The selected center is displayed under Studio.
Click Change studio and change the center if needed.
From I would like to Gift, choose one of the following based on the requirement.
Amount Gift Card
From the I would like to gift section, the guest selects the Amount option.
List of predefined cash values along with an option to customize the cash
value of the gift card appears.
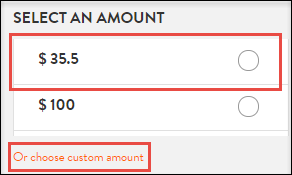
The guest does one of the following, as required:
Selects a predefined cash value such as $35.5 as shown in the screenshot.
Clicks the Choose Custom Amount link, enters a cash value, and clicks Done.
Service Gift Card
From the I would like to gift section, the guest selects the Service option.
The service category drop-down list and list of services appear.
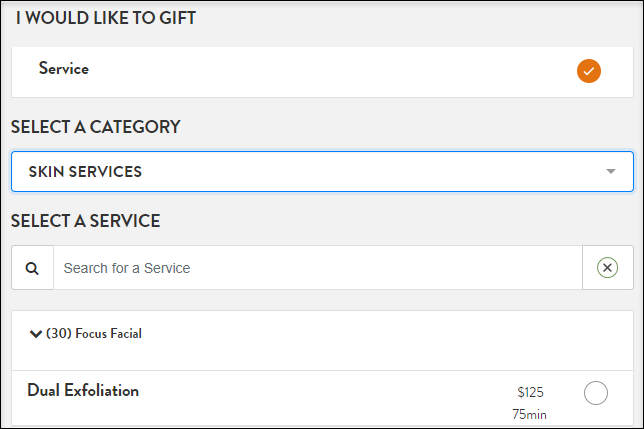
From the Select a Category drop-down list, the guest selects the desired category.
From the Select a Service list, the guest selects a desired service.
Package Gift Card
From the I would like to gift section, the guest selects the Packages option.
The list of predefined packages along with an option to customize the package appears.
The guest does one of the following, as required:
Selects a predefined package.
Selects the Custom package option.
From Select Gift Card type, choose:
eGift cards – Email and enter the recipient’s email address
eGift cards – SMS and enter the recipient’s phone number
Physical gift cards and enter the delivery and shipping details
Purchase an eGift card
To purchase an e-gift card perform the following actions as a guest:
Log in to the Webstore with your username and password or select the Continue as Guest option to buy the gift card.
Click gift cards available on the top banner of the page.
Select the desired type of gift card from Amount, Service, and Package gift cards.
Based on the requirement, from the SELECT GIFT CARD TYPE section select eGift cards, option.
To choose the specific occasion, select the appropriate option from the Occasion section.
To choose a style for the selected occasion, pick from the displayed options.
To provide a personalized note for the recipient in the Message section, enter a message.
To send the gift card immediately, from the Delivery Date option select Send Now.
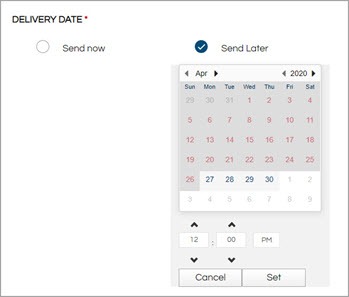
To schedule the gift card for a later time, select Send Later and pick a date and time.
For the Send Later option of the e-gift card, the default time on the chosen date is set to 9 AM (center time).
Click Save.
To preview the gift card, click Preview and Buy.
Review the summary and scroll down to the Make a Payment section.
To continue with the payment, In the Payment section enter the card details and click Submit
One of the following takes place:
If you purchased the gift card for others, you, as the buyer, will get an invoice, and the recipient will receive the gift card via email as an attachment.
If you purchased the gift card for yourself, you, as the buyer, will receive both the invoice and the gift card in your email.
Purchase a Physical Gift Card
To purchase a physical gift card:
The guest must perform the following actions:
Guest logs in to the Webstore with their username and password or selects the Continue as Guest option to buy the gift card.
Guest clicks gift cards available on the top banner of the page.
The guest selects the desired type of gift card from Amount, Service, and Package gift cards.
Based on the requirement, from the SELECT GIFT CARD TYPE section the guest selects Physical gift cards option.
In the Recieve Through section, the guest can choose the gift card to be shipped to self or others or pick up at the store.
Shipping- Select Shipping to send the gift card to self or others. Provide the required delivery details and address of the recipient.
Pickup- Select Pickup to collect the gift card at the center.
In the Activation date section, the guest can choose to activate the gift card immediately or select a date in the future from which the card will be activated.
Immediately- Select Immediately to activate the gift card right away.
Select date- Select a date in the future from which the card will be activated.
Enter a message for the recipient in the Message section.
Note
Guests can add a personalized message when purchasing a physical gift card. To ensure it fits in the gift card envelope, organizations can limit the number of characters allowed. A character counter is shown below the message box, and limits may vary by language or region.
Click Preview and Buy, to preview the gift card.
Review the summary and scroll down to the Make a Payment section.
In the Make a Payment section, enter the card details and click Submit.
One of the following takes place:
If the guest has purchased the gift card for others, as a buyer, the guest receives an invoice and the recipient will receive the gift card in an email as an attachment.
If the guest has purchased the gift card for themselves, as a buyer, they will receive both the invoice and gift card.
Impacts and considerations
The purchased physical gift card must be added to the guest profile from the Online gift card status report; otherwise, it will not appear on the profile at purchase.
To add the physical gift card to the guest profile: Navigate to Online gift card status report > Search for the gift card. Click Status column and select picked up status from the Delivery mode pop-up. Update the gift card number and then save it.
For physical gift cards, the recipient message is included with the card during shipping or pickup. To prevent messages from being too long to fit in the envelope, organizations can enable a setting to limit the number of characters guests can enter. When enabled, a character counter appears in the message box, and limits may vary by language or region.
Purchase predefined gift cards
Important
You can purchase gift cards only if you have a payment processor configured for your center.
Predefined Gift Cards allow your business to offer a set of gift cards that already have a service or a value assigned to them. This makes it easy for your guests as they can just check the value or the service predefined in the gift card and make a purchase accordingly.
This also makes it easy for the gift card recipient as they do not have to decide on the service while redeeming the gift card.
Before you begin
Note
Your Webstore automatically displays predefined gift cards after you configure them at your organization level.
For guests to purchase predefined gift cards
Navigate to the Webstore URL and log in to your account.
The Webstore homepage appears.
From the menu, click Gift Cards.
The Gift Card page appears and displays the following types of gift cards:
Amount
Services
Packages
Select Services.
The predefined gift card options appear.
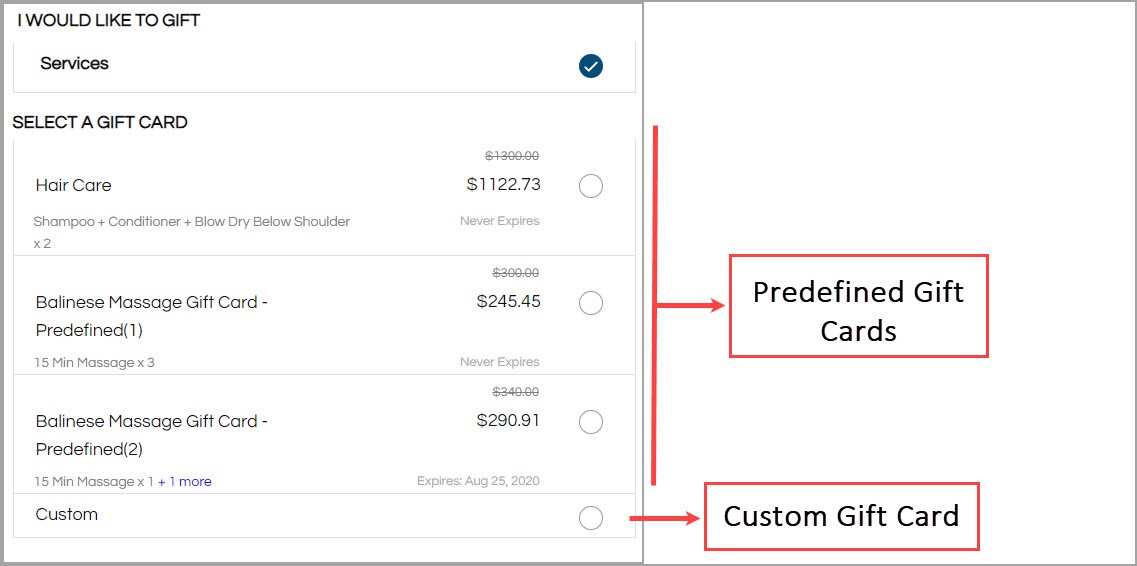
Your guests are shown the gift card options in the following order:
Predefined Gift Cards - These are the gift cards you define at the organization level.
Custom Gift Cards - These are the gift cards that your guests can customize by adding various services.
Select the predefined gift card.
The Webstore prompts you to enter the following details:
Recipient Email: Enter the email address of the receiver of this gift card.
Recipient Email: Enter the email address of the receiver of this gift card.
Click Proceed and enter the following:
Occasion: Select an occasion for the gift card.
(Optional) Message: Enter the message that will appear on the gift card.
Delivery Date: Select any one of the following:
Send Now: Select this option to send the gift card immediately after checkout.
Send Later: Select this option and specify a date and time for the gift card to be delivered.
The gift card purchase summary appears.
Click Preview and Buy.
The payment page appears.
If you already have a saved card, click Buy Now to make the payment.
Else, add new card details and then click Buy Now.
The payment is made and the invoice appears. You have successfully purchased a gift card.
View gift card balance
Important
You can sell gift cards on the webstore only if you have a payment processor configured for your center.
Your guest can view the gift card balance from the Account and from the Gift Card page.
Know how your guest can view the gift card balance from their Webstore account
Guest logs in to the webstore with their Username and Password.
Guest clicks their account name available on the top right corner of the page.
Guest’s account details appear.
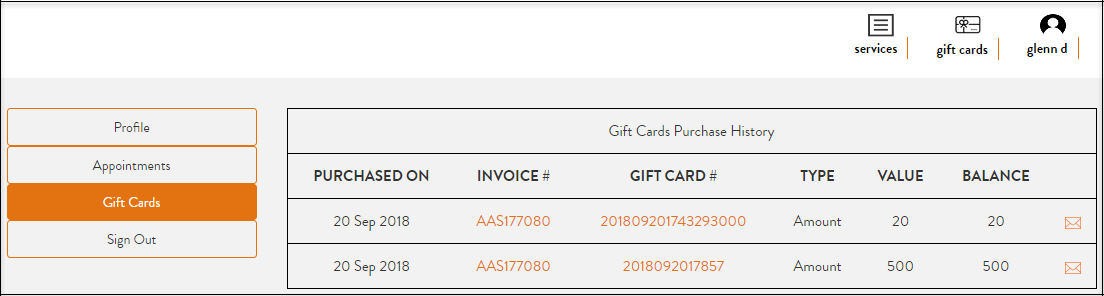
Guest click the Gift Cards.
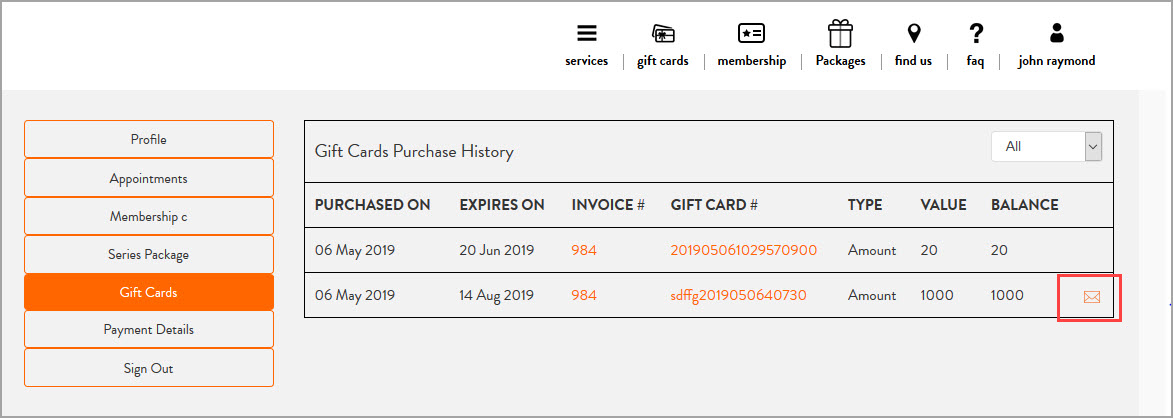
The Gift Cards Purchase History appears.
Know how your guest can view the gift card balance from the Gift Cards page
Guest opens the webstore site and clicks the Gift Cards available on the top right corner of the page.
Guest clicks Check a Card Balance.
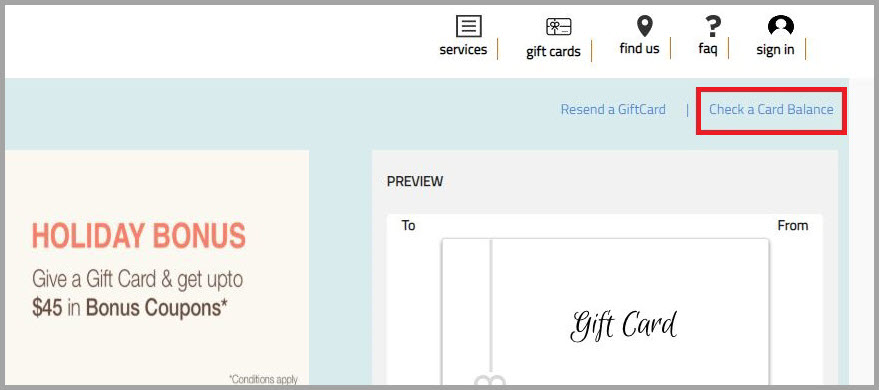
The Balance Check pop-up appears.
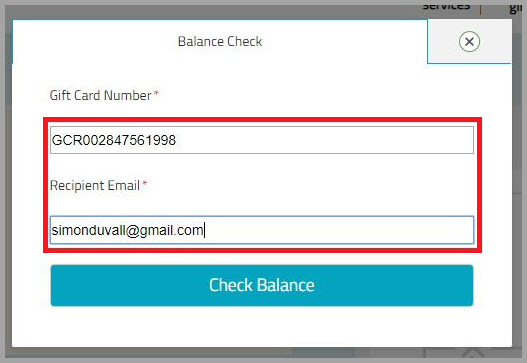
In the Gift Card Number field, the guest enters their gift card number for whichthey want to view the balance.
In the Recipient Email field, the guest enters the recipient's email address.
Guest clicks Check Balance.
The available balance information appears.
Note
If you have received a bonus gift card on purchase of a gift card, you can check the balance of the bonus gift card too. Enter the bonus gift card number in the Gift Card Number field to view the balance remaining on the bonus gift card.
Resend a gift card
Important
You can sell gift cards on the Webstore v2 only if you have payment processors configured for your center.
Your front-desk staff can resend gift cards to recipients from their Guest Profile page and from the Gift Card page.
Note
The recipient's email address should match the email address provided during the purchase of the gift card.
Resend a gift card from the guest profile page
Your guests do the following actions:
Navigate to the Webstore v2 by opening the URL.
The Webstore home page appears.
Click Sign In.
Sign In or Create Account page opens.
Enter the Username and Password to login.
The Services page appears.
Click the guest profile icon.

The guest profile page opens.
Click Gift Cards on the side menu.
The Gift Cards purchase history appears.
Click the email icon beside the gift card that you want to resend.
Note
Bonus Gift Cards cannot be resent.
The Resend Gift Card Email to Recipient pop-up appears and the recipient email id is auto-populated.
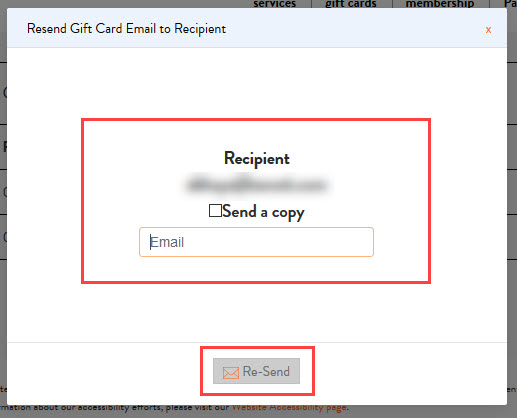
[Optional] Select Send a Copy checkbox and enter the email id to send a copy of the gift card to another email address.
Click Resend.
The gift card and a copy (If applicable), are resent to the respective recipient(s).
To resend a gift card from the gift cards page
Your guests do the following actions:
Click the Gift Cards option in the main menu.
The Gift Cards page opens.
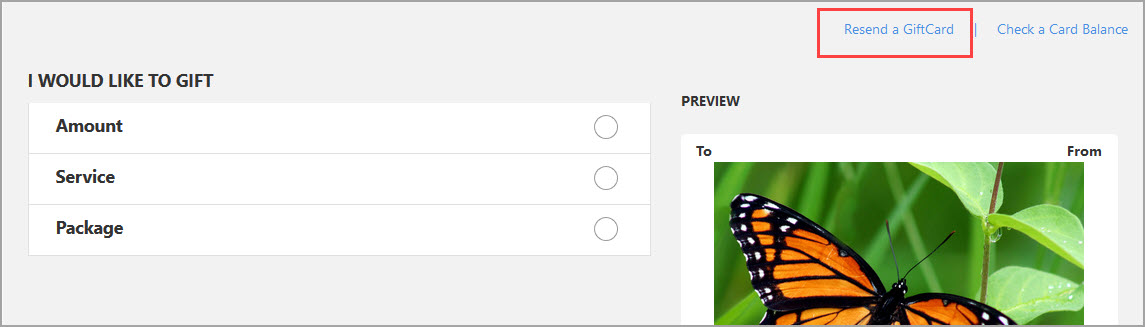
Click Resend a Gift Card option.
The Resend My Gift Card pop-up appears.
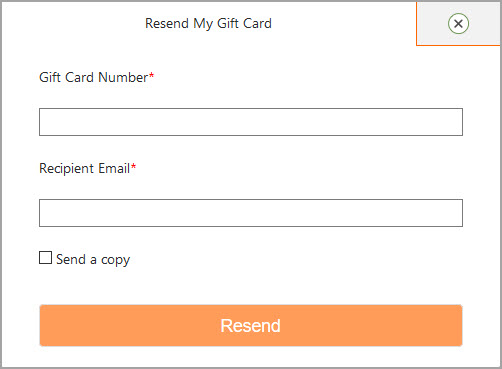
Enter the number of the gift card in the Gift Card Number field.
Enter the email id of the recipient in the Recipient Email field.
Note
The recipient's email address should match the email address provided during the purchase of the gift card.
[Optional] Select the Send a Copy checkbox, and enter an email address, to send a copy of the gift card to another recipient.
Click Resend.
The gift card is resent to the recipient and a copy is sent to the specified email address (if applicable).
Note
On Webstore, Zenoti resends gift cards only with templates used at the time of sale. It uses updated templates only for new sales. For example, you sold a gift card with template T1. When you update the template to T2 and resend the gift card, the guests will still receive it with template T1. But you will sell new gift cards with template T2.
Purchase a gift card and pay for the tip too
Guests often purchase gift cards for their loved ones. They can go a step further and pay a tip amount too. This way, the person who receives the gift card can redeem services and need not worry about paying a tip after taking the services.
Prerequisites
Enable Gift Cards without Tax.
At the organization level, enable Ask for tips with service and package gift cards. Complete other relevant details such as Incude Tip Label and Include Tip Help Text.
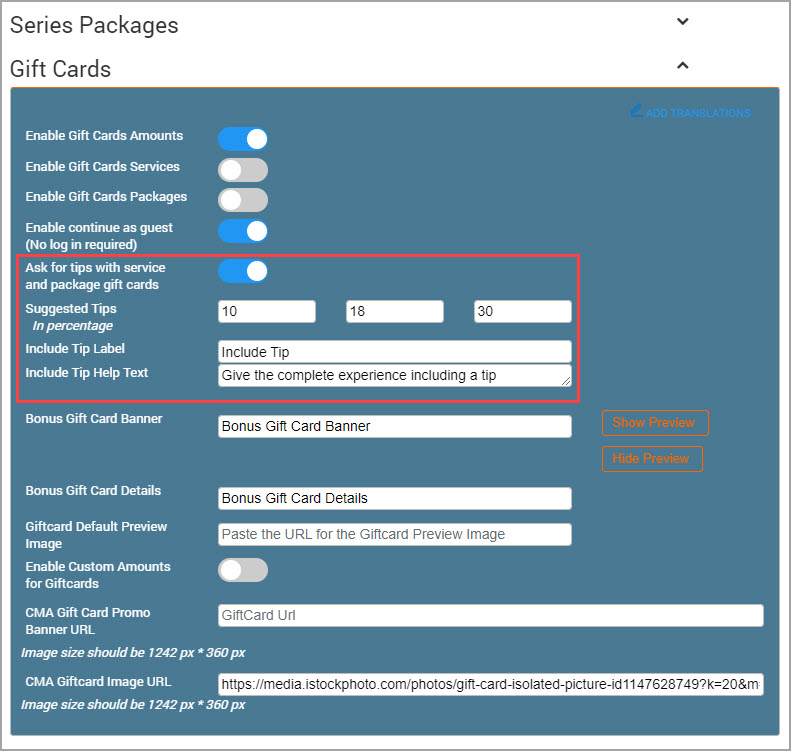
Note
You can override the Ask for tips with service and package gift cards setting at the center level.
To override the setting at the center levelAt the center level, click the Configuration icon.
Navigate to Online Booking > Online booking settings > Webstore V2.
Select the Ask for Tips with service and package giftcards checkbox.
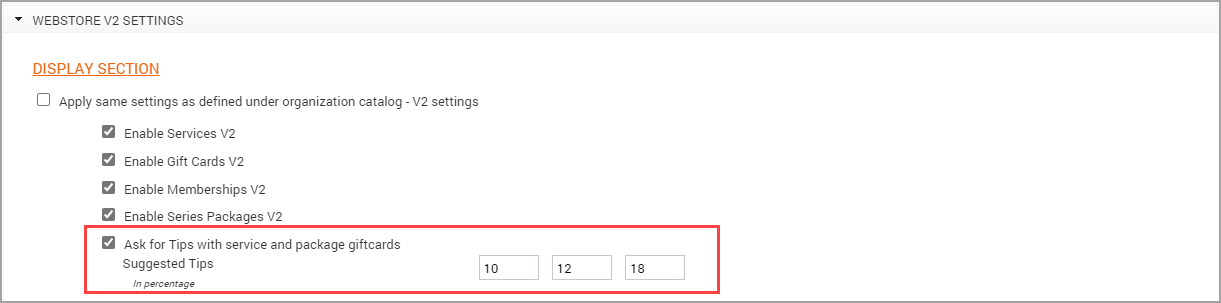
It the Suggested Tips boxes, enter the suggested tips.
Click Save.
The guests from the center can purchase a gift card and pay for the tip.
Disable the Allow sale of gift cards inclusive of tax option.
To purchase a gift card and pay for the tip
The guest should:
Log in to Webstore with their Username and Password.
Note
If your guest does not wish to log in to the Webstore, they can use the Continue as Guest option to buy the card. After they select a Service, or a Package option as mentioned in the subsequent step, Webstore prompts to log in. Here, instead of logging in to the Webstore, they can select Continue as Guest. To enable this, select the Enable continue as guest (No log in required) setting in the Gift Cards section of the Webstore v2 template.
Click Gift Cards available on the top right corner of the page.
The Amount, Service, and Package gift cards appear.
Select a service or package gift card as explained in Purchase a gift card
From the Include Tip? list, select the desired tip. Your guest can also enter a custom tip amount.
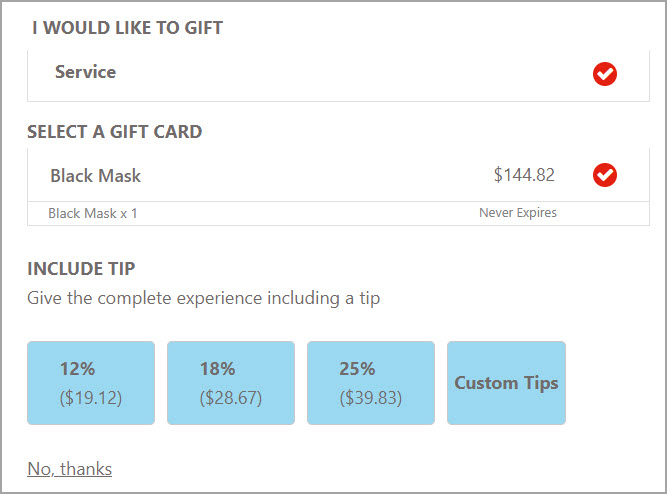
Note
Organizations can also choose not to suggest tips. If the organization does not suggest tips, then the guest can add an amount of their choice.
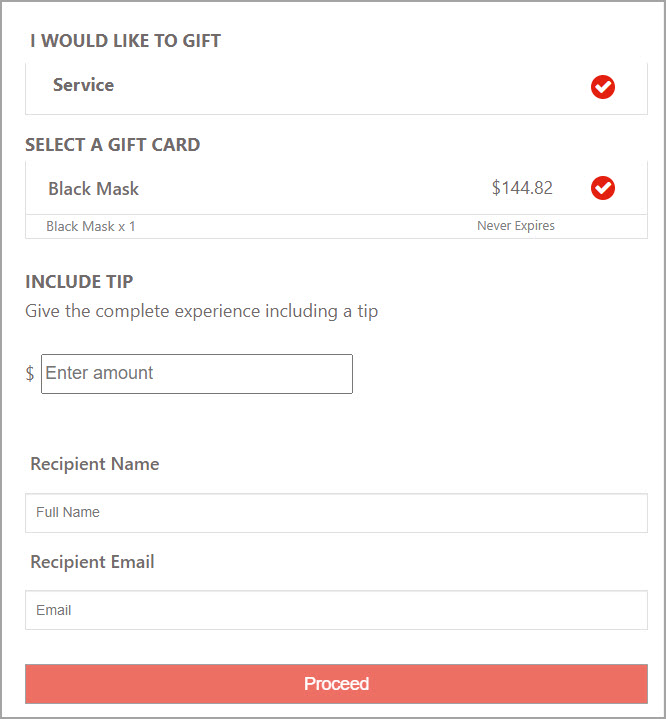
Enter the Recipient Name, Recipient Email ID, and click Proceed.
In the Occasion field, select the desired occasion.
From the Styles field, select the desired style.
In the Message box, enter a message for the recipient.
From the Delivery Date, select Send Now to send the gift card immediately or select Send Later.
If you select Send Later, select a date and time, and click Set.
Click Preview and Buy.
In the Payment section, enter the card details.
Click Submit.
The guest receives an invoice and the recipient receives the gift card in an email as an attachment.
Note
The organization can use the macro [ValueWithTipCallOut] to inform the receiver that the sender has added a tip to the gift card.