Configure automation rules
Lead stage automation rules allow you to automatically move leads between stages based on key events such as appointment bookings, cancellations, no-shows, and membership invoice actions. This reduces manual updates, ensures consistency, and keeps lead stages accurate throughout the sales journey.
To create an automation rule,
At the organizational level, navigate to Lead management > Lead settings > Automation rules.
The page displays all created automation rules.
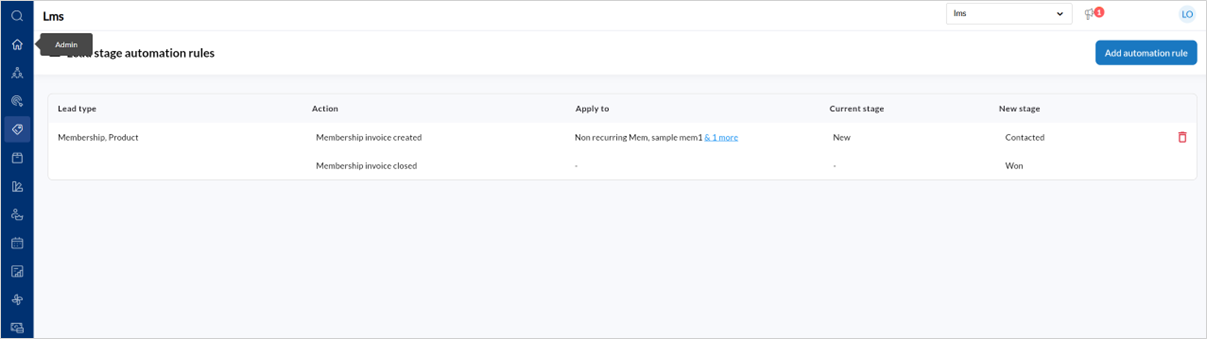
To create a new rule, click Add automation rules.
To configure a rule for services,
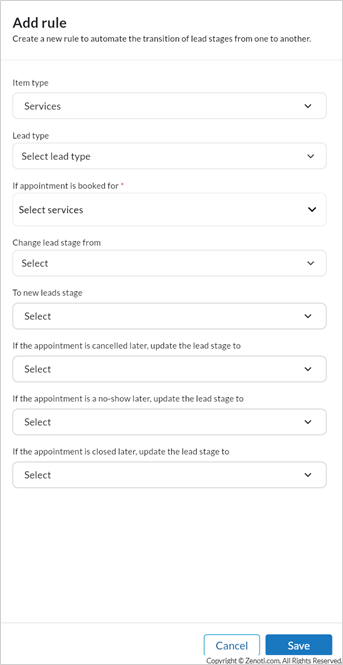
Select Services from the Item type field.
This tells the system that the rule should trigger based on appointment-related events.
From Lead type, select the lead types this rule should apply to. You can select one or more specific lead types, or choose Any if the rule should apply to all service-related leads.
In the If appointment is booked for field, select the services or service categories that should trigger this rule. You may expand categories to choose individual services, or select Any if the rule should apply regardless of which service is booked. After making your selection, click Save to confirm the services.
In the Change lead stage from field, choose one or more stages that the lead must already be in for the rule to trigger. For example, you might select New or Contacted.
In the To new lead stage field, select the stage the lead should move to as soon as the appointment is booked. For example, you may want the lead to move to Contacted or Interested.
If you want the lead stage to update when an appointment is cancelled, select the appropriate stage from the If the appointment is cancelled later, update the lead stage to field. For example, you may choose Lost or Interested, depending on your business process.
If you want the lead stage to update when the customer does not show up, use the If the appointment is a no-show later, update the lead stage to field and select the relevant stage.
If you want the lead stage to update when the appointment is successfully completed, select the final stage from the If the appointment is closed later, update the lead stage to field. This is commonly set to Won.
Click Save.
To configure a membership-based rule,
Select Memberships from the Item type field.
In the Lead type field, choose the lead types this membership rule should apply to. You can select multiple lead types if required.
In the If membership is sold for field, select the memberships that should trigger the rule. You can choose specific memberships or select Any to apply the rule to all memberships. Save your selection once complete.
In the Membership invoice is subsequently closed change sales stage to field, select the lead stage the lead should move to when the membership invoice is closed.
Click Save.